Aqviz

How to Assess the Condition of Exterior Siding

Assessing the condition of exterior siding is essential to maintain a home’s protective barrier against weather elements, reports SGI Property Management Dallas team. Exterior siding shields the structural framing and insulation from moisture, wind, and ultraviolet damage. Regular inspections help detect early signs of deterioration, preventing costly repairs caused by rot, mold, or structural compromise. By conducting thorough assessments, homeowners can extend the lifespan of their siding and ensure the home remains energy-efficient and comfortable throughout the seasons.

Different types of siding materials have unique vulnerabilities and maintenance needs. Common materials include vinyl, fiber cement, wood, engineered wood, stucco, and masonry veneers such as brick or stone. Understanding each siding type’s behavior under environmental stresses allows for more accurate evaluation of its condition and identification of potential failure points. Additionally, familiarity with these materials aids in selecting the most suitable siding for a specific climate and architectural style, optimizing both durability and aesthetic appeal.

Systematic inspection involves a thorough walkaround, looking for visual and tactile signs of damage. Key indicators include cracks, gaps, warping, discoloration, and evidence of moisture intrusion. Timely detection and repair of these defects help preserve the siding’s effectiveness and the home’s overall integrity. Incorporating seasonal inspections into a home maintenance schedule can prevent minor issues from escalating into major structural problems, saving time and expense in the long run.

Understanding Exterior Siding Materials

Exterior siding serves as a home’s first line of defense against environmental factors. Vinyl siding is the most common due to its low maintenance and affordability, offering resistance to moisture but susceptible to warping if installed improperly. Fiber cement siding is durable and fire-resistant but requires painting within a short window after installation to prevent deterioration.

Wood siding demands regular painting or staining every five to seven years to maintain its protective qualities and resist rot and insect damage. Engineered wood, made from oriented strand board (OSB), is moisture sensitive and can degrade if exposed to water. Stucco requires a proper drainage plane to avoid water accumulation behind it. Brick and stone veneers provide excellent durability but reveal moisture issues through efflorescence or staining.

Each siding material also responds differently to climatic conditions. For example, vinyl siding can become brittle and crack in extremely cold temperatures, while wood siding may expand and contract with humidity changes, leading to potential gaps or warping. Understanding these material-specific reactions helps homeowners anticipate maintenance needs and plan for appropriate protective measures such as sealants or protective coatings to mitigate environmental impact.

Additionally, the installation quality plays a critical role in siding performance. Even the most durable materials can fail prematurely if not installed according to manufacturer guidelines. Proper flashing, ventilation, and moisture barriers behind the siding contribute significantly to its longevity. Homeowners should ensure that contractors follow best practices during installation to avoid problems that might not become evident until years later.

Steps to Inspect Exterior Siding Condition

Inspecting siding begins with a complete walkaround of the home’s perimeter, observing every side closely. Look for visible cracks, gaps, holes, or missing caulking around joints and penetrations such as windows, doors, and utility entries. These openings can allow moisture to infiltrate the wall assembly if left unattended.

Next, check for warping, buckling, or areas where siding pulls away from the wall, which often indicate underlying moisture damage. Discoloration, staining, or white powdery deposits known as efflorescence suggest water intrusion or mold growth. Probing suspect areas gently with a screwdriver can reveal soft spots indicating rot. Also, verify that siding maintains a minimum clearance of six inches above ground level to prevent moisture wicking.

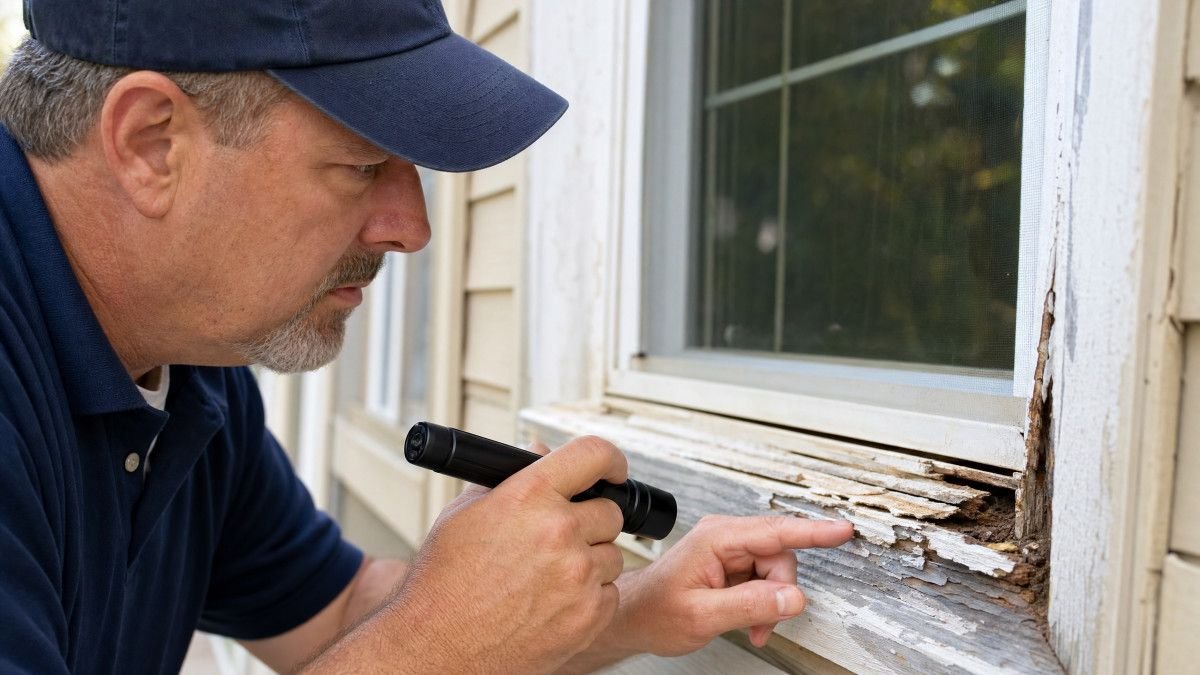
It is beneficial to carry a flashlight during inspections to closely examine shaded or hard-to-see areas where moisture may accumulate unnoticed. Inspecting after rainfall can reveal water retention or leaks that might not be visible during dry weather. Additionally, paying attention to the condition of gutters and downspouts is important, as improper drainage can lead to water splashing onto siding, accelerating damage.

Homeowners should also document findings with photographs and notes to track changes over time. This practice helps identify patterns of deterioration and supports informed decisions about repair or replacement timing. Keeping a maintenance log contributes to better communication with contractors and ensures that no areas of concern are overlooked during subsequent inspections.

Common Siding Defects and Moisture Intrusion Signs

Each siding type exhibits typical defects that signal the need for repair. Vinyl siding often warps due to improper installation without expansion gaps; it may also crack from impact or become brittle in cold weather. Fading is common with prolonged UV exposure. Fiber cement siding can crack at joints, especially if not painted within 90 days of installation, exposing it to moisture damage.

Wood siding shows rot, peeling paint, or insect damage if not properly maintained. Stucco may develop hairline cracks, which are generally harmless, but wide cracks can indicate structural issues or water ingress. Missing or damaged weep screeds on stucco allow water to remain trapped behind the surface. Signs of moisture intrusion include staining, visible mold, soft spots under the surface, bubbling paint, and efflorescence on masonry surfaces.

Another common indicator of moisture problems is the presence of mildew or algae growth, often appearing as green or black streaks on siding surfaces. These organisms thrive in damp environments and can hasten material degradation if not addressed promptly. Additionally, a musty or damp odor inside the home may signal hidden moisture behind the siding that is not yet visible externally.

Structural symptoms such as interior wall bubbling, peeling wallpaper, or warped drywall can also point to moisture intrusion originating from compromised siding. It is important to investigate these interior signs in conjunction with exterior observations to fully assess the extent of water damage and prevent further deterioration.
how-to-assess-the-condition-of-exterior-siding-2
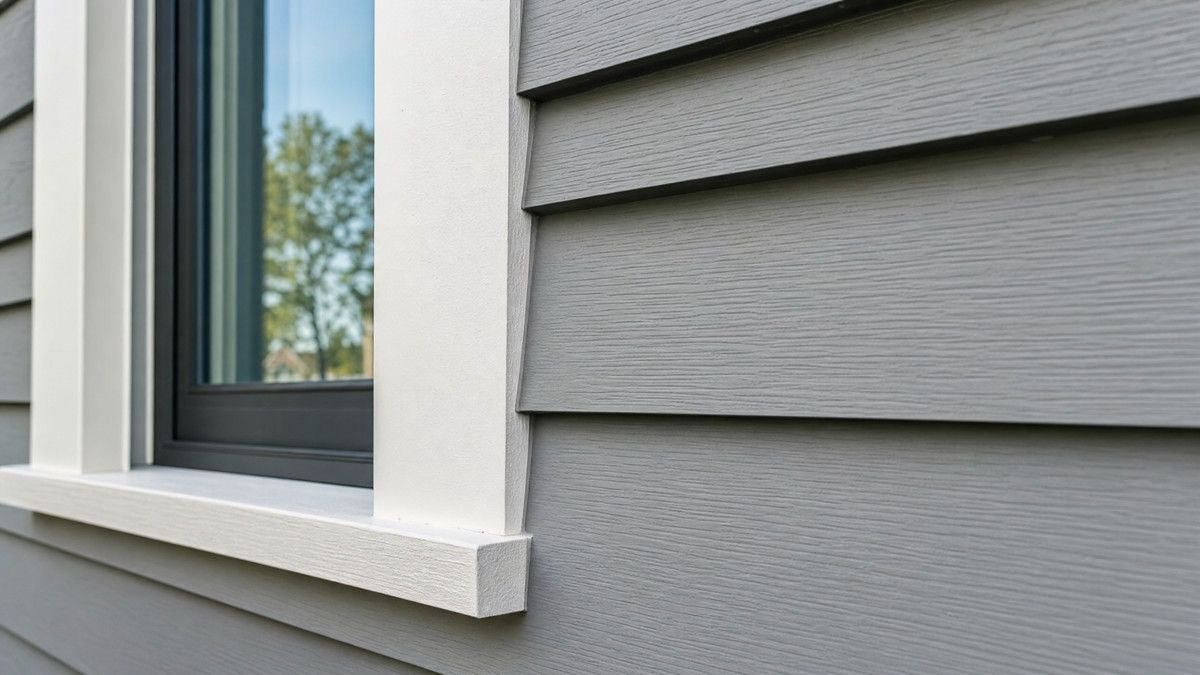
Properly installed fiber cement siding requires a minimum 1.25-inch overlap between courses, fully caulked butt joints at trim intersections, and a minimum 6-inch clearance above grade to prevent moisture wicking.

Comparing Siding Materials: Durability and Maintenance

Choosing the right siding material impacts maintenance requirements and longevity. Vinyl siding offers low maintenance but can be vulnerable to physical damage and improper installation. Fiber cement is durable and fire-resistant but requires timely painting to protect it. Wood siding demands frequent upkeep to avoid rot and insect damage, while engineered wood is less durable due to moisture sensitivity.

Stucco provides a unique aesthetic but requires proper installation of drainage components to avoid moisture problems. Brick and stone veneers are highly durable but can reveal moisture issues through surface efflorescence. Understanding these characteristics helps homeowners anticipate inspection focus areas and maintenance schedules.

Cost considerations and climate compatibility also play important roles in siding selection. For instance, fiber cement siding is well-suited for regions prone to wildfires due to its fire-resistant properties, whereas wood siding may fare better in dry climates where moisture-related problems are less prevalent. Vinyl siding is popular in many areas for its affordability and ease of installation, though it may not perform as well under extreme weather conditions such as hail or high winds.

Maintenance demands vary widely among siding types and should be factored into long-term homeownership planning. Some materials, like brick or stone veneers, require minimal upkeep beyond occasional mortar joint inspections, while wood siding calls for regular painting or staining to maintain its integrity. Homeowners should weigh both upfront and ongoing costs to find the most practical balance between aesthetics, durability, and maintenance workload.

Siding Material Typical Lifespan (Years) Maintenance Frequency Common Defects Cost Range (per square foot)
Vinyl 20–40 Low; occasional cleaning and caulking Warping, cracking, fading $2–$7
Fiber Cement 25–50 Painting every 7–15 years Cracking, paint failure $5–$10
Wood 15–40 Painting or staining every 5–7 years Rot, insect damage, paint failure $3–$10
Engineered Wood 15–30 Painting every 5–7 years Moisture damage, swelling $3–$8
Stucco 40–50+ Inspection and patching as needed Cracking, moisture intrusion $6–$9
Brick/Stone Veneer 50+ Minimal; check mortar joints Efflorescence, cracking $8–$15

Repair and Maintenance Best Practices for Siding

Repairing siding begins with sealing gaps and penetrations using appropriate caulking to prevent moisture entry. Damaged panels should be replaced promptly to avoid further deterioration. Wood siding benefits from repainting or restaining to maintain its water resistance and appearance. Installing proper flashing around windows, doors, and utility penetrations is essential to divert water away from vulnerable areas.

Maintaining proper grade and slope around the house foundation ensures water drains away from siding and reduces moisture exposure. Regular inspection and upkeep, including cleaning debris and trimming vegetation away from the siding, help prevent moisture retention and insect infestation. Annual inspections allow early detection of emerging issues before they escalate.

When conducting repairs, it is critical to use materials compatible with the existing siding to maintain uniform appearance and performance. For example, caulking should be flexible and weather-resistant, matching the siding’s expansion properties. In cases of extensive damage, partial or full siding replacement may be necessary to restore the protective barrier effectively.

Preventive maintenance also includes cleaning the siding surface to remove dirt, mildew, and pollutants that can degrade materials over time. Soft washing or gentle pressure washing methods tailored to the siding type can rejuvenate appearance and inhibit biological growth. Homeowners should avoid harsh chemicals or abrasive techniques that could damage the siding finish or underlying substrate.

Frequently Asked Questions

What is the typical lifespan of vinyl siding?

Vinyl siding generally lasts between 20 and 40 years. Its durability depends on installation quality, environmental exposure, and maintenance. Properly installed vinyl siding with regular cleaning and timely repairs can reach the upper range of this lifespan. However, harsh weather conditions like hailstorms or extreme heat can reduce its longevity, so ongoing care is important to maximize performance.

How long does fiber cement siding last?

Fiber cement siding typically lasts from 25 to 50 years. It is valued for its durability and fire resistance. However, timely painting within 90 days of installation and ongoing maintenance are critical to prevent cracking and moisture damage that can shorten its life. When well-maintained, fiber cement can outperform many other siding materials in both lifespan and resistance to environmental stressors.

What is the required clearance between siding and soil?

A minimum clearance of six inches between the bottom of the siding and the soil is recommended. This gap prevents moisture from wicking into the siding material and reduces the risk of rot and insect infestation at the base of the walls. Maintaining this clearance also allows for proper airflow and drainage, which helps keep the siding dry and extends its service life.

How often should caulking around siding be inspected and replaced?

Caulking should be inspected at least once a year for cracks or gaps that could allow water penetration. Replacement of caulking typically occurs every five to ten years depending on material quality and environmental conditions to maintain an effective moisture barrier. Prompt attention to deteriorated caulking prevents water intrusion and subsequent damage to the siding and underlying wall structure.

What is the approximate cost to reside a house?

Residing a house can range from $5,000 to $20,000 depending on siding material, house size, and labor costs. Vinyl siding is generally less expensive, while fiber cement and masonry veneers are at the higher end of the cost spectrum. Additional factors such as removal of old siding, complexity of the installation, and regional labor rates also influence the overall cost.

Conclusion

Accurately assessing the condition of exterior siding is crucial to preserving a home’s structural integrity and preventing costly moisture damage. Understanding the characteristics and vulnerabilities of various siding materials allows for targeted inspections and timely identification of defects such as cracks, warping, and signs of moisture intrusion. Consistent maintenance, including caulking, painting, and ensuring proper grading, enhances siding performance and lifespan. Maintaining a proactive approach to siding care can greatly reduce the risk of expensive repairs and improve the home’s energy efficiency and curb appeal.

Regular inspections combined with appropriate repairs help avoid extensive damage from rot, mold, and structural degradation. Homeowners can protect their investment by maintaining siding as a durable weather barrier, ensuring a safe, comfortable, and visually appealing exterior for many years. A well-maintained siding system also contributes to higher property value and peace of mind, knowing the home is safeguarded against environmental challenges.
Detecting Drainage Issues Around a Home’s Exterior

Understanding and addressing drainage issues around a home’s exterior is paramount for maintaining its structural integrity and preventing costly water damage, notes Schambs Property Management. Effective water management diverts rainwater and melting snow away from the foundation, safeguarding against basement flooding, soil erosion, and compromised structural stability. Neglecting these issues can lead to significant long-term problems, including mold growth, pest infestations, and even foundational shifts that jeopardize the entire property.

This article provides a comprehensive guide to detecting common drainage problems, offering practical insights into identifying the subtle and overt signs of water mismanagement. It delves into various aspects of exterior drainage, from evaluating landscape grading to inspecting gutter systems and understanding the impact of impervious surfaces. By equipping homeowners with the knowledge to proactively identify and mitigate these concerns, the aim is to foster a more resilient and protected living environment.

Identifying Poor Grading and Landscape Issues

Poor grading is a primary cause of drainage problems, characterized by land that slopes towards the home’s foundation, directing water inward rather than away.

The slope of the ground immediately surrounding a home is critical for effective drainage. Ideally, the landscape should gently decline away from the foundation at a minimum gradient of six inches over the first ten feet. This ensures that rainwater and snowmelt naturally flow away from the structure, preventing accumulation that can saturate the soil adjacent to the foundation. An insufficient slope, or worse, a negative slope where the ground pitches towards the house, creates a direct pathway for water to seep into basements or crawl spaces, leading to dampness, mold, and potential structural damage.

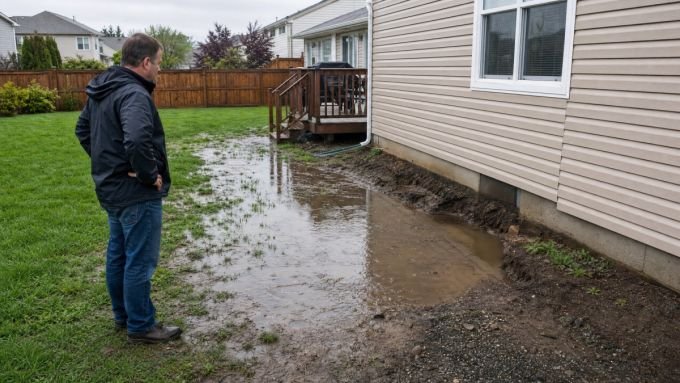
Beyond the immediate grading, other landscape features can exacerbate drainage issues. Compacted soil, often a result of heavy foot traffic or construction activities, reduces water absorption and increases runoff. Similarly, impermeable surfaces like concrete patios or driveways that are improperly sloped can channel significant volumes of water directly towards the home. Observing areas where water consistently pools after rainfall, or where soil erosion is evident, provides clear indicators of underlying grading and landscape deficiencies that require attention.

Assessing Gutter and Downspout Performance

Properly functioning gutters and downspouts are essential for collecting roof runoff and channeling it safely away from the home’s foundation.

Gutters and downspouts serve as the first line of defense against roof water runoff impacting the home’s perimeter. Their primary function is to collect precipitation from the roof and direct it through downspouts to a safe discharge point, typically several feet away from the foundation. When these systems are compromised, water can cascade directly down the side of the house, saturating the soil below and potentially entering the basement or crawl space. Common issues include blockages from leaves and debris, which cause water to overflow, and improper pitch, leading to standing water within the gutters themselves.

Regular inspection and maintenance are crucial for optimal gutter performance. Homeowners should routinely clear gutters of obstructions, especially during autumn and after severe weather events. Additionally, ensuring that downspout extensions are properly installed and direct water at least five to ten feet away from the foundation is vital. The absence of splash blocks or underground drainage systems can result in concentrated water flow that erodes soil and creates localized saturation, further contributing to drainage problems. The National Association of Home Builders (NAHB) recommends that downspouts discharge water at least 6 feet away from the foundation [1].

Recognizing Foundation and Basement Indicators

Signs of drainage issues often manifest in the foundation and basement, indicating water intrusion and potential structural compromise.

The foundation of a home is particularly vulnerable to persistent moisture. Visible cracks in the foundation walls, both interior and exterior, can be a direct consequence of hydrostatic pressure exerted by saturated soil. This pressure can force water through even small fissures, leading to dampness, efflorescence (white, powdery mineral deposits), and eventually more significant structural damage. Water stains on basement walls or floors, a musty odor, and the presence of mold or mildew are unequivocal indicators of water intrusion, often originating from exterior drainage deficiencies. These issues not only compromise indoor air quality but can also weaken structural components over time.

Beyond visible cracks, subtle changes in the home’s structure can also point to drainage problems. Sticking doors and windows, uneven floors, or gaps between walls and ceilings might suggest differential settlement of the foundation, a condition often exacerbated by inconsistent soil moisture levels. The presence of standing water in window wells or crawl spaces after rainfall is another clear red flag. Addressing these internal indicators requires a thorough investigation of external drainage systems, as interior repairs alone will not resolve the root cause of the water problem. According to the Federal Emergency Management Agency (FEMA), proper drainage is a key factor in preventing basement flooding [2].

detecting-drainage-issues-around-a-homes-exterior-1
A close-up view of a home’s foundation reveals hairline cracks and damp soil, suggesting persistent moisture issues due to inadequate drainage.

Detecting Issues with Driveways, Patios, and Walkways

Impervious surfaces like driveways, patios, and walkways can contribute to drainage problems if not properly sloped or designed to manage runoff.

Hardscaped areas around a home, while aesthetically pleasing and functional, can significantly alter natural drainage patterns. Concrete or paved surfaces prevent water from percolating into the ground, increasing the volume and velocity of surface runoff. If these surfaces are not correctly graded to direct water away from the home, they can become conduits for water to flow directly towards the foundation. Visible signs of this include water pooling against the house after rain, or erosion of soil at the edges of these hardscaped areas where water is concentrated. Cracks in driveways or patios can also allow water to penetrate beneath the surface, leading to sub-surface saturation and potential damage to the underlying soil and foundation.

Proper installation of these features requires careful consideration of drainage. This includes ensuring a slight slope away from the house, incorporating permeable materials where possible, and installing channel drains or catch basins to collect and divert runoff. For instance, the International Residential Code (IRC) specifies requirements for grading around foundations to ensure positive drainage [3]. Without these measures, even a well-maintained home can suffer from water intrusion due to poorly managed hardscapes. Observing how water behaves on these surfaces during a rain event can provide valuable clues about their contribution to overall drainage issues.

Understanding the Role of Landscaping and Vegetation

While vegetation can help absorb water, certain landscaping choices and plant placements can inadvertently worsen drainage problems around a home.

Landscaping plays a dual role in exterior drainage. On one hand, well-placed vegetation, especially deep-rooted plants and trees, can absorb significant amounts of rainwater, reducing surface runoff and soil saturation. On the other hand, improper landscaping can exacerbate drainage issues. For example, planting large shrubs or trees too close to the foundation can lead to root systems interfering with underground drainage pipes or even causing damage to the foundation itself. Furthermore, dense ground cover or raised garden beds that slope towards the house can trap moisture against the foundation walls, creating a perpetually damp environment conducive to mold and rot.

Consideration should be given to the type of plants used and their placement. Native plants that are well-adapted to local rainfall patterns can be particularly effective in managing stormwater. Creating rain gardens or bioswales in areas prone to pooling can also help absorb and filter runoff. It is important to ensure that any landscaping features, such as retaining walls or decorative borders, do not inadvertently create barriers that prevent water from flowing away from the house. Regular maintenance, including pruning and ensuring proper spacing, helps maintain a healthy landscape that supports effective drainage rather than hindering it.

Comparative Analysis of Common Drainage Issues

Drainage Issue Common Causes Potential Solutions
Poor Grading Insufficient slope away from foundation, settled soil Regrading, adding soil to create positive slope
Clogged Gutters/Downspouts Leaves, debris, improper installation Regular cleaning, installing gutter guards, extending downspouts
Foundation Cracks/Seepage Hydrostatic pressure, expansive soils, poor waterproofing Exterior waterproofing, French drains, crack repair
Improper Hardscape Slope Patios/driveways sloping towards house Resloping hardscapes, installing channel drains
Saturated Landscape Overwatering, poor soil absorption, dense vegetation Improving soil drainage, strategic planting, rain gardens

Frequently Asked Questions

What are the early signs of poor exterior drainage?

Early signs include standing water near the foundation, eroded landscaping, water stains in the basement or crawl space, and mildew or mold growth on exterior walls. These indicators often become apparent after heavy rainfall or snowmelt, signaling that water is not being effectively diverted away from the home’s critical structural components.

How can I check my property’s grading?

To check your property’s grading, observe the slope of the ground around your home. Ideally, the ground should slope away from the foundation at a rate of at least six inches for the first ten feet. You can use a string line level and stakes to accurately measure the grade. A reverse slope or flat areas indicate a need for regrading to ensure proper water runoff.

What role do gutters and downspouts play in drainage?

Gutters and downspouts are crucial for collecting rainwater from the roof and directing it away from the foundation. They prevent water from cascading down the side of the house, which can saturate the soil and lead to foundation issues. Properly maintained and extended downspouts are vital for effective water management.

When should I consider professional help for drainage problems?

Professional assistance is advisable for persistent standing water, significant foundation cracks, recurring basement flooding, or when complex solutions like French drains, extensive regrading, or exterior waterproofing are needed. Experts can accurately diagnose the root cause and implement effective, long-lasting solutions.

Effectively detecting and addressing drainage issues around a home’s exterior is a critical aspect of property maintenance. By understanding the various indicators, from subtle landscape changes to more overt signs of water intrusion in the basement, homeowners can take proactive steps to protect their investment. Regular inspections, timely maintenance of gutters and downspouts, and thoughtful landscaping choices are all integral to a robust drainage strategy. When in doubt, consulting with drainage professionals can provide tailored solutions, ensuring the long-term health and stability of the home.

References

  • [1] National Association of Home Builders. (n.d.). *Residential Construction Performance Guidelines*.
  • [2] Federal Emergency Management Agency. (2008). *Protecting Your Home and Property From Flood Damage*. FEMA 347.
  • [3] International Code Council. (2021). *International Residential Code (IRC)*.

What to Do About a Failing Septic System

A septic system is a crucial component of wastewater management for many homes, particularly in rural and suburban areas not connected to municipal sewer lines, explains Rollingwood Management Leander. Designed to treat and dispose of household wastewater on-site, these systems rely on a delicate balance of physical and biological processes. When a septic system begins to fail, it can lead to significant health hazards, environmental contamination, and costly property damage. Understanding the signs of failure and knowing the appropriate steps to take is essential for homeowners.

The proper functioning of a septic system is vital for public health and environmental protection. Untreated wastewater can introduce harmful bacteria, viruses, and nutrients into groundwater and surface water, posing risks to drinking water sources and aquatic ecosystems. Early detection and intervention are key to mitigating these risks and ensuring the longevity of the system. This article outlines the common indicators of septic system distress, explores underlying causes, and provides actionable advice for homeowners facing such a challenge.

Recognizing the early signs of a failing septic system is crucial for timely intervention and preventing extensive damage.

Identifying the Warning Signs

The initial indicators of a septic system malfunction often manifest subtly, making them easy to overlook without careful observation. One of the most common signs is the presence of sewage odors, either indoors or outdoors, particularly near the septic tank or drain field. These unpleasant smells indicate that wastewater is not being properly contained or treated, allowing gases to escape. Another key symptom is slow drains or backups in household plumbing fixtures, such as toilets, sinks, and showers. This suggests a blockage or reduced flow capacity within the system, often due to an overloaded or failing drain field.

Beyond odors and slow drainage, visual cues can also signal trouble. Unusually lush, green patches of grass or soggy areas in the yard, especially over the drain field, are strong indicators of a failing system. This occurs when effluent, instead of percolating through the soil, rises to the surface, providing excess nutrients and moisture to the vegetation. Additionally, if you notice standing water or puddles in your yard after minimal rainfall, it could be a sign that the drain field is saturated and unable to absorb additional liquid. These visual anomalies warrant immediate investigation to prevent further environmental impact and potential health risks.

Regular monitoring of your home’s wastewater system can help identify these issues before they escalate. Pay attention to any changes in water flow, unusual smells, or visible alterations in your yard. Addressing these warning signs promptly can save significant repair costs and protect your property and the environment from contamination [1].

Several factors contribute to septic system failure, ranging from improper maintenance to environmental conditions.

Common Causes of Failure

Septic system failures are rarely attributable to a single cause; instead, they often result from a combination of factors that compromise the system’s integrity and functionality. Infrequent pumping is a primary culprit, as it allows solids to accumulate in the septic tank, eventually overflowing into the drain field. This sludge and scum can clog the soil pores, preventing proper effluent absorption and leading to system backup. The U.S. Environmental Protection Agency (EPA) recommends that most septic tanks be pumped every three to five years, depending on household size and water usage [2]. Neglecting this maintenance task significantly increases the risk of failure.

Another significant cause is the improper disposal of household waste. Flushing non-biodegradable items such as wet wipes, feminine hygiene products, and excessive grease or harsh chemicals can disrupt the bacterial balance essential for wastewater treatment in the tank. These materials can also create blockages in pipes and the drain field, exacerbating the problem. Furthermore, excessive water usage, particularly from high-flow fixtures or prolonged showers, can overwhelm the system’s capacity, leading to hydraulic overload. When the drain field receives more wastewater than it can absorb, it becomes saturated, impairing its ability to treat and disperse effluent effectively.

Environmental factors and physical damage also play a role in septic system failures. Tree roots, attracted by the moisture and nutrients in the drain field, can infiltrate pipes and tanks, causing cracks and blockages. Driving heavy vehicles or constructing structures over the drain field can compact the soil, reducing its permeability and hindering effluent absorption. Additionally, poor site selection during installation, such as placing a system in an area with high water tables or unsuitable soil types, can predispose it to failure. Understanding these diverse causes is the first step toward implementing effective preventative measures and corrective actions.

Addressing a failing septic system requires a systematic approach, often involving professional assessment and targeted repairs or replacement.

Effective Solutions and Repairs

Once a septic system failure is identified, immediate action is necessary to prevent further damage and environmental contamination. The first step is to contact a qualified septic system professional. They can conduct a thorough inspection, often involving dye tests, camera inspections, and soil percolation tests, to accurately diagnose the problem. Based on their assessment, solutions can range from minor repairs to complete system replacement. For instance, if the issue is a simple blockage in the pipes leading to the tank, a professional might be able to clear it with specialized equipment, restoring proper flow without extensive work.

If the drain field is saturated or clogged, several options may be considered. Pumping the septic tank can provide temporary relief by removing accumulated solids and reducing hydraulic load on the drain field. In some cases, resting the drain field by diverting wastewater to an alternative system or reducing water usage can allow the soil to dry out and regain its absorption capacity. For more severe drain field failures, remediation techniques like aeration or chemical treatments might be attempted to rejuvenate the soil. However, if the drain field is beyond repair, a new one may need to be installed in a different location on the property, adhering to local regulations and soil suitability requirements [3].

In situations where the septic tank itself is compromised—due to cracks, leaks, or structural damage—replacement becomes necessary. Modern septic tanks are often made of durable materials like concrete or fiberglass and are designed for longevity. Upgrading to an advanced treatment unit, such as an aerobic treatment unit (ATU), might be a viable solution for properties with challenging soil conditions or limited space. ATUs use oxygen to break down waste more effectively, producing a higher quality effluent. Regardless of the specific solution, all repairs and replacements must comply with local health department regulations and building codes to ensure safety and effectiveness.

Preventative maintenance is the most effective strategy to extend the lifespan of a septic system and avoid costly failures.

Preventative Maintenance Strategies

Proactive maintenance is paramount to ensuring the long-term health and efficiency of your septic system. Regular pumping, as recommended by the EPA, is the cornerstone of preventative care. This routine removal of sludge and scum prevents solids from migrating into the drain field, where they can cause irreversible damage. Homeowners should keep detailed records of pumping dates and any maintenance performed to track the system’s history. Additionally, being mindful of what goes down the drain is critical. Avoid flushing non-biodegradable items, excessive cooking grease, and harsh chemicals, which can disrupt the biological processes within the tank and lead to blockages.

Water conservation also plays a significant role in preventing septic system overload. Reducing overall water usage through efficient appliances, shorter showers, and fixing leaks minimizes the hydraulic load on the drain field, allowing it to function optimally. Landscaping practices around the drain field should also be carefully considered. Planting only shallow-rooted vegetation, such as grass, helps prevent tree roots from infiltrating pipes. Avoid planting trees or shrubs with aggressive root systems near the septic area. Furthermore, never drive or park vehicles, construct patios, or place heavy objects over the drain field, as this can compact the soil and damage the underground components.

Annual inspections by a certified septic professional can identify potential issues before they escalate into major failures. These inspections can check for leaks, assess sludge and scum levels, and evaluate the overall condition of the tank and drain field. Some jurisdictions may even require periodic inspections. Educating all household members about proper septic system care is also vital. By adopting these preventative measures, homeowners can significantly extend the life of their septic systems, avoid expensive repairs, and protect public health and the environment [4].

Understanding the costs associated with septic system repair and replacement helps homeowners prepare for potential expenses.

Costs and Financial Considerations

The financial implications of a failing septic system can vary widely, depending on the severity of the problem and the required solution. Minor repairs, such as clearing a simple blockage or replacing a damaged pipe section, might cost a few hundred dollars. However, more extensive issues, like a compromised drain field or a failing septic tank, can lead to significantly higher expenses. The cost of pumping a septic tank typically ranges from $300 to $600, a relatively small investment compared to the potential costs of system failure. Neglecting regular pumping often results in more expensive repairs down the line.

Replacing a drain field can be one of the most costly repairs, often ranging from $5,000 to $20,000 or more, depending on the size of the system, soil conditions, and local labor rates. This process involves excavation, removal of the old system, and installation of new distribution pipes and gravel. A complete septic system replacement, including a new tank and drain field, can easily exceed $15,000 to $30,000, particularly if advanced treatment technologies are required or if the site presents complex challenges. These figures underscore the importance of preventative maintenance, as it is almost always more cost-effective than reactive repairs.

Homeowners should also consider the potential for property value depreciation if a septic system is known to be failing or in poor condition. Disclosure of such issues is often required during property sales, which can impact marketability and price. Some local governments offer financial assistance programs or low-interest loans for septic system repairs or replacements, especially for low-income households or in areas with environmental concerns. It is advisable to research available grants or incentives in your region. Investing in regular maintenance and timely repairs not only protects your health and the environment but also safeguards your financial investment in your home.

Symptom Potential Cause Recommended Solution
Sewage odors (indoors/outdoors) Tank overflow, drain field saturation, vent pipe issues Professional inspection, tank pumping, drain field assessment
Slow drains or backups Clogged pipes, overloaded drain field, excessive solids in tank Clear blockages, reduce water usage, pump septic tank
Lush, green grass over drain field Effluent surfacing due to drain field failure Professional drain field evaluation, potential replacement
Soggy spots or standing water in yard Saturated drain field, high water table, soil compaction Divert water, rest drain field, improve drainage, professional assessment
Gurgling sounds from plumbing Air trapped in pipes, partial blockages, vent issues Check for blockages, ensure proper venting, professional plumbing inspection
what-to-do-about-a-failing-septic-system-1
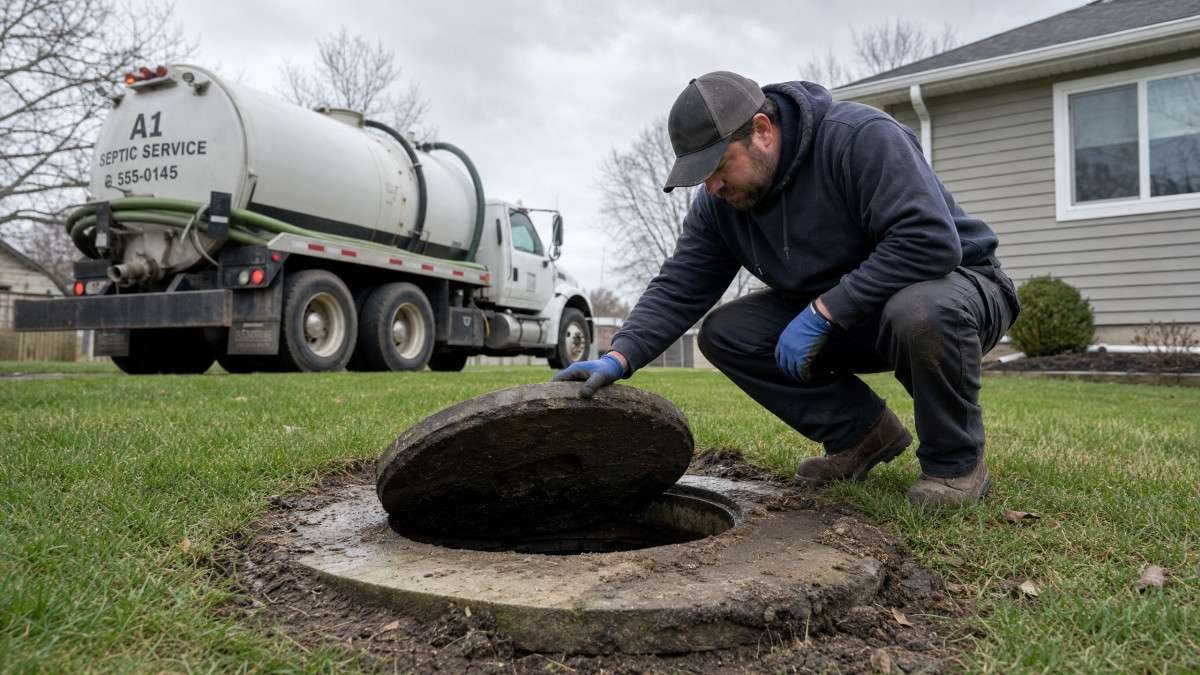
Regular maintenance, including pumping and inspections, is vital for preventing septic system failures.

Frequently Asked Questions

How often should a septic tank be pumped?

Septic tanks should typically be pumped every three to five years, depending on household size, wastewater generation, and tank capacity. For larger households or those with garbage disposals, more frequent pumping may be necessary. Regular pumping prevents the accumulation of solids that can lead to drain field clogging and system failure. A professional can assess your specific needs and recommend an appropriate pumping schedule.

What are the early warning signs of septic system failure?

Early warning signs include slow drains, gurgling pipes, sewage odors (indoors or outdoors), and unusually lush or soggy patches of grass over the drain field. You might also notice standing water in your yard, even without heavy rainfall. These symptoms indicate that the system is struggling to process wastewater and requires immediate attention to prevent more severe and costly problems.

Can I repair a failing septic system myself?

While minor issues like clearing a simple pipe blockage might be within a homeowner’s capability, major septic system repairs, especially those involving the tank or drain field, should always be handled by qualified professionals. Septic systems are complex, and improper repairs can lead to further damage, environmental contamination, and potential health hazards. Professionals have the expertise, equipment, and permits required to safely and effectively address these issues.

What causes septic system failure?

Common causes of septic system failure include infrequent pumping, flushing non-biodegradable items (e.g., wet wipes, excessive grease), excessive water usage that overwhelms the system, tree root intrusion into pipes, and soil compaction over the drain field due to heavy vehicles or structures. Additionally, improper installation or unsuitable soil conditions can contribute to premature failure. Understanding these causes helps in implementing preventative measures.

A failing septic system is a serious concern that demands prompt attention. By recognizing the early warning signs, understanding the common causes, and implementing effective solutions and preventative maintenance strategies, homeowners can protect their property, health, and the environment. Regular inspections, responsible waste disposal, and water conservation are key to ensuring the longevity and efficient operation of your septic system. When in doubt, always consult with a certified septic professional to diagnose and address any issues, ensuring compliance with local regulations and safeguarding your investment.

References

  1. U.S. Environmental Protection Agency. “How to Care for Your Septic System.” Accessed May 5, 2026.
  2. U.S. Environmental Protection Agency. “Septic System Basics.” Accessed May 5, 2026.
  3. International Association of Certified Home Inspectors (InterNACHI). “Septic Systems.” Accessed May 5, 2026.
  4. Minnesota Department of Health. “Septic System Maintenance: A Guide for Homeowners.” Accessed May 5, 2026.

How to Assess the Condition of Windows and Doors

Understanding Common Window and Door Issues

Windows and doors are critical components of a building’s envelope, and their condition directly impacts energy efficiency, security, and indoor comfort, observes RGroup Property Management Tubac. Common issues include drafts, leaks, operational difficulties, and visible deterioration of materials.

Regular inspection of windows and doors is essential for maintaining a building’s structural integrity and energy performance. Over time, exposure to weather elements, daily wear and tear, and inadequate maintenance can lead to various problems. These issues range from minor cosmetic flaws to significant structural damage that can compromise the entire building envelope. Addressing these problems promptly can prevent more extensive and costly repairs in the future, ensuring the longevity and efficiency of the property.

One of the most prevalent issues is air leakage, often caused by degraded weatherstripping, sealant failures, or gaps in the framing. According to the U.S. Department of Energy, air leaks through windows and doors can account for 25% to 40% of heat loss in a typical home [1]. This not only leads to higher energy bills but also creates uncomfortable drafts and inconsistent indoor temperatures. Identifying and sealing these leaks is a primary step in improving a building’s energy efficiency and occupant comfort. The effectiveness of a building’s thermal envelope is significantly compromised by poorly performing windows and doors, making them a focal point for energy audits.

Water intrusion is another serious concern, typically manifesting as leaks around frames, sills, or glazing. This can result from deteriorated caulking, damaged flashing, or compromised seals. Persistent moisture can lead to wood rot, mold growth, and damage to interior finishes, posing health risks and structural hazards. Early detection of water damage is crucial to prevent the spread of decay and maintain a healthy indoor environment. The presence of water stains, peeling paint, or warped materials near windows and doors often indicates a moisture problem that requires immediate attention. The International Residential Code (IRC) provides guidelines for proper flashing and sealing to prevent water penetration around openings [2].

Visual Inspection Techniques

A thorough visual inspection involves examining all components of windows and doors for signs of wear, damage, or deterioration, including frames, sashes, panes, hardware, and surrounding building materials.

Begin the visual inspection by systematically examining the exterior and interior of all windows and doors. On the exterior, look for cracks, peeling paint, or discoloration on frames and sills, which can indicate water damage or material degradation. Pay close attention to the caulking and weatherstripping; these seals are the first line of defense against air and moisture infiltration. Any gaps, cracks, or hardened material should be noted, as they signify a need for replacement. Inspect the glass panes for cracks, condensation between double panes (indicating a failed seal), or signs of impact damage. The condition of the flashing around the window or door opening is also critical; improperly installed or damaged flashing can direct water into the wall cavity, leading to hidden structural issues.

Moving to the interior, observe the areas around windows and doors for water stains, mold growth, or warped wood, which are clear indicators of moisture penetration. Check the operation of the window and door hardware, including locks, latches, and hinges. They should operate smoothly and securely. Difficulty in opening, closing, or locking can point to issues with the frame’s squareness, foundation settling, or worn hardware. Also, assess the condition of interior paint or wallpaper near these openings; bubbling or peeling can be a subtle sign of moisture problems. A comprehensive visual assessment provides a foundational understanding of the unit’s overall health and highlights areas requiring further investigation or immediate repair.

Performance Testing for Air and Water Leaks

Performance testing involves methods such as the smoke pencil test, infrared thermography, and hose testing to identify air infiltration and water penetration points that may not be visible during a visual inspection.

Beyond visual cues, performance testing offers a more definitive assessment of air and water tightness. The smoke pencil test is a simple yet effective method for detecting air leaks. By holding a smoke pencil (or an incense stick) around the edges of closed windows and doors on a windy day, or with an exhaust fan running, any disturbance in the smoke trail indicates an air leak. This method helps pinpoint specific areas where weatherstripping or sealants have failed, allowing for targeted repairs. For a more advanced approach, infrared thermography can visualize temperature differences caused by air infiltration or insulation deficiencies around openings. A thermal camera can reveal cold spots (in winter) or hot spots (in summer) where conditioned air is escaping or unconditioned air is entering, providing a comprehensive map of thermal bridges and air leakage pathways. This technology is particularly useful for identifying hidden issues within wall cavities adjacent to windows and doors.

For water penetration, a controlled hose test can simulate rainfall conditions to identify leaks. This involves carefully spraying water at various angles around the exterior of the window or door frame while observing the interior for any signs of water intrusion. It is crucial to start spraying from the bottom and work upwards, isolating sections to accurately determine the source of any leak. This test should be conducted with caution to avoid causing new water damage. Alternatively, a more rigorous test, often performed by professionals, is the AAMA 502 or ASTM E1105 standard test method, which uses specialized equipment to apply uniform water pressure and measure air infiltration rates, providing quantitative data on performance. These tests are essential for confirming the effectiveness of repairs or assessing the quality of new installations, ensuring that windows and doors meet specified performance criteria for weather resistance.

Assessing Hardware and Operational Functionality

Evaluating the hardware and operational functionality of windows and doors involves checking the smooth operation of moving parts, the security of locking mechanisms, and the integrity of hinges, tracks, and balances.

The functionality of window and door hardware is paramount for both security and ease of use. Begin by testing all moving components: open and close windows and doors multiple times to ensure they operate smoothly without excessive force, sticking, or grinding. For windows, check the balances or springs that assist in holding the sash open; if a window slides down on its own, the balances likely need adjustment or replacement. Inspect hinges for signs of rust, bending, or loose screws, which can cause misalignment and affect sealing. Lubricating moving parts with appropriate lubricants can often resolve minor operational issues and extend the lifespan of the hardware. For sliding doors and windows, clean the tracks thoroughly and inspect rollers for wear; worn rollers can make operation difficult and lead to premature failure of the unit.

Security is another critical aspect of hardware assessment. Test all locking mechanisms to ensure they engage fully and securely. For windows, check latches and locks for proper alignment and tightness. For doors, verify that deadbolts extend fully into the strike plate and that handles operate correctly. Any play or looseness in the locking hardware can compromise the security of the opening. The condition of weatherstripping and seals also plays a role in operational functionality, as deteriorated seals can create friction or prevent proper closure. Regular maintenance, including cleaning and lubrication, can significantly improve the performance and longevity of window and door hardware, contributing to the overall security and energy efficiency of the building. The International Building Code (IBC) outlines specific requirements for egress and security hardware in various building types, emphasizing the importance of functional and secure openings [3].

Material Degradation and Structural Integrity

Assessing material degradation and structural integrity involves inspecting for rot, rust, corrosion, warping, and signs of structural stress in the frames, sashes, and surrounding wall areas, which can compromise the entire opening.

The long-term performance of windows and doors is heavily dependent on the integrity of their materials and structural components. For wooden windows and doors, inspect thoroughly for signs of rot, especially in areas exposed to moisture, such as sills, bottom rails, and lower frame sections. Probe suspicious areas with a screwdriver or awl; soft or crumbling wood indicates rot that needs immediate attention. Paint blistering or cracking can also be an early indicator of moisture intrusion and underlying rot. For metal frames (aluminum, steel), look for rust or corrosion, particularly at joints, welds, and areas where coatings have been compromised. Rust can weaken the frame and lead to structural failure. Vinyl or fiberglass frames should be checked for cracks, warping, or discoloration, which can occur due to prolonged UV exposure or manufacturing defects. Warping can compromise the seal and operational functionality, leading to air and water leaks.

Beyond the immediate window or door unit, assess the structural integrity of the surrounding wall. Look for cracks in the plaster or drywall, bowing of the wall, or gaps between the frame and the wall, which could indicate foundation issues or structural movement. These issues can transfer stress to the window or door frame, leading to misalignment and operational problems. The presence of insect damage, such as termite tunnels in wooden components, also warrants immediate investigation and remediation. A comprehensive assessment of material degradation and structural integrity ensures that the window or door is not only performing its intended function but also contributing positively to the overall stability and safety of the building. Addressing these issues proactively can prevent costly structural repairs and extend the life of the building envelope. The National Fenestration Rating Council (NFRC) provides performance ratings for windows, doors, and skylights, which can be used to compare the energy efficiency and structural performance of different products [4].

Assessment Area Key Indicators of Poor Condition Potential Consequences
Visual Inspection Cracked caulk, peeling paint, condensation between panes, damaged flashing Air leaks, water intrusion, mold growth, reduced curb appeal
Performance Testing Smoke trail disturbances, cold/hot spots (thermography), water penetration during hose test High energy bills, uncomfortable drafts, interior water damage
Hardware & Operation Sticking, grinding, loose hinges, non-engaging locks, broken balances Security risks, difficulty of use, increased wear on components
Material Degradation Wood rot, metal rust/corrosion, vinyl/fiberglass cracks or warping Structural weakening, pest infestation, complete unit failure
how-to-assess-the-condition-of-windows-and-doors-1
A home inspector utilizes a moisture meter to identify hidden water damage within a window frame, a crucial step in assessing its overall condition.

Frequently Asked Questions

How often should windows and doors be inspected?

Windows and doors should ideally be inspected annually, preferably in the spring or fall, to identify any issues before they become severe. However, if you notice drafts, leaks, or operational problems, an immediate inspection is warranted. Regular inspections can help catch minor issues early, preventing them from escalating into costly repairs and maintaining the energy efficiency of your home.

What are the signs of a failed window seal?

The most common sign of a failed window seal is condensation or fogging between the panes of glass, which cannot be wiped away. This indicates that the inert gas (like argon or krypton) between the panes has escaped, and moist air has entered. Other signs include increased energy bills due to reduced insulation and a noticeable draft even when the window is closed. A failed seal significantly reduces the window’s thermal performance.

Can I repair a rotting window frame myself?

Minor wood rot in a window frame can sometimes be repaired by homeowners using epoxy fillers or wood hardeners, after removing all decayed wood. However, for extensive rot or structural damage, it is highly recommended to consult a professional. Improper repairs can lead to further deterioration, water intrusion, and compromise the structural integrity of the window and surrounding wall. Professionals can assess the extent of the damage and recommend the most effective repair or replacement solutions.

When is it time to replace windows and doors instead of repairing them?

The decision to replace rather than repair windows and doors often depends on the extent of the damage, the age of the units, and the cost-effectiveness of repairs. If multiple panes have failed seals, frames are extensively rotted or corroded, or if the units are very old and inefficient, replacement is usually the more economical and beneficial option in the long run. Significant drafts, persistent leaks, and operational difficulties that cannot be easily fixed are also strong indicators for replacement. New windows and doors can offer substantial improvements in energy efficiency, comfort, and home value.

Assessing the condition of windows and doors is a multifaceted process that combines visual inspection, performance testing, and an understanding of material degradation. Regular and thorough evaluations are crucial for maintaining a building’s energy efficiency, security, and structural integrity. By proactively identifying and addressing issues, homeowners and property managers can prevent costly damage, enhance indoor comfort, and extend the lifespan of these essential building components. Investing time in proper assessment and timely maintenance ultimately contributes to a healthier, safer, and more sustainable living or working environment.

References

[1] U.S. Department of Energy. Air Sealing Your Home. Accessed May 5, 2026.

[2] International Code Council. International Residential Code (IRC) – Flashing. Accessed May 5, 2026.

[3] International Code Council. International Building Code (IBC) – Means of Egress. Accessed May 5, 2026.

[4] National Fenestration Rating Council. NFRC Website. Accessed May 5, 2026.

Understanding the Importance of Radon Testing

Radon is a naturally occurring radioactive gas that poses a significant health risk, primarily lung cancer, due to its colorless, odorless, and tasteless nature, making testing the only way to detect its presence in homes, warns RentWise Property Company Sterling.

Radon gas originates from the natural radioactive decay of uranium found in nearly all soils. This invisible and undetectable gas can seep into homes through cracks in foundations, walls, and other openings, accumulating to dangerous levels. The U.S. Environmental Protection Agency (EPA) estimates that radon is responsible for about 21,000 lung cancer deaths each year, making it the second leading cause of lung cancer after smoking [1].

The insidious nature of radon lies in its imperceptibility; homeowners cannot see, smell, or taste it. Consequently, without specific testing, individuals remain unaware of their exposure, which can persist for years. This prolonged exposure to elevated radon concentrations significantly increases the risk of developing lung cancer, underscoring the critical need for proactive detection measures in residential properties.

Understanding the pervasive threat of radon is the first step towards safeguarding indoor environments. Educational initiatives often highlight the geological prevalence of uranium and its decay products, emphasizing that any home, regardless of its age or construction, can be susceptible to radon infiltration. This universal susceptibility necessitates widespread awareness and consistent testing protocols to mitigate potential health hazards effectively..

The Silent Threat: What is Radon and Why is it Dangerous?

Radon is a radioactive gas formed from uranium decay in soil, dangerous because it is a leading cause of lung cancer, undetectable by human senses, and can accumulate to hazardous levels indoors.

Radon is a radioactive gas that forms naturally from the breakdown of uranium in rocks and soil. As uranium decays, it produces radium, which then decays into radon gas. This gas can migrate through the ground and enter buildings through various entry points, including cracks in foundations, floor-wall joints, and utility penetrations. Once inside, it can accumulate, especially in lower levels of a home, reaching concentrations that pose a serious health risk [2].

The primary danger of radon stems from its radioactivity. When inhaled, radon and its decay products, known as radon progeny, can damage the cells lining the lungs. This cellular damage can lead to the development of lung cancer over time. The risk is cumulative, meaning that the longer an individual is exposed to high levels of radon, and the higher those levels are, the greater their chance of developing lung cancer. Studies by organizations like the World Health Organization (WHO) consistently highlight radon as a significant environmental health hazard that demands attention [4].

The EPA has established an action level of 4 picocuries per liter (pCi/L) for radon in indoor air, recommending mitigation for homes with levels at or above this concentration. However, it is important to note that there is no known safe level of radon exposure; any exposure carries some degree of risk. This emphasizes the importance of keeping radon levels as low as reasonably achievable within residential settings to protect public health.

Common Entry Points and Accumulation in Homes

Radon enters homes primarily through openings in the foundation, such as cracks, floor-wall joints, and utility openings, driven by pressure differences that draw soil gases indoors.

Radon gas tends to accumulate in the lowest parts of a building, such as basements and crawl spaces. It enters through a variety of pathways that compromise the integrity of the building envelope. These include structural cracks in concrete slabs, gaps around service pipes, sump pump openings, and even through pores in concrete blocks. The pervasive nature of these entry points means that almost any home can be vulnerable to radon infiltration, regardless of its construction type or age.

The primary mechanism for radon entry is often a phenomenon known as the “stack effect.” This occurs when warmer indoor air rises and escapes through upper windows and vents, creating a slight vacuum in the lower parts of the house. This negative pressure differential actively draws soil gases, including radon, from the ground into the home. Factors such as weather conditions, ventilation systems, and household activities can influence the magnitude of this pressure difference and, consequently, the rate of radon entry.

Furthermore, radon can also be present in well water, particularly in areas with high uranium content in the bedrock. When this water is used for showering, washing dishes, or other household activities, radon gas can be released into the indoor air. While waterborne radon is generally a smaller contributor to overall indoor radon levels compared to soil gas, it can still be a significant source in certain regions and warrants consideration during comprehensive radon assessments.

Effective Methods for Radon Testing

Effective radon testing involves both short-term and long-term devices, with long-term tests providing a more accurate annual average of radon levels for informed mitigation decisions.

There are two main categories of radon testing devices: short-term and long-term. Short-term tests are designed to provide quick results, typically over a period of 2 to 90 days. Common short-term devices include charcoal canisters, alpha track detectors, electret ion chambers, and continuous radon monitors. These tests are useful for initial screening or when a rapid assessment is needed, such as during a real estate transaction. However, due to daily and seasonal fluctuations in radon levels, short-term tests may not always reflect the annual average accurately.

Long-term tests, on the other hand, are deployed for periods exceeding 90 days, often for several months up to a year. Alpha track detectors and electret ion chambers are also available in long-term versions. These tests provide a more representative average of a home’s radon concentration, making them ideal for determining the need for mitigation. The EPA recommends conducting a long-term test if a short-term test result is between 4 and 10 pCi/L, to confirm the need for mitigation with greater certainty [3].

Regardless of the type of test chosen, proper placement and adherence to manufacturer instructions are crucial for obtaining accurate results. Tests should be placed in the lowest lived-in area of the home, away from drafts, heat sources, and high humidity. It is also important to keep windows and doors closed as much as possible during short-term testing to ensure representative indoor radon levels. Professional radon testing services are also available, offering expertise in device placement, data interpretation, and mitigation recommendations.

Interpreting Results and Mitigation Strategies

Radon test results above the EPA’s action level of 4 pCi/L necessitate mitigation, with common strategies including sub-slab depressurization and sealing entry points to reduce indoor radon concentrations.

Once radon test results are obtained, interpreting them correctly is paramount. The EPA recommends taking action to reduce radon levels if the result is 4 pCi/L or higher. While this is the established action level, it is important to remember that there is no completely safe level of radon. Therefore, even if levels are below 4 pCi/L, homeowners may consider mitigation to further reduce their exposure, especially if levels are consistently between 2 and 4 pCi/L [4].

The most common and effective method for reducing high radon levels is a system called sub-slab depressurization, also known as active soil depressurization. This involves installing a vent pipe through the foundation floor and connecting it to a fan that draws radon gas from beneath the house and vents it safely outside, above the roofline. This creates a negative pressure field beneath the slab, preventing radon from entering the living space. Other mitigation techniques include sealing cracks and other openings in the foundation, and improving home ventilation.

Choosing the appropriate mitigation strategy often depends on the home’s construction, radon levels, and budget. It is highly recommended to consult with a qualified radon mitigation professional to design and install a system tailored to specific needs. These professionals are trained to assess the unique characteristics of a home and implement the most effective and durable solutions, ensuring long-term protection against radon exposure. Regular retesting after mitigation is also advised to confirm the system’s effectiveness.

Preventative Measures and Long-Term Protection

Preventative measures for radon include sealing foundation cracks and ensuring proper ventilation, while long-term protection involves regular testing and maintaining mitigation systems to sustain low radon levels.

Beyond immediate mitigation, several preventative measures can be incorporated during new construction or home renovations to minimize future radon infiltration. These include installing a gas-permeable layer beneath the foundation slab, such as a layer of gravel or a drainage mat, coupled with a vapor barrier. Passive radon systems, which incorporate a vent pipe without a fan, can also be installed during construction, providing a pathway for radon to escape naturally. These systems can be easily upgraded to active systems with the addition of a fan if future testing reveals elevated radon levels.

For existing homes, maintaining good indoor air quality through adequate ventilation can help reduce radon concentrations, although it is not a substitute for active mitigation if levels are high. Sealing visible cracks and openings in the foundation, while not a standalone solution, can complement mitigation efforts by reducing the pathways for radon entry. These efforts contribute to a holistic approach to managing indoor air quality and minimizing exposure to environmental hazards.

Long-term protection against radon requires ongoing vigilance. Even after a mitigation system is installed, it is crucial to retest for radon every two years, or after any significant structural changes to the home. This ensures that the system remains effective and that radon levels continue to be within acceptable limits. Homeowners should also regularly check their mitigation system’s fan to ensure it is operating correctly.

Frequently Asked Questions

Here are some common questions regarding radon and its testing.

What is radon and why is it dangerous?

Radon is a naturally occurring radioactive gas that is colorless, odorless, and tasteless. It originates from the radioactive decay of uranium in soil, rock, and water, and can seep into homes through cracks in foundations, walls, and other openings. Prolonged exposure to elevated levels of radon is the second leading cause of lung cancer after smoking, posing a significant health risk to occupants.

How does radon enter a home?

Radon typically enters homes from the soil beneath the foundation. It can infiltrate through various pathways, including cracks in concrete slabs, floor-wall joints, loose-fitting pipes, sump pump openings, and even through water supplies. The pressure difference between the indoor and outdoor air often draws radon gas into the lower levels of a building.

What are the common methods for radon testing?

Common radon testing methods include short-term and long-term tests. Short-term tests, such as charcoal canisters or alpha track detectors, provide quick results over a few days to a week. Long-term tests, typically lasting 90 days or more, offer a more accurate annual average of radon levels. Both types of tests are readily available for homeowners to deploy.

What should I do if my home has high radon levels?

If radon levels in a home are found to be elevated (typically above 4 picocuries per liter, or pCi/L, as recommended by the EPA), mitigation is necessary. Common mitigation techniques include sub-slab depressurization, which involves installing a vent pipe and fan to draw radon from beneath the house and vent it outside. Sealing cracks and openings in the foundation can also help reduce radon entry.

Are there specific regions more prone to high radon levels?

Yes, radon levels can vary significantly by geographic region, primarily due to differences in underlying geology and soil composition. Areas with higher concentrations of uranium in the bedrock are more likely to have elevated radon levels. Geological surveys and state health departments often provide maps or data indicating regions with higher radon potential. However, it is crucial to remember that high radon levels can be found in any home, regardless of its location, making testing universally important.

How often should I test my home for radon?

The EPA recommends testing your home for radon every two years, especially if you have a mitigation system in place, or if there have been significant renovations or changes to the home’s structure. If initial tests show low levels, retesting periodically ensures that conditions haven’t changed, as radon levels can fluctuate over time due to various environmental factors.

Comparative Analysis of Radon Testing Methods

Testing Method Duration Accuracy Cost (Approx.) Pros Cons
Short-Term (Charcoal Canister) 2-7 days Good for initial screening $10-$30 Quick results, inexpensive, DIY friendly Less representative of annual average, susceptible to environmental changes
Short-Term (Alpha Track) 3-90 days Good for initial screening $20-$50 Less sensitive to humidity, DIY friendly Requires laboratory analysis, results take longer than charcoal, still short-term
Long-Term (Alpha Track) 90+ days Highly accurate annual average $30-$60 Most accurate for mitigation decisions, accounts for seasonal variations Results take a long time, requires consistent placement, not suitable for quick assessments
Continuous Radon Monitor 48+ hours Real-time data, good for diagnostics $150-$1000 (rental/purchase) Instantaneous readings, hourly data, tamper-resistant More expensive, requires power source, professional calibration often needed

In conclusion, understanding the importance of radon testing is not merely a recommendation but a critical component of home safety and public health. Given radon’s invisible and insidious nature, regular testing remains the only reliable method to detect its presence and assess potential risks. By taking proactive steps to test for radon and implement appropriate mitigation strategies when necessary, homeowners can significantly reduce their exposure to this hazardous gas, thereby safeguarding the long-term health and well-being of their families. The collective effort in raising awareness and promoting testing can lead to healthier indoor environments for communities worldwide.

References

[1] U.S. Environmental Protection Agency. (2024). Radon Health Risks. https://www.epa.gov/radon/health-risks-radon

[2] National Cancer Institute. (2023). Radon and Cancer. https://www.cancer.gov/about-cancer/causes-prevention/risk/radon

[3] U.S. Environmental Protection Agency. (2024). Radon Testing and Mitigation. https://www.epa.gov/radon/radon-testing-and-mitigation

[4] World Health Organization. (2009). WHO Handbook on Indoor Radon: A Public Health Perspective. https://www.who.int/publications/i/item/9789241547673

Identifying Signs of Structural Damage in a House

Understanding the integrity of a home’s structure is paramount for ensuring safety and preserving property value, reports Rentwerx Property Management New Braunfels. Structural damage, often insidious in its progression, can manifest in various subtle and overt ways, posing significant risks if left unaddressed. Recognizing these early warning signs is critical for homeowners, enabling timely intervention that can prevent minor issues from escalating into catastrophic failures. This article provides a comprehensive guide to identifying the key indicators of structural compromise, offering insights into what to look for and why these signs matter.

The foundation, walls, and roof form the skeletal system of any dwelling, bearing the cumulative weight and resisting environmental forces. When any component of this system is compromised, the entire edifice can be affected, leading to a cascade of problems ranging from cosmetic blemishes to severe instability. Factors such as soil movement, water intrusion, poor construction practices, and natural disasters can all contribute to structural degradation. A proactive approach to monitoring a home’s condition is therefore not merely a maintenance task but a fundamental aspect of responsible homeownership.

Cracks in Walls and Foundations

Cracks in walls and foundations are often the most visible and concerning indicators of potential structural damage, particularly when they are wide, diagonal, or extend through multiple building materials.

Cracks are a common occurrence in homes, but distinguishing between benign settlement cracks and those indicative of structural issues is crucial. Hairline cracks, typically less than 1/16 inch wide and often appearing vertically in plaster or drywall, are usually cosmetic and result from normal settling or temperature fluctuations. These are generally not a cause for alarm. However, cracks that are wider than 1/8 inch, run horizontally or diagonally, or form a stair-step pattern in brickwork warrant immediate attention. Such cracks often signal significant foundation movement, differential settlement, or excessive stress on load-bearing elements [1].

Foundation cracks, especially those that are wide, extend through the foundation wall, or show signs of displacement (where one side is higher or lower than the other), are particularly serious. These can indicate issues such as expansive soils, hydrostatic pressure, or inadequate footings. Vertical cracks in foundations can sometimes be benign if uniform and narrow, but any crack that allows water intrusion or shows signs of widening over time should be professionally evaluated. The presence of multiple, interconnected cracks across different parts of the house, such as walls, ceilings, and floors, further strengthens the suspicion of systemic structural problems [2].

Monitoring the progression of cracks is also vital. Homeowners can place small pieces of tape or plaster over suspicious cracks and note the date. If the tape breaks or the plaster cracks further, it indicates ongoing movement, necessitating a professional structural assessment. Ignoring these signs can lead to exacerbated damage, compromising the safety and long-term stability of the property.

Uneven or Sloping Floors

Uneven or sloping floors are a strong indicator of structural instability, often resulting from foundation settlement, weakened floor joists, or compromised subflooring.

A house with a perfectly level floor is rare, as minor settling is expected over decades. However, noticeable unevenness, significant slopes, or bouncy sections of flooring are red flags for structural problems. These issues can arise from several underlying causes, including differential settlement of the foundation, where one part of the foundation sinks more than another. This can be due to poor soil compaction, changes in soil moisture content, or inadequate drainage around the perimeter of the house. Over time, this uneven support translates directly to the floor system above, causing noticeable inclines or dips [1].

Another common cause is compromised floor joists or beams. These critical structural components can weaken due to water damage, insect infestation (such as termites or carpenter ants), or simply age and excessive loading. When joists lose their structural integrity, they can sag, leading to uneven floors. In older homes, original construction methods might not have accounted for modern loads, such as heavy furniture or appliances, contributing to floor deflection. A professional inspection can determine if the issue lies with the foundation, the floor framing, or a combination of both, providing a clear path for remediation [2].

To assess floor levelness, homeowners can use a long level or even a rolling ball. If a ball consistently rolls in one direction, it confirms a significant slope. Pay particular attention to areas near load-bearing walls or in the center of rooms, as these often reveal the most critical issues. Addressing these problems early can prevent further stress on the entire structural framework of the house.

Sticking Doors and Windows

Doors and windows that stick, jam, or no longer close properly are frequently symptomatic of structural shifts that distort their frames, indicating potential foundation or wall movement.

While humidity can cause wood frames to swell and lead to sticking doors or windows, persistent issues that occur regardless of weather conditions often point to more serious structural concerns. When a house settles unevenly, the door and window frames can become racked or distorted, preventing them from operating smoothly. This distortion is a direct consequence of stress being placed on the walls and their openings, indicating that the foundation or supporting elements are shifting [1].

Observing the pattern of sticking can provide further clues. If doors and windows on one side of the house consistently stick, it might suggest localized settlement on that side. Similarly, if doors and windows on upper floors are affected, it could point to issues with the load-bearing walls or floor joists below. It is important to differentiate between minor seasonal adjustments and persistent, worsening problems. A door that suddenly becomes difficult to close after a period of heavy rain, for instance, might indicate issues with drainage and hydrostatic pressure affecting the foundation [2].

Beyond just sticking, look for gaps around the frames, especially at the top or bottom, or if the frame itself appears visibly out of square. These are clear signs that the opening has been deformed by structural movement. While adjusting hinges or planing down doors might offer temporary relief, these actions do not address the root cause and the problem is likely to recur or worsen if the underlying structural issue is not resolved.

Bowing Walls and Sagging Ceilings

Bowing walls and sagging ceilings are critical indicators of excessive structural load, compromised framing, or significant moisture damage, demanding immediate professional assessment.

Walls that visibly bow inward or outward, or ceilings that exhibit a noticeable sag, are serious signs of structural distress. Bowing basement walls, for example, are often caused by excessive lateral pressure from saturated soil outside, which can push the foundation walls inward. This pressure can be exacerbated by poor drainage around the foundation, leading to hydrostatic forces that exceed the wall’s capacity. Over time, this can lead to severe cracking and eventual wall collapse if not addressed [1].

Similarly, sagging ceilings can indicate several problems, including weakened roof trusses or rafters, excessive weight in the attic (such as stored items or heavy insulation), or water damage from a leaky roof or plumbing. Water-saturated drywall or plaster becomes heavy and loses its structural integrity, leading to visible sagging. In some cases, a sagging ceiling might also point to issues with the floor joists of an upper level, especially if accompanied by unevenness on the floor above. The presence of water stains, discoloration, or a musty odor alongside a sagging ceiling further confirms moisture as a contributing factor [2].

It is crucial to distinguish between minor plaster imperfections and actual structural bowing or sagging. Use a level or a straightedge against the wall or ceiling to confirm the extent of the deviation. Any significant departure from flatness, particularly if accompanied by cracks or other signs of distress, should prompt an immediate inspection by a structural engineer. Early detection and repair of bowing walls or sagging ceilings are essential to prevent more extensive and costly structural failures.

Persistent Dampness and Mold

Persistent dampness, water stains, and recurring mold growth, particularly in basements or crawl spaces, often signify water intrusion issues that can compromise structural elements and lead to long-term damage.

While dampness and mold are often associated with health concerns, their persistent presence can also be a critical indicator of underlying structural problems related to water management. Water is one of the most destructive forces to a home’s structure. Chronic leaks, poor drainage, or high humidity levels can lead to wood rot, rust in metal components, and deterioration of concrete and masonry. Basements and crawl spaces are particularly vulnerable to water intrusion, which can weaken foundation walls, compromise support beams, and create an environment conducive to mold growth [1].

Signs of water intrusion include efflorescence (white, powdery deposits on masonry), water stains on walls or floors, peeling paint, and a consistently musty odor. If left unaddressed, prolonged exposure to moisture can lead to the softening and decay of wooden structural members, such as sill plates, floor joists, and support posts. This degradation reduces their load-bearing capacity, potentially leading to sagging floors, bowing walls, and overall structural instability. Furthermore, mold growth, while primarily a health hazard, thrives in damp conditions and can accelerate the decay of organic building materials [2].

Effective management of water around the home is paramount for structural preservation. This includes ensuring proper grading away from the foundation, maintaining functional gutters and downspouts, and installing French drains or sump pumps if necessary. Regular inspections of basements and crawl spaces for signs of dampness or leaks can help identify and mitigate these issues before they cause significant structural damage. Addressing water problems promptly is a fundamental step in maintaining the long-term integrity of a house.

Sign of Damage Potential Cause Severity Indicator Recommended Action
Hairline Wall Cracks Minor settling, temperature changes Low (cosmetic) Monitor, seal if desired
Wide/Diagonal Wall Cracks (>1/8 inch) Foundation movement, differential settlement High (structural) Professional structural assessment
Uneven/Sloping Floors Foundation settlement, weakened joists Medium to High (structural) Structural engineer inspection
Sticking Doors/Windows Frame distortion due to structural shift Medium (structural) Assess foundation/wall stability
Bowing Basement Walls Hydrostatic pressure, soil expansion High (structural) Foundation repair specialist
Sagging Ceilings Water damage, compromised framing, excessive load Medium to High (structural) Identify source, structural repair
Persistent Dampness/Mold Water intrusion, poor drainage Medium (can lead to structural) Address water source, dehumidify

Frequently Asked Questions

This section addresses common inquiries regarding the identification and implications of structural damage in residential properties.

What are the most common signs of structural damage?

Common signs of structural damage include visible cracks in walls or foundations, uneven or sloping floors, sticking doors and windows, bowing walls, and persistent dampness or mold in basements. These indicators often suggest underlying issues with a building’s integrity that require professional assessment.

How can I differentiate between cosmetic and structural cracks?

Cosmetic cracks are typically hairline, superficial, and often appear in plaster or drywall, usually due to minor settling or temperature fluctuations. Structural cracks, conversely, are wider (exceeding 1/8 inch), often diagonal or horizontal, and may extend through the foundation or load-bearing walls. They can also show signs of displacement, where one side of the crack is higher or lower than the other.

What should I do if I suspect structural damage?

If structural damage is suspected, it is crucial to contact a qualified structural engineer or a reputable foundation repair specialist immediately. They can conduct a thorough inspection, accurately diagnose the problem, and recommend appropriate remedial actions. Early intervention can prevent further deterioration and more costly repairs.

Can structural damage be repaired?

Yes, most forms of structural damage can be repaired, though the complexity and cost vary significantly depending on the extent and nature of the issue. Repairs might involve foundation underpinning, crack injection, wall reinforcement, or drainage improvements. A professional assessment is essential to determine the most effective repair strategy.

Recognizing the early signs of structural damage is a critical skill for any homeowner. From subtle wall cracks to more overt issues like bowing walls or sagging ceilings, these indicators serve as vital warnings that a home’s integrity may be compromised. Prompt identification and professional evaluation are essential steps in mitigating potential risks, ensuring the safety of occupants, and preserving the long-term value of the property. Investing in regular inspections and addressing concerns proactively can save significant time, money, and stress in the future.

References

  1. FEMA P-550, Chapter 5: Foundations and Floors
  2. HUD Homeowner’s Guide to Foundations

How to Check for Proper Attic Ventilation

Why is Attic Ventilation Important?

Proper attic ventilation is crucial for maintaining a healthy and energy-efficient home by regulating temperature and moisture levels, preventing structural damage, and extending the lifespan of your roof, explains Rentfy Property Management team.

Attic ventilation plays a pivotal role in a home’s overall health and efficiency. Without adequate airflow, an attic can become a hotbed for issues ranging from excessive heat buildup in summer to moisture accumulation in winter. These problems not only compromise the comfort of living spaces but also lead to significant structural damage over time. Understanding the fundamental principles behind effective attic ventilation is the first step toward safeguarding your home against these preventable hazards.

The primary function of an attic ventilation system is to create a continuous flow of air, drawing in cooler, drier air from outside and expelling warmer, moister air from within the attic space. This constant exchange helps to equalize the temperature between the attic and the outdoors, reducing the strain on HVAC systems and lowering energy consumption. Furthermore, it prevents the condensation of moisture, which can lead to mold growth, wood rot, and compromised insulation effectiveness. A well-ventilated attic acts as a protective buffer, shielding the entire house from extreme weather conditions and contributing to its long-term durability.

Beyond temperature regulation, proper ventilation also contributes to the longevity of roofing materials. Excessive heat trapped in an attic can cause shingles to curl, crack, and degrade prematurely, necessitating costly repairs or early replacement. The U.S. Department of Energy emphasizes that adequate attic ventilation can significantly extend the life of a roof, potentially saving homeowners thousands of dollars over the years. This protective aspect underscores the economic benefits of maintaining a well-ventilated attic, making it a critical consideration for any homeowner. [1]

What are the Signs of Poor Attic Ventilation?

Signs of poor attic ventilation include excessive heat in upper rooms, higher energy bills, ice dams on the roof, moisture or mold growth in the attic, and premature aging of roofing materials.

Identifying the symptoms of inadequate attic ventilation early can save homeowners from costly repairs and significant discomfort. One of the most immediate indicators is an unusually warm or stuffy upper floor during hot weather, as heat radiating from the attic penetrates the living spaces below. This forces air conditioning systems to work harder, resulting in noticeably higher utility bills. According to the Environmental Protection Agency (EPA), poor attic ventilation can increase cooling costs by up to 15-20% during peak summer months. This substantial increase highlights the direct financial impact of an inefficient attic system. [2]

In colder climates, the formation of ice dams along the roof eaves is a tell-tale sign. Ice dams occur when heat escaping from the attic melts snow on the roof, which then refreezes at the colder edges, creating a barrier that can force water under shingles and into the home. This can lead to significant water damage to ceilings, walls, and insulation. Beyond temperature and energy concerns, visible evidence of moisture or mold growth within the attic space itself is a critical warning. This can manifest as stained wood, a musty odor, or actual fungal colonies on rafters and insulation. Such conditions not only pose health risks but also indicate a severe lack of airflow necessary to dry out the attic.

Additionally, the premature deterioration of roofing materials, such as cracked or curling shingles, can often be traced back to prolonged exposure to excessive heat trapped in an unventilated attic. The Asphalt Roofing Manufacturers Association (ARMA) notes that attic temperatures can reach up to 150°F (65°C) in poorly ventilated spaces, drastically accelerating the degradation of asphalt shingles. Recognizing these signs promptly allows for timely intervention and mitigation of potential damage, preserving both the structural integrity and aesthetic appeal of the home. [3]

How to Inspect Your Attic Ventilation System?

To inspect your attic ventilation system, begin by safely accessing the attic and visually checking for clear, unobstructed soffit vents, functional ridge or gable vents, and proper insulation placement that doesn’t block airflow.

A thorough inspection of your attic ventilation system requires a systematic approach, prioritizing safety and attention to detail. Before entering the attic, ensure adequate lighting and wear appropriate safety gear, including a mask, gloves, and sturdy footwear. Start by examining the soffit vents, located under the eaves of your roof. These are the intake vents, designed to draw in fresh air. Confirm they are not blocked by insulation, debris, or paint. Any obstructions will severely restrict airflow, rendering the entire system ineffective. The goal is to see a clear path for air to enter the attic space freely, ideally with a minimum of 1 inch (2.5 cm) clearance between insulation and the roof sheathing at the eaves. [1]

Next, turn your attention to the exhaust vents, typically located at the highest point of the roof, such as ridge vents, or on the gable ends. Ridge vents, which run along the peak of the roof, should be continuous and free of damage or blockages. Gable vents, found on the vertical walls at the ends of the attic, should also be clear and properly screened to prevent pest entry. It’s also crucial to ensure that insulation is not packed too tightly against the roof deck or blocking the exhaust vents. The interaction between intake and exhaust vents creates the necessary convection current for effective ventilation, so both components must be in optimal working order. The International Residential Code (IRC) recommends a minimum net free ventilating area of 1 square foot for every 300 square feet of attic floor space, provided that at least 50% of the ventilation is located in the upper portion of the attic and at least 50% in the lower portion. [4]

During the inspection, also look for signs of moisture, such as water stains on the wood framing or insulation, and any evidence of mold or mildew growth. These indicators suggest that despite the presence of vents, the system may not be functioning optimally, or there might be other sources of moisture intrusion. Checking for proper sealing of all penetrations from the living space into the attic, such as around plumbing pipes, electrical wires, and light fixtures, is also essential. These small gaps can allow significant amounts of warm, moist air to enter the attic, contributing to condensation issues. A comprehensive visual check combined with an understanding of ventilation principles will help identify potential problems. [2]

Feature Natural Ventilation (e.g., Ridge/Soffit Vents) Mechanical Ventilation (e.g., Powered Fans)
Initial Cost Lower Higher
Operating Cost None (passive system) Ongoing electricity costs (unless solar)
Effectiveness Reliable and consistent, relies on natural airflow High airflow capacity, effective in extreme heat
Energy Use None Requires electricity, can increase energy bills
Maintenance Low (periodic inspection for blockages) Higher (motor, thermostat, and fan blade checks)

What are the Different Types of Attic Ventilation?

Common types of attic ventilation include natural systems like soffit and ridge vents, and mechanical systems such as powered attic fans and solar-powered vents, each designed to facilitate air exchange.

Attic ventilation systems can be broadly categorized into natural and mechanical types, each offering distinct advantages depending on climate, roof design, and homeowner preferences. Natural ventilation relies on the principles of convection and wind pressure to move air. The most prevalent natural system combines soffit vents (intake) with ridge vents (exhaust). Soffit vents allow cooler air to enter the attic at its lowest point, while ridge vents, located at the roof’s peak, allow warmer, lighter air to escape. This continuous flow helps maintain a balanced attic temperature and prevents moisture buildup without requiring electricity. Gable vents, positioned on the vertical walls of the attic, can also serve as exhaust or intake, often working in conjunction with other vent types. The effectiveness of natural ventilation is often enhanced by a balanced system, where the net free area of intake vents closely matches that of exhaust vents. [1]

Mechanical ventilation systems, on the other hand, utilize powered fans to actively draw air out of the attic, creating a negative pressure that pulls in fresh air through intake vents. Powered attic fans, typically installed on the roof or gable wall, are equipped with thermostats that activate them when the attic temperature reaches a certain threshold, often around 100-110°F (38-43°C). These fans can move a significant volume of air, typically ranging from 750 to 1,600 cubic feet per minute (CFM), making them highly effective in hot climates. Solar-powered attic fans offer an energy-efficient alternative, operating solely on solar energy, making them environmentally friendly and cost-effective to run, though their performance can vary with sunlight availability. [3]

Another mechanical option includes whole-house fans, which are distinct from attic fans. While attic fans primarily ventilate the attic space, whole-house fans are designed to draw air from the living spaces through the attic and out through attic vents, providing a cooling effect for the entire home. However, it is crucial to ensure adequate attic exhaust capacity when using whole-house fans to prevent pressure imbalances. The choice between natural and mechanical systems often depends on a careful assessment of the home’s specific needs, local building codes, and energy efficiency goals. For instance, in regions with mild climates, natural ventilation might suffice, whereas in areas with extreme heat, mechanical assistance could be more beneficial. [5]

How to Improve Existing Attic Ventilation?

To improve existing attic ventilation, ensure all intake and exhaust vents are clear of obstructions, consider adding more vents if airflow is insufficient, and properly seal air leaks from the living space into the attic.

Improving an existing attic ventilation system often involves a combination of maintenance, strategic additions, and air sealing efforts. The first and most straightforward step is to ensure that all current vents, both intake (soffit) and exhaust (ridge, gable, or roof vents), are completely free from any blockages. This includes removing insulation that might be covering soffit vents, clearing debris like leaves or bird nests, and ensuring that paint hasn’t sealed vent openings. Even minor obstructions can significantly impede airflow and reduce the system’s effectiveness. Regular inspection and cleaning of these vents are essential for optimal performance, ideally performed annually as part of routine home maintenance. [1]

If, after clearing obstructions, signs of poor ventilation persist, it may be necessary to augment the existing system. This could involve installing additional soffit vents to increase intake, or adding more exhaust vents to enhance the expulsion of hot, moist air. For instance, if a home only has gable vents, adding a continuous ridge vent can dramatically improve airflow by creating a more efficient path for air movement. The National Renewable Energy Laboratory (NREL) suggests that a balanced system, with roughly equal amounts of intake and exhaust ventilation, is most effective. This balance ensures a continuous flow of air, preventing stagnant pockets and maximizing heat and moisture removal. [6]

Furthermore, addressing air leaks from the living space into the attic is critical. Sealing gaps around light fixtures, plumbing stacks, and attic hatches prevents conditioned air from escaping into the attic, which not only reduces energy waste but also minimizes the amount of moisture entering the attic, thereby lessening the burden on the ventilation system. Using caulk for smaller gaps and expanding foam for larger openings can effectively seal these pathways. These combined efforts contribute to a more balanced and effective attic environment, leading to improved indoor air quality, reduced energy consumption, and extended structural longevity. [2]

Frequently Asked Questions

How much ventilation does my attic need?

The general building code recommendation, such as the International Residential Code (IRC), suggests a minimum of 1 square foot of net free ventilating area (NFVA) for every 300 square feet of attic floor space. This should be balanced with at least 50% of the ventilation area for intake (low on the roof or in soffits) and 50% for exhaust (high on the roof or in gables).

Can I have too much attic ventilation?

While having more ventilation than the minimum requirement is generally not a problem, having an imbalanced system can be. For example, having significantly more exhaust ventilation than intake can cause negative pressure in the attic, which may pull conditioned air from your living spaces. The key is to have a balanced system where intake and exhaust ventilation areas are roughly equal.

Do I need attic ventilation in a mild climate?

Yes, attic ventilation is necessary even in mild climates. Moisture is generated year-round from daily activities like showering, cooking, and laundry. This moisture can rise into the attic, and without proper ventilation, it can condense and lead to mold, mildew, and wood rot. Ventilation ensures this moisture is safely exhausted, regardless of the outside temperature.

Should I cover my attic vents in the winter?

No, you should never cover your attic vents, even in winter. Attic ventilation is a year-round system designed to handle both heat in the summer and moisture in the winter. Covering vents in winter traps warm, moist air rising from the living space. This moisture can condense on the cold surfaces of the attic, leading to frost, and when it thaws, it can cause water damage to insulation and ceilings.

Proper attic ventilation is an often-overlooked yet critical component of a healthy and energy-efficient home. By understanding its importance, recognizing the signs of inadequate airflow, and knowing how to inspect and improve your system, homeowners can protect their investment, enhance indoor comfort, and significantly reduce energy costs. Regular maintenance and strategic upgrades to your attic ventilation system are key to ensuring its long-term effectiveness and the overall well-being of your home.

References

  • [1] Attic Ventilation – Energy.gov
  • [2] Attic Ventilation and Your Home – EPA
  • [3] Asphalt Roofing Manufacturers Association (ARMA)
  • [4] International Residential Code (IRC) – Chapter 8
  • [5] Whole-House Fans – Energy.gov
  • [6] Improving Attic Ventilation – NREL

Understanding Lead Paint Risks in Pre-1978 Homes

Lead-based paint, commonly used before 1978, poses significant health risks, warns Redsail Property Management Williamsburg. Millions of older homes still contain this hazardous material. Understanding these dangers is crucial for homeowners, renters, and those involved in property maintenance or renovation. Exposure to lead can have severe, irreversible health consequences, affecting neurological, renal, and hematopoietic systems. The U.S. Department of Housing and Urban Development (HUD) estimates that approximately 3.6 million housing units with children under six years old contain lead-based paint hazards, highlighting the urgency of addressing this issue.

The primary concern is the ingestion or inhalation of lead dust and chips. As paint deteriorates or is disturbed during renovation, it releases microscopic lead particles. These can settle on surfaces, contaminate soil, and become airborne, making them easily ingested by young children who often put their hands or toys in their mouths. Children are particularly vulnerable due to their rapid development and higher absorption rates. Adults can also be exposed through occupational activities or home renovation. Even minimal exposure can lead to elevated blood lead levels, and there is no known safe level of lead in the body.

Lead paint poses significant health risks, especially to children, affecting neurological development and overall well-being.

Lead exposure, even at low levels, has profound and lasting effects. Children are highly vulnerable due to their developing nervous systems and frequent hand-to-mouth activity. Ingested or inhaled lead interferes with brain, kidney, and blood-forming organ function, leading to developmental delays, reduced IQ, learning disabilities, and behavioral problems. Studies show even small increases in blood lead levels can decrease cognitive function. The CDC emphasizes that no amount of lead exposure is safe for children.

For adults, chronic lead exposure can cause hypertension, joint and muscle pain, headaches, memory loss, and mood disorders. The World Health Organization (WHO) identifies lead exposure as a major public health concern, contributing to cardiovascular disease and kidney damage. Occupational exposure in industries like construction can lead to higher lead levels and more severe outcomes. Pregnant women are also at risk, as lead can cross the placental barrier, harming the fetus and potentially causing premature birth or developmental problems. The CDC reiterates that no safe blood lead level exists for children, stressing the need for prevention.

Homes built before 1978 are highly likely to contain lead paint, necessitating careful inspection and testing.

The 1978 federal ban on lead-based paint in residential properties makes this year a critical benchmark. Homes built before 1978 are presumed to contain lead paint unless professionally tested and certified lead-free. The older the home, the higher the probability and concentration of lead paint, with pre-1950 homes having the highest likelihood. Over 75% of homes built before 1978 are estimated to contain some lead-based paint, making it a widespread issue.

Identifying lead paint is complex as it can be hidden under newer paint layers. Visual inspection is insufficient. Deteriorating paint (chipping, peeling, chalking) indicates potential hazards, but even intact lead paint can become hazardous if disturbed. Friction surfaces like windows and doors can abrade lead paint, releasing dust. Lead paint can be found on walls, ceilings, trim, doors, windows, and exterior siding. Comprehensive assessment is essential, as its hidden nature complicates identification and mitigation.

Safe renovation practices are essential to prevent lead contamination and protect occupants during home improvements.

Renovating a pre-1978 home requires meticulous planning and adherence to lead-safe work practices to avoid hazardous lead dust. Disturbing lead paint through activities like sanding, scraping, or drilling releases lead particles. Without proper containment and cleaning, these particles spread, creating long-term health risks, especially for children. The EPA mandates specific procedures for contractors, requiring certification and lead-safe practices to protect workers and occupants. Homeowners performing their own renovations are strongly advised to follow these guidelines.

Key precautions include isolating the work area with plastic sheeting (inside and outside) to prevent dust migration. Remove or cover all furniture and belongings with two layers of 6-mil plastic sheeting, taped securely. Turn off HVAC systems and seal vents. Wet methods (wet scraping/sanding) are preferred over dry methods to minimize airborne dust. Power tools with HEPA filters are recommended for dust collection. Proper personal protective equipment (PPE), including N100/P100 respirators, disposable gloves, and coveralls, is crucial to prevent inhalation and skin contact, avoiding secondary contamination.

Encapsulation, enclosure, and removal are primary strategies for managing lead paint hazards, each with specific applications.

Managing lead paint involves several approaches, often combined in a comprehensive plan. Encapsulation applies a special liquid coating over lead paint, creating a durable barrier to prevent dust and chips. This cost-effective solution is suitable for intact surfaces not subject to impact, like walls or ceilings. Homeowners can apply EPA-approved encapsulants following strict guidelines. However, encapsulation is not permanent and requires regular monitoring for damage, as breaches re-expose lead paint. Its effectiveness depends on underlying paint condition and proper application, typically lasting several years.

Enclosure involves placing a new, impermeable surface over lead-painted components, sealing off the hazard. Examples include covering lead-painted walls with drywall or paneling, installing vinyl windows over lead-painted frames, or covering contaminated soil. This method provides a more robust and lasting barrier than encapsulation, physically separating lead paint from the environment. Enclosure is useful for frequently disturbed components, offering a permanent solution without full removal, and can be integrated into general home improvements. It prevents exposure without disturbing the lead paint, minimizing dust creation.

Regular maintenance and awareness are crucial for preventing lead exposure in homes with existing lead paint.

Even after remediation, ongoing vigilance and routine maintenance are vital. Deterioration from environmental factors, wear and tear, or damage can re-expose lead hazards. Homeowners should regularly inspect painted surfaces, especially in high-traffic areas and those accessible to children. Any chipping, peeling, chalking, or cracking paint must be addressed promptly and safely using lead-safe practices to prevent dust release. The EPA recommends immediate action on deteriorating paint, as even small amounts of lead dust pose significant risks.

Simple housekeeping reduces lead exposure. Regularly wet-wiping surfaces, particularly window sills, floors, and other horizontal areas, removes lead dust. Use disposable wet cloths and all-purpose cleaner, discarding cloths after use. HEPA-filtered vacuums are highly effective for fine lead particles; avoid dry sweeping or dusting, which spread dust. Frequent cleaning of children’s toys and pacifiers is also recommended, as children often put these items in their mouths, increasing exposure risk.

Characteristic Pre-1978 Homes (Potential Lead Paint) Post-1978 Homes (Lead Paint Banned)
Construction Era Before 1978 1978 and later
Lead Paint Presence Presumed to contain lead paint on some surfaces; high probability, especially in homes built before 1950. Unlikely to contain lead paint from original construction, unless from imported items or cross-contamination.
Primary Risk Deteriorating paint, lead dust from friction surfaces, renovation disturbance, contaminated soil. Minimal risk from original paint; potential risk from imported goods, certain hobbies, or contaminated soil from external sources.
Testing Recommendation Highly recommended for all painted surfaces, especially before renovation, if children under six are present, or if purchasing the property. Professional XRF testing or laboratory analysis is advised. Generally not required unless specific concerns arise (e.g., chipping paint, child with elevated blood lead levels).
Renovation Protocol Lead-safe certified practices required (EPA RRP Rule) for any work disturbing painted surfaces. Includes containment, dust minimization, and specific cleaning. Standard renovation practices; lead-safe practices may be advisable if lead sources are suspected, but not federally mandated for original paint.
Health Implications Significant risk of lead poisoning, especially for children (developmental delays, reduced IQ), pregnant women (fetal harm), and adults (hypertension, neurological issues). Very low risk from paint; potential risks from other lead sources should still be considered.
Common Locations Windows, doors, trim, walls, exterior siding, soil around foundation. Often in multiple layers. Less common, but can be found in imported toys, ceramics, older plumbing, or industrial settings.
Management Strategies Encapsulation, enclosure, removal (abatement), regular wet cleaning, professional lead abatement contractors, and ongoing monitoring. Focus on prevention of exposure from other sources, general home maintenance, and awareness of potential non-paint lead sources.

Frequently Asked Questions

What are the primary health risks associated with lead paint exposure?

Lead paint exposure can lead to severe health issues, particularly in children. These include developmental delays, learning difficulties, behavioral problems, and in extreme cases, seizures, coma, or death. For adults, chronic exposure can result in high blood pressure, joint and muscle pain, headaches, memory difficulties, and reproductive problems. The neurological damage in children is often irreversible, making prevention paramount.

How can I identify if my home has lead paint?

The only definitive way to identify lead paint is through professional testing. This can involve using an X-ray fluorescence (XRF) analyzer, which provides immediate, non-destructive results by measuring lead content on painted surfaces. Alternatively, paint chip samples can be collected by a certified professional and sent to an accredited laboratory for analysis, which provides precise measurements of lead concentration by weight. While home test kits are available, they are often less reliable and may provide false negatives or positives compared to professional methods, and are not recommended for definitive assessment.

What precautions should be taken during renovation of a pre-1978 home?

During renovation, it is crucial to contain dust and debris to prevent lead contamination. This includes sealing off work areas with two layers of 6-mil plastic sheeting, taped securely at seams and to the floor, and turning off HVAC systems and sealing vents. Wet sanding or scraping methods should be used instead of dry methods to minimize airborne dust. Employ HEPA-filtered vacuums for cleanup, as standard vacuums can spread lead dust. Workers should wear appropriate personal protective equipment, such as N100 or P100 respirators, disposable gloves, and disposable coveralls.

Is encapsulation a safe and effective method for managing lead paint?

Encapsulation involves covering lead paint with a durable coating that creates a barrier, preventing lead dust and chips from becoming airborne. It can be a safe and effective interim control method if the paint is in good condition and the encapsulant is properly applied and maintained. Encapsulants are typically polymer-based materials that bond to the paint and create a protective layer, effectively sealing the lead within. However, it is not a permanent solution and requires regular inspection to ensure the barrier remains intact.

The presence of lead paint in homes built before 1978 represents a significant public health challenge. While the 1978 ban was a critical step, its legacy impacts millions of residences. Understanding the profound health risks, particularly for children, is paramount. Recognizing hazards, implementing stringent lead-safe practices during maintenance and renovation, and utilizing appropriate management strategies like encapsulation, enclosure, or professional removal are indispensable. Homeowners, property managers, and professionals must remain diligent in identifying, managing, and abating lead paint to ensure a safe and healthy living environment for all, contributing to a future free from lead poisoning.

References

  1. U.S. Environmental Protection Agency. (n.d.). Lead Renovation, Repair and Painting (RRP) Rule. Retrieved from https://www.epa.gov/lead/renovation-repair-and-painting-program
  2. Centers for Disease Control and Prevention. (2022, October 27). Lead. Retrieved from https://www.cdc.gov/nceh/lead/default.htm

Why Attic Insulation Can Underperform in Ottawa Homes

Attic insulation often doesn’t perform as expected in Ottawa homes, and it’s usually not because the material itself is bad. More often than not, the issue comes down to how it was installed, how the attic is ventilated, or how the home has changed over time.

If you’ve noticed uneven temperatures, higher energy bills, or cold drafts in winter, your attic insulation may not be doing its job. Understanding why this happens can help you fix the problem before it gets worse.

Common Reasons Insulation Falls Short

There are a few recurring issues that cause insulation to underperform in colder climates like Ottawa:

  • Poor installation: Gaps, compressed sections, or uneven coverage reduce effectiveness
  • Air leaks: Warm air escaping through cracks can cancel out insulation benefits
  • Moisture buildup: Damp insulation loses its ability to trap heat
  • Aging materials: Older insulation can settle or degrade over time

Even a well-insulated attic can struggle if just one of these factors is present.

The Impact Of Air Leaks

Uncontrolled air leaks are one of the most common issues that often go unnoticed. Warm air rises, and if your attic floor isn’t properly sealed, that heat escapes before the insulation can do its job.

Common leak points include:

  • Around light fixtures
  • Plumbing vents
  • Chimneys
  • Attic hatches

Sealing these gaps is often just as important as adding insulation. Without it, you’re essentially heating the outdoors during winter.

Ventilation Matters More Than You Think

Insulation and ventilation work together. If your attic isn’t properly ventilated, moisture can build up, especially during Ottawa’s long winters.

This can lead to:

  • Mold growth
  • Ice dams on the roof
  • Reduced insulation performance

A balanced system allows fresh air in while pushing moist air out. Without that airflow, even high-quality insulation won’t hold up well over time.

When Insulation Gets Old Or Damaged

Insulation doesn’t last forever. Over the years, it can settle, shift, or become contaminated by dust and moisture. When that happens, it no longer provides consistent coverage.

Signs your insulation may need attention:

  • Uneven temperatures between rooms
  • Drafts despite closed windows
  • Rising heating costs
  • Visible thin or patchy areas in the attic

If you’re dealing with these issues, it may be time to consider upgrading your attic insulation in Ottawa to restore performance.

Choosing The Right Approach

Not every home needs a full insulation replacement. Sometimes, targeted improvements can make a big difference.

Consider these steps:

  • Seal air leaks before adding new insulation
  • Check ventilation systems for proper airflow
  • Top up existing insulation where it has settled
  • Replace insulation only if it’s damaged or ineffective

Working with professionals who understand local conditions can help you avoid unnecessary work and focus on what actually improves efficiency.

Why Ottawa Homes Face Unique Challenges

Ottawa’s climate puts extra pressure on attic systems. Cold winters and fluctuating temperatures create ideal conditions for heat loss and moisture issues.

Homes in the area often deal with:

  • Heavy snow loads are affecting roof ventilation
  • Freeze-thaw cycles that impact attic conditions
  • Long heating seasons increasing energy demand

Because of this, solutions that work in milder regions may not be enough here. Proper planning and maintenance are key.

If you’re exploring ways to improve comfort and reduce energy costs, looking into reliable insulation services in Ottawa can help identify exactly where your attic is underperforming and what steps will make the biggest difference.

Small Fixes Can Go A Long Way

You don’t always need a major renovation to see results. Sealing leaks, improving airflow, and addressing weak spots in insulation can quickly improve comfort.

Even simple updates guided by trusted insulation Ottawa professionals can reveal hidden problem areas and lead to noticeable savings over time.

How to Prepare for a Home Staging Consultation

According to Real Capital Group – Buffalo Experts, a home staging consultation serves as a critical first step in preparing a property for sale, offering expert guidance to maximize its appeal and market value. This initial meeting typically involves a professional stager assessing your home room by room, providing tailored recommendations on decluttering, repairs, furniture arrangement, and aesthetic enhancements. The objective is to transform your living space into an inviting environment that resonates with a broad range of potential buyers, ultimately facilitating a quicker and more profitable sale. Understanding the process and preparing adequately ensures you gain the most actionable insights from this valuable service.

Understanding the Consultation Process

A home staging consultation is a detailed assessment where a professional stager evaluates your property to identify areas for improvement, offering expert recommendations to enhance its market appeal. This process typically involves a walk-through of every room, focusing on how to best highlight your home’s features and address any potential drawbacks from a buyer’s perspective. The stager provides a strategic plan, often including advice on decluttering, minor repairs, paint colors, and furniture placement, all aimed at creating an inviting and desirable space for prospective buyers.

The consultation begins with an initial discussion about your selling goals, timeline, and any specific concerns you might have regarding your property. This allows the stager to tailor their advice to your unique situation. Following this, the stager conducts a comprehensive walk-through, meticulously examining each area of your home, both interior and exterior. They observe flow, lighting, existing decor, and potential buyer objections, taking notes and often photographs to document their findings. This thorough evaluation forms the basis of their recommendations, ensuring a holistic approach to preparing your home for the market.

During the walk-through, the stager will provide verbal recommendations, explaining the rationale behind each suggestion. These might range from simple adjustments, such as rearranging artwork or removing personal items, to more significant changes like painting a room or updating light fixtures. Some stagers offer a “walk-and-talk” service where you take notes, while others provide a detailed written report summarizing their advice. The goal is to empower you with a clear, actionable plan to implement the staging recommendations effectively, transforming your home into a highly desirable listing.

Engaging with the stager during this phase is crucial. Ask questions, clarify any uncertainties, and discuss the feasibility of their suggestions within your budget and timeframe. A collaborative approach ensures that the staging plan is practical and aligns with your resources. Remember, the stager’s expertise is invaluable in identifying aspects of your home that might deter buyers, offering an objective perspective that homeowners often overlook. Their guidance is designed to optimize your property’s presentation, making it stand out in a competitive real estate market.

Decluttering and Depersonalizing

Effective decluttering and depersonalization are foundational steps in preparing for a home staging consultation, creating a neutral canvas that allows potential buyers to envision themselves living in the space. This involves systematically removing excess items, organizing belongings, and packing away personal photographs, memorabilia, and unique decor. By minimizing clutter and personal touches, you present a cleaner, more spacious, and universally appealing environment, enabling the stager to focus on strategic enhancements rather than organizational challenges.

Begin by tackling one room at a time, categorizing items into “keep,” “donate,” “discard,” and “pack for moving.” Focus on clearing all surfaces, including countertops, shelves, and tabletops, to create an impression of ample space. Overstuffed closets and cabinets also convey a lack of storage, so organize these areas to appear half-empty. This not only makes your home look larger but also signals to buyers that there is plenty of room for their own belongings. A well-organized home suggests meticulous maintenance and care, qualities highly valued by prospective purchasers.

Depersonalizing your home is equally important. While family photos and personal collections make a house a home for you, they can distract buyers from focusing on the property itself. Remove all personal photographs, diplomas, religious items, and highly specific decor. Replace them with neutral art or simple, elegant accessories that appeal to a broader audience. The aim is to create a blank slate, allowing buyers to project their own lives and styles onto the space, fostering an emotional connection with the property. This subtle shift can significantly impact how quickly and for how much your home sells.

Consider renting a storage unit for items you plan to keep but don’t need for daily living or staging. This temporary solution helps to create a sense of spaciousness and order within your home. Remember, the less clutter a buyer sees, the more they can appreciate the architectural features and overall layout of the house. According to a 2025 report by the National Association of Realtors (NAR), 83% of buyers’ agents said staging a home made it easier for a buyer to visualize the property as a future home [1]. This statistic underscores the importance of presenting a clean, depersonalized space.

Addressing Repairs and Maintenance

Before a home staging consultation, proactively addressing minor repairs and deferred maintenance is crucial, as these issues can significantly detract from a property’s perceived value and deter potential buyers. This preparation involves fixing leaky faucets, patching holes in walls, repairing broken fixtures, and ensuring all appliances are in good working order. By resolving these small imperfections, you demonstrate meticulous homeownership and prevent stagers from having to focus on basic fixes, allowing them to concentrate on strategic aesthetic improvements that truly elevate your home’s market appeal.

Walk through your home with a critical eye, imagining you are a prospective buyer. Look for dripping faucets, loose doorknobs, squeaky hinges, and any visible cracks or holes in walls and ceilings. These seemingly minor flaws can accumulate and create an impression of neglect, leading buyers to assume there are larger, more costly problems lurking beneath the surface. Addressing these issues beforehand signals to both the stager and future buyers that the home has been well-maintained, instilling confidence in its overall condition.

Pay particular attention to areas that receive heavy use, such as kitchens and bathrooms. Ensure all grout is clean and intact, caulk around sinks and tubs is fresh, and all light bulbs are working and match in color temperature. Consider repainting walls in neutral tones if they are scuffed or brightly colored, as this provides a fresh, clean backdrop for staging. A fresh coat of paint is one of the most cost-effective ways to update a home and make it more appealing to a wider audience, often yielding a high return on investment.

Don’t overlook the exterior of your home. Curb appeal is the first impression buyers get, so ensure your landscaping is tidy, pathways are clear, and the front door is welcoming. Fix any broken fence pickets, clean gutters, and power wash dirty siding or driveways. A well-maintained exterior sets a positive tone before buyers even step inside. According to a study by The Zebra in 2026, a professionally staged home spends 73% less time on the market compared to those without staging, partly due to the positive impression created by addressing maintenance issues [2].

Strategic Cleaning and Odor Elimination

Thorough cleaning and effective odor elimination are paramount before a home staging consultation, as a pristine and fresh-smelling environment significantly enhances a property’s perceived value and buyer appeal. This involves deep cleaning every surface, from floors to ceilings, and neutralizing any lingering odors from pets, cooking, or smoke. By presenting a spotless and inviting atmosphere, you enable the stager to focus on optimizing visual aesthetics, ensuring that the home feels welcoming and well-cared for, which can dramatically influence a buyer’s emotional response.

Undertake a deep clean of your entire home, paying close attention to often-overlooked areas. Scrub bathrooms and kitchens until they sparkle, ensuring all fixtures, tiles, and appliances are gleaming. Clean windows and mirrors to maximize natural light and improve views. Dust all surfaces, vacuum carpets, and mop hard floors. Consider hiring professional cleaners if time or resources are limited, as their expertise can achieve a level of cleanliness that is difficult to match. A truly clean home feels fresh and new, allowing buyers to imagine a move-in ready experience.

Odor elimination is just as critical as visual cleanliness. Lingering smells from pets, cooking, or smoke can be a major deterrent for buyers, often subconsciously influencing their perception of the home. Identify and address the source of any odors, rather than just masking them. This might involve deep cleaning carpets and upholstery, airing out rooms, or even repainting if smoke odors are deeply embedded. Use neutral air fresheners sparingly, or opt for natural methods like baking soda or bowls of fresh citrus to create a subtle, pleasant aroma.

The goal is to create an environment that appeals to all senses, making buyers feel comfortable and at ease. A fresh, clean scent can evoke positive emotions and associations, while unpleasant odors can create an immediate negative impression. Real estate professionals consistently emphasize the importance of a clean and odor-free home in attracting buyers. As one expert, Jane Smith, a veteran home stager with over 15 years of experience, states, “A buyer’s first impression is often sensory. If a home smells clean and looks immaculate, it immediately feels more valuable and cared for.” This highlights the profound impact of a strategically cleaned and odor-free home on buyer perception.

Optimizing Lighting and Curb Appeal

Optimizing both interior lighting and exterior curb appeal is essential before a home staging consultation, as these elements significantly impact a property’s initial impression and overall attractiveness to potential buyers. Enhancing natural and artificial light sources creates a brighter, more spacious interior, while improving the home’s exterior presentation draws buyers in and sets a positive tone. By focusing on these visual aspects, you ensure the stager can build upon a strong foundation, maximizing the home’s perceived value and desirability from the moment a buyer arrives.

Inside your home, maximize natural light by opening all blinds, curtains, and shades. Clean windows thoroughly to allow maximum light penetration. Supplement natural light with appropriate artificial lighting; ensure all light fixtures have working bulbs of consistent color temperature. Brighter rooms feel larger, more inviting, and more modern. Consider adding lamps to dimly lit corners to create a warm and welcoming ambiance. Good lighting can dramatically alter the mood and perception of a space, making it feel more expansive and appealing.

Curb appeal is the first impression your home makes, so it must be impeccable. Mow the lawn, trim hedges, weed garden beds, and plant fresh flowers to add color and vibrancy. Ensure pathways and driveways are clean and free of debris. Consider a fresh coat of paint on the front door, and polish any exterior hardware. A welcoming entrance creates an immediate positive emotional response from buyers, encouraging them to explore further. This initial visual impact is crucial, as it sets the stage for their entire viewing experience.

Small details can make a big difference. Ensure house numbers are clearly visible, mailboxes are in good repair, and outdoor lighting is functional. If you have a porch or patio, arrange outdoor furniture neatly and add some inviting cushions. These touches convey that the home is well-cared for and ready for new occupants. A strong curb appeal not only attracts more potential buyers but also often translates into a higher perceived value for the property. It signals that the interior is likely to be just as well-maintained and appealing.

Preparing Documentation and Information

Preparing relevant documentation and information for your home staging consultant is a proactive step that streamlines the consultation process and enables the stager to provide more precise, tailored advice. This includes gathering details about recent renovations, property disclosures, and any unique selling points of your home. By having this information readily available, you equip the stager with a comprehensive understanding of your property’s history and features, allowing them to develop a more effective staging strategy that highlights its best attributes and addresses potential buyer questions.

Compile a list of all recent upgrades and renovations, including dates and costs. This information is valuable for the stager to understand the investment made in the home and to highlight these features to potential buyers. For example, a newly renovated kitchen or updated bathroom can be a significant selling point. Also, gather any property disclosures or inspection reports that might be relevant, as these can inform the stager about potential areas of concern that need to be visually mitigated or explained.

Be ready to discuss your target buyer demographic, if you have one in mind, and any specific challenges you anticipate in selling your home. For instance, if a room is unusually small or has an awkward layout, sharing this concern with the stager allows them to brainstorm creative solutions. Providing a copy of your home’s floor plan can also be incredibly helpful, as it allows the stager to visualize space and flow more effectively, even after they leave the property. This detailed input ensures the staging advice is highly relevant and practical.

Consider preparing a brief overview of your neighborhood’s amenities, such as nearby schools, parks, shopping centers, and transportation links. While this is typically handled by your real estate agent, having this information on hand can help the stager understand the lifestyle your home offers and how to best market it. The more context you provide, the better equipped your stager will be to craft a compelling narrative for your property. This collaborative approach ensures that every aspect of your home’s appeal is considered and optimized for sale.

Comparison of Staging Approaches

Understanding the different home staging approaches, particularly occupied versus vacant staging, helps homeowners make informed decisions about the best strategy for their property and how to prepare for a consultation. Occupied staging utilizes the homeowner’s existing furniture and decor, with the stager providing guidance on rearrangement, decluttering, and minor enhancements. Vacant staging involves bringing in rental furniture and accessories to furnish an empty home. Each approach has distinct benefits and considerations, influencing the preparation required for a successful consultation.

Feature Occupied Staging Vacant Staging
Definition Uses homeowner’s existing furniture and decor. Furnishes an empty home with rental items.
Cost Generally lower, as it leverages existing assets. Higher, due to furniture rental and delivery fees.
Flexibility Requires homeowner cooperation for decluttering and rearrangement. Full creative control for the stager; easier to create a cohesive look.
Emotional Detachment Can be challenging for homeowners to depersonalize. Easier for buyers to visualize themselves in a neutral space.
Time on Market Often reduces time on market, but depends on homeowner’s implementation. Significantly reduces time on market and often increases sale price.

Occupied staging is often preferred when homeowners are still living in the property during the selling process. The stager’s role is to work with what is already present, guiding the homeowner on how to best utilize their belongings to create an appealing space. This might involve recommending which pieces of furniture to keep, how to arrange them for optimal flow, and what accessories to remove or add. The success of occupied staging heavily relies on the homeowner’s willingness and ability to implement the stager’s recommendations, making thorough preparation for the consultation even more critical.

In contrast, vacant staging provides the stager with a blank canvas, allowing them to curate a complete look that perfectly targets the ideal buyer demographic. While more expensive, vacant staging often yields higher returns and faster sales, as the professional presentation is consistent and unhindered by existing personal items. For homeowners considering vacant staging, the preparation for a consultation would involve ensuring the home is completely empty, clean, and ready for the stager to bring in all necessary furnishings and decor. This approach minimizes homeowner involvement in the physical staging process.

Regardless of the chosen approach, the initial consultation remains a pivotal moment. For occupied staging, it’s your opportunity to receive a personalized action plan. For vacant staging, it’s where the stager assesses the property’s potential and discusses design concepts. In both scenarios, a well-prepared homeowner who has addressed basic maintenance and cleanliness allows the stager to provide more advanced, strategic advice, ultimately leading to a more effective staging outcome. The decision between occupied and vacant staging often comes down to budget, timeline, and the homeowner’s comfort level with depersonalizing their living space.

Frequently Asked Questions

What is the primary goal of a home staging consultation?

The primary goal of a home staging consultation is to receive expert advice on how to best present your property to potential buyers. A professional stager will identify areas for improvement, suggest decluttering strategies, and recommend optimal furniture arrangements to enhance your home’s appeal and market value.

How long does a typical home staging consultation last?

A standard home staging consultation usually lasts between one to three hours. This timeframe allows the stager to thoroughly assess each room, discuss your selling objectives, and provide comprehensive recommendations tailored to your home’s unique features and the target buyer demographic.

Should I clean and declutter before the consultation?

While a deep clean and extensive decluttering can wait until after the consultation, it is beneficial to tidy up and remove obvious clutter beforehand. This allows the stager to see the home’s true potential and focus on strategic recommendations rather than basic organizational issues. A clean slate helps them visualize the space more effectively.

What information should I provide to the home stager?

To maximize the consultation’s effectiveness, provide your stager with details about your selling timeline, target buyer, and any budget considerations. Sharing information about recent renovations or specific challenges you perceive in your home can also help the stager offer more precise and actionable advice.

Preparing for a home staging consultation is a strategic investment that significantly contributes to a successful home sale. By understanding the process, diligently decluttering, addressing minor repairs, ensuring cleanliness, and optimizing visual appeal, homeowners can maximize the value derived from expert staging advice. This proactive approach not only streamlines the consultation but also sets the stage for a quicker sale at a potentially higher price, transforming your property into a highly desirable asset in the competitive real estate market.

References

  1. National Association of Realtors. “2025 Profile of Home Staging.”
  2. The Zebra. “Home Staging Statistics in 2026.”