Aqviz

Bathroom Lighting Cost Guide

According to McCourt Real Estate & Property Management, this bathroom lighting cost guide covers what you will pay in 2026 for every fixture type. Bathroom lighting costs between \$200 and \$2,500 per fixture installed, depending on whether you are replacing an existing fixture or running new wiring for a new location. Replacing a vanity light with a like-for-like fixture costs \$150 to \$500 including the fixture and labor. Adding a new recessed light where no fixture existed costs \$300 to \$800. A full bathroom lighting upgrade with multiple fixtures, new circuits, and dimmer switches costs \$1,500 to \$4,000.

Bathroom lighting is subject to code requirements that other rooms are not — fixtures near water must be damp-rated or wet-rated depending on their proximity to the shower or tub. The cost difference between a standard fixture and a damp-rated fixture is small — $20 to $50 per fixture. The cost of installing a standard fixture that corrodes and fails within two years is the cost of replacing it with the damp-rated fixture you should have installed the first time.

Bathroom Lighting Costs by Fixture Type

Fixture Type Fixture Cost Installed Cost (Replacement) Installed Cost (New Location)
Vanity bar (2-4 lights) $50 – $300 $150 – $500 $300 – $800
Vanity sconce (single) $40 – $200 $120 – $400 $250 – $600
Recessed can (4- or 6-inch) $20 – $80 $150 – $350 $300 – $800
Flush-mount ceiling $40 – $200 $150 – $400 $300 – $700
Pendant light $60 – $300 $200 – $500 $350 – $800
Shower light (wet-rated recessed) $40 – $200 $200 – $450 $400 – $900
Exhaust fan with integrated light $100 – $400 $300 – $800 $500 – $1,200

A replacement — swapping an existing fixture for a new one in the same location using the same electrical box — costs the least because no new wiring is needed. The electrician removes the old fixture, connects the new one to the existing wires, mounts it, and leaves. The entire job takes 30 to 60 minutes per fixture and costs $100 to $300 in labor per fixture, plus the fixture cost.

A new location — adding a light where no fixture existed, costs significantly more because the electrician must run new cable from the switch or from an existing circuit, cut a hole in the ceiling or wall for the fixture box, and patch and paint around the new opening. The labor is two to three times longer, and the additional materials, cable, box, connectors, add $20 to $50 per fixture. The total installed cost for a new-location recessed light is $300 to $800, compared to $150 to $350 for a replacement in an existing location.

Wiring and Circuit Requirements for Bathrooms

The National Electrical Code requires at least one ceiling-mounted or wall-mounted light fixture in every bathroom, controlled by a wall switch. A second circuit, a dedicated 20-amp circuit, is required for the bathroom receptacle outlets. The lighting can share a circuit with other rooms. The outlets cannot.

Adding a new circuit for bathroom lighting, rarely necessary unless the bathroom is being added to a house that previously had none, costs $350 to $700 for a standard 15-amp lighting circuit. The cost covers the breaker, the cable run from the panel to the bathroom, the switch, and the labor. If the panel is in the basement and the bathroom is on the second floor, the cost is at the high end because the cable must be fished through two floors of finished walls.

The U.S. Department of Energy recommends LED lighting for all bathroom fixtures due to the combination of energy efficiency, long lifespan, 15,000 to 50,000 hours, and the availability of color-temperature options that range from warm white at 2,700K for a soft, flattering light to cool daylight at 5,000K for task lighting at the mirror. LEDs cost more upfront than incandescent bulbs, $5 to $15 per bulb versus $1 to $2, but use 75% to 80% less energy and last 15 to 25 times longer. An LED bulb in a bathroom that is used two hours per day will last 20 to 68 years before it needs replacement.

Damp-Rated vs. Wet-Rated, the Code Distinction That Costs Money

Bathroom light fixtures must be rated for the zone they are installed in. Fixtures directly above a shower or bathtub must be wet-rated, designed to withstand direct water spray. Fixtures within 3 feet of the shower or tub but not directly above it must be damp-rated, designed for high-humidity environments where condensation is likely. Fixtures more than 3 feet from the water source can use standard dry-location ratings.

A wet-rated recessed shower light costs $40 to $200 for the fixture, $20 to $50 more than a standard recessed can, and the installation labor is identical. The cost difference is entirely in the fixture rating. Installing a standard fixture in a wet-rated zone saves $30 and creates a shock hazard and a corrosion failure that will require replacing the fixture within two years. The electrical inspector will flag an incorrectly rated fixture during the final inspection and require it to be replaced. The cost of doing it right the first time is lower than the cost of doing it twice.

Dimmers, Timers, and Smart Controls

A dimmer switch for bathroom vanity lights costs $15 to $50 for the switch and $50 to $100 for installation, $65 to $150 total. Dimming the vanity lights to 50% in the morning reduces the shock of bright light before coffee and extends LED bulb life by reducing heat buildup. A timer switch for the exhaust fan costs $20 to $60 for the switch and $50 to $100 for installation. A humidity-sensing switch that automatically turns the fan on when moisture levels rise costs $40 to $100 for the switch and $50 to $100 for installation, $90 to $200 total, and prevents the most common bathroom ventilation failure: the fan that never gets turned on because someone forgot.

Smart lighting controls, app-controlled dimmers, motion sensors, voice-activated switches, cost $50 to $200 for the device and require a neutral wire in the switch box, which older homes may not have. Running a neutral wire to a switch box that lacks one costs $150 to $400 per switch location. Confirm the switch box has a neutral before you buy a smart switch. The packaging does not mention this requirement prominently. The electrician will mention it when they open the box and discover it is missing.

Frequently Asked Questions

How much does bathroom lighting cost to install?

Replacing an existing bathroom light fixture costs $150 to $500 per fixture installed. Adding a new fixture in a new location costs $300 to $900. A full bathroom lighting upgrade with multiple fixtures, new switches, and dimmers costs $1,500 to $4,000. The cost depends on the number of fixtures, whether new wiring is needed, and the fixture quality.

What type of lighting is best for a bathroom?

LED lighting at 2,700K to 3,000K color temperature is best for most bathrooms. Vanity lights at eye level on either side of the mirror eliminate shadows on the face, the most common bathroom lighting complaint. A ceiling-mounted fixture provides ambient light. A recessed shower light with a wet rating provides safe illumination in the shower. A combination of ambient, task, and accent lighting creates a bathroom that works for both morning routines and evening relaxation.

Do I need a permit to install bathroom lighting?

Replacing an existing fixture in the same location does not require a permit in most jurisdictions. Adding a new fixture, running new wiring, or installing a new circuit does require a permit. The electrical inspector will verify that the fixture ratings are appropriate for the location, damp-rated near the shower, wet-rated over it, and that the circuit is not overloaded.

Can I install bathroom lighting myself?

Replacing an existing fixture in the same location, disconnect two or three wires, connect the new fixture, is within the capability of a careful DIYer who turns off the circuit breaker and verifies the power is off before touching any wires. Running new wiring, adding a switch, or installing a new circuit requires knowledge of electrical code and should be done by a licensed electrician. The risk of improper wiring near water is electrocution, not just a non-functioning light.

How many lights does a bathroom need?

A small bathroom, powder room or half bath, needs one ceiling or wall fixture. A full bathroom needs a ceiling fixture for ambient light, vanity lighting on either side of or above the mirror for task lighting, and a wet-rated recessed light in the shower. A large master bathroom may also benefit from accent lighting, a pendant over a freestanding tub or recessed lights in a water closet. The minimum is one fixture that provides adequate, shadow-free light at the mirror. Most bathrooms are under-lit, not over-lit.

How much does a bathroom exhaust fan with a light cost?

An exhaust fan with an integrated light costs $100 to $400 for the unit and $300 to $1,200 installed. The installation cost varies widely because it depends on whether the fan is replacing an existing unit, $300 to $500, or being installed where no fan existed, requiring a new vent duct through the roof or exterior wall, $800 to $1,200. The vent duct is the expensive part. Running a 4-inch duct through an attic to a roof vent costs more than the fan itself.

What Good Bathroom Lighting Costs

A vanity light on either side of the mirror, two sconces or a 3-light bar, plus a ceiling fixture for ambient light, a wet-rated recessed shower light, and dimmer switches on the vanity and ceiling lights costs $800 to $2,000 installed as replacements in existing locations. Add $300 to $800 per fixture that requires new wiring. The total for a well-lit bathroom with LED fixtures and dimmers is $1,000 to $3,000.

Bathroom lighting is the most used lighting in the house, more hours per day than any room except the kitchen, and the most frequently installed wrong. Shadows on the face at the mirror, a single ceiling fixture that leaves the shower dark, a fan that never runs because the switch is outside the bathroom and nobody remembers to flip it. Each of these mistakes costs $150 to $500 to fix after the fact. Each costs nothing to avoid by planning the lighting layout before the drywall goes up or before the electrician arrives for the upgrade. The lights will be on every morning for the next twenty years. Spend the extra $300 to make them right. Ever tried to put on makeup or shave in a bathroom lit only by a single ceiling fixture directly above your head? The shadows under your eyes are lying to you. The lighting is the problem, not your face.
Why More Homeowners Are Choosing Under-Sink Water Filtration for Modern Kitchens

Kitchen design has changed dramatically over the past decade. Today’s homeowners are looking beyond attractive finishes and stylish appliances—they’re creating spaces that are functional, sustainable, and designed to improve everyday living. From energy-efficient lighting to eco-friendly building materials, every design decision contributes to a healthier home.

One feature that’s quietly becoming an essential part of modern kitchens is a built-in water filtration solution. Unlike bulky countertop units or disposable pitchers, water filter systems for under the sink offer a discreet way to enjoy cleaner drinking water while maintaining the clean, uncluttered appearance that contemporary kitchens are known for.

A Cleaner Kitchen Starts with Better Design

Minimalism continues to influence residential architecture, encouraging homeowners to reduce visual clutter and maximize usable workspace. Countertops are no longer filled with small appliances and accessories. Instead, integrated solutions help preserve clean lines while improving functionality.

An under-sink filtration system fits perfectly within this design philosophy. Installed inside the kitchen cabinet and connected directly to the existing faucet, it remains completely out of sight while providing filtered water whenever it’s needed. Because no additional faucet or countertop equipment is required, the kitchen maintains its streamlined appearance without sacrificing convenience.

Durability Matters as Much as Performance

Sustainable homes rely on products that are built to last. Durable materials reduce replacement frequency, conserve resources, and lower long-term environmental impact.

This is one reason many homeowners prefer filtration systems constructed with stainless steel components rather than plastic housings. Stainless steel resists corrosion, performs reliably in damp environments, and offers exceptional longevity. Leak-resistant braided stainless steel hoses also provide added confidence that the system will continue operating safely for years.

Investing in quality materials often means fewer replacements and less waste over the life of the home.

Modern Filtration Has Become More Sophisticated

Municipal drinking water is treated to meet safety standards, but many people still notice chlorine taste, odors, or concerns about certain contaminants. Advances in filtration technology have made it possible to reduce a much wider range of impurities while preserving the naturally occurring minerals that contribute to water quality.

One example is the AquaReveal® under-sink filtration system, designed to connect directly to virtually any kitchen faucet without drilling or complicated installation. The system arrives pre-assembled, making it suitable for homeowners seeking an easy upgrade during a kitchen renovation or even in an existing home.

Its dual-stage filtration combines two specialized filters that work together to address multiple categories of contaminants while maintaining a strong flow rate of approximately 3 to 4 liters per minute.

A Dual-Filter Approach

The first stage uses a 0.5-micron solid carbon block filter that helps reduce bacterial cysts, chlorine, volatile organic compounds (VOCs), and more than 95% of PFAS. Unlike some filtration methods, it retains naturally beneficial minerals like calcium and magnesium while helping improve water taste.

The second stage features AquaRenaissance’s exclusive PR110 filter, manufactured in Canada. What makes this cartridge particularly noteworthy is its ability to address chloramine—a disinfectant increasingly used by municipalities because it remains effective longer than chlorine.

Conventional carbon filters often struggle to remove chloramine effectively. The PR110 uses catalytic carbon, an advanced filtration media whose electronically modified surface accelerates catalytic oxidation, allowing it to break down chloramine more efficiently than standard activated carbon.

Even more importantly, it also removes ammonia, the byproduct produced when chloramine is treated, creating an all-in-one filtration solution that’s uncommon in the residential market.The PR110 is also capable of removing trace heavy metals—including lead, copper, and mercury—along with hydrogen sulfide, which causes unpleasant odors, and significantly improving the taste and smell of tap water.

Addressing Today’s Water Quality Concerns

Water quality concerns have evolved in recent years. Homeowners now look beyond chlorine taste alone and pay greater attention to emerging contaminants and heavy metals.

Modern filtration systems can help reduce:

Chlorine and chloramine

Lead, mercury, copper, and other heavy metals

PFAS (forever chemicals)

Volatile organic compounds (VOCs)

Pharmaceuticals and hydrocarbons

Hydrogen sulfides

Arsenic

Radioactive contaminants such as cesium and uranium

Bacterial cysts

At the same time, preserving beneficial minerals helps maintain water’s natural composition without producing flat-tasting drinking water.

Certified Performance Brings Confidence

When selecting any filtration product, independent certification is just as important as the list of contaminants it claims to remove.

Both filtration cartridges used in the AquaReveal system carry NSF/ANSI certification under the AquaRenaissance brand. These internationally recognized standards verify that certified filters have been independently tested for safety and performance, providing homeowners with additional confidence in the filtration process.

Sustainability Beyond Plastic Bottles

Installing a permanent kitchen filtration system also supports broader sustainability goals. Families who have convenient access to filtered tap water are less likely to purchase bottled water regularly, reducing single-use plastic waste and the environmental impact associated with manufacturing and transporting bottled beverages.

Because the AquaReveal system uses replaceable cartridges rather than disposable filtration units, only the filters require periodic replacement not the entire system. This approach supports long-term use while minimizing unnecessary plastic waste.

A Smart Addition to Any Kitchen

Whether designing a new home or updating an existing kitchen, integrated filtration has become an increasingly practical feature. Hidden beneath the sink, these systems preserve valuable counter space, provide convenient access to filtered water, and contribute to a cleaner, more sustainable living environment.

As homeowners continue investing in healthier and more efficient homes, high-quality under-sink filtration demonstrates that some of the most valuable design improvements are the ones that remain almost completely invisible—yet make a noticeable difference every day.

Metal Roofing vs. Replacement: How to Decide Between Coating, Repairing, and Starting Over

A metal roof that is rusting at the seams and leaking at the fasteners does not necessarily need to be replaced. A metal roof that is structurally intact but looks weathered may need nothing more than a coating system that adds 10 to 15 years of service life for 20% to 40% of the cost of a full replacement. The difference between a $5,000 coating job and a $25,000 tear-off comes down to the difference between surface deterioration and structural deterioration. One is cosmetic and weather-related. The other is terminal.

Metal roofing is the longest-lived residential and commercial roofing material available. Standing-seam panels installed correctly last 40 to 60 years. The metal itself — steel, aluminum, or copper — will outlast the building. What fails is not the metal but the coatings, the fasteners, and the sealants at the seams and penetrations. These are repairable and renewable. The decision framework below distinguishes between conditions that warrant a coating restoration, conditions that warrant targeted repairs, and conditions where replacement is the only responsible option. The framework is organized around one question: is the metal still structurally sound?

“Metal roof. Inspector says sand and repaint, roofer says full replacement. The inspector works for the insurance company. The roofer works for himself. I don’t know who to believe.”

— r/Roofing, May 2026 (32 upvotes, 82 comments), source

This conflict is structural. The insurance inspector’s incentive is to minimize the claim — if the metal can be restored, the insurance payout is limited to restoration cost. The roofer’s incentive is to sell a full replacement. The homeowner is caught between two parties whose financial interests do not align with the facts of the roof. The only way to resolve the conflict is a third-party assessment from an independent metal roofing inspector who has no financial stake in the outcome — someone who is paid for the inspection, not for the work that follows. That inspection answers the threshold question: is the metal substrate intact or not?

Cost Comparison — Coating vs. Repair vs. Replacement

The financial decision between coating, repairing, and replacing a metal roof is dominated by one number: the remaining structural life of the metal panels. If the panels are intact, a coating system costs $2 to $5 per square foot installed and adds 10 to 15 years. A full replacement of the same roof with new standing-seam metal costs $8 to $14 per square foot and lasts 40 to 60 years. The coating costs 20% to 40% as much and delivers 20% to 25% of the lifespan. The math favors coating when the building will be owned for less than 15 more years and replacement when it will be owned for more than 20.

Option Cost/sq ft Lifespan Added Best When
Silicone/Polyurethane Coating $2–$5 10–15 years Panels intact, rust <20%
Targeted Repair (fasteners, seams) $500–$2,000 (total) 5–10 years Localized leaks, minor rust
Full Tear-Off + New Metal $8–$14 40–60 years Structural damage, >30% rust
Retrofit Over Existing Metal $5–$8 20–30 years Commercial, panels sound

According to EPA data, reflective metal roofing can reduce peak cooling demand by 11% to 27% compared to dark asphalt shingles, which means a metal replacement that includes a reflective coating or uses cool-roof-rated metal panels generates ongoing utility savings that partially offset the higher upfront cost over the roof’s life. An asphalt shingle roof replaced every 20 years costs roughly the same over a 60-year period as a metal roof installed once and never replaced. The metal premium is a one-time expense. The asphalt savings are paid back in replacement costs every two decades.

When a Metal Roof Coating Makes Financial Sense

A coating restoration, sometimes called a roof recovery, applies a liquid-applied silicone, acrylic, or polyurethane coating directly over the existing metal roof surface. The coating fills pinholes, seals minor seam separations, and provides a new waterproof membrane on top of the metal. The coating also restores reflectivity, a weathered metal roof that has oxidized to a dull gray absorbs more heat than a freshly coated white or reflective surface, and the cooling energy savings from the restored reflectivity can be significant in warm climates.

A metal roof is a candidate for coating when the metal panels are structurally intact with no perforations larger than a pinhole, rust covers less than 20% of the total surface area, the fasteners are still holding, even if some need replacement, and the roof deck underneath is not water-damaged or rotted. Surface rust must be wire-brushed and treated with a rust-inhibiting primer before the coating is applied. Rust that has penetrated through the metal, visible from the underside in the attic or through the roof deck, is not a coating candidate. That panel must be replaced.

The coating system should be professionally applied with an airless sprayer to achieve the manufacturer’s specified dry-film thickness, typically 20 to 30 mils for silicone and 15 to 20 mils for acrylic. A roller-applied coating is thinner and less durable. The coating warranty, typically 10 to 15 years for materials, is contingent on proper surface preparation and application thickness. A coating applied over a dirty or poorly prepared surface will delaminate within 2 to 3 years regardless of the warranty on the can.

When Full Replacement Is the Only Option

Metal roof replacement is necessary when the metal panels have rusted through in multiple locations, the fasteners have corroded to the point where the panels are loose and cannot be re-secured, the roof deck underneath is water-damaged and must be replaced, or the roof has reached the end of its engineered service life and a coating would be a temporary bandage on a terminal condition.

The threshold for replacement versus coating is roughly 30% rust coverage or more than 5 perforations in a single roof plane. At that level of deterioration, the labor cost of preparing the surface for coating, wire-brushing, treating, and priming rust on 30% of the roof, approaches the labor cost of tearing off and replacing the same panels. The coating materials cost less, but the labor cost of preparation narrows the gap to the point where replacement becomes the better long-term value.

Full replacement also makes sense when the existing metal roof is a corrugated or exposed-fastener system that has reached the end of its fastener life. Exposed-fastener metal roofs rely on rubber gaskets under each screw head to seal the penetration. Those gaskets degrade from UV exposure and thermal cycling over 15 to 25 years. Once the gaskets fail, water enters through every screw hole. Replacing every fastener and gasket on a large roof costs roughly the same as a coating system and provides less reliable waterproofing. At that point, replacement with a concealed-fastener standing-seam system eliminates the fastener penetration problem entirely.

Decision Framework, 4 Questions That Point to the Right Answer

1. Is the metal structurally intact? Get on a ladder or send up a drone. Look for perforations, rust-through, and loose panels. Tap the panels with a screwdriver handle, a sharp metallic ring means the metal is sound. A dull thud means the metal is thin and may be rusting from the underside. If the metal is intact, coating or repair is possible. If the metal is perforated or thinned, replacement is necessary.

2. How long will you own the building? If the answer is less than 10 years, a coating that adds 10 to 15 years of service life covers the entire remaining ownership period at a fraction of replacement cost. If the answer is more than 20 years, replacement with new metal that will last 40 to 60 years is the better long-term value. If the answer is 10 to 20 years, the decision depends on the roof’s current condition, a roof in good condition gets a coating, a roof in poor condition gets a replacement.

3. What is the fastener condition? Exposed-fastener roofs with failing gaskets are the most common metal roof failure mode. If the gaskets are cracked, missing, or visibly deteriorated on more than 10% of the fasteners, the entire fastener population will fail within 5 years. Replacing all fasteners and gaskets costs $1 to $3 per square foot in labor and materials. Adding a coating over the new fasteners seals them and extends the roof life. If the fasteners are intact and the only problem is surface rust or oxidation, a coating alone is sufficient.

4. Is there decking damage underneath? Water that has penetrated the metal panels and saturated the roof deck or insulation requires replacement of the affected area. A coating applied over a water-damaged deck traps moisture and accelerates rot. The only way to confirm decking condition is to lift a few panels at the eaves or in areas where leaks were reported and inspect the substrate. If the decking is wet, soft, or moldy, those panels must come off and the decking must be replaced before any new roofing material is installed.

Frequently Asked Questions

How long does a metal roof coating last?

A professionally applied silicone or polyurethane coating system lasts 10 to 15 years on a properly prepared metal roof surface. Acrylic coatings last 8 to 12 years. The coating lifespan depends primarily on surface preparation, a coating applied over rust, dirt, or loose oxidation will fail at the bond line within 2 to 3 years regardless of the coating’s rated durability. The second factor is film thickness. A coating applied at 10 mils dry when the specification calls for 20 mils will perform for roughly half the rated lifespan. Insist on a wet-film gauge measurement during application to verify thickness.

Can I install metal roofing over existing asphalt shingles?

Yes, metal roofing can be installed over a single layer of asphalt shingles in most jurisdictions. The shingles provide a flat substrate, and the metal panels are screwed through the shingles into the roof deck. The installation requires furring strips, 1-by-4-inch boards screwed horizontally every 2 feet, to create an air gap between the shingles and the metal panels. The air gap allows the metal to shed heat and prevents condensation on the underside of the panels from saturating the shingles. Installing metal directly on shingles without an air gap is not recommended by any metal roofing manufacturer and will void the warranty. The weight of the metal plus the existing shingles must be within the roof structure’s load capacity, roughly 1.5 to 3 pounds per square foot for metal plus 2 to 3 pounds per square foot for shingles, and most residential roof structures can support the combined load without reinforcement.

Will my insurance premium change if I switch to a metal roof?

Yes, most insurance carriers offer a premium discount for metal roofing, typically 5% to 20%, because metal roofs are Class A fire-rated and Class 4 impact-rated when tested to UL 2218 standards. The discount is largest in hail-prone regions where impact resistance directly reduces the insurer’s claim exposure. The discount is smallest in regions where wind is the primary risk and the roof material matters less than the installation method. Ask your agent for a quote on the new roof before installation. The discount will not cover the cost difference between metal and asphalt, but it reduces the net premium difference over the life of the roof.

Average Roof Cost By Material

According to property management in Richland Hills, the average roof cost by material ranges from \$7,000 for a basic three-tab asphalt shingle roof to \$60,000 for a natural slate roof on a typical 2,000-square-foot home in 2026. Asphalt shingles — the material on roughly 80% of American homes — cost the least per square foot and last 15 to 30 years. Metal roofing costs two to three times more upfront and lasts two to three times longer. Tile and slate cost the most and can outlast the building itself. The material you choose determines not just the upfront cost but the cost per year over the life of the roof — and those two numbers often point in opposite directions.

Most homeowners compare upfront cost. The smarter comparison is cost per year. A $12,000 architectural asphalt roof that lasts 25 years costs $480 per year. A $22,000 steel metal roof that lasts 50 years costs $440 per year. The metal roof costs $10,000 more to install and $40 less per year to own. The right choice depends on how long you will own the house, not just how much the check is today.

Roof Cost by Material — Complete Comparison

Material Cost Per Square 2,000 sq ft Total Lifespan Cost Per Year
Asphalt 3-Tab $350 – $450 $7,000 – $9,000 15–20 yrs $350 – $600
Architectural Asphalt $450 – $750 $9,000 – $15,000 25–30 yrs $300 – $600
Steel Standing-Seam $800 – $1,500 $16,000 – $30,000 40–60 yrs $267 – $750
Aluminum $900 – $1,600 $18,000 – $32,000 40–60 yrs $300 – $800
Copper $1,500 – $2,500 $30,000 – $50,000 70–100 yrs $300 – $714
Zinc $1,200 – $2,000 $24,000 – $40,000 60–90 yrs $267 – $667
Concrete Tile $700 – $1,500 $14,000 – $30,000 50+ yrs $280 – $600
Clay Tile $1,000 – $2,000 $20,000 – $40,000 50–100 yrs $200 – $800
Natural Slate $1,500 – $3,000 $30,000 – $60,000 75–200 yrs $150 – $800
Synthetic Composite $600 – $1,100 $12,000 – $22,000 30–50 yrs $240 – $733
Wood Shake/Shingle $800 – $1,400 $16,000 – $28,000 25–40 yrs $400 – $1,120

The per-year cost column is the most important and most overlooked number in roofing. Notice that architectural asphalt, steel standing-seam, concrete tile, and copper all converge in the $300 to $600 per year range despite upfront costs that differ by $20,000 or more. The material that lasts longer spreads its cost over more years. The math is simple. The cash flow is the constraint.

Asphalt Shingles — the Most Roof for the Least Money

Asphalt shingles are the most common roofing material in America because they hit the intersection of affordability, availability, and acceptable lifespan better than any other material. Three-tab shingles cost $7,000 to $9,000 installed and last 15 to 20 years. Architectural shingles cost $9,000 to $15,000 and last 25 to 30 years. The $2,000 to $6,000 upgrade to architectural buys roughly ten extra years of service, better wind resistance, 110 to 130 mph versus 60 to 70 mph, and a dimensional appearance that adds curb appeal. For every dollar spent, architectural asphalt is the highest-return roofing decision available.

Asphalt’s limitation is lifespan. At 20 to 30 years, an asphalt roof will be replaced once or twice over a typical homeownership period. The replacement cost is predictable, roughly the same as the original cost, adjusted for inflation, and the installer pool is deep. Every roofing contractor in the country installs asphalt shingles. The same is not true for metal, tile, or slate.

Metal Roofing, the Long-Game Value Leader

Metal roofing costs $16,000 to $50,000 installed depending on the metal type and lasts 40 to 100 years. The upfront premium over asphalt is $8,000 to $35,000. The per-year cost is comparable to or lower than architectural asphalt for steel and copper, $267 to $750 per year for steel, $300 to $714 for copper. The value proposition depends entirely on how long you own the house. At 15 years of ownership, the metal roof’s per-year cost crosses below architectural asphalt. At less than 15 years, asphalt is cheaper in total cost. At more than 15 years, metal is cheaper per year and becomes cheaper in cumulative cost around year 22.

Metal roofing also reduces cooling costs by 10% to 25% in hot climates because the reflective surface rejects solar heat. Over 50 years, those savings can total $5,000 to $15,000, effectively reimbursing a significant portion of the upfront premium. The U.S. Department of Energy identifies reflective roofing materials, including metal, as one of the most cost-effective energy-efficiency upgrades for homes in cooling-dominated climates. The energy savings are real and measurable. They just arrive slowly, $300 to $500 per year on the utility bill.

Tile and Slate, Generational Roofs

Clay tile, concrete tile, and natural slate are the longest-lasting roofing materials and the most expensive to install. They weigh 600 to 1,500 pounds per square, three to five times as much as asphalt, and require a roof structure engineered to support that load. A structural evaluation before purchasing tile or slate is not optional. The existing roof framing may or may not be adequate. If it is not, structural reinforcement adds $3,000 to $8,000 before the first tile is installed.

Concrete tile is the value leader within the heavy-roof category at $14,000 to $30,000 installed with a 50-plus-year lifespan. Clay tile costs $20,000 to $40,000 and delivers the authentic Mediterranean or Spanish Colonial appearance. Natural slate costs $30,000 to $60,000 and can last 75 to 200 years, effectively a permanent roof. The quarry matters for slate: Pennsylvania slate, Vermont slate, and Spanish slate have different densities, weathering characteristics, and expected lifespans. A slate roof quoted without a quarry name is a slate roof quoted by someone who does not understand the material they are selling.

Synthetic and Wood, the Niche Options

Synthetic composite roofing, made from recycled rubber, plastic polymers, or engineered composites, costs $12,000 to $22,000 installed and lasts 30 to 50 years. It mimics the appearance of slate or wood shake at roughly half the cost and a fraction of the weight. No structural reinforcement is needed. The appearance from the street is convincing. Up close, a trained eye can tell the difference. Synthetic materials have been on the market for less than 30 years. The 50-year lifespan claims are based on accelerated weathering tests, not real-world data. Buy from a manufacturer with a warranty that covers labor, not just materials.

Wood shake and shingle roofing costs $16,000 to $28,000 installed and lasts 25 to 40 years in dry climates, less in wet or humid regions. It is the best-looking option on Craftsman, Cape Cod, and mountain architecture, and the highest-maintenance option in any climate. Wood roofs need cleaning, treatment, and inspection every three to five years. In wildfire-prone areas, wood roofing is restricted by code unless it is pressure-treated with fire retardant, which adds 30% to 50% to the material cost. Wood roofing is a regional choice, common in the Pacific Northwest and New England, rare and expensive elsewhere.

Frequently Asked Questions

What is the cheapest roofing material?

Three-tab asphalt shingles are the cheapest roofing material at $7,000 to $9,000 for a typical 2,000-square-foot home. They last 15 to 20 years. Architectural asphalt shingles cost $2,000 to $6,000 more but last 25 to 30 years, making them cheaper per year despite the higher upfront cost.

What is the most expensive roofing material?

Natural slate is the most expensive roofing material at $30,000 to $60,000 for a typical home. Copper roofing costs $30,000 to $50,000. Both can last 70 to 200 years, making their per-year cost competitive with asphalt despite the dramatically higher upfront price.

Which roofing material lasts the longest?

Natural slate lasts 75 to 200 years and is the longest-lasting roofing material available. Copper and zinc metal roofing last 70 to 100 years. Clay and concrete tile last 50 to 100 years. Steel and aluminum last 40 to 60 years. Architectural asphalt lasts 25 to 30 years.

Is a metal roof worth the extra cost over asphalt?

Yes, if you plan to stay in the home for more than 15 years. The per-year cost of steel standing-seam is $267 to $750, comparable to architectural asphalt at $300 to $600, but the upfront premium of $8,000 to $20,000 only makes sense if you own the house long enough to realize the lifespan advantage. Energy savings from solar reflectivity add $5,000 to $15,000 in utility savings over 50 years in hot climates.

Can I mix roofing materials on the same roof?

Yes, on different architectural sections, a metal porch roof, asphalt shingles on the main house, a tile accent on a dormer. Mixing materials on the same continuous roof surface creates seams where different expansion rates and installation methods meet and is not recommended. The transition between materials requires custom flashing that must be detailed correctly to prevent leaks.

What is the best value roofing material per year?

Architectural asphalt shingles offer the best value at $300 to $600 per year of service. Steel standing-seam metal is competitive at $267 to $750 per year. Concrete tile at $280 to $600 per year is surprisingly cost-effective on a per-year basis, the barrier is the upfront cost and the structural weight requirement, not the long-term value.

The Material That Makes the Most Sense

Architectural asphalt shingles are the right answer for most homeowners. $9,000 to $15,000. 25 to 30 years. $300 to $600 per year. Every roofing contractor in the country installs them. Every building department approves them. Every home supply store stocks them. They are not the most beautiful. They are not the longest-lasting. They are the material that balances cost, lifespan, availability, and resale value better than any other option on the market.

If you plan to stay in the house for more than 15 years and can afford the upfront premium, metal earns its price. If you are building a forever home with the architectural character to support it, tile and slate are generational investments. For everyone else, which is most people, architectural asphalt is the answer. It was the answer 30 years ago. It is the answer today. The shingles are better. The math is the same. Ever stood in the roofing aisle at a home improvement store staring at three-tab and architectural shingles, trying to remember which one the contractor recommended? The answer is architectural. It was architectural last time. It will be architectural next time. The question only feels complicated because someone told you to consider all your options. Your options are architectural asphalt, or something that costs more and lasts longer. The second category is for forever homes and specific climates. The first category is for everyone else. You know which one you are.

Repurposing Your Home Space After a Business Relocation

Many Australians launched home-based enterprises over the past few years, transforming garages, basements, and spare bedrooms into bustling operational hubs. However, recent real estate and employment data highlights a significant shift back to traditional workplaces. A 2025 CBRE Australian Occupier Survey reveals that smaller organisations are confidently returning to dedicated physical workspaces, with staff averaging 3.1 days a week in the office.

In cities like Perth, physical attendance has rebounded to nearly 90 percent as growing companies transition out of residential setups. The Property Council of Australia also reports a substantial increase in physical workspace leasing. This trend is heavily driven by business owners seeking dedicated areas that promote team collaboration and help strictly separate work from domestic life. As these companies move into leased commercial properties, homeowners are often left with vacant, utilitarian rooms. Reclaiming this square footage offers a fantastic opportunity to boost your daily lifestyle and significantly increase your overall property value.

Coordinating the Commercial Move

Moving a scaled-up business out of a residential property is not your standard weekend DIY chore. The logistics of safely extracting heavy business assets require careful planning to prevent accidental damage to your hallways, doorframes, and driveways. Business owners must manage the secure transit of sensitive AV equipment, fragile IT servers, and heavy, confidential document archives. Rather than risking physical injury or costly property damage, hiring professional commercial removalists ensures that all specialised corporate assets are transported securely.

Furthermore, attempting to move these items yourself can lead to severe personal injury or significant disruptions to your trading hours. Industry experts highly recommend selecting moving teams that hold membership with the Australian Furniture Removers Association (AFRA) to guarantee strict operational standards and insurance compliance. Interstate office and commercial relocation costs in Australia generally range from $1,500 to $5,500. This price varies significantly based on the total volume of business equipment and the transit distance. Once the massive desks, workstations, and inventory shelves are finally out the door, you can properly assess the blank canvas left behind.

Addressing Structural Wear and Tear

A heavily utilised home office or industrial-style workshop usually takes quite a beating over the years. After the room is fully cleared, you will likely notice impact damage, chipped paint, and scuffed plasterboard left behind by heavy filing cabinets and rolling swivel chairs. Repairing this inevitable wear and tear is the vital first step in your residential renovation journey. For minor plasterboard patch repairs, Australian homeowners should typically budget between $80 and $280. However, for heavily used converted garages that require a complete drywall re-skin, the costs can range between $500 and $1,200 depending on the room’s condition.

Standard new residential plastering is priced by area, with wall installations averaging $20 to $35 per square metre and ceilings ranging from $25 to $40 per square metre. Often, skilled tradespeople utilise a highly efficient technique called skimming. This process involves applying a very thin coat of plaster over slightly damaged walls to create a perfectly fresh surface, covering old paint and minor dents without requiring a full board replacement. Taking the time to properly prepare your surfaces will guarantee a flawless final coat of paint and significantly extend the lifespan of your renovation. For detailed advice on planning these physical repairs, reading through dedicated home improvement guides can help you effectively budget for materials and choose the most durable paint finishes.

Maximising Property Value Through Bedroom Conversions

Transforming a defunct residential workspace back into a high-quality bedroom or comfortable living area provides substantial financial returns. Research from the Information Services Group notes that creating clear, physical boundaries between domestic life and work zones is now a top priority in modern residential design. A basic bedroom renovation, which typically covers fresh paint, updated light fixtures, and new flooring, averages between $2,000 and $5,000 in Australia.

If you opt for a mid-range bedroom conversion that incorporates custom built-in wardrobes, premium finishes, and upgraded electrical work, costs generally sit between $5,000 and $15,000. Upgrading this space does more than just improve your family’s daily routine. Converting an industrial-style home office back into a cosy bedroom is a highly strategic financial move. Real estate professionals note that well-executed bedroom upgrades can boost a property’s perceived value by 10-15%, while also helping the home sell faster and reducing market risk for property investors.

This is a far more cost-effective way to add a room compared to building a completely new ground-level bedroom extension, which currently demands construction costs ranging from $1,300 to $3,900 per square metre. Investors and owner-occupiers alike recognise the immense financial benefits of having an extra bedroom on the floor plan.

Key Steps for a Smooth Space Transition

To ensure your room conversion is both cost-effective and beautifully finished, it is best to follow a structured renovation approach.

  • Assess the physical damage: Inspect your walls, skirting boards, and floors for deep structural issues versus mere cosmetic scuffs before booking any tradespeople.
  • Define the new residential purpose: Decide early if the vacant room will become a luxurious guest bedroom, a children’s playroom, or a dedicated home cinema. This decision dictates your future lighting, flooring, and electrical needs.
  • Update the electrical layout: Remove excess power points, heavy-duty cables, or commercial internet lines that were necessary for intensive business operations but are now entirely redundant for a family space.
  • Focus on domestic comfort: Soften the room’s aesthetic by replacing commercial-grade carpets or bare concrete floors with plush residential flooring, warm lighting tones, and stylish window treatments.

Watching your small business outgrow your house is a thrilling professional milestone. By carefully managing the logistical challenges of the physical move and strategically renovating the leftover space, you can enjoy the ultimate dual reward. You gain a thriving, collaborative commercial enterprise located offsite, alongside a beautifully restored, highly valuable family home. Ultimately, reclaiming this domestic real estate allows your household to relax and enjoy a more balanced lifestyle.

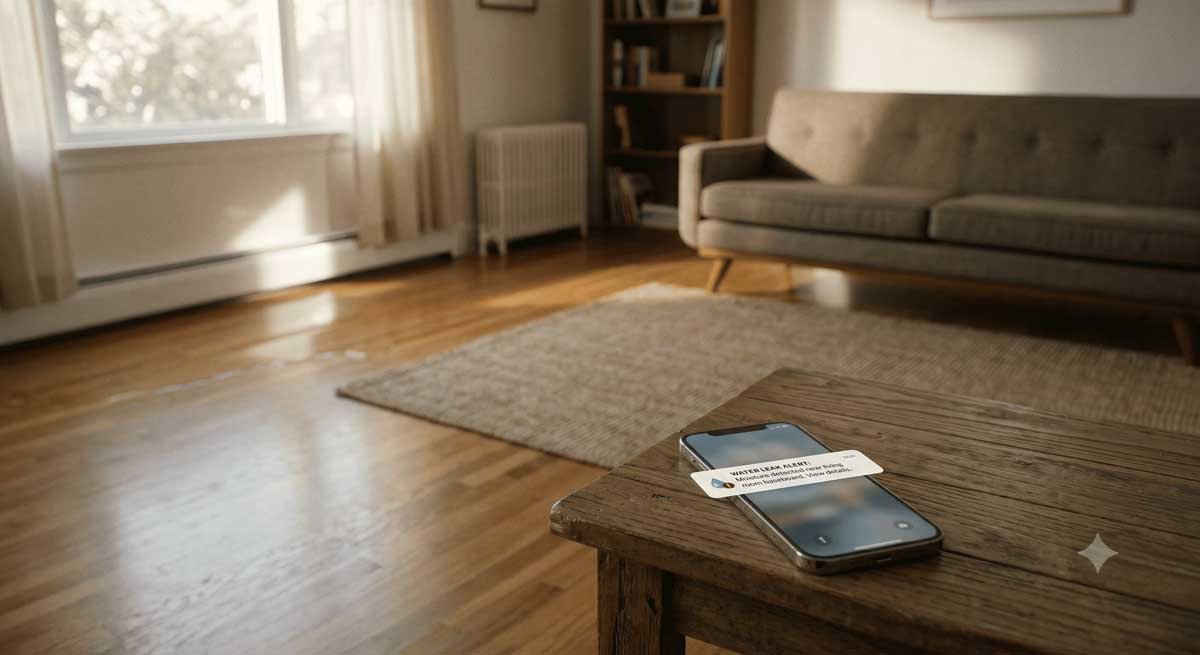
Smart Shutoff Valves: Stopping a Burst Pipe Before It Floods Your Home.

A smart shutoff valve is a device installed on your home’s main water line that monitors how water moves through your pipes and automatically closes the supply when it detects a burst pipe or an abnormal leak. Instead of returning to inches of standing water and ruined drywall, you get an alert on your phone and a system that has already stopped the flow. This article explains how these valves work, what they catch, how they compare to your manual shutoff, and what to consider before having one installed.

Why a Burst Pipe Turns Into a Flood So Fast

Water under household pressure moves quickly. A failed supply line, a cracked fitting, or a pipe that splits after a hard freeze can release several gallons a minute. Cold weather makes this worse, because water expanding inside a frozen line can rupture it the moment it thaws. If a failure happens while you are at work, asleep, or away for the weekend, the water keeps running until someone notices.

By then it has often soaked subfloors, traveled into wall cavities, and reached the lower levels of the home. The damage rarely stops at the water itself. Trapped moisture in framing and insulation invites mold, warps wood, and breaks down finishes, which is why supply-side failures are among the most common and most expensive water claims a household can face.

What a Smart Shutoff Valve Actually Does

A smart shutoff valve combines three things: a sensor that measures water flow and pressure, a small processor that learns your home’s normal usage, and a motorized valve that can physically close the line. When the system sees a pattern that does not fit normal use, water running continuously for far longer than a shower or a load of laundry would, for example, it flags the event.

Depending on how it is set up, the valve either alerts you to confirm or shuts the water off on its own. Most models connect to an app, so you can watch usage, receive leak alerts, and open or close the valve remotely from anywhere.

The Leaks You Would Otherwise Miss

The dramatic burst is only part of the picture. A lot of water damage comes from small, quiet leaks: a pinhole in an aging copper line, a slow drip behind a wall, or a supply hose to a toilet or washing machine that fails little by little. These can run for days without an obvious sign until a stain or a musty smell appears.

Because a smart valve watches continuous flow rather than waiting for visible water, it can catch this kind of slow loss early, often before it reaches a finished surface. Many systems also track unusually small but steady flow that points to a leak you would never hear.

Why This Beats Relying on Your Main Shutoff

Every home already has a manual main shutoff. The trouble is that it only helps if a person is there to turn it, knows where it is, and reaches it in time. A pipe that bursts at two in the morning, or while the house sits empty during a trip, gives no one that chance.

A smart valve removes the human from the emergency. It reacts in seconds, at any hour, whether or not anyone is home, and it does not depend on someone remembering which way the old valve turns or fighting a stiff handle that has not moved in years.

Where It Fits in a Home’s Water Protection

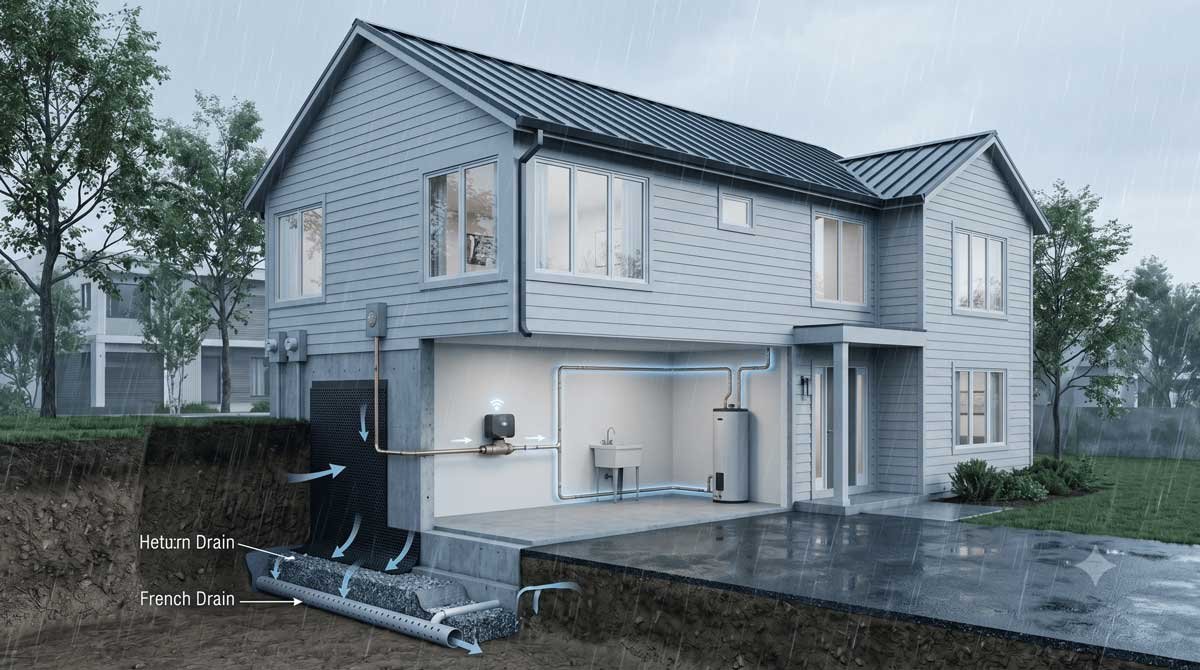
It helps to think of a smart shutoff valve as protection against water coming out of your own plumbing, the supply lines that feed your fixtures and appliances. That is a different threat from groundwater pushing in through a foundation or moisture rising through a crawl space, which is what exterior waterproofing and drainage are built to handle.

A complete approach covers both. Waterproofing keeps outside water from entering the building envelope, and a smart valve keeps an internal failure from filling the home from within. Neither one replaces the other, and a home that is well sealed against groundwater can still flood from a single failed supply line.

Types of Systems to Know

  • Whole-home flow valves: installed on the main line, they monitor and can shut off all water to the house. This is the most complete option.
  • Point-of-leak sensors with shutoff: small sensors placed near risky spots such as the water heater, washing machine, or under sinks, which trigger a connected valve the moment they detect water.
  • Standalone automatic valves: simpler units that close on a sensor signal without the learning and reporting features of a full smart system.

Limitations Worth Understanding

A smart valve is a safeguard, not a cure. It stops the flood, but the failed pipe or fitting still has to be repaired. Most systems run on power and a wireless connection, so it is worth choosing one with battery backup and confirming how it behaves if the internet drops.

Sizing and placement matter just as much. The valve has to match your main line and your home’s water pressure, and it has to sit on the supply where it controls the whole house. A unit that is undersized or installed in the wrong spot will not protect the way it should.

Limitations Worth Understanding

Installation and Setup

Because a smart shutoff valve ties directly into the main water line, installation is plumbing work, not a plug-in gadget. The line usually has to be cut, the valve fitted and sealed, and the system tied into power and tested under real pressure. Local code can also dictate where and how it is installed. For these reasons most homeowners have it put in by a licensed plumber, who can size the unit, place it on the correct part of the supply, and verify that it closes fully under load. If you are weighing this upgrade, professional smart shutoff valve installation makes sure the system is matched to your home and actually shuts off when it counts.

Keeping It Working

Like any safety device, a smart valve should be checked from time to time. Run the test cycle the manufacturer provides, confirm the valve fully opens and closes, replace backup batteries on schedule, and make sure app alerts reach a phone that is actually monitored. A system you never test is one you cannot fully trust in an emergency.

The Bottom Line

For most homes, especially those with older supply lines, a leaking or burst pipe is less a question of if than when. A smart shutoff valve will not stop a pipe from failing, but it can keep that failure from becoming a flood that ruins floors, walls, and everything below. Paired with sound waterproofing and routine plumbing maintenance, it closes one of the most costly gaps in a home’s defense against water.

How to Choose Quality Lumber for a Home Improvement Project

Picking the right lumber can make or break your home improvement project.

Mess it up and you’ll have cupped boards, split joints, and a finished job that screams “amateur.” Get it done right and you’ll have a project your grandchildren will want to keep.

The good news?

Selecting good lumber can be simple. Learn what to look for and do a few quick checks and you will be able to identify quality every time.

Here’s how to do it…

Here’s what’s coming up:

  • Why Lumber Quality Actually Matters
  • Hardwood vs Softwood: What’s The Real Difference?
  • How To Inspect Lumber Like A Pro
  • The Big Benefits Of Sawn To Size Timber
  • Common Lumber Mistakes To Avoid

Why Lumber Quality Actually Matters

Lumber is the backbone of almost every home improvement project.

Whether you’re framing a deck, a wall or custom shelving — the quality of your lumber will determine the quality of your project.

Demand is significant. More than 70% of softwood lumber and structural panels are consumed by the residential construction and home improvement sectors. Accuracy counts.

Buying timber that has already been sawn to size is one of the simplest ways to ensure top-quality from square one. Rather than purchasing stock boards then measuring and cutting them yourself at home, you receive boards that have already been cut precisely to your specifications by seasoned hardwood suppliers.

Pretty cool, right?

Now let’s break down exactly what to look for when you’re choosing lumber…

Hardwood vs Softwood: What’s The Real Difference?

First you need to figure out what type of wood you actually want before purchasing one board.

Here’s the short version:

Hardwood is derived from deciduous trees such as oak, maple, walnut, and cherry. It’s dense, durable, and gorgeous when finished. When you want:

  • Furniture
  • Flooring
  • Cabinetry
  • High-end joinery and trim

Softwood is wood from coniferous trees such as pine, cedar, fir and spruce. It’s lighter in weight, easier to work with, and dramatically cheaper. Softwood can be used to:

  • Framing
  • Decking
  • Outdoor structures
  • DIY projects on a budget

Hardwoods are more expensive, but they usually last significantly longer. Softwoods are cheaper and easy to cut.

The key takeaway?

Choose the wrong wood and bad things happen. Softwood for a kitchen worktop? That worktop will get ruined in a year. Expensive hardwood for general framing? Waste of money.

Match the wood to the job.

How To Inspect Lumber Like A Pro

Walking into a lumberyard can be daunting. Boards piled everywhere. You have no clue what’s good or bad.

Here’s a simple checklist you can run through every single time:

Check For Straightness

Grab the board and sight down its length. Is it straight? Or does it bow, twist, or cup?

Even a slight bow can ruin a project. Always pick boards that lay flat.

Look At The Grain

Quality lumber will have a tight uniform grain pattern. Wide spaced uneven grain means that the wood will check when drying.

Tight grain = strong wood. Wide grain = weak wood. Simple as that.

Check For Knots

Knots are acceptable in some projects (they add character to rustic creations) but are detrimental to fine furniture or structural pieces.

Avoid boards with:

  • Loose knots (they will fall out eventually)
  • Black knots (a sign of decay)
  • Multiple knots clustered together (these create weak spots)

Test The Moisture

This is a biggie. Wood that is too moist will warp, crack and shrink as it seasons.

Moisture meters are great if you have them. You want approximately 6-8% for indoor projects and about 12-15% for outdoor.

Check The Ends

Inspect the ends of all boards. Large cracks (known as “checking”) mean the wood was dried too quickly and may continue to crack.

A quick end check can save you a massive headache later.

The Big Benefits Of Sawn To Size Timber

Want the easiest way to upgrade your next project?

Buy sawn to size timber.

You don’t order standard size boards and then cut them to size at home. You order them already cut to your dimensions. Sounds trivial. Doesn’t make that much of a difference, right? Actually, it changes everything.

Here’s why sawn to size timber wins every time:

  • Less waste — You only pay for the wood you actually need
  • Better accuracy — Professional saws cut way straighter than most home tools
  • Time savings — You skip all the cutting and prep work
  • Cleaner edges — Industrial saws leave smooth, square cuts
  • Consistent quality — Every piece matches in size and finish


If you are looking for timber that you need precise measurements of (furniture, cabinets etc.) then buying sawn to size timber is an easy option. Why waste time measuring, marking and cutting when someone else can do it quicker and more accurately?

It’s the small upgrade that delivers big results.

Common Lumber Mistakes To Avoid

A quick rundown of the biggest mistakes people make when buying lumber:

  • Buying the cheapest material you can find — Most inexpensive lumber is warped, knotty and low-grade. You will pay more to fix problems later.
  • Buy more than you think you need — Plan on purchasing 10-15% extra lumber. You will make mistakes.
  • Ignoring moisture content — This is the #1 cause of project failures.
  • DIY wood storage solutions — Warped wood could be the result of not letting your lumber acclimatize to your house for a few days. Don’t forget to do this.
  • Do not skip the inspection — Inspect every board before you pay. Yards will replace defective boards if you catch them.

Remodeling has been booming lately. Spending on renovations jumped 82% from 2015 to 2024. When that much money is going into projects, proper lumber is essential.

Final Thoughts

Choosing quality lumber really isn’t rocket science.

All you need is to know what to look for, where to purchase, and how to tell the difference between quality wood and junk.

To quickly recap:

  • Match the wood to the job (hardwood vs softwood)
  • Inspect every board for straightness, knots, and moisture content
  • Order sawn to size timber whenever possible
  • Always avoid the common buying mistakes

Do these things and your next DIY project will look good, last longer and save you hundreds.

Good building starts with good lumber. Take a few extra minutes to select quality boards — and the results will be obvious.

How To Pick Paint Finishes for Lasting Wall Protection

Want walls that actually hold up over time?

Homeowners usually choose a paint finish based solely on color….and then complain why their walls look worn after one year. Finish is just as important, if not more important than color.

The right finish can:

  • Protect your walls from damage
  • Make cleaning a breeze
  • Boost your home’s value
  • Stretch the life of your paint job

Learn exactly how finishes can enhance your home, starting from room to room. Ready?

Here’s what’s covered:

  1. Why Paint Finishes Matter
  2. The 5 Main Paint Finishes Explained
  3. How To Pick The Right Finish For Each Room
  4. Common Paint Finish Mistakes To Avoid

Why Paint Finishes Matter

Paint finishes are not just about looks. They are about long-term protection.

Sheen refers to the finish of the paint and how much light is reflected off of the wall. Sheen also determines how durable/washable/moisture resistant the paint will be. This is important when thinking about how your house will look years down the road. Many people overlook this factor.

Quality finishes from reputable brands such as RMP Finishes are designed not to wear down from daily life. The proper product prevents you from repainting every few years. This is how finishes can benefit your home long term.

And the data backs this up…

A National Association of Realtors publication found that interior painting has a 107% return on investment. Furthermore, 80% of real estate agents say that painting your house gives it value. However — that ROI only counts if your paint looks good when you go to sell. The wrong finish can chip, scuff or fade in 12 months. The right one could last 10 years.

Think about it this way:

  • A flat finish in a kid’s bathroom = disaster
  • A high-gloss on the living room ceiling = also disaster
  • Matching the finish to the room = wins every time

So how do you know which finish to use? That’s exactly what’s covered next.

The 5 Main Paint Finishes Explained

At your local paint retailer there are 5 finishes readily available on the shelf. They each serve a purpose. Here is a closer look….

Flat (Matte) Finish

Flat is the matte finish. It covers up imperfections such as bumps, dents and patches very well.

Where to use it:

  • Ceilings
  • Adult bedrooms
  • Formal dining rooms
  • Low-traffic areas

The drawback? Flat paint is the least washable. Scrub flat paint and you’ll scrub right through it off the wall. Avoid using it in high traffic areas.

Eggshell Finish

Eggshell is just a hair higher than flat. It has a very slight sheen to it (similar to a real egg).

It’s the preferred finish for living rooms and bedrooms. This finish masks imperfections fairly well. It’s also much easier to clean than a flat.

Satin Finish

Satin has a gentle, velvety sheen. It is more durable than eggshell and can be scrubbed lightly.

The best rooms for satin:

  • Hallways
  • Kids’ bedrooms
  • Family rooms
  • Laundry rooms

Bonus: Satin is also great for homeowners who want one finish throughout their house.

Semi-Gloss Finish

Semi-gloss is shiny and very durable. Water just beads right off it.

This is the all around standard for anyplace where there is water or oil build up. Kitchens, Bathrooms, doors, trim etc. Works on handprints and splashes too! The more you clean it the better it looks.

But it has a big trade-off…

Semi-gloss will highlight every imperfection on your wall. Bumps, holes, poor patch jobs — you will see them all.

High-Gloss Finish

High-gloss is the most reflective. It’s basically liquid plastic when it dries.

Use it on:

  • Cabinets
  • Trim and moulding
  • Front doors
  • Furniture pieces

Avoid using high-gloss on large expanses of walls. It looks strange and magnifies every little flaw.

How To Pick The Right Finish For Each Room

OK…on to the useful stuff. Here’s a quick rundown by room of choosing the appropriate finish.

Kitchens

Areas of your home will benefit from specific paint finishes. Kitchens need something durable like washable paint since there’s plenty of grease, splatter and wiping involved. Semi-gloss is your best bet. It’s washable and moisture resistant.

Eggshell or flat would be best for the ceiling as they will help disguise imperfections from steam damage over time.

Bathrooms

Bathrooms have high humidity. They splash. Mildew grows here. Use semi-gloss for the safest wall finish.

Looking for something less shiny? Purchase a satin paint that is marked “bathroom” or “mildew-resistant.” Most brands offer these these days.

This also presents another opportunity to use low-VOC products. Sales in the low VOC interior paint market have grown about 12 percent each year as consumers seek healthier alternatives. You definitely want that in bathrooms where moisture can create a sauna of fumes.

Bedrooms and Living Rooms

Rooms that see little foot traffic and are occupied for extended periods of time. Eggshell finishes are best suited for these rooms:

It helps to tone down the appearance of the room and make it feel calm and cozy. Paint companies typically offer you hundreds of eggshell shades to choose from.

Hallways and Kids’ Rooms

These spaces get scuffed up fast. Satin is your best friend here.

Dirty fingers, backpacks, dog tails… satin brushes it off. Plus, it still looks fresh and contemporary.

Trim, Doors, and Cabinets

Paint trim, doors and cabinets with semi-gloss or high-gloss. They receive a lot of handling and need a durable, washable finish.

Popular pro tip: use a different sheen on trim than walls. It creates depth and looks much more finished.

Common Paint Finish Mistakes To Avoid

So you’ve chosen the correct finish. Now just don’t do these things and you’ll be fine. Right? Wrong. Even with the proper finish, these blunders can still wreak havoc on an otherwise beautiful job. Avoid these…

Mistake #1: Skipping the primer

Even the best finish won’t adhere without primer. Your paint can peel or chip or look uneven from day one.

Mistake #2: Mixing finishes mid-wall

If you run out of paint and take another sheen, the wall will look blotchy. Make sure you finish a wall with the same batch.

Mistake #3: Using flat in busy areas

Flat design is probably the most popular style. It looks clean and crisp, but tends to soil easily and isn’t very washable.

Mistake #4: Going too glossy

Matte finish on inappropriate surfaces is a nightmare. It highlights every imperfection and makes it look tacky.

Mistake #5: Ignoring quality

Cheap paint is cheap for a reason. The paint consists of lower grade pigments and resins. Paying slightly more will get you paint that will last 10 years rather than 2.

Final Thoughts

Choosing the correct paint finish is one of the simplest upgrades you can make. It doesn’t cost much extra, but it has a huge impact on:

  • How long your walls last
  • How easy they are to clean
  • How much value your home holds

To recap the simple formula:

  • Flat: ceilings and low-traffic rooms
  • Eggshell: bedrooms and living areas
  • Satin: hallways and kids’ rooms
  • Semi-gloss: kitchens, bathrooms, trim
  • High-gloss: cabinets, doors, accents

Start with these rules and your walls won’t need a repaint every year. Good finishes = lasting walls. It really is that simple.

How Much to Drywall a Garage: A Practical Cost Guide

A two-car garage has roughly 800 to 1,000 square feet of wall area and 400 square feet of ceiling area. The walls are open studs or, in an older garage, possibly covered with pegboard, OSB, or nothing at all. Drywalling the garage turns it from a utilitarian shell into a finished room that is brighter, cleaner, and easier to heat. The cost depends on the size of the garage, whether the ceiling is included, the drywall thickness, and whether the taping and finishing is included in the job. A basic hang-only job costs half as much as a fully taped and painted finish. The difference is whether the garage looks like a construction site with drywall or a finished room, explains Mark Thomas Management experts.

According to wikiHow’s home finishing guide, which has been viewed over 500,000 times, drywall is the phase that transforms a framed space into a room with finished walls and ceilings. The principles are the same for a garage. This guide provides real costs for drywalling a standard two-car garage.

Cost by Scope for a Two-Car Garage (20×20×10)

Scope DIY Materials Professional (Labor + Materials)
Walls only, hang only (no tape) $400-700 $1,000-1,800
Walls only, hang + tape + texture $600-1,000 $1,800-3,500
Walls + ceiling, hang + tape + texture $1,000-1,700 $3,000-5,500
Walls + ceiling, hang + tape + smooth finish (Level 4) $1,200-2,000 $4,000-7,000

Cost Per Sheet and Per Square Foot

Item DIY Cost Professional Cost
4×8 sheet of 1/2-inch standard drywall $15-20 $35-50 (hung + taped)
4×8 sheet of 5/8-inch fire-rated drywall $18-25 $40-60 (hung + taped)
Per square foot (walls, hang + tape) $0.60-1.00 $1.50-3.00
Per square foot (ceiling, hang + tape) $0.80-1.20 $2.00-3.50

Materials Breakdown for a Two-Car Garage (Walls + Ceiling)

Material Quantity Cost
1/2-inch drywall sheets (walls, 800 sq ft) 25 sheets $375-500
5/8-inch drywall sheets (ceiling, 400 sq ft) 13 sheets $235-325
Joint compound (3 buckets) 3 × 4.5 gal $45-75
Drywall tape (paper or mesh) 2-3 rolls $15-25
Drywall screws (5 lbs) 1 box $30-40
Corner bead 8-10 sticks $30-50
Total materials $730-1,015

What Moves the Drywall Cost

  • Ceiling inclusion. Adding the ceiling roughly doubles the square footage and adds the physical difficulty of overhead work. Ceiling drywall requires a lift rental or a second person. The lift costs $30 to $40 per day.
  • Finish level. A Level 3 finish, which is tape and one coat of compound, is adequate for a garage that will be painted but where seams do not need to be invisible. A Level 4 finish, tape and three coats, is required for smooth-painted walls where seams must not show. The third coat adds roughly $0.30 to $0.50 per square foot in labor and materials.
  • Drywall thickness. 5/8-inch drywall is required by code for the ceiling if there is living space above the garage, for fire separation between the garage and the house. If the garage has no living space above, 1/2-inch is acceptable for the ceiling. 5/8-inch drywall weighs 70 pounds per sheet versus 55 pounds for 1/2-inch. The weight difference makes overhead installation significantly harder.
  • Wall condition. Per wikiHow’s wall finishing guide, co-authored by Ryaan Tuttle, proper drywall installation requires a flat, stable framing surface. If the garage has open studs, the drywall can be hung directly. If the garage has existing wall covering that must be removed, add $200 to $500 for demolition and disposal.

DIY vs. Professional: Time and Savings

Drywall is one of the most DIY-accessible trades. Hanging drywall requires a drill, a drywall T-square, a utility knife, and the physical ability to lift 55 to 70-pound sheets. Taping and mudding requires a technique that develops over the first few walls. A homeowner can hang drywall in a two-car garage in one to two weekends working alone. The taping and finishing take an additional two to three weekends because each coat of compound must dry before the next is applied.

The DIY savings on a fully drywalled two-car garage are $1,800 to $4,500 compared to professional installation. The savings come entirely from labor. The material cost is the same whether a homeowner or a contractor buys the drywall. A drywall lift rental for $30 per day makes the ceiling work possible for one person and is the best rental value in the entire project.

Moisture-Resistant Drywall: When You Need It in a Garage

Standard drywall absorbs moisture from the air. In an unconditioned garage, humidity swings from damp summer mornings to dry winter afternoons. Over years, standard drywall can develop mold on the back side where it contacts the studs, and the paper facing can peel in areas exposed to water splashes. Moisture-resistant drywall, green board or purple board, has a treated core and facing that resists moisture absorption. It costs $2 to $4 more per sheet than standard drywall. For a two-car garage using 38 sheets, the premium is $76 to $152.

Moisture-resistant drywall is recommended for the bottom 4 feet of garage walls, where snow melt from vehicles, rain splash from the open garage door, and floor-level humidity are concentrated. It is not required by code for garages in most jurisdictions, but it is a practical upgrade that costs less than $150 and prevents the bottom of the walls from degrading. For a garage that will be heated and used as a workshop or gym, use moisture-resistant drywall on all walls. For a garage that is purely for parking and storage, standard drywall is sufficient.

Drywall Finish Levels Explained for Garages

Drywall finishing is graded from Level 0 to Level 5. For a garage, three levels are relevant:

  • Level 2 (tape only). Joint tape embedded in compound with no finish coats. The tape is visible. The seams are visible. This is the minimum for a garage where appearance does not matter and the drywall is primarily for fire separation. Materials cost roughly $150 less than a Level 4 finish because no additional compound or sanding is required.
  • Level 4 (tape + 3 coats). The standard for painted walls. Tape embedded, three coats of compound applied and sanded smooth. Seams are not visible under flat or matte paint. This is the standard for a garage that will be used as a workshop, gym, or living space. Most professional quotes assume Level 4.
  • Level 5 (skim coat). A thin skim coat of compound applied over the entire surface, not just the seams. Required for high-gloss or semi-gloss paint where every surface imperfection is visible under the sheen. Adds $0.50 to $1.00 per square foot. Rarely used in garages unless the garage is being converted to living space with a high-end finish.

The cost difference between Level 2 and Level 4 is roughly $0.30 to $0.50 per square foot in labor, or $350 to $600 for a two-car garage. For a workshop or gym where the walls will be painted and the garage will be used regularly, Level 4 is worth the additional cost. For a utility garage that exists only for parking, Level 2 is acceptable.

Frequently Asked Questions

Do I need fire-rated drywall in a garage?

Building code requires 5/8-inch Type X fire-rated drywall on the ceiling of an attached garage if there is living space above. It is also required on the wall shared between the garage and the house. The fire-rated drywall provides a one-hour fire separation between the garage and the living space. For a detached garage or a garage with no living space above, standard 1/2-inch drywall is acceptable. Check local code. The inspector will flag non-fire-rated drywall on a shared wall or ceiling.

Should I paint garage drywall or leave it unpainted?

Unpainted drywall absorbs moisture from the air and from any splashes or spills. Over time, unpainted drywall in a garage develops water stains, mold spots, and a general dinginess that cannot be cleaned. Paint the drywall with at least a coat of PVA primer and one coat of paint. The paint cost for a two-car garage is $80 to $150 in materials. The unpainted drywall looks acceptable for about a year. The painted drywall looks acceptable for a decade.

The Garage That Looks Finished

Drywalling a garage costs $730 to $1,015 in materials for DIY, or $1,800 to $5,500 for professional installation depending on whether the ceiling is included. The drywall transforms the garage from exposed studs to smooth walls. The paint that follows is optional but recommended. A drywalled and painted garage is brighter, easier to clean, and feels like a room rather than a shell. The drywall is the skin. Everything before it is bones. The material cost is the same whether a homeowner or a contractor buys the sheets. The labor is the difference. A homeowner who hangs and finishes the drywall themselves saves $1,800 to $4,500. A homeowner who hangs the drywall and hires a taper to finish saves roughly half that amount and gets a professional-quality finish on the seams. Either approach turns exposed studs into walls. The garage becomes a room.


How Much to Finish a 1,000 Sq Ft Basement: A Practical Cost Guide

A 1,000-square-foot basement is the most common size in American homes. It is large enough for a family room, a bedroom, a bathroom, and a mechanical room. It is small enough that the cost of finishing it is a five-figure number, not a six-figure number. The total cost to finish a 1,000-square-foot basement ranges from $15,000 for a basic DIY rec room to $75,000 for a high-end professionally built space with a bathroom, wet bar, and custom finishes. Most homeowners with a 1,000-square-foot basement spend between $30,000 and $45,000 for a mid-range professional finish that includes a bathroom, notes property management in Schertz.

Three Tiers for 1,000 Square Feet

Scope DIY Cost Professional Cost What You Get
Basic rec room $10,000-18,000 $18,000-28,000 Open space, framed and insulated walls, drywall, paint, carpet, basic lighting. No bathroom. No interior walls.
Mid-range finish $18,000-28,000 $30,000-45,000 Family room, 1 bedroom, 1 full bath, LVP flooring, recessed lighting, interior doors, baseboard and casing trim.
High-end finish $30,000-45,000 $55,000-75,000 Mid-range plus: wet bar with cabinetry, separate HVAC zone, custom built-ins, premium flooring, upgraded trim package, egress window.

Trade-by-Trade Breakdown for 1,000 Sq Ft Mid-Range

Per wikiHow’s basement wall guide, co-authored by home improvement specialist Ryaan Tuttle, the framing and insulation phases set the foundation for every trade that follows. A 1,000-square-foot basement typically has 140 to 180 linear feet of wall.

Trade DIY Materials Professional (Labor + Materials)
Framing (160 linear ft) $700-1,200 $2,500-4,500
Insulation (exterior walls + interior sound) $800-1,500 $2,000-4,000
Drywall (hang, tape, finish, 3,200+ sq ft) $1,500-2,500 $4,000-7,000
Electrical (outlets, switches, recessed lights, panel) Not DIY $3,000-6,000
Plumbing (full bath rough-in + fixtures) Not DIY $6,000-12,000
Flooring (LVP, 1,000 sq ft) $2,500-5,000 $3,500-7,000
Paint and trim $800-1,500 $2,500-5,000
HVAC (supply/return ducts, possibly mini-split) Not DIY $2,000-5,000
Permits and design $800-1,600 $1,000-2,000
Total $7,100-13,300* $26,500-52,500

*DIY total is for materials only on the trades the homeowner can do. Electrical, plumbing, and HVAC must be hired and their professional costs are included in the DIY total. The DIY savings come from framing, insulation, drywall, painting, trim, and flooring.

What 1,000 Square Feet Actually Looks Like

A 1,000-square-foot basement is roughly 25 feet by 40 feet, or 32 feet by 32 feet if square. It is the footprint of a modest two-bedroom apartment. In a finished basement, 1,000 square feet typically divides into:

  • Family room / media area: 400-500 sq ft. The largest open space.
  • Bedroom: 120-150 sq ft. Requires an egress window by code.
  • Full bathroom: 50-70 sq ft. The most expensive square footage in the project.
  • Mechanical / storage room: 80-120 sq ft. Houses the furnace, water heater, and electrical panel. Walls are framed but the room may be left unfinished or finished to a lower standard.
  • Hallway and circulation: 80-120 sq ft. The space between rooms that is often overlooked in floor plan sketches.

What Moves the Total Cost on a 1,000 Sq Ft Basement

  • Adding a bathroom: the single largest line item. A full bath adds $8,000 to $18,000 to the total. Cutting the concrete slab for drain lines, if the basement was not roughed-in, adds $3,000 to $5,000 of that.
  • Moisture remediation before starting: interior drain tile and sump pump cost $4,000 to $10,000 for a 1,000-square-foot basement. This must be paid before any finishing begins. It is not optional if the basement has active water intrusion.
  • Egress window: a single egress window for the bedroom costs $2,500 to $5,000 including cutting the foundation wall and installing the window well. Required by code for any basement bedroom.
  • Ceiling treatment: painting the joists black costs $500 to $1,000. A drop ceiling costs $3,000 to $5,000. Drywalling the ceiling costs $4,000 to $7,000. The ceiling decision alone moves the total by $6,000.
  • Staircase finish: finishing the basement stairs costs $1,500 to $3,000. Leaving them as construction stairs saves that amount and makes the entire basement feel unfinished regardless of what was spent on the rest of the space.

1,000 Sq Ft Cost Comparison: Where the Money Goes

On a mid-range 1,000-square-foot basement finished by a contractor at $38,000, the money breaks down like this: plumbing and bathroom fixtures consume roughly 25 percent of the budget, or $9,500. Drywall consumes 15 percent, or $5,700. Electrical consumes 12 percent, or $4,500. Flooring consumes 12 percent. Framing consumes 10 percent. Paint and trim consume 10 percent. HVAC consumes 8 percent. Insulation consumes 5 percent. Permits and design consume 3 percent. The bathroom is the single largest expense by a wide margin. A basement finished without a bathroom costs roughly $10,000 less than the same basement with a full bath.

Frequently Asked Questions

How much can I save by doing the work myself on a 1,000 sq ft basement?

A homeowner who performs framing, insulation, drywall, painting, trim, and flooring saves $10,000 to $18,000 on a 1,000-square-foot basement compared to hiring a general contractor. The electrical, plumbing, and HVAC must still be hired and their costs do not change. The DIY savings are the labor for the trades that do not require a license. On a mid-range 1,000-square-foot basement, the DIY approach costs $18,000 to $28,000 versus $30,000 to $45,000 for a contractor.

How long does it take to finish a 1,000 sq ft basement?

A general contractor with a full crew finishes a 1,000-square-foot basement in 5 to 7 weeks. A homeowner working weekends finishes the same basement in 4 to 6 months. The difference is that the contractor’s subs work sequential weekdays, while the homeowner’s work is compressed into Saturdays and Sundays with material ordering and subcontractor scheduling filling the weeks between. The electrical and plumbing rough-in are scheduled during weekdays while the homeowner is at work, which keeps the overall calendar moving even though the homeowner is not swinging a hammer every day.

Does a 1,000 sq ft finished basement pay for itself at resale?

A finished basement typically recoups 70 to 75 percent of its cost in increased home value. On a $38,000 mid-range finish, the recouped value at resale is roughly $27,000 to $28,500. The net cost to the homeowner, after accounting for increased home value, is about $10,000. The return is higher in the Midwest and Northeast where basements are standard, and lower in the South and coastal West. A basement with a legal bedroom and bathroom adds more value than an open rec room because it increases the home’s listed bedroom and bathroom count.

Where to Save Money Without Sacrificing Quality

The most effective cost-saving strategies on a 1,000-square-foot basement target the high-cost trades without compromising the finished result. Keep the bathroom location close to the existing plumbing stack. Moving the toilet drain to the opposite side of the basement adds $3,000 to $5,000 in concrete cutting and drain line installation. Use an open floor plan with fewer interior walls. Every interior wall adds 20 to 30 linear feet of framing, drywall, and trim, which adds $500 to $1,000 per wall. Install LVP flooring yourself. LVP clicks together without glue and requires no special tools beyond a utility knife. DIY flooring on 1,000 square feet saves $1,500 to $2,500 in labor. Paint the ceiling joists instead of drywalling the ceiling. The black-painted open ceiling is a deliberate design choice that saves $3,000 to $5,000 and preserves access to plumbing and electrical above.

The Basement That Costs What It Costs

A 1,000-square-foot basement is the sweet spot of basement finishing. It is large enough to add meaningful living space to the home. It is small enough that the cost stays in the five-figure range. The bathroom is the single most expensive decision. Everything else is incremental. The framing costs roughly the same per linear foot whether the room behind it is a bedroom or a storage closet. The difference between a $30,000 basement and a $50,000 basement is the bathroom, the flooring material, the ceiling treatment, and the trim package. The framing underneath is identical. A 1,000-square-foot basement finished at $38,000 with a bathroom adds roughly 700 to 800 square feet of living space to the home for a net cost of about $10,000 after accounting for increased resale value.