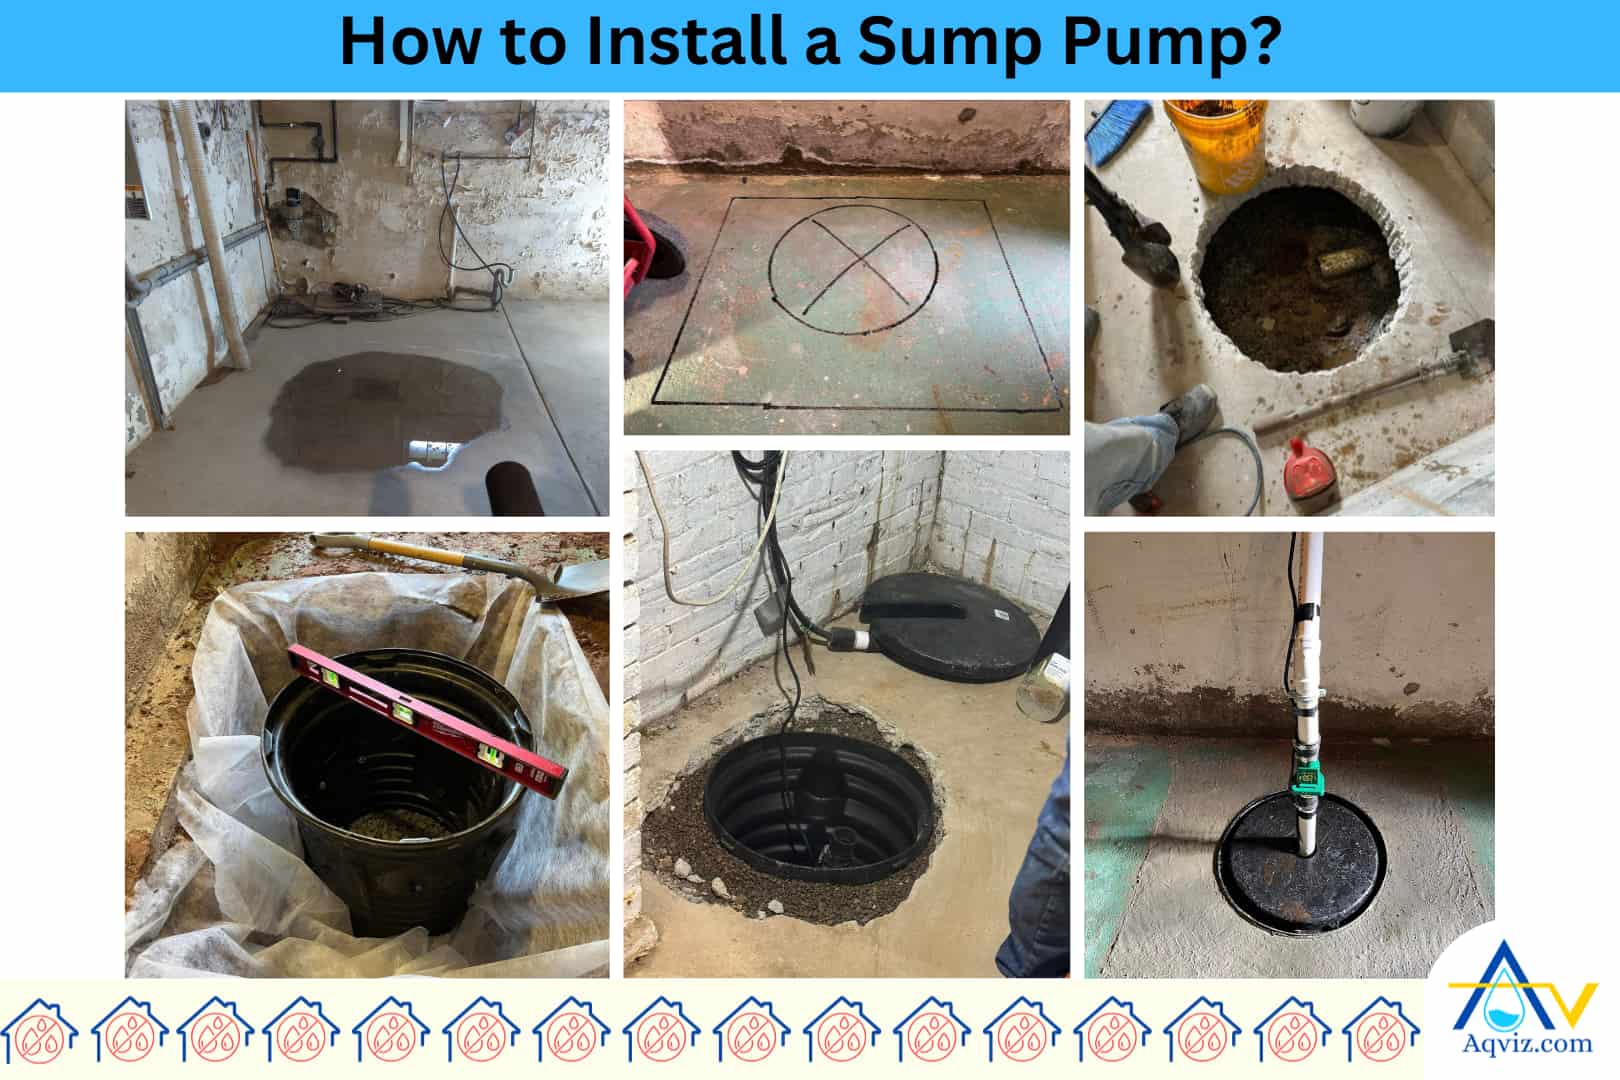
How to Install a Sump Pump?: 10 Step Guide

Sump pump installation is a process of setting up a mechanical sump pump inside a basement or crawlspace to redirect water away from a structure’s foundation. When you install a sump pump, you should follow the step-by-step guide properly. It will increase the installation efficiency and minimize the faults and mistakes as much as possible.
10 Steps for Sump Pump Installations
- Gather relevant tools and materials for sump pump installation
- Identify the lowest point for sump pump installation
- Mark and dig the sump pit
- Install the sump basin (liner)
- Backfill around the sump basin
- Place the sump pump
- Connect the sump pump discharge pipe
- Route sump pump discharge pipe out of the home
- Seal and restore the floor
- Test and power the sump pump system
More than that, when you install a sump pump, you should know its price, when to install, sump pump horsepower, GPH, sump pump type, head height capacity, switch types, and consist of mechanical and electrical knowledge.
After installing the sump pump, you should follow the essential steps mentioned below. We highly recommend that you replace your sump pump if you see continuous failure, wear, and damage signs over time that compromise its ability to manage water effectively.
1. Gather Relevant Tools and Materials for Sump Pump Installation
When you install a sump pump, you will need the following essential tools and key materials throughout the sump pump installation process.
Essential tools for sump pump installation.
- Hammer drill with concrete bits
- Reciprocating saw
- Shovel and trenching spade
- Level and measuring tape
- PVC cutter
- Caulking gun
- Screwdrivers and adjustable wrenches
Key materials include for sump pump installation.
- Submersible or pedestal sump pump
- Sump basin (liner) with cover
- 2″ PVC pipe and fittings
- Check valve and union connector
- Gravel (¾ inch washed)
- Hydraulic cement or concrete mix
- PVC primer and solvent cement
- Electrical GFCI outlet and cord seal
When you install sump pump you should have all of these sump pump parts with you. You can buy all of these as a sump pump kit in the market.
2. Identify the Lowest Point for Sump Pump Installation
The lowest point is the water naturally collected area in the crawlspace or basement due to gravity and slab grading. Installing the sump pump here ensures optimal drainage efficiency and prevents standing water from spreading across the floor or wicking into walls.
To identify the lowest point effectively, Aqviz experts follow the steps below:
Visually inspect the area: When you inspect the area, you can see standing water zones, water stain mark levels, dampness levels, or efflorescence patterns after rain. By using these indicators and observing the floor’s contour, you can determine the ideal location for installing a sump pump.
- Use a laser level: You can use a laser level to check the floor slope direction and find the point where all water settles on the floor.
- Monitor water flow during the hose test: Simulate rainfall using a hose to see where water accumulates most consistently and rapidly in the basement or crawlspace area.
- Walk the floor surface: Some depressions or sunken sections can be felt physically underfoot, especially in older or uneven concrete slabs.
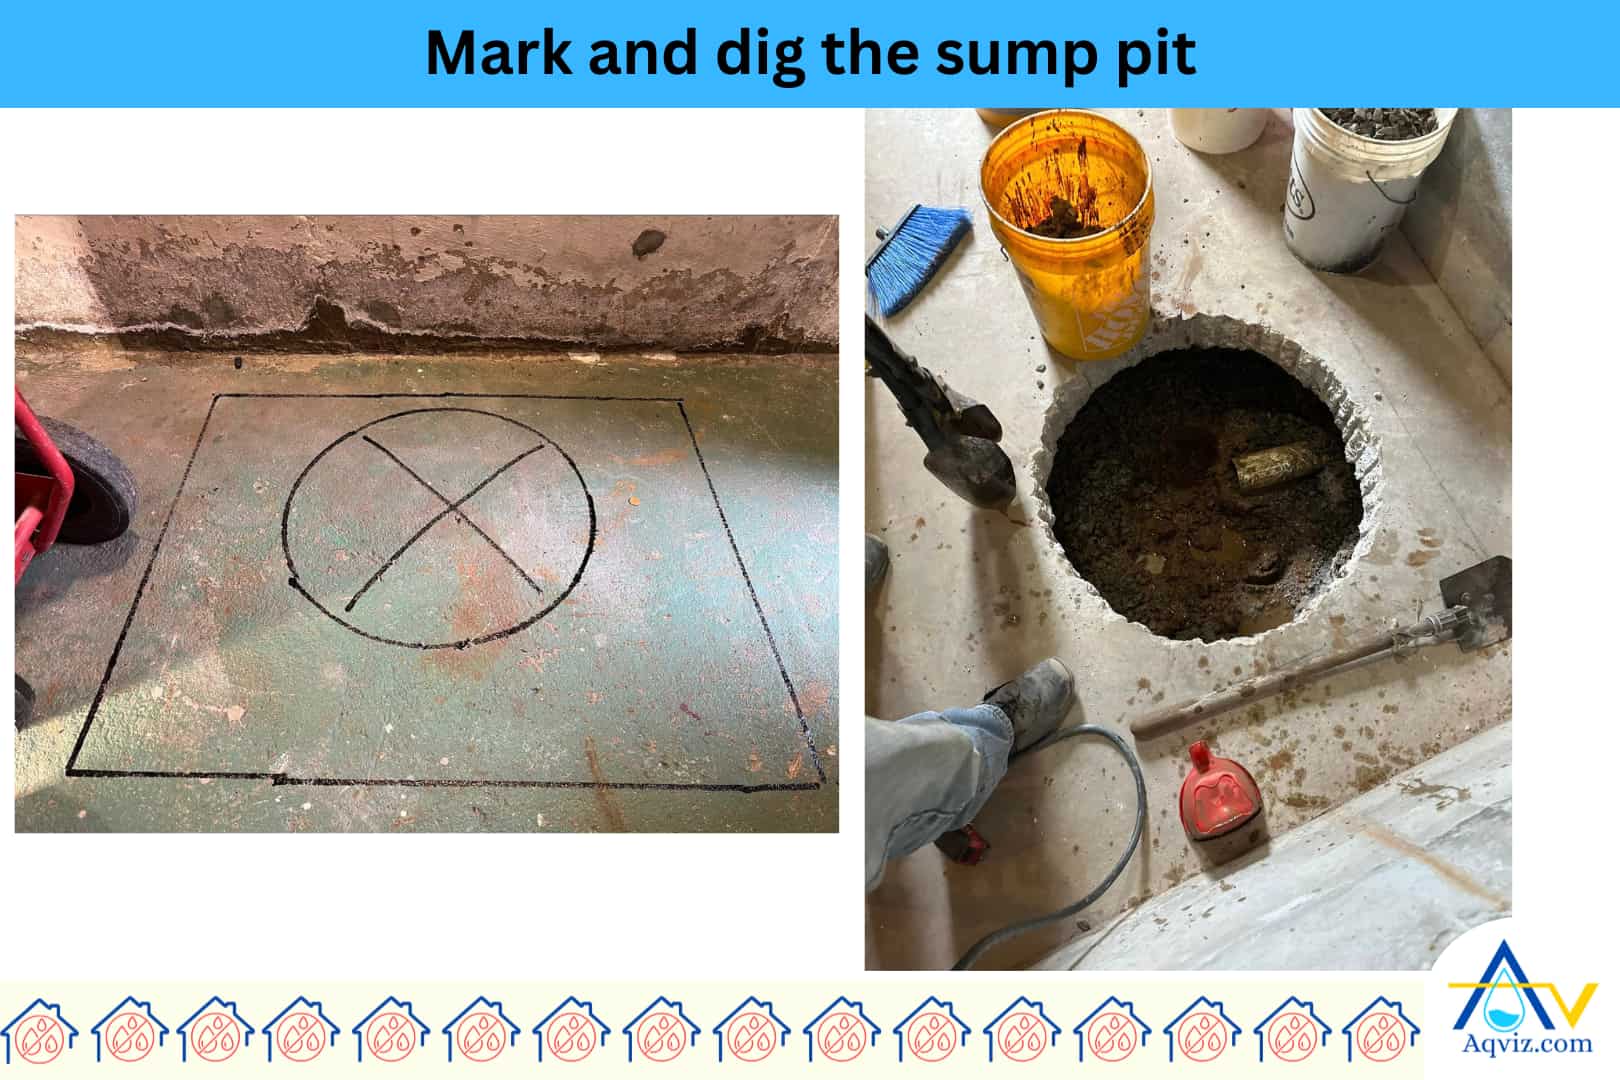
3. Mark and Dig the Sump Pit
Marking and digging the sump pit is the step where you define and excavate the area that will hold the sump basin. This pit must sit exactly on the identified lowest point so the sump pump can efficiently collect and discharge groundwater.
The standard depth of the sump pit should be 24 to 30 inches (60 to 76 cm), with a diameter of 18 to 24 inches (45 to 60 cm), depending on the sump basin size. Use chalk or masking tape to outline the circular pit on the concrete floor, then break the slab using a hammer drill and a masonry chisel.
Shovel out the soil and concrete debris carefully. Always place the excavated soil from the sump pump and rubble onto a tarp or inside buckets to keep the workspace clean and reusable. You can use the clean soil later for backfilling around the sump pump basin if needed. Avoid dumping it directly onto finished surfaces, as wet clay or fine sediment can stain or clog drainage paths in the basement.
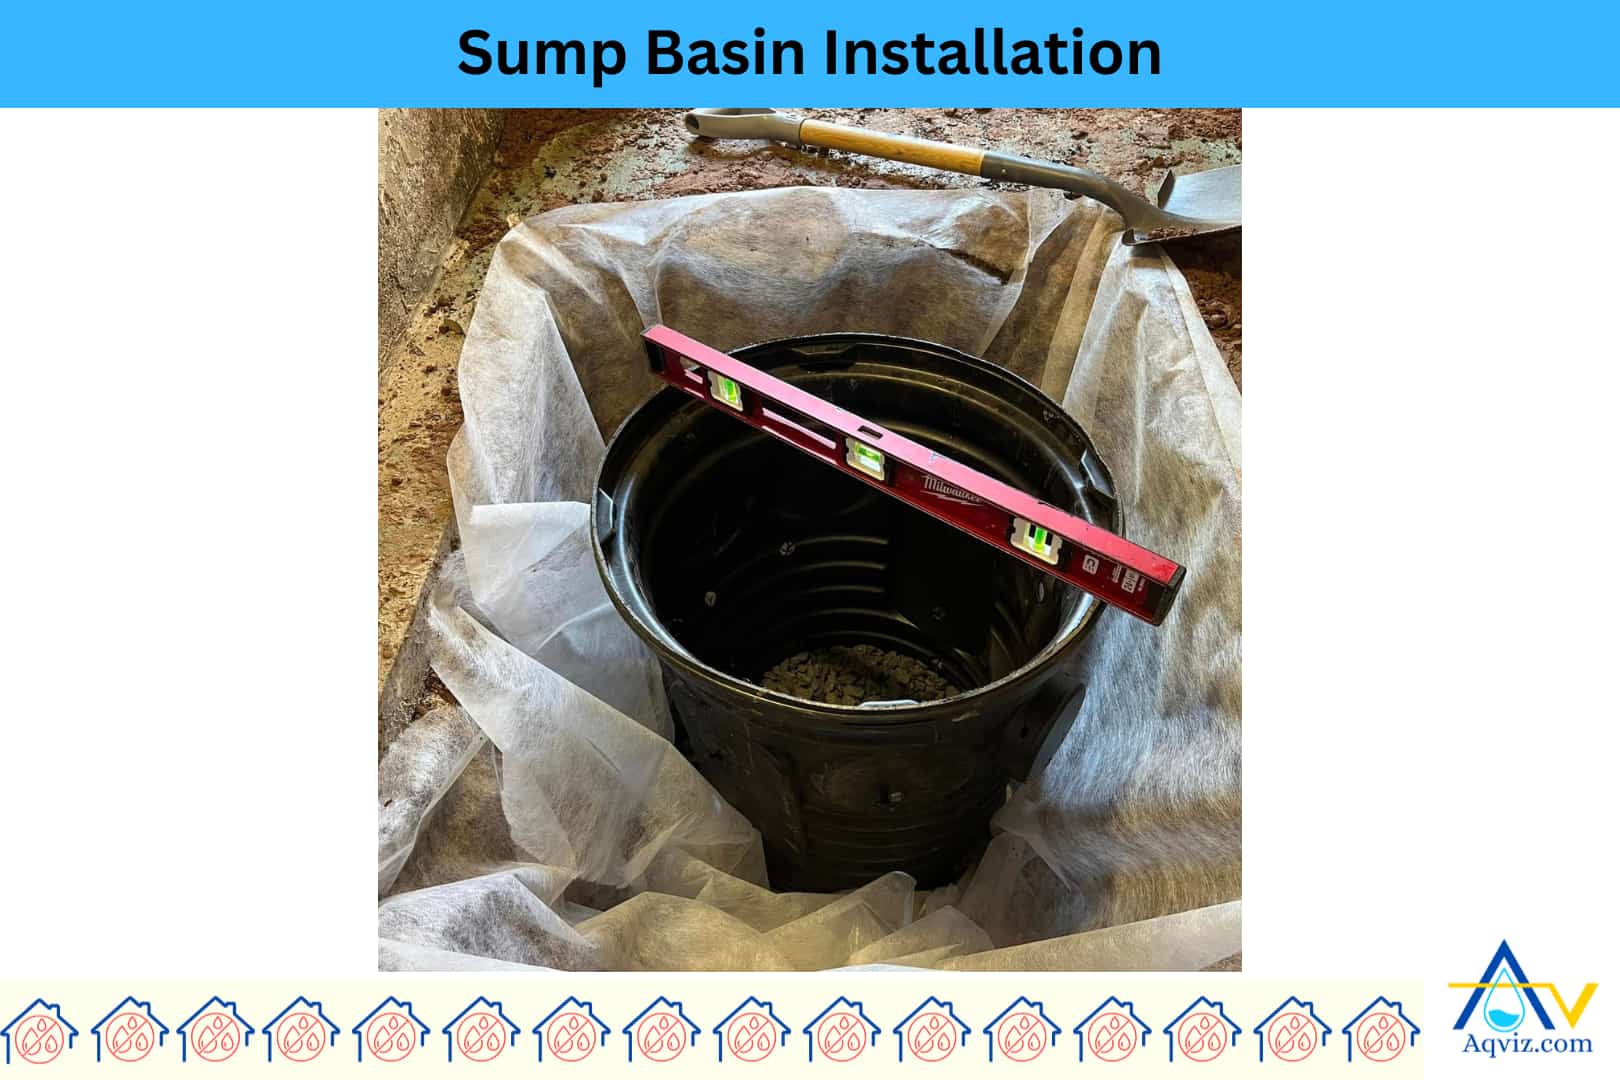
4. Install the Sump Basin (Liner)
Installing the sump basin is the process of placing a durable container into the dug pit to house the sump pump and collect groundwater. The sump basin keeps soil from collapsing into the hole and ensures proper water collection and pump positioning.
Use a heavy-duty perforated plastic sump basin made of polyethylene or polypropylene, which resists corrosion, cracking, and hydrostatic pressure. You should use a sump basin with 18-24 inches (45-60 cm) in diameter and 24-30 inches (60-76 cm) deep, with built-in weep holes to allow groundwater entry.
Lower the sump basin into the pit so that its top edge sits flush or just below the concrete floor level. Make sure it’s level and stable. If the sump basin floats due to a high water table, place 4-6 inches (10-15 cm) of clean ¾-inch gravel at the base before setting it. Rotate the liner if necessary so the discharge hole aligns with your planned pipe route.
5. Backfill Around the Sump Basin
Backfilling around the sump basin is the process of filling the gap between the sump liner and the surrounding soil or concrete edge to secure the basin in place and support water drainage. Proper sump basing backfilling ensures structural stability and allows water to flow freely into the basin without clogging its holes.
Use clean, washed ¾-inch (19 mm) angular gravel aggregate as the backfilling material for the sump pump basin. This type of gravel prevents soil intrusion, allows water to pass easily, and supports the sump basin evenly. Avoid using sand or unwashed stone as the sump basin material because when they compact, they can clog the weep holes.
Fill the gravel around the sump basin evenly. It should be up to 2-3 inches (5-8 cm) below the floor surface. Use a hand tamper or the back of a shovel to lightly compact the gravel as you go. This creates a stable setting for concrete patching later and prevents sump basin shifting under hydrostatic pressure over time.
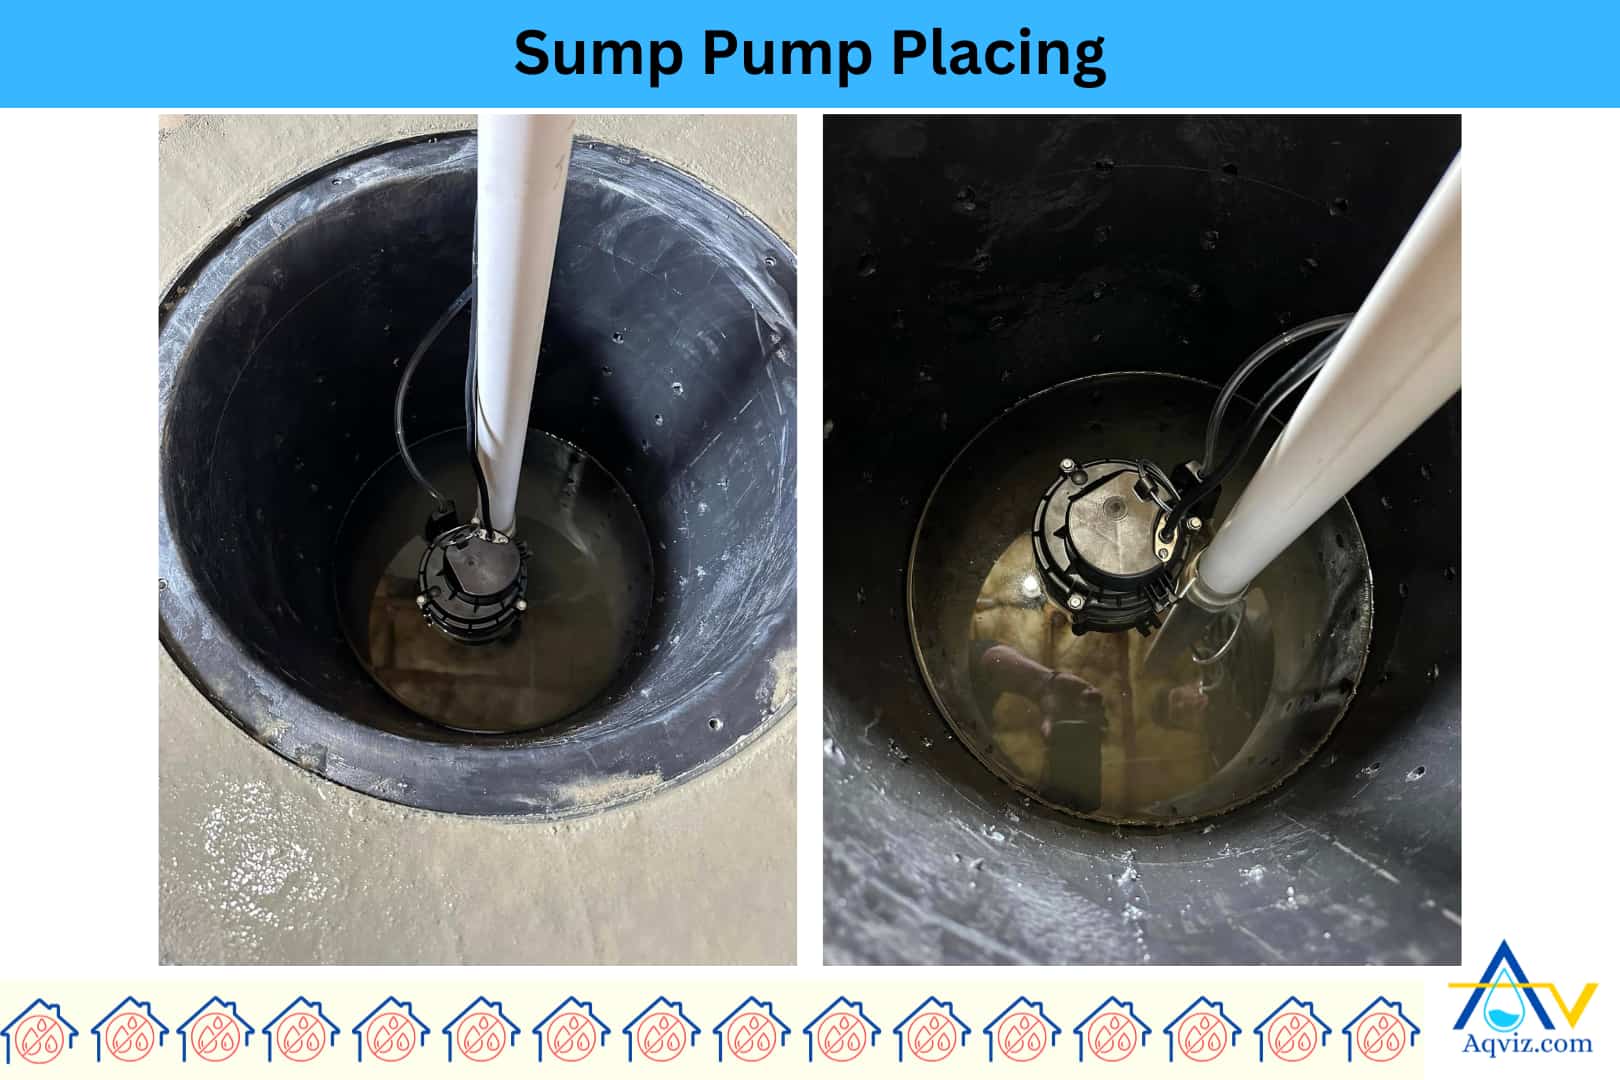
6. Place the Sump Pump
Placing the sump pump is the step where you position the pump inside the installed basin to ensure it operates correctly and efficiently moves water away from the foundation. The pump should sit on a solid, level base. You can use a pump stand or a layer of flat concrete paver to elevate it slightly above any sediment that may settle at the bottom.
Then rotate the pump so the discharge port faces the intended pipe outlet, typically aligned at a 90-degree angle for efficient water flow and minimal pipe bending. Make sure the float switch moves freely without touching the basin walls. The sump pump must remain perfectly vertical to prevent vibration, poor activation, or failure.
Sump pumps are mainly two types according to their size and placement.
- Submersible pumps: Submersible sump pumps are fully sealed and sit inside the basin under water. Submersible sump pumps are ideal for high-volume drainage and quieter operation.
- Pedestal pumps: Pedestal sump pumps motor stay above the basin while the impeller sits in the water. Pedestal sump pumps are easier to service but noisier and less powerful.
Aqviz experts have prepared a complete guide to select the types of sump pumps with including all the information. It helps to determine the horsepower, GPH, head high capacity, switch types, and more. We highly recommend you to refer to this before choosing a sump pump type.
This sump pump calculator helps you to determine the size and capacity of the sump pump.
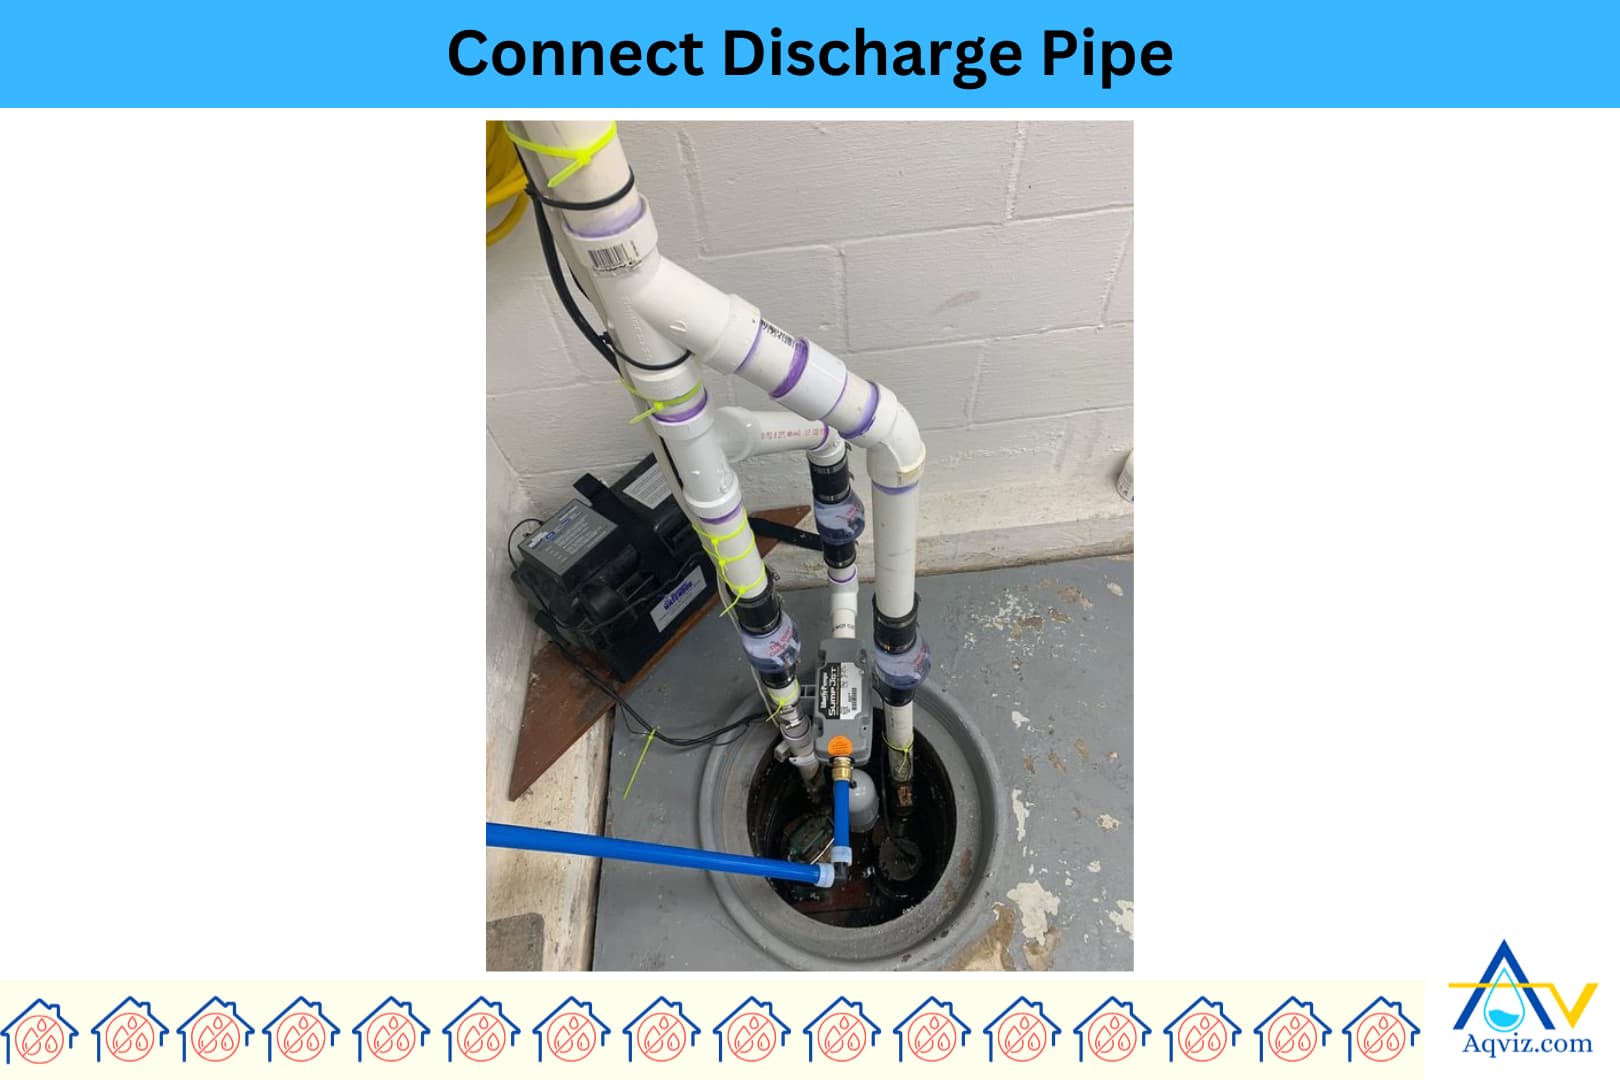
7. Connect the Sump Pump Discharge Pipe
The sump pump discharge pipe is the outlet line that carries water from the sump pump to the exterior drainage point. A properly connected cump pump discharge pipe ensures efficient water flow, prevents clogs, and avoids pump overworking due to backpressure or blockages when it is running.
To connect, you can use a rigid 1½-inch or 2-inch diameter PVC pipe, which is durable, corrosion-resistant, and easy to seal. The sump pump pipe should connect securely to the pump’s discharge port using a threaded male adapter and PVC union fitting for easy maintenance or replacement. Always install a check valve within 12-18 inches (30-45 cm) above the pump to stop backflow and water hammering when the pump shuts off.
Keep the sump pump discharge pipe as short and straight as possible, with smooth bends using sweep elbows instead of sharp 90° turns to reduce friction loss. Glue each joint with PVC primer and solvent cement to create a watertight connection. Make sure the sump pump pipe runs upward from the pump and clears the basin lid and heads toward the wall exit or external drainage route.
8. Route Sump Pump Discharge Pipe Out of the Home
Routing the sump pump discharge pipe out of the home is the process of extending the interior discharge pipe to the outside, where it can safely release water away from the foundation. This step prevents re-entry of discharged water and avoids soil erosion or foundation saturation.
In this step you can use a 1½-inch or 2-inch diameter PVC pipe to match the interior discharge line. The pipe should extend at least 10 feet (3 meters) away from the home’s foundation to avoid water pooling near the structure. Connect the interior pipe to an exterior section using a sealed wall penetration by drilling a hole through the rim joist or concrete wall. It should be slightly sloped downward for gravity drainage.
Seal the sump pump discharge pipe opening using hydraulic cement for concrete walls or a foam gasket and exterior-grade caulk for wood framing. On the outside, direct the discharge into a downspout extension, bubbler pot, French drain, or daylight outlet. Always maintain a continuous slope of at least 1/8 inch per foot (1%) to promote flow and reduce freeze risks. Use a splash block or freeze-resistant extension to manage runoff and prevent backwash during winter.
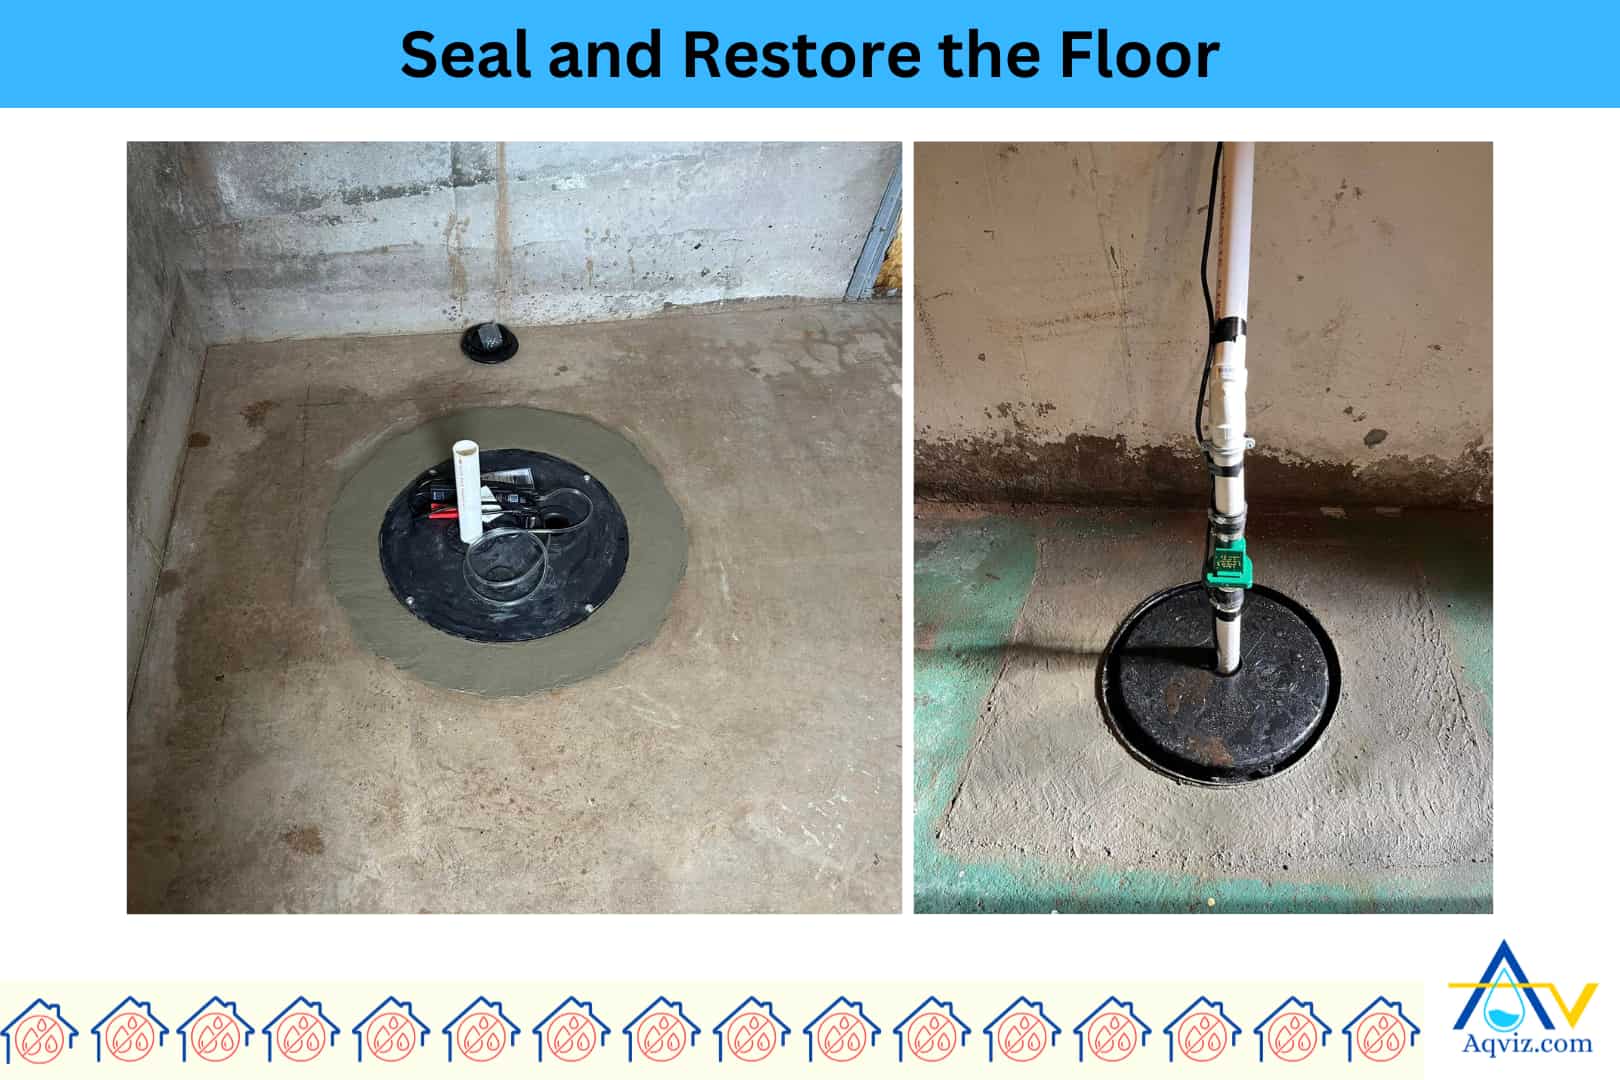
9. Seal and Restore the Floor
Sealing and restoring the floor is the final step after sump pump installation. It helps to restore structural integrity and prevent water vapor intrusion over time. A properly sealed floor protects the sump basin, reduces radon entry, and enhances basement usability.
To seal the sump basin, you can use fast-setting concrete mix or hydraulic cement to patch around the sump basin. First, clean the edges of the pit, then mix the concrete to a firm consistency and pour it up to the existing slab height. Smooth the surface using a trowel for an even finish. Then allow it to cure for 24 to 48 hours, depending on the product.
If the floor is not sealed correctly, moisture, soil gases, and insects can enter through the gaps. It may also cause concrete to crack, sink, or deteriorate over time. Sealing also prevents surface water from entering the sump pit unintentionally, which could overwork the sump pump and reduce its lifespan over time.
10. Test and Power the Sump Pump System
Testing and powering the sump pump system is a critical step to confirm that the unit activates properly, discharges water efficiently, and responds to rising water levels. A properly tested sump pump system prevents unexpected failure during heavy rain, plumbing leaks, or groundwater surges.
After plugging the sump pump into a GFCI-protected outlet, slowly pour 4-5 gallons (15-19 liters) of clean water into the basin. Watch for the float switch activation, the pump startup, and a steady discharge through the pipe. Then you should verify that the check valve closes properly when the pump stops to prevent backflow.
Also, test the alarm (if equipped) and ensure the sump pump resets correctly after each cycle. Regular sump pump testing helps identify issues early, such as a stuck switch, airlock, or discharge blockage. Always keep the sump pump power cord secure and avoid using extension cords, as voltage drops can reduce pump performance.
What Should You Know Before Installing a Sump Pump?
Before installing a sump pump, it’s important to understand several technical and environmental factors that affect performance, longevity, and safety. Here are 10 key things you should know.
- Identify the lowest point for the sump pump installation
- Check the water table level
- Test existing drainage systems
- Choose the right sump pump type
- Evaluate the sump pump discharge location
- Confirm the electrical supply for the sump pump
- Measure sump pit dimensions
- Plan for backup sump pump options
- Know about building codes
- Know about essential maintenance and repairs for the sump pump
What is the Price for Sump Pump Installation?
The price for sump pump installation typically ranges from $450 to $1,800 in the U.S., depending on pump type, site conditions, and labor complexity. For standard installations with a ½ HP submersible pump, sump basin, check valve, and basic discharge setup, homeowners usually pay around $1,200 on average.
The cost for the sump pump installation depends on the
- Sump pump type: Submersible pumps cost more than pedestal models due to power and sealing
- Excavation difficulty: Thick concrete slabs or poor access increase labor time
- Sump pump discharge routing: Long discharge lines or frozen ground require extra fittings and trenching
- Backup sump pump systems: Adding battery or water-powered backups adds $300-$1,000
- Electrical upgrades: Installing new GFCI outlets or circuit breakers increases overall expense
When to Install a Sump Pump?
The best time to install a sump pump is during dry seasons like late spring, summer, or early fall, when the water table is lower and excavation is easier. These conditions reduce the risk of groundwater flooding the pit during installation and allow concrete to cure properly around the sump basin.
You should avoid installing a sump pump during heavy rain periods or winter, as frozen ground, saturated soil, and active leaks can delay the process or cause immediate flooding. Ideally, plan the installation before the wet season starts, especially if you’ve noticed dampness, musty odors, or water seepage during the previous winter or spring. Acting proactively protects your basement before the next heavy rain or snowmelt season.
What Should You Do After Installing a Sump Pump?
After installing a sump pump, these 8 things you should do.
- Pour water into the basin to ensure the float switch activates and water discharges correctly.
- Confirm that it closes properly to prevent backflow after the pump shuts off.
- Use a gasketed or airtight lid to block debris, moisture, and radon gas.
- Ensure water flows away from the foundation and doesn’t pool or freeze.
- Mark the dedicated GFCI outlet or breaker for easy access.
- Remove leftover dirt, concrete, or tools from the pit area.
- Record the pump model, install date, and service schedule for future reference.
- Plan seasonal inspections and cleanings to keep the system running efficiently.
When to Replace a Sump Pump?
You should replace a sump pump when it shows signs of failure, wear, or damage that compromise its ability to manage water effectively. Most sump pumps last 7 to 10 years, but harsh conditions or poor maintenance can shorten their lifespan.
You should replace the sump pump when you see the below severe problems such as
- Frequent cycling or failure to turn on the pump
- Strange noises or vibrations from the pump
- Rust on the pump housing or float
- Constant sump pump clogging
- Water is not discharging from the pipe
- Visible cracks or oil leaks from the sump pump
- Flooding during sump pump operation
Read More About:
What are the Essential Sump Pump Maintenance and Repairs?
Here is the list of essential sump pump maintenance and repair steps.
Essential maintenance for the sump pump
- Test the pump quarterly
- Clean the basin and pump inlet
- Inspect and clean the float switch
- Check the check valve
- Flush the discharge line
- Examine the power supply and GFCI outlet
Common sump pump repairs
- Replace a stuck or faulty float switch
- Repair or replace a failed check valve
- Seal leaks in discharge pipes or the basin lid
- Fix clogged or frozen discharge lines
- Replace a burnt-out motor or impeller
Can you Install a Sump Pump DIY?
Yes, you can install a sump pump as a DIY project if you have solid plumbing, electrical, and concrete cutting skills. DIY sump pump installation can save on labor costs, but it requires precise planning, safe tool use, and full knowledge of water drainage principles.
You’ll need to handle tasks like locating the lowest point, digging the pit, installing the basin, routing discharge lines, and sealing the floor. You should avoid mistakes like incorrect slope, poor sealing, or faulty wiring because these can lead to flooding, electrical hazards, or premature pump failure.
If you’re unsure about any step, please contact Aqviz experts. We will help you to do it smoothly.