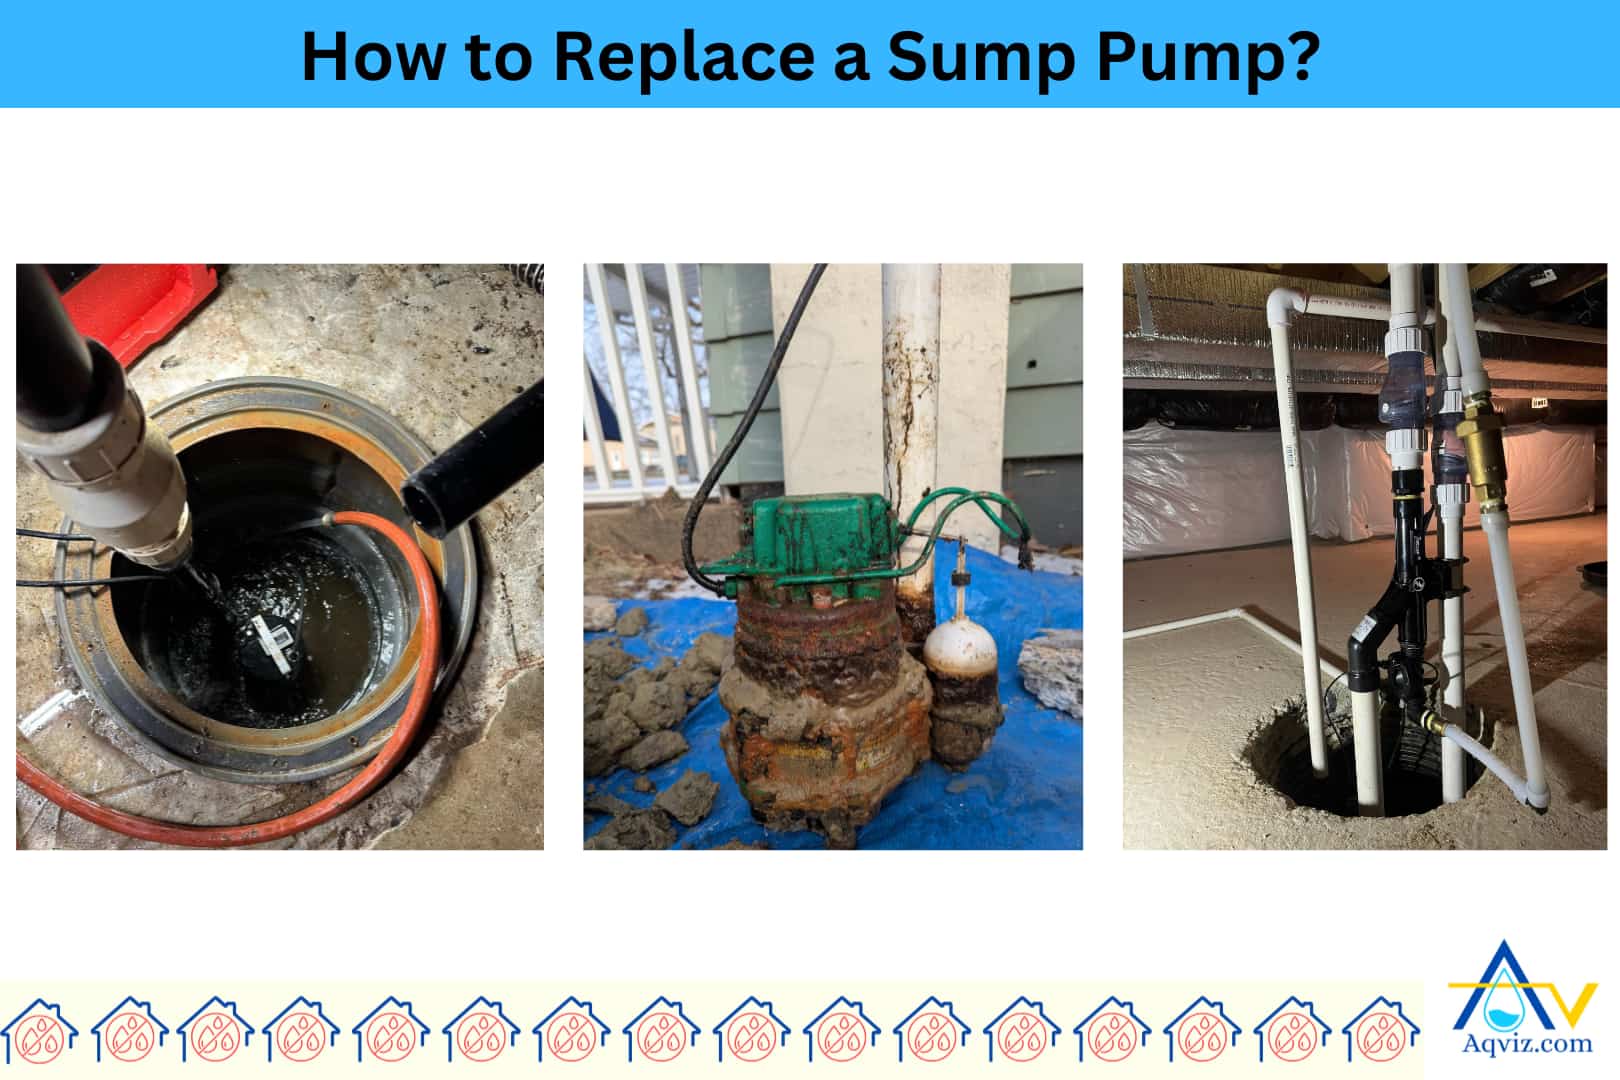
How to Replace a Sump Pump? 7 Step Guide

Sump pump replacement is essential when there is a critical mechanical problem, unable to handle the water flow, or after 7-10 years of installation. So, when you replace a sump pump, you should follow these steps.
7 steps to replace a sump pump
- Unplug the sump pump & disconnect the power
- Remove the old sump pump
- Inspect and clean the sump pit
- Prepare the new sump pump
- Secure all sump pump connections
- Restore power and run a water test
- Final checks the sump pump and replace the cover
More than that, you will need suitable tools and materials for the sump pump replacement process. When you replace sump pump, it will take 1 to 2 hours for a standard installation with accessible components and proper tools.
Aqviz experts recommend that you conduct essential maintenance and repairs after it is installed to ensure the sump pump’s long life. So, contact Aqviz customer service for more support during your installation process. We are available 24/7.
7 Steps to Replace a Sump Pump
- Unplug the sump pump & disconnect the power
- Remove the old sump pump
- Inspect and clean the sump pit
- Prepare the new sump pump
- Secure all sump pump connections
- Restore power and run a water test
- Final checks the sump pump and replace the cover
1. Unplug the Sump Pump & Disconnect the Power
First things first, you should unplug the sump pump from its main power source: If it’s connected to a typical 120V domestic outlet, carefully remove the plug with dry hands.
If the system has a battery backup, disconnect the battery by removing the terminals using an insulated tool, or switch off the unit entirely. For hardwired systems, locate the correct breaker at the electrical panel and switch it off. Always double-check that no power is flowing before proceeding.
To confirm the sump pump is fully disconnected, pour a bucket of water into the sump pit. If the pump stays inactive and silent, it’s safe to begin the replacement. We highly recommend disconnecting the power and keeping all power supply wires away from the sump pit area to avoid electrical hazards and accidental activation during the process.
Before replacing a sump pump, you should choose the best sump pump for your project. First you should calculate the sump pump size using our sump pump calculator and then choose the best some pump among these 7 best sump pumps .
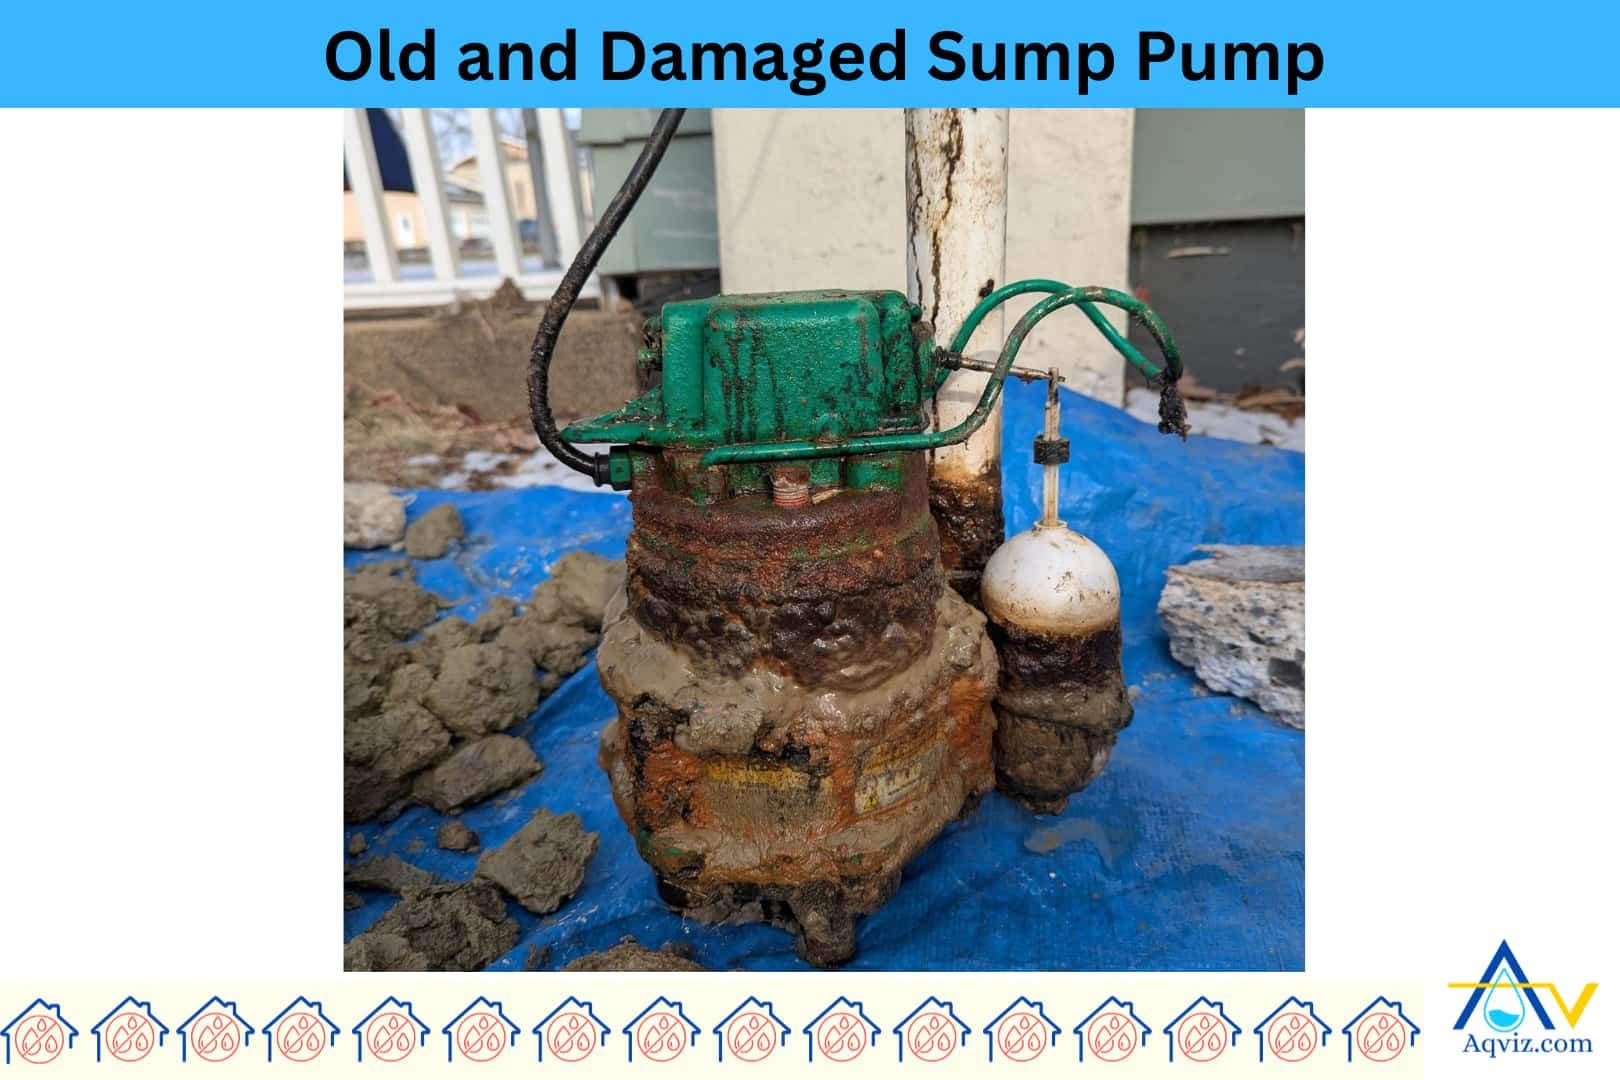
2. Remove the Old Pump
Next, you should remove the old sump pump, disconnect all attached plumbing connections. Start with the discharge pipe, usually secured with a check valve or a slip coupling.
In this step, you can use a pipe wrench or adjustable pliers to loosen clamps or fittings. Also, if the sump pump has a float switch or sensor wire connected to a control unit, carefully detach it to avoid damaging the controls.
Then lift the sump pump straight up by the handle or housing. Avoid tilting it too much since old water and debris may spill back into the pit.
If you carelessly remove the old sump pump, the discharge pipe threads, check valve, or even the pit liner can crack or misalign, leading to future leaks or malfunction. Hence, you should handle all parts gently to avoid extra repair work during replacement.
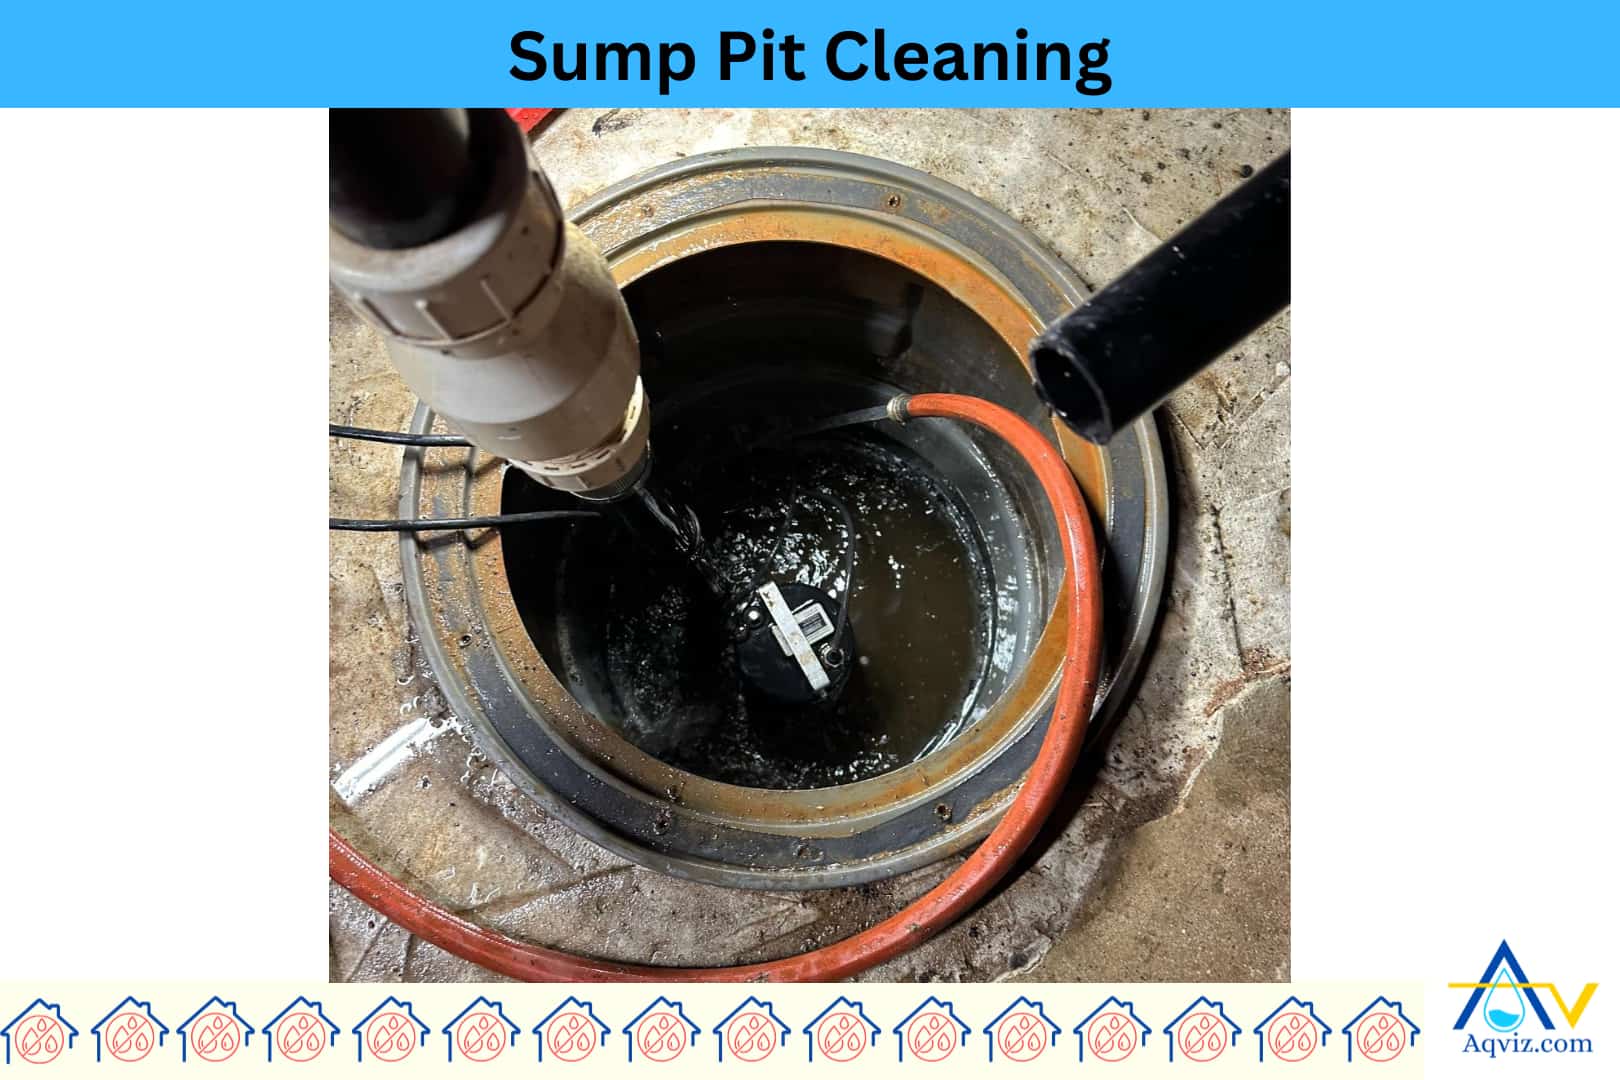
3. Inspect and Clean the Sump Pit
Before installing the new unit, carefully inspect the sump pit for any debris, buildup, or structural issues. You should look for sediment, gravel, silt, or remnants of old pump parts that may block water flow or clog the new pump.
And also, you should check the pit walls and bottom for signs of cracks or erosion. You should ensure the pit base is level and stable because an uneven bottom can cause the new sump pump to tilt, vibrate, or fail prematurely.
To clean the sump pit, use a wet/dry vacuum, a small plastic bucket, or a handheld scoop to remove standing water and debris. Scrub the pit walls and base with a stiff brush to clear algae or sludge buildup. If necessary, rinse it with a hose and immediately remove excess water with the vacuum.
Use a level or straightedge to check that the bottom surface is flat and solid. If the pit liner has shifted or eroded, level it using a small layer of gravel (0.5-1 inch) to create a stable, even base for the new pump.
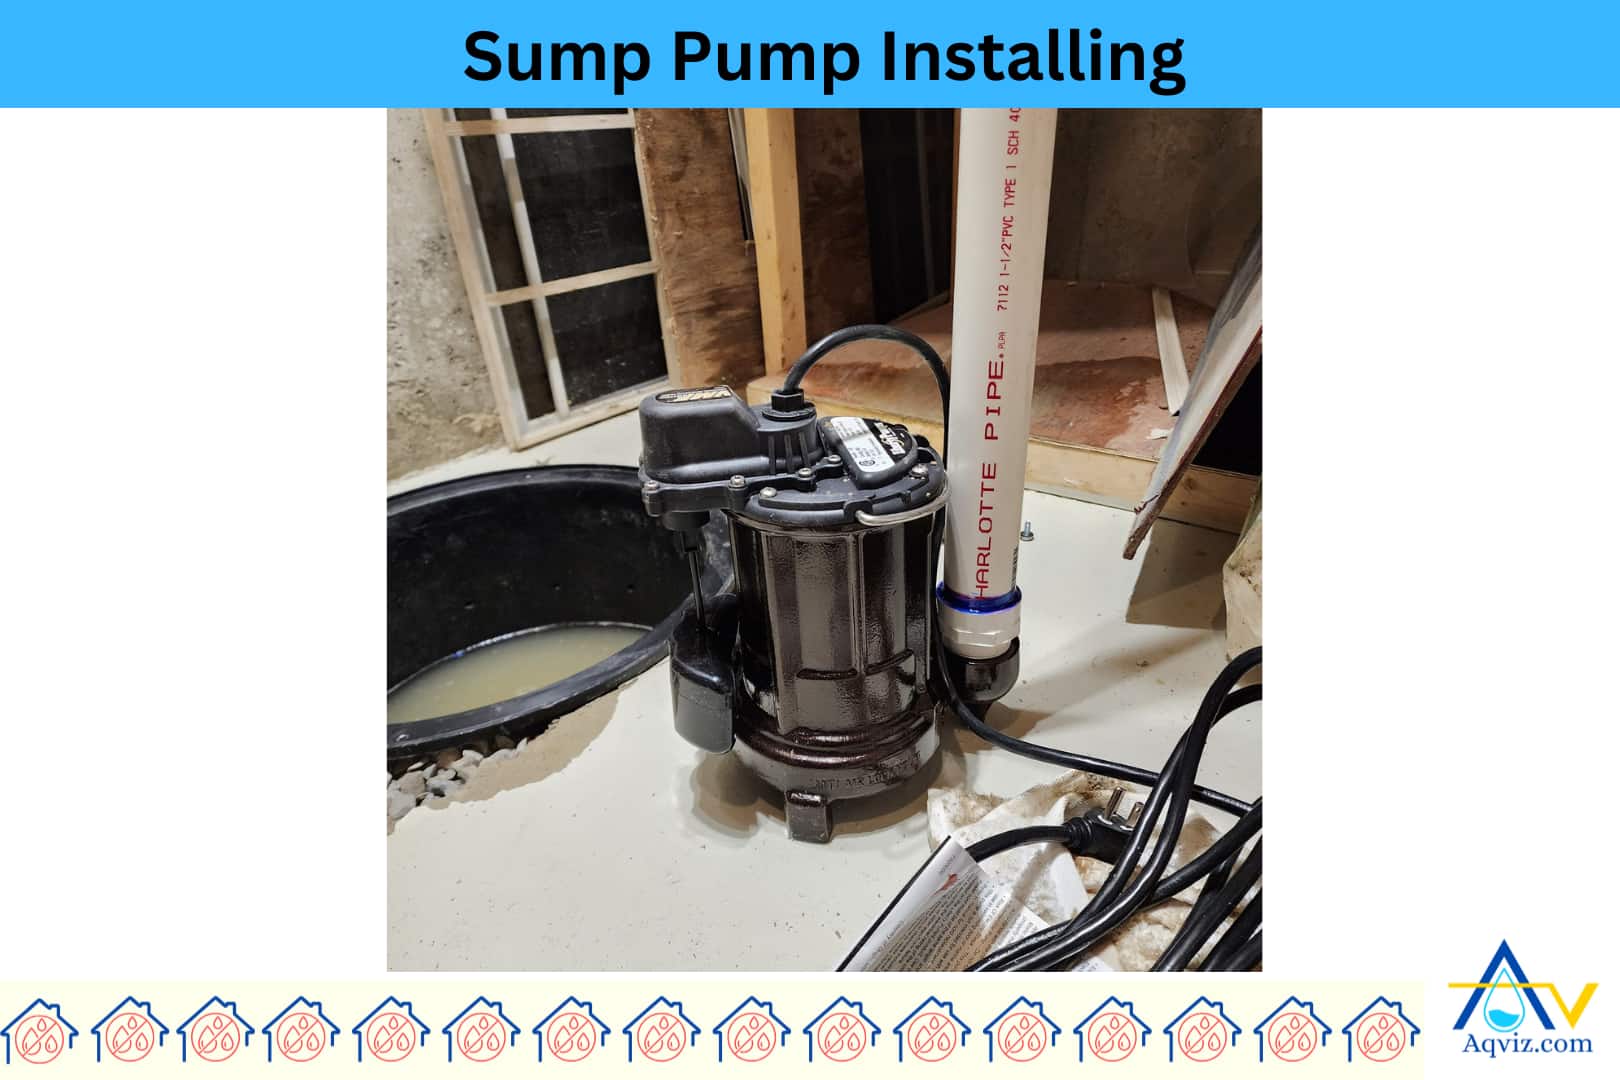
4. Prepare the New Sump Pump
To prepare the new sump pump for installation, start by attaching the discharge pipe to the pump outlet.
Use a PVC male adapter or threaded fitting. But it depends on your pump model. You should secure it tightly using a pipe wrench.
Apply PTFE thread seal tape (Teflon tape) to the threads to prevent leaks. Then connect the check valve above the discharge line. You should ensure the flow arrow points upward to block water from flowing back into the pit.
If your system uses a backup battery pump, mount it on a separate platform beside or above the main unit.
Install the float switch or tether switch as per the manufacturer’s instructions. You should ensure it moves freely without touching the pit wall. Secure all electrical cords and wires using zip ties or clips to prevent tangling during operation.
Test-fit all components to verify alignment before lowering the pump into the pit. Keep tools like pliers, Teflon tape, PVC cutter, and a level handy to make final adjustments and connections with precision.
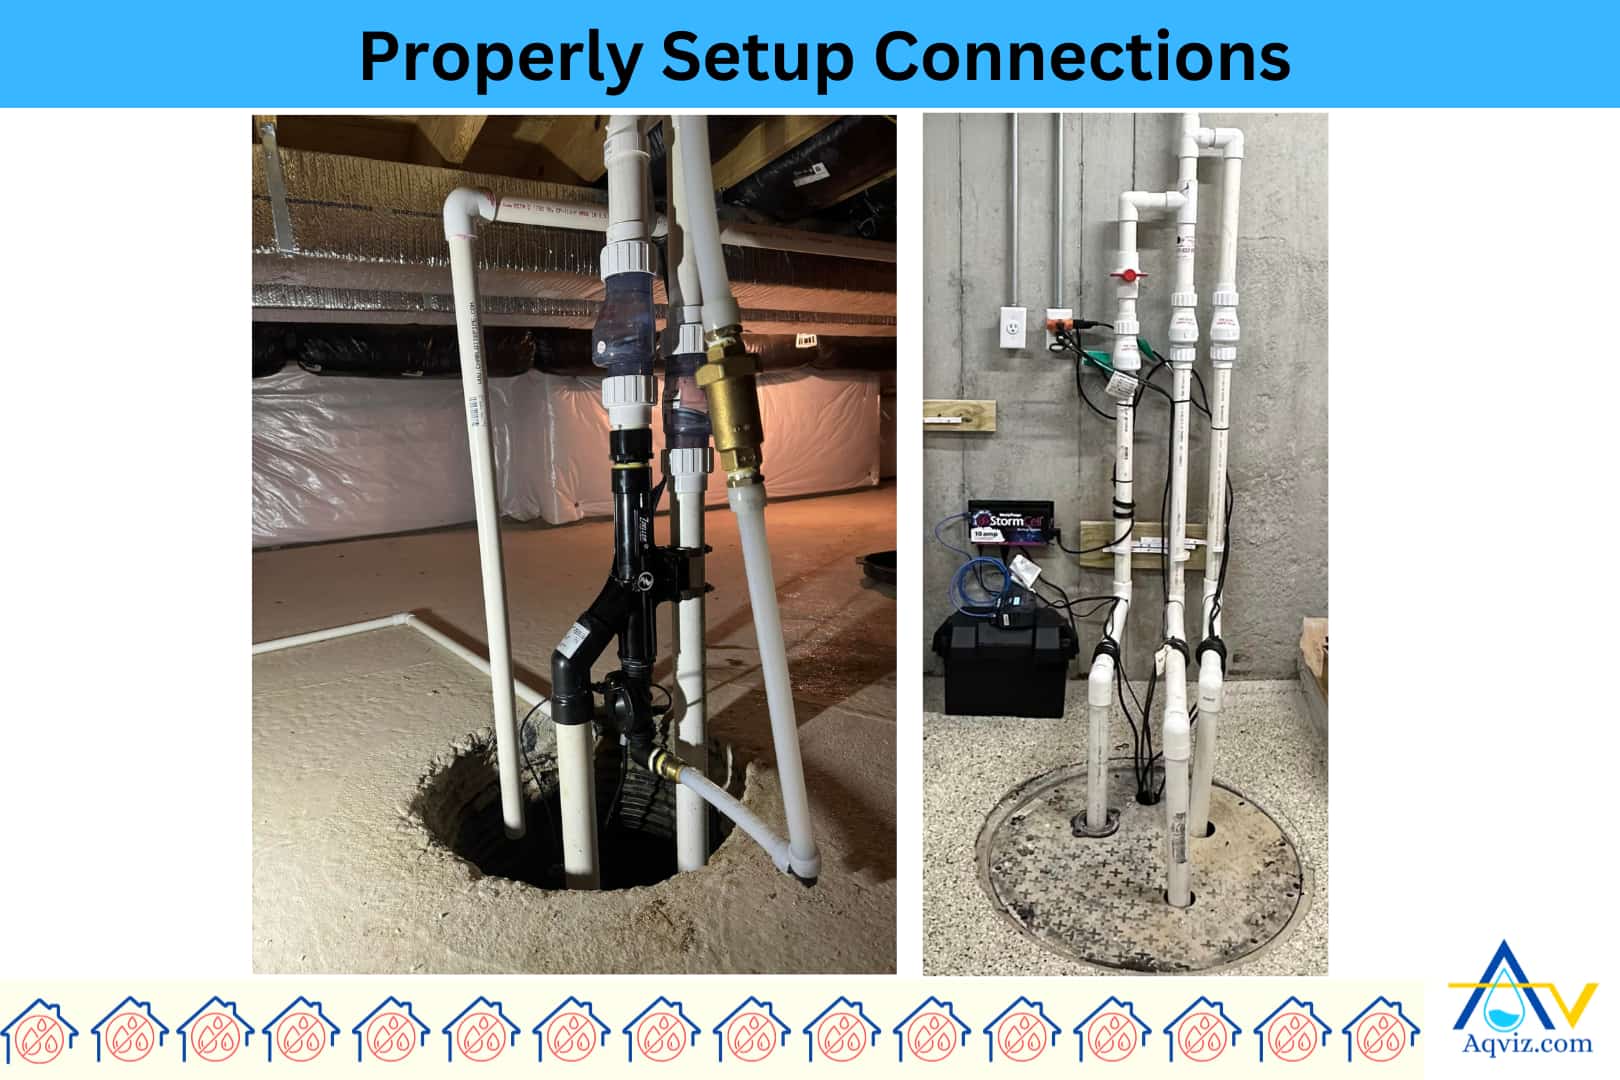
5. Secure All Sump Pump Connections
Once the new sump pump is in position, begin securing all plumbing and electrical connections. You should start with the discharge pipe. You should tighten the threaded fitting or PVC coupling to the pump outlet using a pipe wrench. Then make sure the Teflon tape is properly sealed without overlaps or gaps.
Next, secure the check valve between vertical pipe sections. You should confirm that the flow direction arrow faces upward. Then you should use stainless steel hose clamps or solvent weld joints for a leakproof seal.
At the end, you should ensure the float switch or sensor wire is connected firmly and positioned to operate without obstruction. Pull slightly on each connection to check for movement or looseness.
To determine if the connections are secure, manually pour a bucket of water into the pit and observe for any leaks, backflow, or shifting. If everything remains steady, dry, and responsive, your sump pump connections are properly sealed and secure for operation.
6. Restore Power and Run a Water Test
Here you are in the last step. After securing all components, restore power to the sump pump system.
If it uses a standard wall outlet, plug it back in with dry hands. For hardwired units, switch the correct breaker back on at the main panel.
Then reconnect the battery backup system, ensuring both terminals are secure and the indicator light is active.
Now pour at least 5-10 gallons (19-38 liters) of clean water into the sump pit to raise the float. The sump pump should activate automatically, discharge water smoothly through the pipe, and shut off once the pit is emptied.
You should observe the check valve for backflow, listen for unusual noises, and check the discharge area outside to confirm proper drainage.
A successful sump pump test verifies float function, pump activation, and watertight plumbing before sealing the system.
7. Final Checks and Replace the Cover
Here you are in the last step. Before you seal and close the installation, perform a full round of final checks.
Confirm that the float switch moves freely without touching the pit wall or discharge pipe. Verify the sump pump shuts off at the correct water level and doesn’t short-cycle.
Inspect all plumbing joints and the check valve for leaks during and after the water test. Make sure the pump sits level and stable at the bottom of the pit without shifting or tilting during operation.
Once everything functions correctly, replace the sump pit cover securely. If your system includes a sealed or gasketed lid, align it properly and fasten any screws or latches.
For open pits, ensure the cover is snug and prevents debris or pests from entering. Reattach any vent lines or electrical cord cutouts as needed. A proper cover maintains cleanliness, keeps the pit safe, and helps control humidity and odors in the basement or crawl space.
What Tools and Materials Are Needed for Sump Pump Replacement?
To replace a sump pump safely and efficiently, gather all essential tools and materials before starting. You should have below tools and materials for the sump pump replacement project.
Tools needed for a sump pump replacement
- A pipe wrench or channel-lock pliers
- Flathead and Phillips screwdrivers
- Utility knife
- Wet/dry vacuum
- PVC pipe cutter or hacksaw
- Level or straightedge
- Measuring tape
- Bucket or small scoop
- Cordless drill (for sealed lids or brackets)
- Insulated wrench (for battery terminals)
Read More About: 20 Sump Pump Parts: Install, Repair and Replace
Materials needed for a sump pump replacement
- New sump pump (primary and optional backup)
- PVC discharge pipe (usually 1 1/4” or 1 1/2”)
- Check valve with clamps or unions
- PTFE thread seal tape (Teflon tape)
- Zip ties or cable clips
- Gravel (0.5-1 inch for leveling base)
- Gasket or sealed sump cover (if applicable)
- Battery backup system (optional)
- Replacement fittings and couplings
When Should You Replace the Sump Pump?
You should replace the sump pump if it shows consistent performance failures or physical deterioration that affects drainage.
The most common sign for sump pump replacement is frequent cycling or failure to shut off, which usually points to a faulty float switch or worn-out internal components. If the pump runs but doesn’t remove water, the impeller or motor may be damaged.
More than that there are other key issues, including strange noises, excessive vibration, or a burning smell during operation.
If the pump is over 7-10 years old, corrosion, motor burnout, or outdated capacity can also justify a full replacement.
Replacing a failing sump pump before it completely breaks down helps prevent basement flooding, water damage, and mold growth.
Read More About: 6 Signs of Sump Pump Failures: Reasons and What to Do?
How Long Does It Take to Replace a Sump Pump?
Replacing a sump pump typically takes 1 to 2 hours for a standard installation with accessible components and proper tools. This includes unplugging, removal, inspection, installation, connection, testing, and sealing. Experienced homeowners or contractors with prepared materials can often complete the task faster.
However, several factors can increase the time. If the discharge pipe needs cutting or replacing, if the pit is full of debris, or if the old pump is corroded or jammed, expect an extra 30–60 minutes. Installing a battery backup, sealed lid system, or new check valve assembly can also extend the job beyond 2.5 hours.
How Often Should I Replace the Sump Pump?
You should replace a properly functioning sump pump every 7 to 10 years, even if it seems to be working well. Over time, internal parts of the sump pump, like the motor bearings, float switch, and impeller, wear out, reducing efficiency and increasing the risk of failure during heavy rain events.
If your home is in an area with high annual rainfall, a rising water table, or frequent basement flooding, the pump works harder and wears out faster. Also if the sump pumps that run daily due to poor drainage or high groundwater should be inspected annually and replaced proactively to avoid unexpected breakdowns during storms.
What Are the Essential Sump Pump Maintenance and Repairs?
You should conduct below essential sump pump maintenance and repairs regularly.
6 sump pump maintenance tasks
- Test the sump pump operation monthly by pouring water into the pit
- Clean the sump pit, if it is possible, every 3-4 months to remove debris and sediment
- Inspect the float switch to determine whether it is sticking
- Check the discharge pipe and outside outlet for blockages or freezing
- Examine sump pump power cords and battery backup systems for wear or corrosion
- Tighten sump pump hose clamps and fittings to prevent leaks
5 common sump pump repairs
- Replace a worn or stuck float switch
- Fix or replace a leaking check valve
- Reseal or re-tape pipe threads to stop minor leaks
- Repair disconnected or frayed wiring
- Replace faulty backup batteries or control boards