How to Fix a Leaking Single Handle Faucet?: 7 Steps Guide

A leaking faucet handle is escaping water from a faucet spout when the faucet handle is closed. The main reason for the leaking single faucet handle is the damaged cartridge, and other minor reasons are worn-out interior components such as washers, O-rings, and valves. You can fix a leaking single handle faucet by following these 7 steps.
7 Steps to Fix a Leaking Single Handle Faucet
- Shut off the hot and cold water supply to the faucet
- Remove the set screw cover and set screw
- Remove the faucet handle, removing the set screw
- Remove the faucet cap
- Replace the old cartridge and install a new cartridge
- Replace the bonnet nut again and tighten
- Reinstall the single faucet handle with the screw cap and screw, and test it
A prolonged leaking single handle faucet can cause mold and mildew growth, paint peeling, wood rotting, wood warping, stain marks on the walls, and dampening the walls. In order to prevent these water damages, you can waterproof the bathroom floor, walls, and shower walls by using a suitable waterproof membrane.
When you fix the faucet single handle, you will need tools such as an Allen wrench 3/32 inches, channel lock, tiny flat-head screwdriver, and the relevant faucet anatomy that caused damage.

1. Shut off the hot and cold water supply to the faucet
You should shut off the hot and cold water supply to the faucet to prevent water from flowing while you are working on the faucet, which could cause water damage and make the repair process more difficult.
Shut off valve is located under the sink. You can do this by turning the valves clockwise to close them. Test the single handle faucet to ensure the water supply is completely off.
Remember to close the sink drain to prevent any tiny equipment fall into the drain. Then, remove the screw cover and screw step by step.
2. Remove the set screw cover and set screw
You should remove the set screw cover using a flat head screw. Removing the set screw cover helps to access the set screw that holds the single faucet handle. You should remove the screw cover gently without any damage.
Then you should remove the screw using an Allen wrench 3/32 to detach the single faucet handle from the faucet body.
Remember to place the screw cover and screw to prevent misplacement.
3. Remove the faucet handle, removing the set screw
Once the set screw is removed, lift the handle off the faucet. If it is stuck, gently wiggle it back and forth to loosen it. Removing the faucet handle helps to access the inside components of the single handle faucet.
4. Remove the faucet cap
After removing the faucet handle, you should remove the faucet cap. If the cap is tight, wrap a cloth around it to protect the finish and use channel locks to carefully turn it counterclockwise. Do not force it too much to avoid damaging the cap or faucet. Removing the faucet cap helps to access the cartridge inside.
Remove the bonnet nut using the channel lock
Use the channel lock to grip the bonnet nut and turn it counterclockwise to remove it. Removing bonnet nut helps to free the cartridge from the faucet body.
5. Replace the old cartridge and install a new cartridge
Replacing the old cartridge will solve the single handle faucet leaking mostly. Pull the old cartridge straight out of the faucet body. Take note of its orientation for proper installation of the new one. Then insert the new cartridge in the same orientation as the old one. Align the new cartridge with the corresponding slots inside the faucet body and push it firmly into place.
6. Replace the bonnet nut again and tighten
Thread the bonnet nut back onto the faucet body and tighten it using the channel lock. Be careful not to overtighten, as this could damage the faucet.
7. Reinstall the Single Faucet Handle with Screw Cap and Screw and Test it
Place the handle back onto the faucet and align it with the set screw hole. Insert and tighten the set screw using the Allen wrench 3/32. Then fix the screw cap as before. After the faucet handle reinstallation, you should check for leaks to ensure the repair is successful and the faucet is functioning properly.
You can test the reinstalled cartridge with the water supply back on by turning the shut-off valves counterclockwise. Test the faucet by turning it on and off, and checking for any leaks around the handle or base. If no leaks are found, the repair is complete.
Read more: How to Fix Bathroom Sink Overflowing?
What is a Single Handle Faucet Leaking?
Single handle faucet leaking is escaping water from the faucet spout when the faucet handle is closed. A Single handle faucet can leak due to worn-out or damaged interior components such as washers, O-rings, or valve seats. The frequency of faucet handle leaks can depend on the water pressure, quality of the faucet, frequency of use, and the hardness of the water.
To prevent water damage from the faucet handle leaking in the bathroom, you should know how to waterproof the bathroom. Before you waterproof the bathroom, you should read this to know about bathroom waterproofing
What are the Reasons for Single Faucet Handle Leaking?
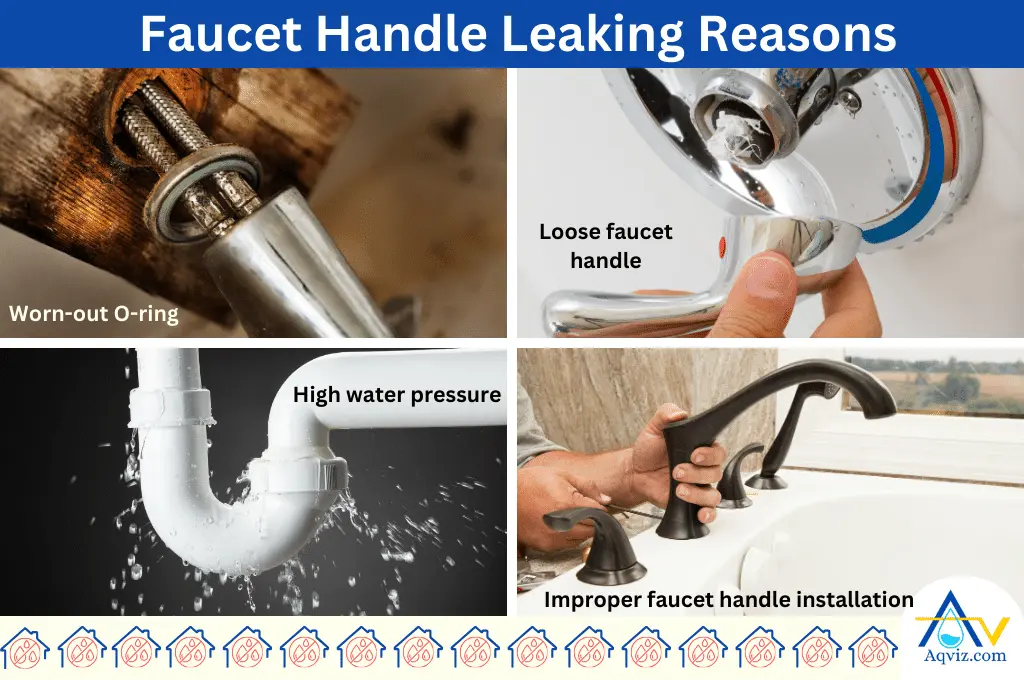
A single faucet handle leaking causes these 4 main reasons:
- Worn-out O-ring: The O-ring in the faucet handle can wear out or become loose over time cause to leak from the faucet handle.
- Loose faucet handle: When the faucet handle is not tightened properly or becomes loose over time, it can cause water to leak out around the base of the handle.
- High water pressure: High water pressure can increase the faucet leaking
- Improper faucet handle installation: Improper faucet handle installation can cause water leaking from the faucet.
What are the Single Faucet Handle Leaking Water Damages?
When a single faucet handle is leaking prolonged can cause below 7 water damage on the fixtures, walls, floors, and other structures.
- Tiles and tile grouts deterioration
- Water seepage on the walls
- Stain marks on the walls
- Mold and mildew growth on the walls
- Paint peeling on the walls
- Wood warping and paint peeling
- Wood rotting