How to Waterproof a Bathroom Wall?

Bathroom wall waterproofing is applying a waterproofing membrane at different heights on the bathroom wall surface until it covers shower splash zones, toilet wall, bathtub floor, and sink wall. Bathroom wall waterproofing can prevent leaks and water damage to the structure, improve indoor air quality, extend the lifespan of the bathroom walls, and prevent mold and mildew growth in the bathroom.
You can use waterproof membranes such as cementitious waterproofing, acrylic, polyurethane, epoxy, bituminous, PVC, HDPE, and EPDM for bathroom wall waterproofing with essential tools for the process. You should follow the below 9 steps to waterproof the bathroom wall waterproofing.
8 steps for bathroom wall waterproofing
- Check the bathroom walls for leak
- Clean the bathroom walls
- Seal cracks and joints of the bathroom wall
- Apply waterproof primer on the wall
- Install waterproof membranes on the wall
- Protect the waterproof layer of the bathroom wall
- Install tile or covering on the bathroom walls
- Regular maintenance of the bathroom properly
You should follow these 5 ways to protect the bathroom wall waterproofing, such as using a backer rod and caulk, installing shower pan liners, minimizing water exposure to the walls, cleaning and inspecting the bathroom walls and maintaining the proper ventilation in the bathroom.

8 Steps for Bathroom Wall Waterproofing
These are the 9 steps for bathroom wall waterproofing
- Check the bathroom walls for leak
- Clean the bathroom walls
- Seal cracks and joints of the bathroom wall
- Apply waterproof primer on the wall
- Install waterproof membranes on the wall
- Protect the waterproof layer of the bathroom wall
- Install tile or covering on the bathroom walls
- Regular maintenance of the bathroom properly
1. Check the bathroom walls for leak
You should know about bathroom wall waterproofing before starting it DIY. As a first step, you should check the bathroom wall for leaks before waterproofing. You should observe the crack paths and holes that cause water to seep into the bathroom through the walls.
2. Clean the bathroom walls
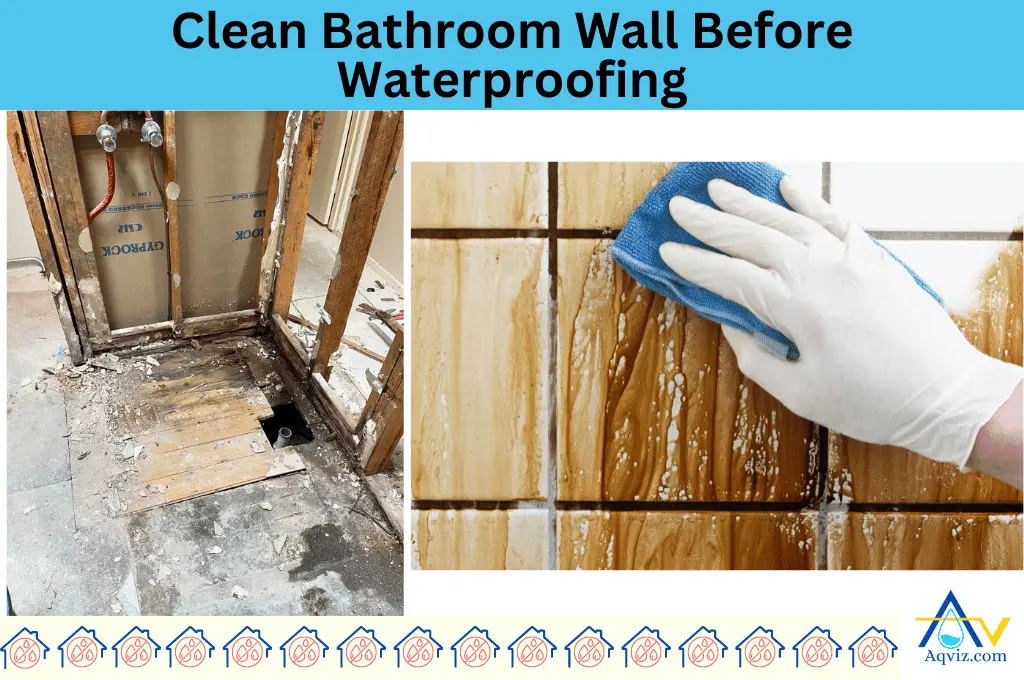
After you check the bathroom walls for leaks, you should clean the surface of the walls. A cleaned bathroom wall surface provides better adhesion for the waterproofing membrane, ensures a smooth finish, and helps identify underlying issues and repair them.

You can clean the bathroom walls by removing tiles, mortars, and loose material parts on the surface. You can use chipping hammers, grinders, and scrapers for the cleaning process.
3. Seal cracks and joints of the bathroom wall
You should seal the cracks and joints in the bathroom walls using a caulk gun, silicone caulk, backer rod, putty knife, and sandpapers. Let the silicone caulk be cured for 24-48 hours and avoid water exposure in the area during curing time.

4. Apply waterproof primer on the wall
You should apply primer on the sealed bathroom wall surface. Primers help to improve the adhesiveness between the walls and the waterproofing membrane.
You should apply a thin, even coat of primer to the walls using a paint roller or a paintbrush. Then, allow the primer coat to dry.

5. Install waterproof membranes on the wall
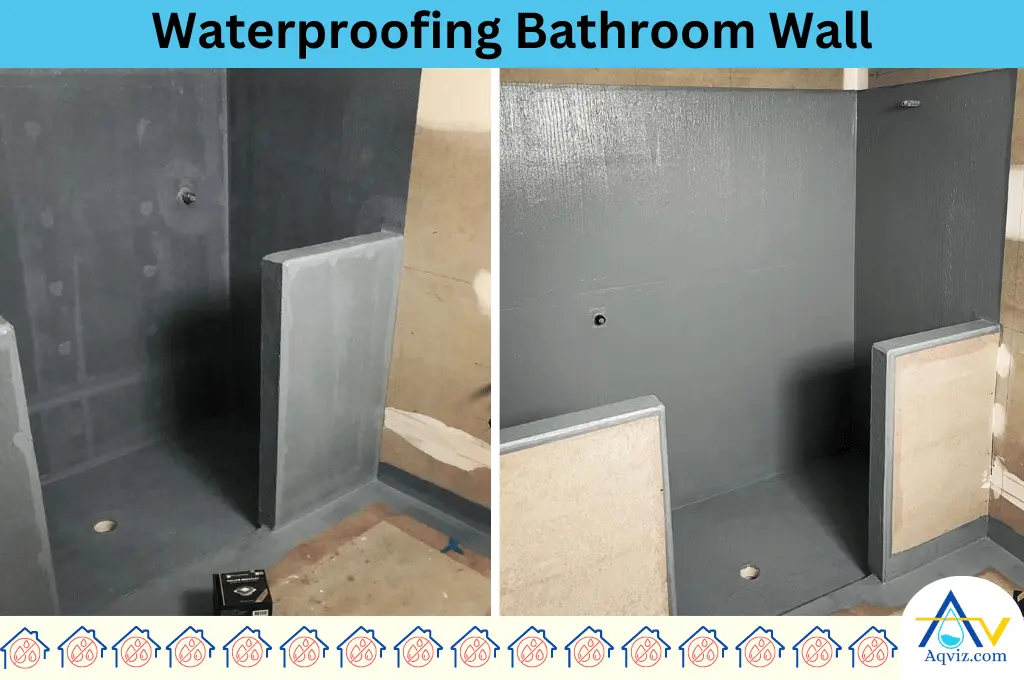
After the primer is applied, you should install a waterproof membrane on the bathroom walls. You should apply a thin, uniform layer of waterproofing membrane sealant to the wall surface using a brush, roller, or sprayer. Then, let it dry according to the manufacturer’s instructions.

6. Protect the waterproof layer of the bathroom wall
You should protect the waterproofing layer by using a backer rod and caulk when installing tile, use a shower pan liner underneath the shower pan, use a shower door or curtains to prevent excessive water splashing and maintain proper ventilation in the bathroom.
7. Install tile or covering on the bathroom walls
Install tile or covering on the bathroom walls to create a physical barrier that protects the underlying waterproofing membrane from scratches, bumps, or abrasions. Tiles are highly water-resistant, prevent water from reaching the wall, and protect the waterproofing membrane.

8. Regular maintenance of the bathroom properly
You should regularly maintain the bathroom walls by removing the soap scum, debris, and grime, which can deteriorate the waterproofing membrane. Regular bathroom maintenance lets us detect leaks, prevent water damage, and protect the waterproofing membrane.
What is Bathroom Wall Waterproofing?
Bathroom wall waterproofing is applying waterproofing membrane on the bathroom wall surface up to 6 feet (183 cm) height splash zones in the shower wall,3 feet (92 cm) height at the toilet wall, 2.5 feet (76 cm) height at the bathtub floor, and 4 feet (122 cm) height at the sink wall.
What are the Advantages of Waterproofing Bathroom Walls?
Prevent leaks and water damage: Bathroom wall waterproofing helps to prevent leak and water damage. Bathroom wall waterproofing creates a barrier that prevents moisture from penetrating the walls because these walls are constantly exposed to moisture, humidity, and showers, which cause mold growth and water damage.
Improves indoor air quality: Bathroom wall waterproofing helps to keep the bathroom dry and healthier. Waterproofing these walls will prevent the emission of gases due to mold growth and water leaks, improving indoor air quality.
Extends the life span of the bathroom walls: Bathroom wall waterproofing extends the lifespan of the wall. Waterproofing the bathroom wall prevents moisture deterioration due to constant exposure to water.
Prevent mold and mildew growth: Waterproofing bathroom walls prevent the mold and mildew growth inside. It helps to improve air quality, and prevent slippering and a dirty look in the bathroom.
What Do You Need to Waterproof Bathroom Walls?
Waterproof membrane for bathroom walls
These are the most used 8 types of waterproof membranes for bathroom walls.
- Cementitious waterproofing: Applying cementitious waterproofing on the bathroom wall requires moderate skill. Laborers involve bathroom wall preparation, mixing the compound, and application on the surface using a brush or trowel. This process can be done within 3-4 days.
- Acrylic waterproofing: Acrylic waterproofing on the bathroom walls requires moderate to high skill level due to the precision needed in the application. You will need laborers for bathroom wall preparation, applying multiple coats, and ensuring even coverage. Acrylic waterproofing is a time consuming task and can be done within 4-7 days.
- Polyurethane waterproofing: Polyurethane waterproofing on the bathroom wall need a high skill level due to the sensitivity of the material due to moisture during application. Laborers will need to prepare the bathroom wall surface and coating.
- Epoxy waterproofing: Epoxy waterproofing on the bathroom wall requires a high skill level due to the need for precise mixing ratios and application techniques. Labors will be needed for bathroom wall preparation, mixing components, and applying them quickly on the surface before hardening.
- Bituminous waterproofing: Bituminous waterproofing on the bathroom walls requires moderate skill. Laborers are involved in bathroom wall preparation, heating, and applying bitumen or laying bituminous sheets. This process is relatively quick and often completed in a few days.
- PVC waterproofing: PVC waterproofing requires moderate to high skill levels. Manpower is essential for preparing the bathroom wall by cutting and fitting the sheets and welding the seams. The installation process can be time-consuming, taking several days to a week.
- HDPE waterproofing: HDPE waterproofing requires high skill levels due to the precision needed in welding the seams and ensuring proper installation. Labor involves bathroom walls preparation, cutting and positioning the HDPE sheets, and welding the seams using specialized equipment.
- EPDM waterproofing: EPDM waterproofing requires moderate to high skill levels, particularly in handling and seaming large sheets. Labor involves for bathroom wall preparation, cutting and fitting the EPDM sheets, and adhering or mechanically fastening them.
Tools for bathroom wall waterproofing
These are the 12 tools for bathroom wall waterproofing
- Eye protection
- Gloves
- Masks
- Utility knife
- Hammer drill
- Sander
- Scraper
- Wire brush
- Paint roller
- Notched trowel
- Paintbrush
- Smoothing trowel
What are the 5 Ways to Protect Bathroom Wall Waterproofing?
- Use backer rod and caulk: You can use backer rods and high-quality silicone caulk to seal gaps between the walls and around the shower pan when installing tiles or other wall coverings in the bathroom. This creates a secondary barrier against water intrusion and protects the waterproofing membrane.
- Install shower pan liners: Install a shower pan liner underneath the shower. Shower pan liners provide extra protection in case of leaks from the pan or drain to protect the bathroom wall waterproofing membrane.
- Minimize water exposure: Minimize excessive water exposure by installing shower doors and curtains in front of the bathroom wall. Shower doors and curtains prevent excessive water splashing within the shower area, reduce the amount of water exposure to the bathroom walls, and prevent the bathroom wall waterproofing membrane.
- Cleaning and inspection: Clean and inspect the bathroom and walls for leaks, water damage, and mold growth. Take immediate action to seal gaps and destroy mold growth, which will help extend the life span of the bathroom wall waterproofing membrane.
- Maintain proper ventilation: Maintain proper ventilation in your bathroom to prevent moisture build-up and mold growth on the walls. We can install exhaust fans, doors, and windows to ensure proper air circulation and reduce the moisture buildup on the bathroom walls.
What If you Do not Waterproof the Bathroom Wall?
If you do not waterproof the bathroom wall properly, you will always face the below problems.
- Increase in mold and mildew growth on the bathroom walls
- Deterioration of building materials on the bathroom walls
- Paint peeling and blistering on the bathroom walls
- Damaged tiles and grouts on the bathroom walls
- Structural damage in the bathroom
- Water leaks to adjoining rooms through bathroom walls
Read more: How to Waterproof Bathroom Floor? Method, Products, Cost, and Time
How to Waterproof a Bathroom Floor?
- Clean the bathroom floor.
- Apply Primer on the bathroom floor.
- Cut the Membrane according to the bathroom floor width and length
- Apply Adhesive for sheet membranes on the bathroom floor
- Lay the Membrane on the bathroom floor
- Seal the Joints in the sheet membrane on the bathroom floor
- Seal Edges in the bathroom floor
- Let the waterproof membrane Dry
- Check for bathroom floor Leaks
- Install Flooring on the bathroom floor
