A single hairline crack in a poured concrete foundation can funnel more than 20 gallons of water into a basement during one heavy rainstorm. Professional waterproofing companies charge an average of $5,213 per job, according to 2025 industry pricing data, with exterior excavation projects reaching $15,000 or more. The good news: most residential basement moisture problems respond to interior DIY methods that cost between $200 and $500 in materials.
This guide walks through each step of DIY waterproofing basement projects, from diagnosing the moisture source to applying the final sealant coat. It also covers the mistakes that cause most waterproofing jobs to fail and the situations where hiring a professional actually makes sense.
Why Basement Waterproofing Matters More Than Most Homeowners Realize
Basement moisture does far more than create a musty smell. Left unchecked, water infiltration degrades concrete, rots wooden framing, and creates conditions where mold colonies establish themselves within 24 to 48 hours of sustained dampness.
According to the U.S. Environmental Protection Agency (EPA), mold produces allergens and irritants that trigger allergic reactions, asthma attacks, and respiratory irritation in both sensitive and non-sensitive individuals. The EPA’s guidance is clear: all wet areas should be completely dried within 48 hours to prevent mold growth.
Water damage also hits the wallet. Foundation repairs caused by prolonged moisture exposure range from $2,000 to $7,000 for minor crack injection and up to $15,000 or more for structural underpinning. Catching a moisture problem early and addressing it with a $300 DIY waterproofing project prevents repair bills that can run 10 to 50 times higher.
Signs Your Basement Needs Waterproofing
Several warning signs indicate water is getting into a basement, and catching them early keeps a manageable DIY project from becoming a structural emergency. Here are the most common red flags:
- White powdery deposits (efflorescence) on concrete or block walls, caused by minerals left behind as water evaporates through masonry
- Musty or damp odors that persist even after cleaning, signaling hidden moisture behind walls or under flooring
- Visible cracks in foundation walls or the basement floor, especially horizontal cracks in block walls (which indicate lateral soil pressure)
- Water stains or discoloration along the base of walls or around window wells
- Peeling paint or bubbling on basement walls, a sign that moisture is pushing through from behind
- Condensation on pipes and windows in the basement, even during moderate weather
Quick moisture test: Tape a 12-inch square of aluminum foil to a suspect wall area and leave it for 24 hours. If condensation forms on the room-facing side, the problem is humidity (solved with ventilation and a dehumidifier). If moisture appears between the foil and the wall, water is seeping through the masonry, and the wall itself needs waterproofing treatment.
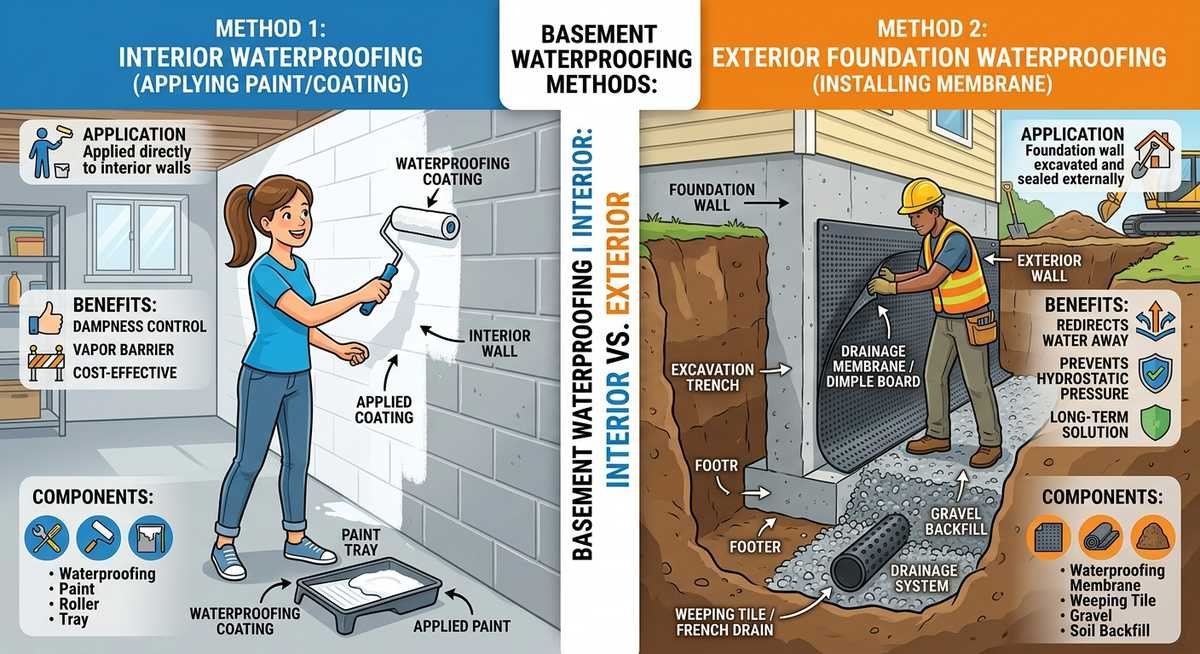
Interior vs Exterior Waterproofing: Which Approach Fits Your Situation
Interior waterproofing methods handle roughly 80% of residential basement moisture problems for under $500 in materials. Exterior waterproofing solves structural water intrusion but requires excavation around the foundation, heavy equipment, and budgets starting at $5,000. Most homeowners tackling basement waterproofing from the outside hire contractors for the excavation portion.
| Factor | Interior Waterproofing (DIY-Friendly) | Exterior Waterproofing (Pro-Level) |
|---|---|---|
| Typical cost | $200 – $3,000 | $5,000 – $15,000 |
| DIY difficulty | Moderate (painting, patching, sealing) | Very high (excavation, drainage) |
| Best for | Minor seepage, condensation, wall dampness | Severe water intrusion, hydrostatic pressure |
| Timeline | 1-3 days for most basements | 1-2 weeks with excavation |
| Effectiveness | Stops surface moisture and minor seepage | Addresses root cause at foundation level |
| Warranty | Product warranty only (5-15 years) | Contractor warranty (10-25 years typical) |
Waterproofing companies rarely lead with interior solutions because exterior jobs generate significantly higher revenue. For basements with occasional dampness, efflorescence, or minor crack seepage, interior methods provide reliable long-term protection at a fraction of the cost.
Step-by-Step DIY Waterproofing Basement Guide
DIY waterproofing basement projects follow six steps, and skipping any of them reduces the lifespan of the finished job. Total materials cost for a standard 1,000-square-foot basement runs between $200 and $500.
Step 1: Fix Exterior Water Sources First
No amount of interior sealant compensates for water pouring toward the foundation from outside. Before touching a single basement wall, check these exterior items:
- Clean gutters and extend downspouts at least 4 to 6 feet away from the foundation
- Regrade soil so it slopes away from the house at a minimum of 6 inches over the first 10 feet
- Seal any visible cracks in exterior concrete or stucco above grade
- Clear window wells of debris and verify drainage
These exterior fixes cost little or nothing and eliminate the most common water sources before they ever reach the basement.
Step 2: Clean and Prep Walls
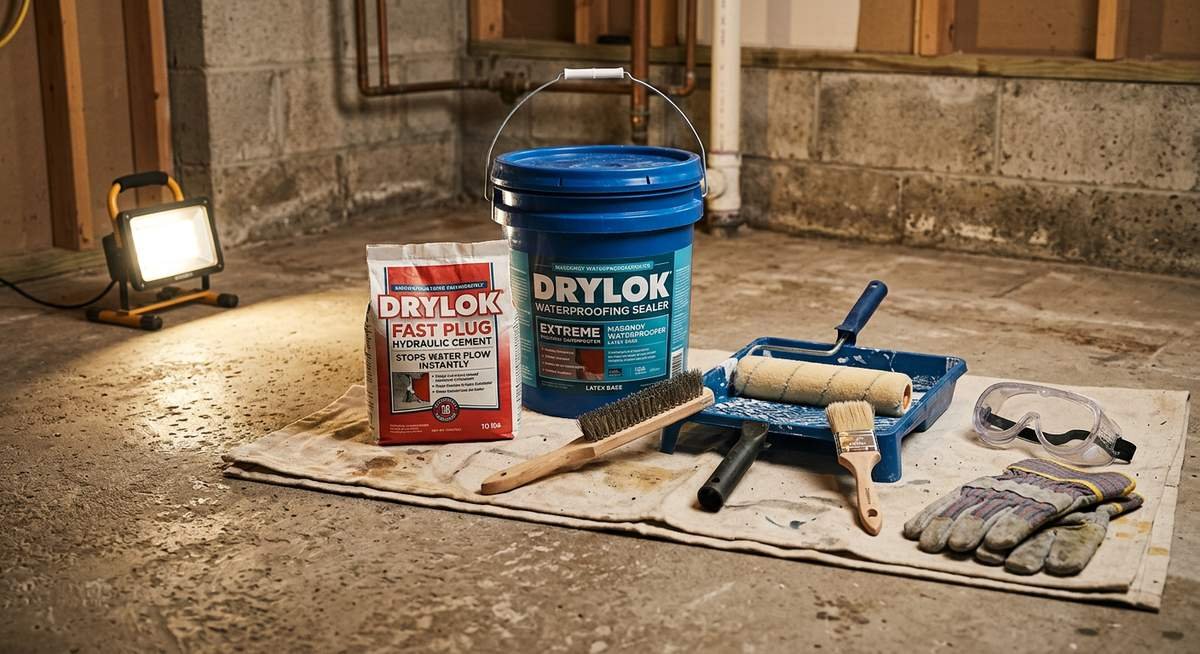
Waterproofing products bond to clean, bare masonry. Use a stiff wire brush to remove efflorescence, loose paint, dirt, and any existing coatings. For stubborn mineral deposits, apply a masonry cleaning solution (muriatic acid diluted per manufacturer instructions works on heavy efflorescence). Rinse thoroughly and allow walls to dry.
Step 3: Patch Cracks and Holes
Fill cracks and holes with hydraulic cement, which expands as it cures and can stop active water flow through a crack. For hairline cracks under 1/8 inch, an epoxy injection kit provides a permanent structural bond. Larger cracks (over 1/4 inch) or horizontal wall cracks may indicate structural movement and warrant a professional evaluation before any waterproofing work.
Step 4: Apply Waterproofing Sealant
Three product categories dominate the DIY market, each suited to different severity levels:
| Product Type | Example Brands | Best For | Coverage | Approx. Cost |
|---|---|---|---|---|
| Waterproofing paint | DRYLOK, Zinsser WaterTite | Minor dampness, condensation | 75-100 sq ft/gal | $30-50/gallon |
| Penetrating sealer | RadonSeal, Ghostshield | Porous concrete, radon mitigation | 100-200 sq ft/gal | $40-70/gallon |
| Membrane system | Sani-Tred, Liquid Rubber | Active seepage, below-grade walls | 50-75 sq ft/gal | $60-100/gallon |
Apply with a thick-nap roller or stiff bristle brush, working the product into pores and surface imperfections. Most products require two coats with 24 hours of drying time between applications. A standard basement (800-1,200 sq ft of wall surface) typically needs 3 to 5 gallons total.
Step 5: Address Floor Seepage
If water comes up through the basement floor, apply a concrete floor sealant after the wall treatment. For persistent floor water, an interior perimeter drain (French drain) connected to a sump pump is the most effective long-term solution. DIY interior French drain installation runs $1,000 to $3,000 in materials and rental equipment, compared to $3,000 to $8,000 professionally installed.
Step 6: Control Humidity After Treatment
Waterproofing treatment stops liquid water, but basement humidity still needs management. Run a dehumidifier rated for the basement’s square footage (50-pint units handle most residential basements) and keep relative humidity below 50%. Ensure dryer vents exhaust outdoors, not into the basement. Properly sealed basement walls combined with humidity control keep the space dry for years.
Total materials cost for steps 1 through 6, excluding a French drain system: roughly $200 to $500. That covers hydraulic cement ($8-15), epoxy injection kit ($25-40 per crack), 4-5 gallons of waterproofing product ($120-250), wire brush and roller supplies ($20-30), and a dehumidifier ($150-250 if not already owned).
Common DIY Waterproofing Basement Mistakes That Waste Time and Money
The most expensive mistake in any DIY waterproofing basement project costs nothing at the hardware store: skipping the prep work. Here are the five failures that account for the majority of waterproofing jobs that do not last.
- Painting over dirty or damp walls. Waterproofing products need clean, dry masonry to bond properly. Applying sealant over efflorescence or existing paint creates a barrier that peels within months.
- Ignoring exterior drainage. Interior waterproofing manages moisture that reaches the basement walls. If gutters overflow onto the foundation or soil slopes toward the house, no interior coating can keep up with the volume of water pushing through.
- Using the wrong product. Waterproofing paint handles surface dampness. Active water flow through cracks requires hydraulic cement first, then sealant. Penetrating sealers work on bare concrete but fail on previously painted surfaces.
- Skipping the second coat. One coat of waterproofing paint provides roughly half the rated protection. Manufacturers specify two coats for a reason, and each coat needs a full 24 hours of curing time.
- Forgetting post-treatment humidity control. A sealed basement without a dehumidifier traps moisture in the air, which condenses on cooler surfaces and creates the same mold conditions the waterproofing was meant to prevent.
Frequently Asked Questions
How much does DIY waterproofing basement projects cost?
DIY waterproofing basement materials typically cost $200 to $500 including sealant, hydraulic cement, and supplies. Professional waterproofing averages $5,213 nationally in 2025, with interior systems ranging from $2,459 to $8,181 depending on basement size and method.
Does waterproofing paint actually work?
Waterproofing paints like DRYLOK and Zinsser WaterTite effectively stop minor dampness and condensation when applied to clean, bare masonry per manufacturer instructions. They are rated to withstand up to 10-15 PSI of hydrostatic pressure. Active leaks through cracks require patching with hydraulic cement before painting, and severe water intrusion from high water tables may need a drainage system rather than surface coatings alone.
How long does DIY basement waterproofing last?
Properly applied waterproofing paint lasts 10 to 15 years on interior basement walls. Penetrating sealers can last the lifetime of the concrete since they chemically react within the pores rather than forming a surface film. Hydraulic cement crack repairs are permanent unless the foundation experiences new structural movement.
Can I waterproof a basement with standing water?
Standing water must be removed and the source addressed before any waterproofing product is applied. Pump out the water, dry the space with fans and a dehumidifier for at least 48 hours (per EPA mold prevention guidelines), then proceed with crack repair and sealant application.
When should I hire a professional instead of doing it myself?
Hire a professional if the basement has horizontal wall cracks (indicating structural pressure), persistent standing water that returns after pumping, water entering from multiple sources simultaneously, or if the home sits in an area with a high water table. Foundation wall bowing, significant settling, or cracks wider than 1/4 inch also warrant professional structural evaluation before any waterproofing work begins.
Protect Your Basement Before the Next Heavy Rain
DIY waterproofing basement work is one of the highest-return home maintenance projects available. A weekend of prep work, crack repair, and sealant application costing $200 to $500 prevents thousands in foundation damage, keeps mold out of the living space, and adds usable square footage to the home. Start with the exterior drainage check, fix what you find, and work inward from there.