You jiggle the handle and the running stops for a few seconds before starting again. The food coloring test confirmed it: colored water is seeping from the tank into the bowl. The flapper is not sealing, points out N Property Group professionals. You need to replace it. You have never looked inside a toilet tank before, and you are not sure whether all flappers are the same, whether you need tools, or whether you are about to flood the bathroom.
Replacing a toilet flapper is the most common toilet repair, and it is also the easiest. You do not need a plumber. You need a new flapper, which costs between five and fifteen dollars, and about ten minutes. The most important step is buying the right flapper. The rest is unhooking the old one and hooking on the new one.
What a Flapper Is and Why It Fails
The flapper is a rubber disk at the bottom of the toilet tank that covers the flush valve opening. When you push the handle, a chain lifts the flapper, and water rushes from the tank through the flush valve into the bowl. When the tank empties, the flapper drops back onto the flush valve seat, sealing the opening. The tank refills, and the toilet is ready for the next flush.
Flappers fail because the rubber degrades over time. Chlorine in the water supply, chemical toilet bowl cleaners dropped into the tank, and simple age cause the rubber to harden, crack, or warp. A hardened flapper does not conform to the flush valve seat. A cracked flapper leaks water even when properly seated. A warped flapper sits crooked and leaves a gap. Any of these conditions causes water to leak from the tank into the bowl continuously, which is the running toilet you hear at three in the morning.
The average flapper lasts three to five years. If your toilet is older and the flapper has never been replaced, it is due. If you have been using drop-in tank cleaners, the flapper may fail in a year or less. If the flapper looks fine but the toilet is running, the problem may be the flush valve seat rather than the flapper itself. Run your finger around the seat. If it feels rough or you can see mineral deposits, clean the seat before replacing the flapper.
Buy the Right Flapper Before You Start
Flappers are not universal. Do not grab the first flapper you see at the hardware store and assume it will fit. The wrong flapper will not seal, and the toilet will continue to run. You will have wasted your time and your money.
There are two common sizes: two-inch and three-inch flappers. The size refers to the diameter of the flush valve opening. Older toilets and standard toilets use a two-inch flapper. Newer high-efficiency toilets and pressure-assist toilets often use a three-inch flapper. A three-inch flapper on a two-inch flush valve will not seat. A two-inch flapper on a three-inch flush valve will fall through. Match the size.
Flappers attach to the flush valve in different ways. Most flappers have two rubber ears that hook onto pegs on the sides of the flush valve tube. Some flappers have a ring that slides over the overflow tube. Others attach with a hinge mechanism specific to the toilet brand. Look at your existing flapper and note how it is attached before you go to the store.
The safest approach is to remove the old flapper and take it with you to the hardware store. Match it physically. Hold the new flapper next to the old one. Confirm the size, the attachment mechanism, and the shape of the sealing surface. If you are unsure, buy a universal flapper that includes adapters for different attachment styles. A universal flapper is adjustable and works in most toilets, but it may not seal as perfectly as an OEM flapper made by the toilet manufacturer.
For Kohler toilets, buy a Kohler flapper. For Toto toilets, buy a Toto flapper. These brands use proprietary flush valve designs, and a universal flapper often does not seal correctly. The brand-specific flapper costs a few dollars more and saves you the frustration of a repair that does not fix the problem.
Replace the Flapper Step by Step
Remove the toilet tank lid and set it aside on a towel on the floor. Tank lids are porcelain. They break when dropped. Do not place the lid on the edge of the sink or the tub. Place it flat on a folded towel.
Locate the shutoff valve behind the toilet near the floor. Turn it clockwise until it stops. If the valve is stuck, do not force it. Old shutoff valves can break. If you cannot turn the shutoff valve, you will need to shut off the main water supply to the house. Do this before proceeding. Working on a toilet with the water on is not possible.
Flush the toilet to empty the tank. Hold the handle down until as much water as possible drains out. There will be a small amount of water remaining in the bottom of the tank, below the flapper. This is normal. You do not need to sponge it out unless it interferes with seeing the flush valve seat.
Unhook the flapper chain from the flush handle lever. The chain is attached to the lever by a small clip or hook. Unclip it and let the chain hang.
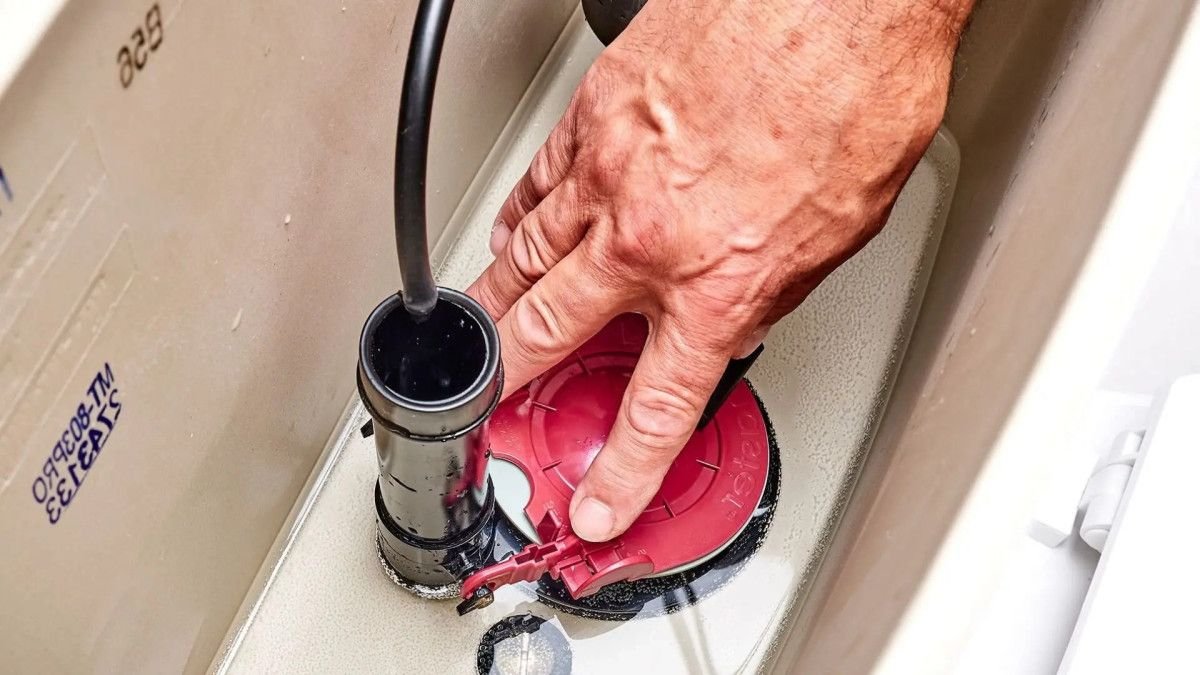
Lift the old flapper off the flush valve. If it has rubber ears, stretch the ears off the pegs. If it has a ring, slide the ring up and off the overflow tube. If it has a hinge, depress the tabs and lift. The old flapper pulls free.
Inspect the flush valve seat. Run your finger around the rim where the flapper sits. If you feel mineral deposits, clean the seat with fine steel wool or a scouring pad. Do not use anything abrasive enough to scratch the plastic. If the seat is pitted or cracked, the flush valve itself needs replacement. A new flapper will not seal against a damaged seat. Replacing the flush valve requires removing the tank from the bowl, which is a larger job. If the seat is damaged, stop here and decide whether to call a plumber or tackle the flush valve replacement.
Install the new flapper. Hook the ears onto the pegs, slide the ring over the overflow tube, or snap the hinge into place, depending on the attachment style. The flapper should sit flat on the flush valve seat with no gaps. Press down gently around the edges to confirm it is seated evenly.
Attach the chain to the flush handle lever. The chain should have about half an inch of slack when the flapper is seated. Too much slack means the flapper will not lift fully when you flush, resulting in a weak flush. Too little slack means the chain holds the flapper slightly open, resulting in the exact running toilet you are trying to fix. Most flapper chains have a clip with multiple hook positions. Try different positions until you find the one that gives the right amount of slack.
Turn the water back on slowly. Let the tank fill completely. Flush the toilet and watch the flapper. It should lift fully when you push the handle and drop back onto the seat cleanly when the tank empties. The chain should not catch under the flapper. The flapper should not drift sideways and land off-center. If any of these things happen, adjust the chain length or reposition the flapper.
Do the food coloring test to confirm the repair. Put a few drops of food coloring into the tank. Do not flush. Wait ten minutes. If no colored water appears in the bowl, the flapper is sealing correctly. The repair is complete. Replace the tank lid.
If the New Flapper Does Not Fix the Problem
If the toilet continues to run after replacing the flapper, and the water level in the tank is below the top of the overflow tube, the flush valve seat is the most likely culprit. A flapper cannot seal against a damaged seat. You felt the seat earlier and it seemed fine, but it may have a hairline crack or a warped section that is not visible without removing the tank. The fix is replacing the flush valve assembly, which requires removing the tank.
If the chain is the correct length and the flapper is seated properly, but the flapper lifts too early and the flush is weak, the flapper may be the wrong type for your toilet. Some toilets use a flapper with a foam float attached to the chain that keeps the flapper lifted until the tank is nearly empty. If your old flapper had a float and your new one does not, the flush timing will be wrong. Buy a flapper with a float or install an aftermarket float on the chain.
If the flapper is the correct type, the chain is adjusted correctly, and the seat is clean, but water is still leaking into the bowl, the flush valve gasket where the flush valve meets the bottom of the tank may be leaking. This gasket is between the tank and the flush valve, and replacing it requires removing the flush valve. This is the point where most homeowners call a plumber.
Frequently Asked Questions
Can I use a universal flapper instead of a brand-specific one?
In most toilets, yes. A universal flapper with adjustable attachments will work in standard American Standard, Eljer, and Mansfield toilets. For Kohler and Toto toilets, use the brand-specific flapper. These brands use proprietary flush valve shapes, and a universal flapper rarely seals correctly. The brand-specific flapper costs three to five dollars more and saves you the extra trip to the hardware store.
How often should a toilet flapper be replaced?
Every three to five years, or when the toilet starts running and the food coloring test confirms a leak. If you use drop-in tank cleaners, replace the flapper annually. The chemicals in tank cleaners degrade the rubber much faster than water alone. Stop using tank cleaners, and your flapper will last several times longer.
Do I need to turn off the water to replace the flapper?
Yes. The water must be off, and the tank must be empty. Attempting to replace a flapper with the tank full means working underwater, which is not possible and will soak your bathroom floor when you inevitably splash.
How do I know if I need a new flapper or a new flush valve?
Replace the flapper first. It costs five dollars and takes ten minutes. If the toilet still runs after replacing the flapper and the water level is correct, inspect the flush valve seat by feel and by sight. If the seat is rough, grooved, cracked, or warped, the flush valve needs replacement. A new flapper cannot seal against a damaged seat. Replacing the flush valve is a larger job that involves removing the tank.
The Short Version
Turn off the water. Flush the tank empty. Unhook the old flapper. Take it to the store. Buy an exact match. Hook on the new one. Connect the chain with half an inch of slack. Turn the water back on. Do the food coloring test. If the bowl stays clear, you fixed it.
A flapper costs between five and fifteen dollars. The tools are your hands. The time is ten minutes for the actual replacement and twenty minutes to drive to the hardware store and back. You have been jiggling the handle for a week. Stop jiggling. Replace the flapper.