Roof Ice Dams: Signs, Reasons, Impacts and How to Fix

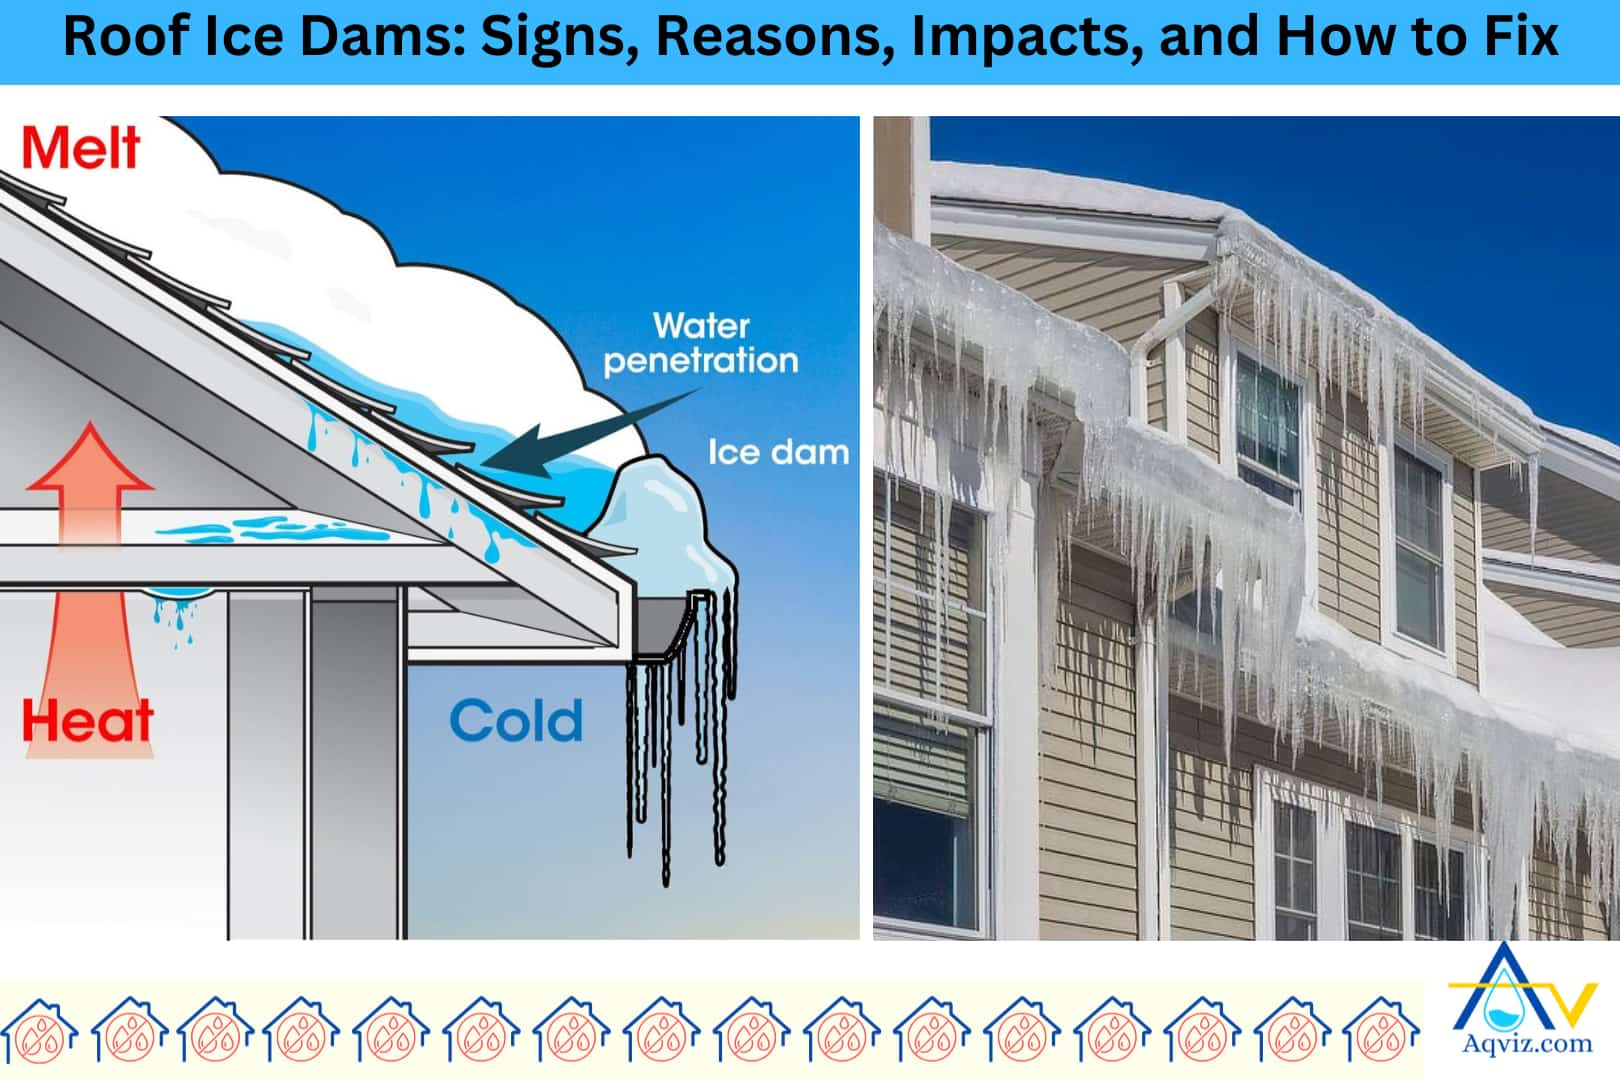
An ice dam on a residential roof is a ridge of solid ice that forms along the lower edge of the roof near the eaves. Ice dams are 4 to 12 inches in height and can reach up to 6 inches in thickness. Ice dams form when the upper sections of a snow-covered roof warm above 32°F (0°C) while the lower sections remain below freezing. This uneven heating causes snow to melt, flow downward, and refreeze once it reaches the colder roof edge.
An ice dam can begin forming within 24 to 48 hours if the environmental conditions are ideal. You can identify the ice dam by the icicles along the eaves, ice buildup on soffit or facia, water stains on siding or walls, damp attic insulation, shingle damage near the roof edge, and mold and mildew odor in upper rooms.
Ice dams are always a problem for the house structure. It tends to cause roof leaks, wall and ceiling damage, insulation failure, mold and mildew growth, gutter and fascia damage, and shingle deterioration. To remove the ice dams, you can use roof-safe ice melt, use heated cables, use hot water, use a roof rake with a telescopic handle, use an ice pick or mallet, or use a professional steam remover. To prevent future ice dams in the winter season. Aqviz experts highly recommend that you increase attic insulation, improve attic ventilation, seal attic air leaks, install ice and water shield membrane, and use snow guards and snow rakes properly.

What is an Ice Dam on a Roof?
An ice dam on a residential roof is a ridge of solid ice that forms along the lower edge of the roof near the eaves. Ice dams are 4 to 12 inches in height and can reach up to 6 inches in thickness. The height of the ice dam depends on the snow load, temperature shifts, and attic conditions. Ice dams cause to prevent melting snow from draining off the roof properly.
Ice dams form when the upper sections of a snow-covered roof warm above 32°F (0°C) while the lower sections remain below freezing. This uneven heating causes snow to melt, flow downward, and refreeze once it reaches the colder roof edge. The result is a dense, solid block of glacier-type ice. This condition is most common in roofs with poor attic insulation or inadequate ventilation. We’ve often dealt with homes where the ice damming became visible only after signs like ceiling stains or water dripping from soffits emerged.
Read More About: What to Know About Roof Waterproofing?
How Long Does It Take to Build an Ice Dam on the Roof?
An ice dam can begin forming within 24 to 48 hours if the environmental conditions are ideal. The key factors for the ice dams are snow accumulation, roof temperature, attic insulation, and outdoor air temperature. The repeated melt-refreeze cycle accelerates dam formation if daytime temperatures hover just above 32°F (0°C) and nighttime temperatures drop well below freezing. The process is even faster if the roof surface warms due to poor insulation or heat loss from the attic.
In cases where 6 inches or more of snow sits on a roof and the attic temperature stays above freezing due to heat escape, ice dams can start developing the next day after a snowfall. We’ve seen ice buildup begin in as little as one cold night, followed by a sunny day. Persistent conditions like these over 2-3 days, can create ice ridges thick enough to block meltwater, causing water to back up under shingles. Cold climates with daily temperature swings between 20°F and 35°F (-6°C to 1.5°C) are especially prone to rapid ice dam formation.
How to Identify an Ice Dam on the Roof?
Ice dams can be identified by the icicles along the eaves, ice buildup on soffit or facia, water stains on siding or walls, damp attic insulation, shingle damage near the roof edge, and mold and mildew odor in upper rooms.
- Icicles along the eaves: Large, dense icicles hanging from the roof edge or gutters often indicate trapped meltwater behind an ice dam.
- Ice buildup on soffits or fascia: Observe thick ice sheets or ridges along the soffit vents or fascia boards. These show freezing runoff pooling near the roofline.
- Water stains on ceilings or walls: Interior discoloration, usually near exterior walls, is a strong sign of moisture intrusion caused by ice dam backup.
- Damp attic insulation: Detect wet or compressed insulation in the attic near the eave indicates water has seeped past the roof barrier.
- Shingle damage near the roof edge: Observe lifted, cracked, or distorted shingles at the lower slope, which show signs of ice pushing up under roofing layers.
- Mold or mildew odor in upper rooms: A musty smell in upper floors can indicate prolonged moisture exposure due to undetected roof ice damming.
Read More About: Roof Seepage: Detect, Reasons, Impacts, and Fixing
What are the Impacts of Roof Ice Dams?
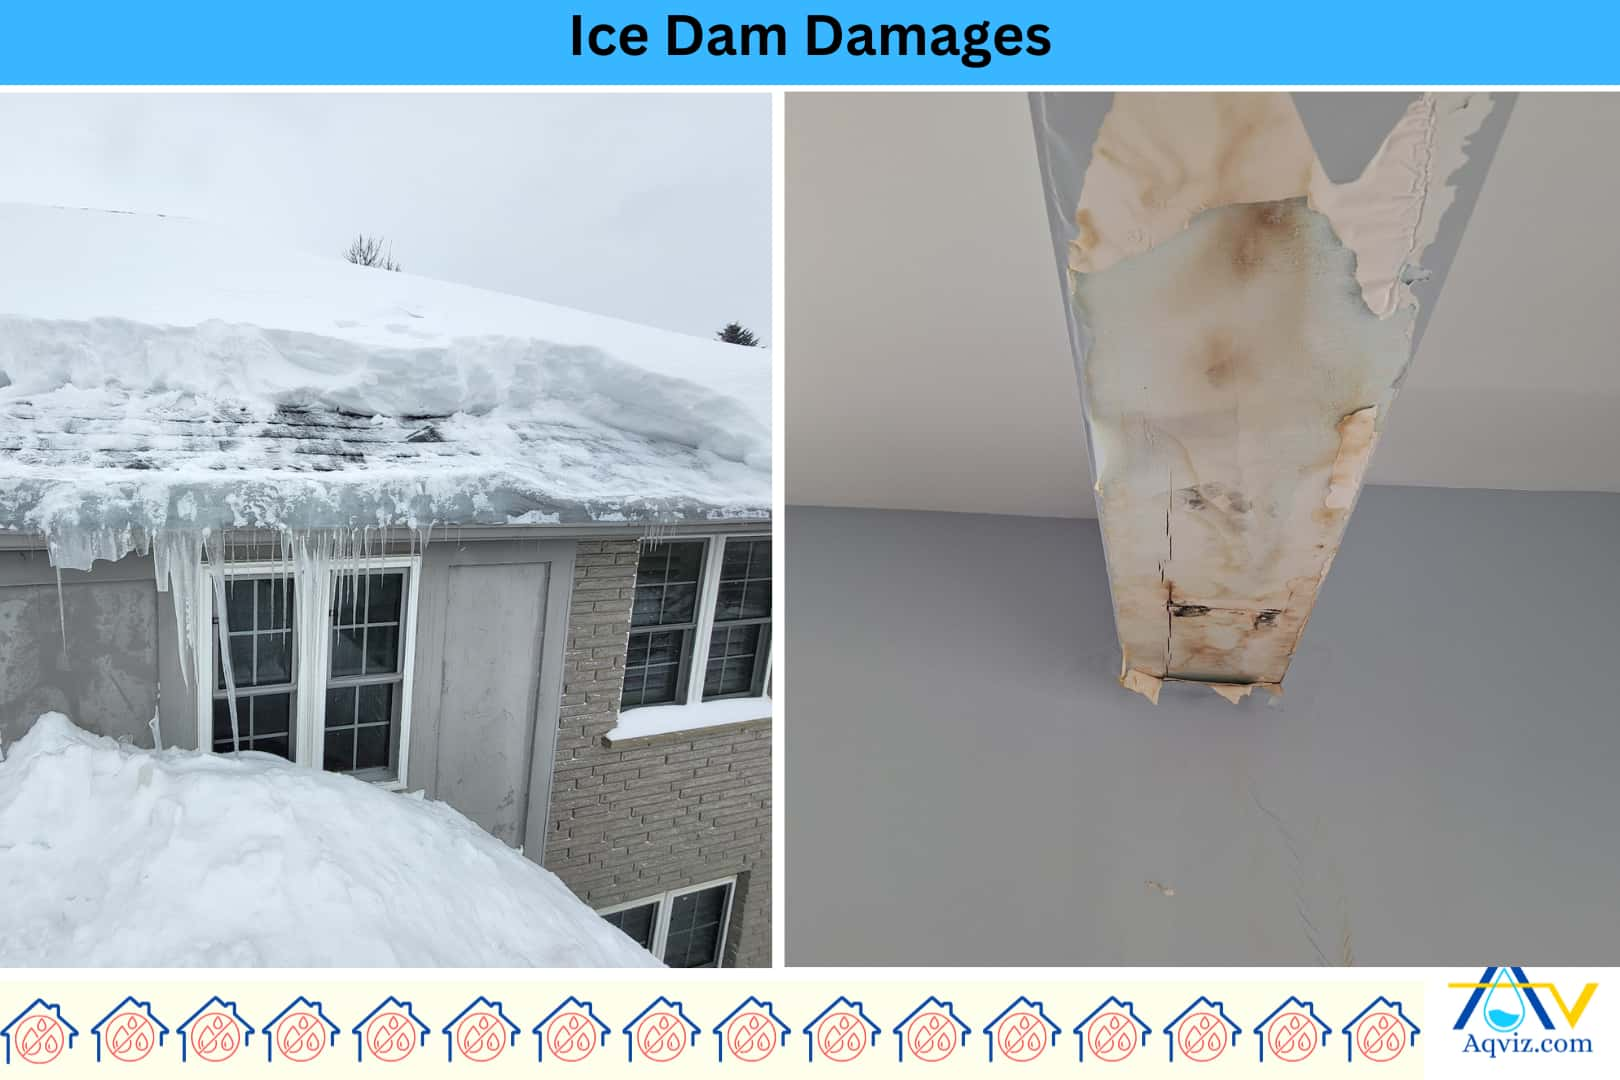
Roof ice dams cause different water problems and damage in the house, including roof leaks, wall and ceiling damage, insulation failure, mold and mildew growth, gutter and fascia damage, and shingle deterioration.
- Roof leaks: Ice dams trap meltwater on the roof surface, forcing it beneath shingles and into underlayment seams, leading to hidden water infiltration over time.
- Ceiling and wall damage: Ice dams cause backed-up water to seep into ceilings and walls, causing bubbling, blistering, peeling paint, and drywall warping.
- Insulation failure: Ice dam causes insulation failure due to continuous moisture exposure, reducing its R-value and leading to higher heating bills and mold-friendly conditions.
- Mold and mildew growth: Ice dams cause mold and mildew growth behind walls and in attics.
- Gutter and fascia damage: The excessive weight of ice dams bends or tears gutters, while freeze-thaw cycles crack and rot wooden fascia boards.
- Shingle deterioration: Water trapped beneath the ice dam loosens granules, cracks asphalt shingles, and accelerates roof aging and premature failure.
These are the critical roof damages due to ice dams on the roof as per the Aqviz experts. We observed the following x roof water damage due to ice dams on the roof.

How to Remove Ice Dams?
To remove an ice dam, you should follow the 6 methods such as.
- Roof-safe ice melt: Apply a calcium chloride-based de-icer directly on the ice dam to accelerate melting without damaging shingles or gutters.
- Heated cables: Install electric heat cables in a zigzag pattern along the roof edge to melt ice gradually and maintain water flow during freeze-thaw cycles.
- Hot water method: Spray hot (not boiling) water using a hose to create drainage channels through the ice dam. This is ideal for quick, temporary relief.
- Roof rake with a telescoping handle: Use a roof rake to gently pull snow off the lower 3-4 feet of the roof. Less snow reduces the meltwater that feeds the ice dam.
- Ice pick or mallet: Tap carefully with a rubber mallet to break small sections of ice. Avoid metal tools that can puncture shingles.
- Professional steam removal: Hire trained technicians with steam machines that safely melt ice without harming the roofing material. This is best for thick or stubborn dams.
How to Prevent Roof Ice Dams?
To prevent roof ice dams, you should increase attic insulation, improve attic ventilation, seal attic air leaks, install ice and water shield membrane, and use snow guards and snow rakes properly.
- Increase attic insulation: Attic insulation helps to prevent ice dams on the roof by maintaining a consistent ceiling temperature and reducing heat escaping properly.
- Improve attic ventilation: Attic ventilation prevents warm air buildup under the roof deck by allowing cold air to circulate, keeping the roof surface uniformly cold.
- Seal attic air leaks: Air sealing prevents heat from escaping into the attic by closing gaps around vents, recessed lights, and chimneys, which reduces roof snowmelt.
- Install ice and water shield membrane: Ice and water shields block meltwater from penetrating under shingles by creating a waterproof barrier along eaves and valleys.
- Use snow guards and snow rakes: Snow guards and roof rakes prevent snow buildup at the edge of the roof, which reduces the volume of meltwater feeding ice dams.
- Add heat cables or de-icing systems: Heat cables installed along roof edges or gutters help to maintain water flow by melting ice before it can form a dam.
