Sagging Ceilings: Signs, Reasons, Impacts and How to Fix

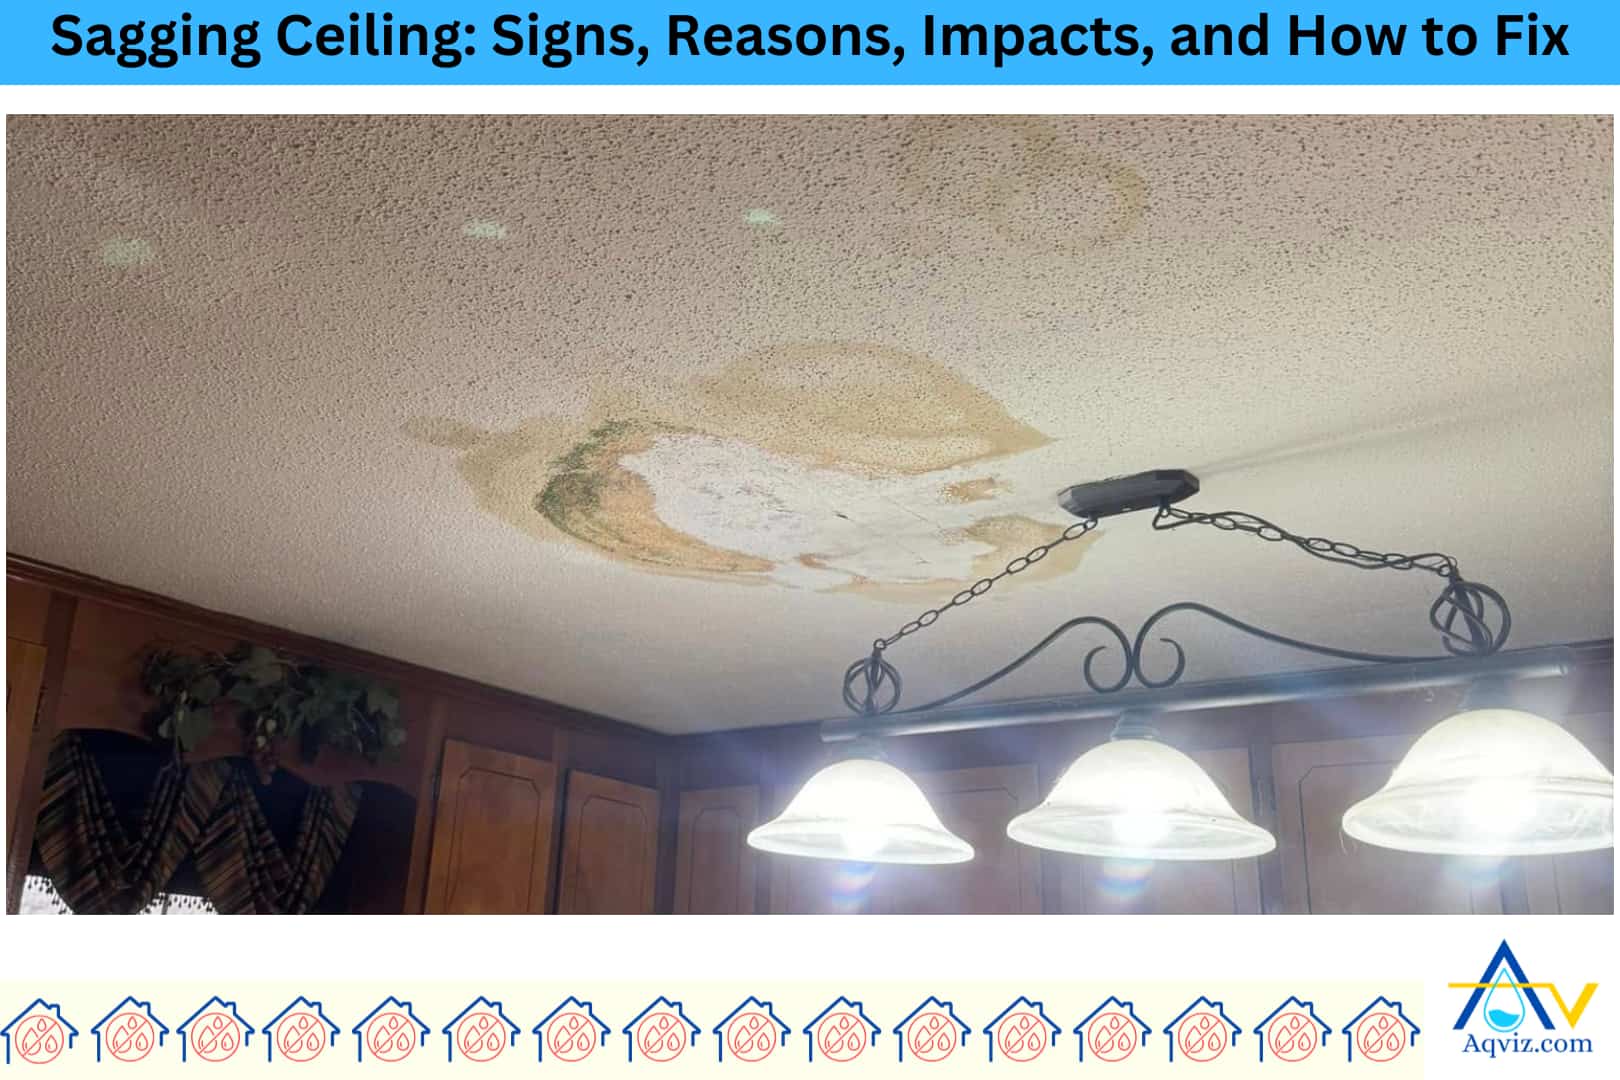
A sagging ceiling is a structural deformation where the ceiling surface bends or bows downward. A ceiling is sagging due to water intrusion, structural movement, excessive weight, poor ceiling installation, and material deterioration. This can be observed by the visible dip, cracks across the ceiling, separation at seams or joints, and nail and screw pop-ups in the ceiling.
The most sagged ceiling type is drywall ceiling. More than that, plaster ceiling, plywood ceiling, wood panel ceiling, and suspended ceilings are other types of ceiling that can sag easily when they are prone to higher humidity. A ceiling can sag due to water intrusion, structural movements, excessive weight, poor ceiling installation, and material deterioration over time.
This huge problem causes to increase in safety hazards, water damage, reduces property value, increases repair costs, and aesthetic deterioration over time. To fix this, you should follow the 10 steps mentioned below. Aqviz experts highly recommend you fix immediate leaks, use moisture-resistant materials, control indoor humidity, avoid overloading the attic, and ensure proper ceiling installation to prevent the ceiling from sagging over time.
What Is a Sagging Ceiling?
A sagging ceiling is a structural deformation where the ceiling surface bends or bows downward. Ceiling sagging can be observed between the joists, and you may notice cracks, gaps, or seams that don’t align properly. A ceiling is sagging due to water intrusion, structural movement, excessive weight, poor ceiling installation, and material deterioration.
The most commonly used ceiling material is gypsum board (drywall). Gypsum boards are highly susceptible to water absorption and can lose their rigidity when exposed to prolonged humidity, plumbing leaks, or roof seepage. Therefore, gypsum ceilings deteriorate faster in high moisture zones, areas like bathrooms, laundry rooms, or poorly ventilated basements.
Read More About: What to Know About Roof Waterproofing?
Which Ceilings Sag the Most?
The most commonly sagged ceiling material is gypsum (drywall). More than that, plaster ceiling, plywood ceiling, wood panel ceiling, and suspended ceilings are other types of ceilings that can sag.
- Drywall ceiling: Drywall ceilings sag due to moisture absorption, weakened joints, and overloaded insulation above the ceiling. They are most affected in high-moisture areas such as bathrooms, kitchens, laundry rooms, and basements, where humidity and hidden plumbing leaks are common.
- Plaster ceiling: Plaster ceilings sag due to the breakdown of the plaster-to-lath bond over time. This occurs most often in older homes with poor ventilation and in rooms like living areas or dining rooms, where ceiling movement goes unnoticed until visible deformation appears.
- Plywood ceiling: Plywood ceilings sag due to warping and delamination from sustained humidity or roof leaks. They are most commonly affected in attic rooms, enclosed porches, and garages where environmental control is minimal.
- Wood panel ceiling: Wood panel ceilings sag due to seasonal swelling, shrinkage, and poor fastening. These are typically found sagging in sunrooms, dens, and upper-level rooms where temperature fluctuation and poor airflow accelerate wood movement.
- Suspended ceiling: Suspended ceilings sag due to tile saturation from leaks and misaligned grids. This occurs most frequently in basements, commercial spaces, and utility rooms where condensation or pipe leakage above the tiles compromises their structure.
What Are the 5 Signs of a Sagging Ceiling?
You can identify a sagging ceiling by using a visible dip, cracks across the ceiling, separation at seams or joints, and nail and screw pop-ups in the ceiling.
- Visible dip or bowing: You can observe a downward curve or uneven surface in the ceiling, especially between joists. This is often the first noticeable indicator of structural stress or water damage, and discoloration or water stains near the walls.
- Cracks across the ceiling: Sagging ceilings show fine hairline cracks or larger fractures, often spreading out from corners, fixtures, or along taped drywall seams. These cracks can be a clear sign of shifting or weakened support.
- Separation at seams or joints: You may detect gaps or ridges where drywall panels meet, caused by ceiling material pulling away from fasteners or framing due to sagging pressure.
- Nail or screw pops: Ceilings with movement often show fasteners backing out, creating raised or broken spots. These are easy to identify on painted surfaces where circular marks or bumps appear.
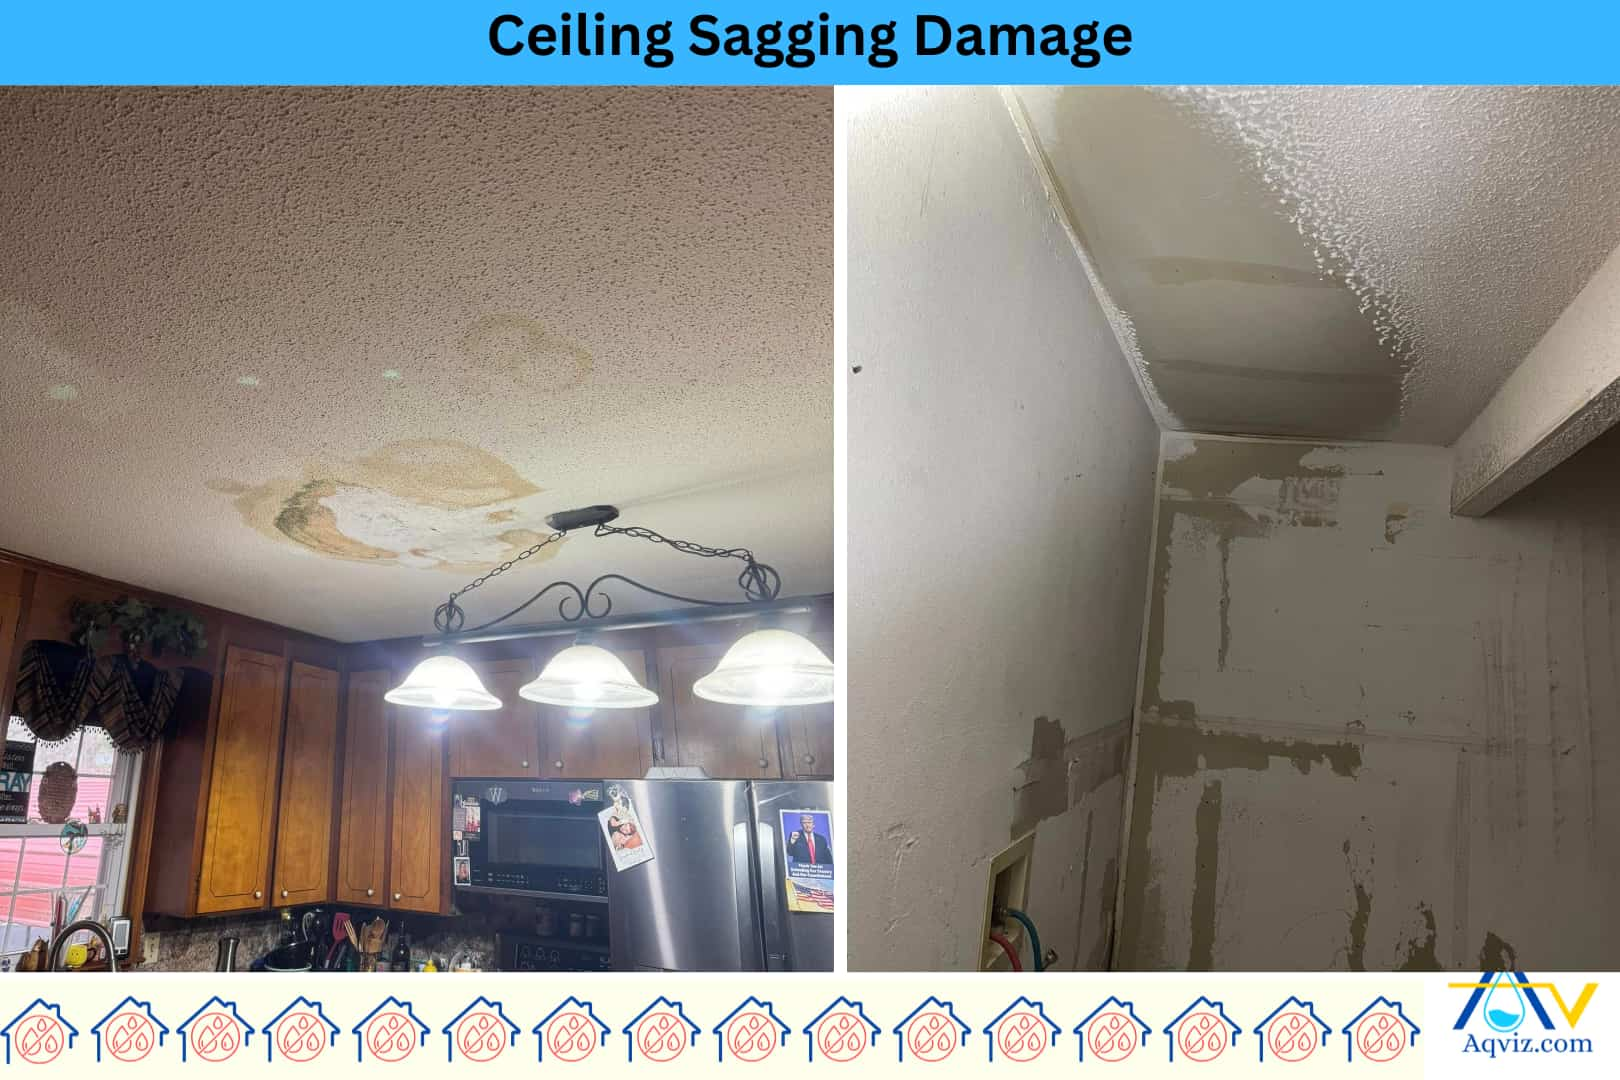
- Discoloration or water stains: Brown or yellow stains help identify hidden leaks above the ceiling, which saturate the material and lead to gradual sagging. These stains often appear near plumbing lines or under roof penetrations.
What Are the Reasons for Sagging Ceilings?
These are the 5 reasons for sagging ceilings.
- Water intrusion
- Structural movement, like foundation settlement or shifting joists
- Excessive weight
- Poor ceiling installation
- Material deterioration
What Are the Impacts of Sagging Ceilings?
Sagging ceiling causes to increase in safety hazards, water damage, reduces property value, increases repair costs, and aesthetic deterioration over time.
- Increase safety hazard: Sagging ceilings raise the risk of a partial or full collapse, which can be dangerous for people inside and cause serious damage to the property.
- Water damage: If a ceiling sags for too long, moisture can spread to nearby areas, causing stains, roof mold growth, and the breakdown of materials like wood, plaster, or drywall.
- Reduced property value: A visibly deformed ceiling reduces the property’s market appeal and can lower its appraised value, whether it’s a home or a commercial building.
- Increased repair costs: Delaying ceiling repairs often causes more serious structural damage, turning small fixes into a full ceiling replacement.
- Decrease aesthetic appeal: Sagging ceilings give the room an uneven, damaged appearance, which lowers the overall look and comfort of the interior space.
How to Fix a Sagging Ceiling?
To fix the sagging ceiling, you should follow the 10 steps below
- Identify the reasons for ceiling sagging: First, you should inspect for roof leaks, plumbing failures, or attic overload. Use a flashlight to check above the ceiling surface and trace moisture stains or structural shifts.
- Shut off utilities: Turn off electricity and water lines near the affected area to prevent accidents during repair.
- Mark the sagging section: Use a straight edge or chalk line to outline the drooping area for precise removal and replacement.
- Remove the damaged material: Cut and remove sagged drywall or plaster using a utility knife or multi-tool. You should wear protective gear to avoid inhaling dust.
- Inspect framing and joists: Check for warped, cracked, or loose ceiling joists, then reinforce them with metal brackets, sister joists, or blocking if needed.
- Install new ceiling board: Fit moisture-resistant drywall or ceiling panels into place. Secure with drywall screws spaced 12 in (30.5 cm) apart along joists.
- Tape and finish joints: Apply joint tape and compound, feathering the edges for a smooth finish. Allow to dry, then sand and reapply as needed.
- Prime and paint: Use a stain-blocking primer followed by ceiling-grade paint to restore a clean, uniform appearance.
- Fix the root issue: Seal roof penetrations, repair plumbing leaks, or reduce attic load to prevent future sagging.
- Improve ventilation: Add exhaust fans or vents in high-moisture areas like bathrooms and kitchens to control humidity and extend ceiling life.
Read More About Other Water Problems on the Roof
How to Prevent Sagging Ceilings?
To prevent ceiling sagging, you should follow the steps below.
- Fix leaks immediately: Repair roof leaks, damaged flashing, or plumbing failures as soon as they’re detected to stop moisture from weakening ceiling materials.
- Use moisture-resistant materials: Install water-resistant drywall or ceiling panels, especially in high-humidity areas like bathrooms, kitchens, and basements.
- Control indoor humidity: Maintain indoor humidity between 30-50% using exhaust fans, dehumidifiers, or improved HVAC systems to prevent material softening and mold.
- Avoid overloading attic space: Limit heavy storage or HVAC equipment directly above ceilings to reduce excess stress on joists and drywall.
- Ensure proper installation: Use correct fastener spacing (12 in or 30.5 cm) and reinforce ceilings with adequate framing support during construction or renovation.