How to Waterproof a Water Tank?: 7 Steps Guide

Water tank waterproofing is applying water impervious layer inside the water tank in order to prevent seepage and leakage from the inside of the water tank. You can waterproof a water tank by following the 7 steps.
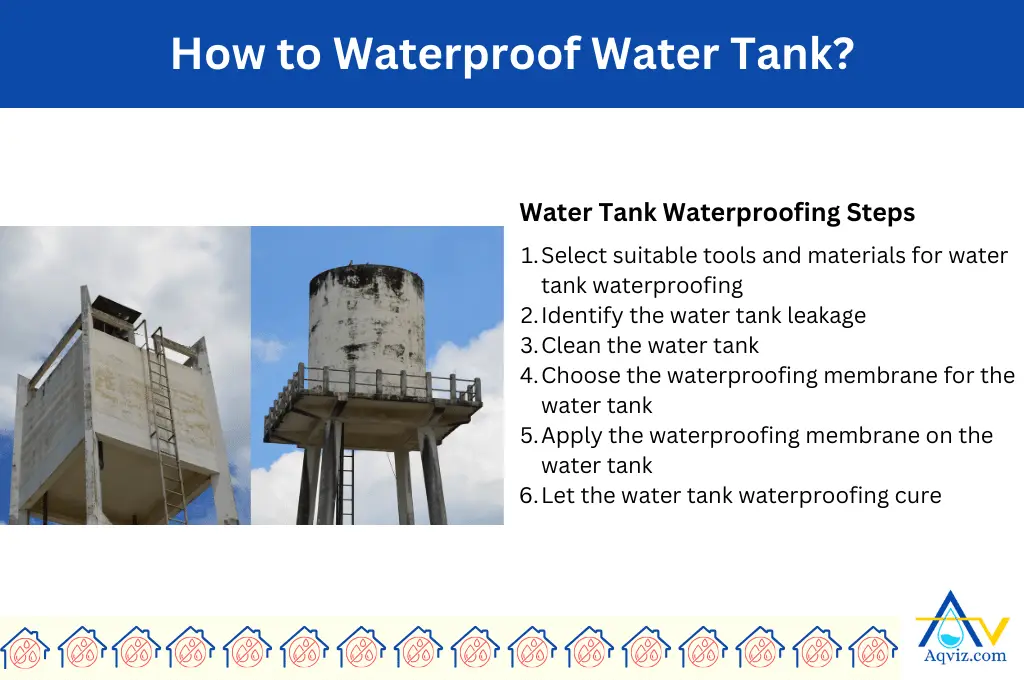
7 Steps for Water Tank Waterproofing
- Select suitable tools and materials for water tank waterproofing
- Identify the water tank leakage
- Clean the water tank
- Let the water tank surfaces dry
- Choose the waterproofing membrane for the water tank
- Apply the waterproofing membrane on the water tank
- Let the water tank waterproofing cure
These steps can be applied to underground water tanks, overhead water tanks, concrete water tanks and rainwater tanks.
1. Select Suitable Tools and Materials for Water Tank Waterproofing
You should choose essential tools and quality materials for water tank waterproofing. Tools can improve the speed and efficiency of the waterproofing. Quality materials can increase the effectiveness and durability of the waterproofing layer. Hence, you should select the tools and materials for water tank waterproofing.
Before starting this step-by-step guide, we highly recommend that you refer to this guide, “What to Know about Water Tank Waterproofing?” This guide is prepared by the Aqviz experts, and we have included all indetail about water tank waterproofing.
Safety tools for water tank waterproofing
- Waterproofing tools: You should have all the recommended waterproofing tools before starting a water tank waterproofing project.
- Goggles gas mask: A gas mask is used to prevent inhaling harmful chemicals while waterproofing in the water tank
- Gloves: Gloves are used to protect the hands from harmful contaminants in waterproofing membranes.
- Air suction system: An air suction system is needed to increase the water tank’s ventilation.
- Paint suit: A paint suit is used to protect from the harmful contaminants in waterproofing compounds.
Tools for water tank waterproofing
- Drill
- Spectualer
- Brush
- Pressure gun
- Sponge
Supplies for water tank waterproofing
- Waterproof primer: Primer is used to improve the adhesion between the surface and the membrane.
- Waterproofing membrane: You can use a cementitious waterproofing membrane, epoxy waterproofing membrane, polyurethane, or Liquid rubber waterproofing membrane for water waterproofing.
- Protective coating
You should choose a waterproofing membrane among these 10 types of waterproofing membranes in this guide.
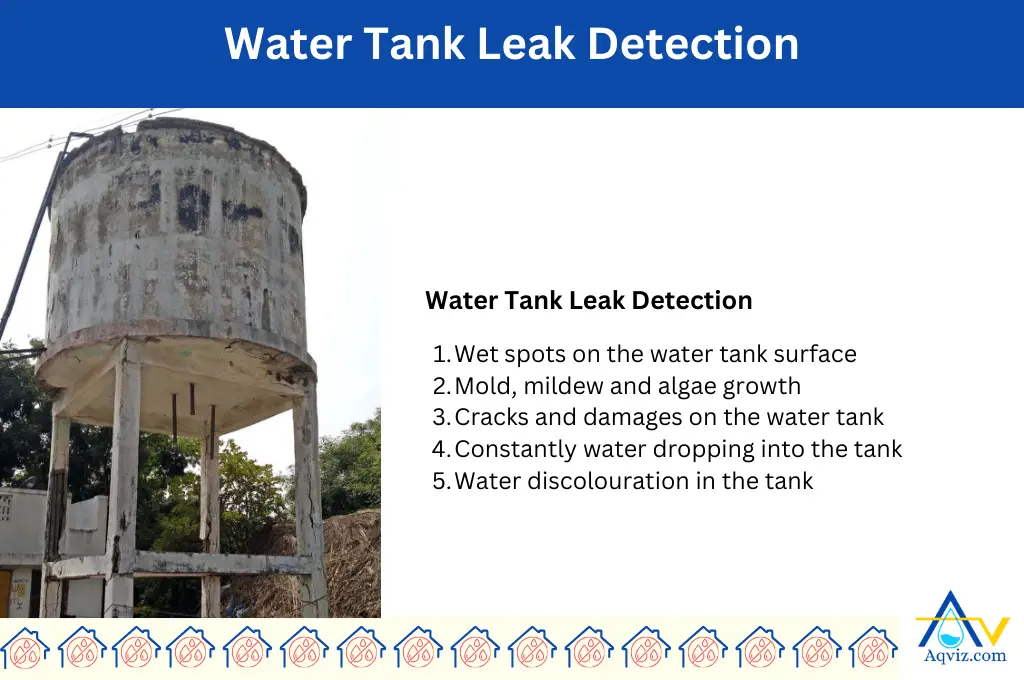
2. Identify the Leakage in the Water Tank
You can identify the water leakage problems in the water tank by observing and measuring. The water leakage identification of the water tank can increase the accuracy and effectiveness of the waterproofing. You can follow the signs and measurements to identify the water leakage in the water tank
- Wet spots on the water tank surface
- Mold, mildew, and algae growth
- Cracks and damage on the water tank
- Constantly water dripping into the tank
- Water discolouration in the tank
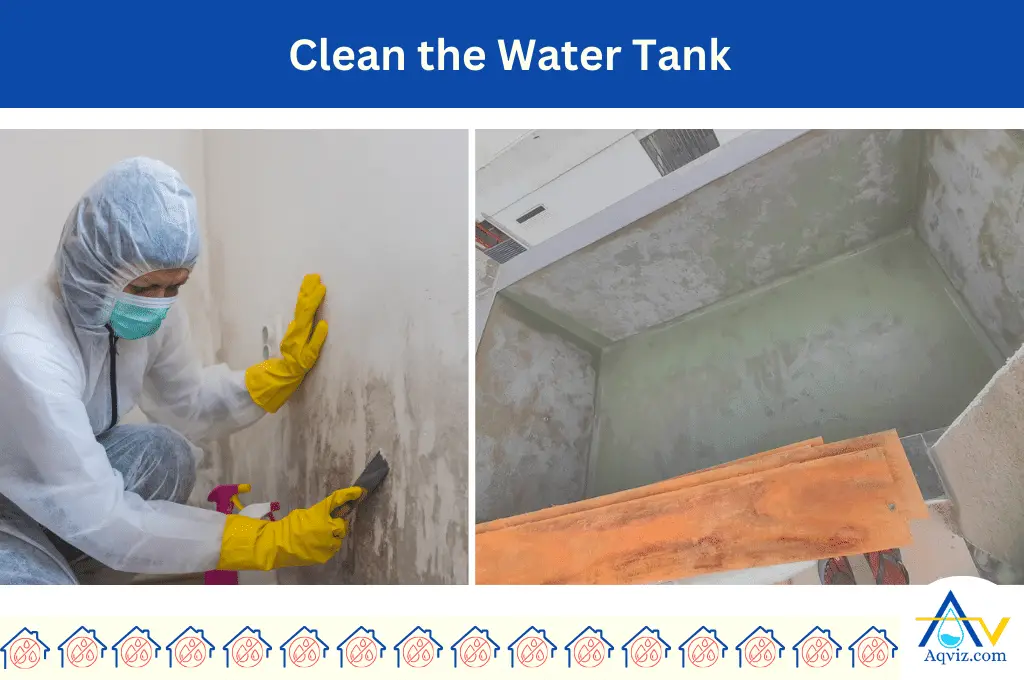
3. Clean the Water Tank
Water tank cleaning is important for crack and damage, and waterproofing adhering to the water tank surface. First, you should wash the water tank’s interior walls by using a pressure washer. Pressure washer water will remove any dirt or grime stuck on the walls and floor of the tank.
Then, you can use a scrub brush to remove any dirt, algae, fungus, or any other contaminant that could interfere with the waterproofing process. After the scrubbing process is done, you should wash the surface again using mild detergent. After the cleaning process is over, you can observe more cracks and damage in the tank surface.
4. Let the Water Tank Dry
The water tank drying process removes all water in the water tank in order to have a dry surface on the water tank. After liquid water is removed, you have to keep it dry for about 24-48 hours to allow any remaining moisture to evaporate naturally by opening the tank lid. You can increase the water tank drying process by using a dehumidifier or heater to speed up the drying process. But you should not damage the water tank surface by increasing the heat.
A properly dried water tank surface is easy to clean, easy to find the cracks and damages, and waterproofing can adhere to the surface tightly. The concrete water tank drying process is more important than metal water tank.
5. Choose the Waterproofing Membrane for the Water Tank.
You should choose a waterproofing membrane for the water tank by considering several factors, such as the toxicity of the waterproofing membrane, the water tank material, placement, environmental conditions, age of the water tank construction, durability of the waterproofing layer, and service and maintenance.
- Choose non-toxic waterproof membranes for drinking water tanks: When you choose a waterproofing membrane for a drinking water tank, you should choose a non-toxic membrane in order to keep the water of better quality and healthier.
- Consider the material of the water tank: Water tanks are mainly made of concrete and metal. Concrete water tanks can be waterproofed by using cementitious waterproofing, epoxy waterproofing, and liquid rubber. Metal water tanks can be waterproofed by using epoxy and liquid polyurethane.
- Consider water tank placement while choosing a waterproof water tank: Water tanks are mainly placed underground and overhead. You should have a dam proofing if the ground water tank is much deep. You should protect the overhead water tank’s outer surface by using UV coating and waterproof sealant.
6. Apply Waterproofing Membrane on the Water Tank
When you apply water tank waterproofing, you should follow the manufacturer’s guidelines and method statements step by step. You can follow the steps for underground waterproofing, overhead water tank waterproofing, rainwater tank waterproofing, and concrete water tank waterproofing.
- Wear all the safety instruments and equipment to increase personal safety: Wear a gas mask and set up a ventilation system of air suction system in the water tank. The gas mask is essential to prevent inhaling the harmful contaminants in the water tank and the waterproofing membrane. Air suction system helps to improve the air circulation of the water tank.
- Prepare the waterproofing membrane for the water tank surface as per the manufacturer’s instructions.
- Apply the primer on the water tank interior surface: Water tank waterproofing membranes require the application of a primer to enhance adhesion. If a primer is needed, carefully apply it to the entire surface of the water tank using a brush, spray or roller. Then you should allow the primer to dry as per the manufacturer’s instructions.
- Apply the membrane on the water tank surface: You can use a brush, roller, or spray equipment, to apply the waterproofing membrane to the walls and floor of the water tank. You should ensure consistent application, covering all areas thoroughly. Pay special attention to corners, joints, and any areas where water may potentially seep through.
- Allow the waterproof membrane to cure: After applying the waterproof membrane on the water tank surface you should allow it to cure as per the manufacturer’s instructions. This typically involves a drying or curing period, during which the membrane forms a strong and durable barrier against water penetration.
- Inspect for any missed applying spots on the water tank surface: You should inspect the water tank for any missed spots or areas once the surface is cured that may require additional waterproofing. Touch up any areas as needed to ensure complete coverage.
- Test for effectiveness: After the waterproofing membrane has been applied and cured, it is recommended to conduct a water test to check for any leaks or seepage. Fill the water tank with water and observe for any signs of water leakage. If any issues are detected, address them promptly by reapplying the membrane or using additional waterproofing measures.

7. Let the Waterproofing Layer Cure
After waterproofing is done, let the water tank to for curing at least 24-48 hours. You should check the manufacturer’s guidelines for further instructions. During the curing process, do not expose the layer to water. After the curing process is over you can fill the water tank for inspection and checking.
What are the Water Tank Damages?
Water tank damages tend to leak water outside. When you observe the following 5 damages in the water tank, you should waterproof it using a suitable waterproofing method.
- Leaks and seepage: Cracks or holes in the water tank can lead to water loss and structural instability.
- Metal corrosion: Metal water tanks are particularly susceptible to rust and corrosion, which can weaken the structure and contaminate the water.
- Cracks in the structure: Concrete water tanks can develop cracks over time due to thermal expansion and contraction, leading to water leakage.
- Weaken the structure: When the water tank is exposed to water without proper waterproofing can degrade the material, compromising the tank’s strength.
- L eak harmful contamination: Surrounding contaminants can leak inside the water tank, and it can affect the water quality and safety when it is left without waterproofing over time.
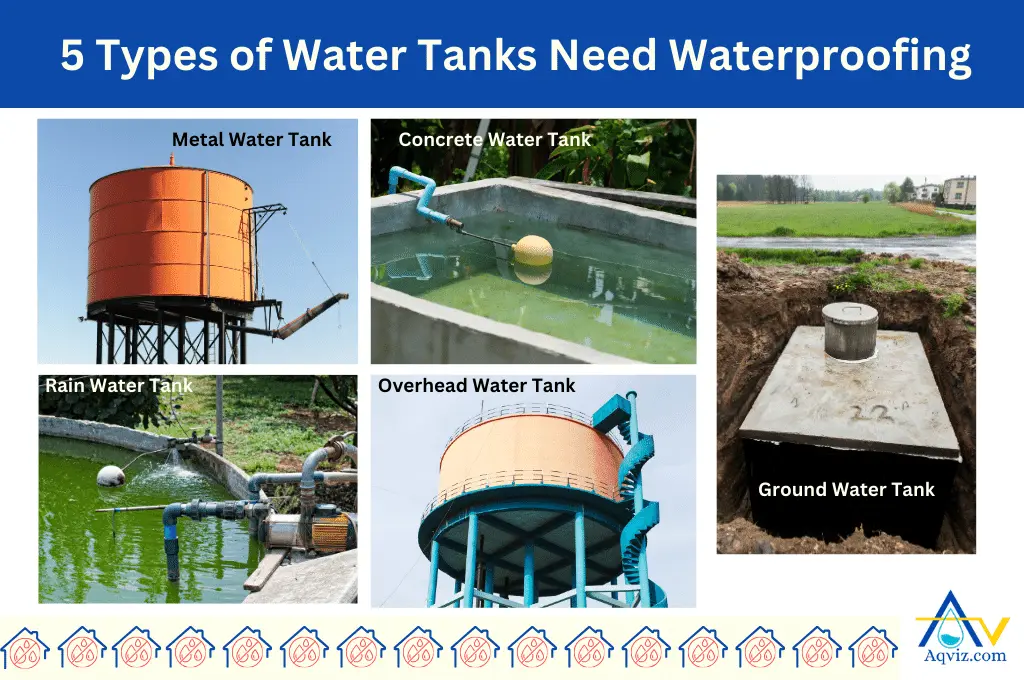
What Water Tanks You Should Waterproof?
You should waterproof both the underground and overhead water tanks, which are made of concrete and metal. You should waterproof concrete and metal water tanks, which are made for drinking water and collecting rainwater.
- Underground water tank should be waterproofed to prevent water ingress and structural damage caused by hydrostatic pressure.
- The overhead water tank should be waterproofed to protect against environmental factors and ensure the integrity of the tank structure.
- A concrete water tank should be waterproofed to avoid cracks and leaks that can compromise the tank’s durability and water quality.
- Metal water tanks should be waterproofed to prevent rust and corrosion, ensuring the longevity and safety of the stored water.
- Rainwater water tank should be waterproofed to maintain the purity of the collected water and prevent contamination from external sources.