Moisture Barriers: Classes, Thickness, Cost, and Installation

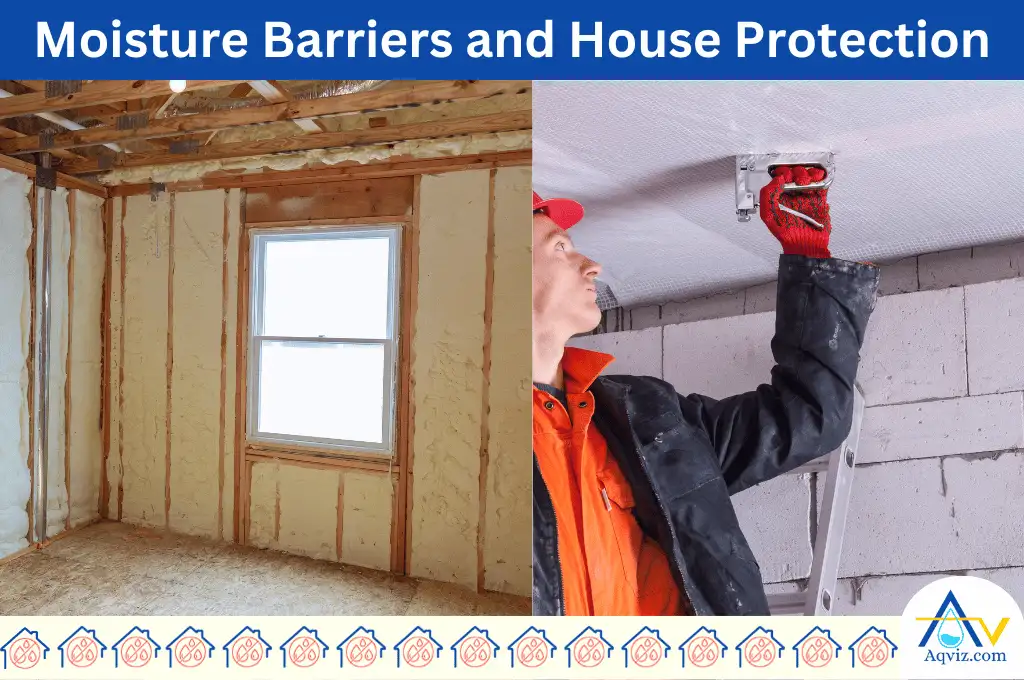
A moisture barrier is also known as a vapor or water barrier. It is applied to the exterior walls in order to prevent moisture from seeping into the house. Moisture barriers can be categorized into Class I, Class II, and Class III. These classes are based on the moisture permeability of the layer.
The average thickness of the moisture barrier is 12 mil. When it is installed, it will cost between $7.50 and $22.00 for the professionals and will take 8-12 hours for 1000 sqft. The main 4 purposes of the moisture barriers are preventing moisture from passing, preventing mold and mildew growth, controlling the moisture-damaged areas, and preventing the intrusion of unconditioned air and moisture. You can install moisture barriers in walls, flooring, crawl space, and basement walls. You can install a moisture barrier in the home by following the proper guidance. It will minimize the damage and increase the efficiency.
The moisture barriers should be protected by proper installation, regular inspection, proper barrier selection, and regular maintenance. A moisture barrier can be damaged by incorrect installation, selecting the wrong type, physical damage from punctures, improper maintenance, and exposure to extreme environmental conditions.
The main 3 disadvantages of moisture barriers in the house are trapping moisture inside the home if it is not properly installed in the home, requiring regular maintenance, and having a complex installation process. Hence, you should protect the moisture barrier for optimum usage.
What is a Moisture Barrier?
A moisture barrier is also known as a vapor or water barrier. It is a material that is applied on the exterior walls and floors of a building to prevent moisture from seeping into the house structure. Moisture barriers can block both liquid and vapor from outside the house. The primary task of the moisture barrier is to protect the building materials from water damage.
What Does a Moisture Barrier Do?
A moisture barrier prevents moisture intrusion by stopping water vapor and liquid water from passing through walls, floors, roofs, and crawlspaces. It reduces condensation, protects insulation and structural materials, and minimizes moisture-related damage such as mold growth, corrosion, and material deterioration. In our field work, correctly installed moisture barriers extend material life and maintain indoor humidity within safe limits.
What Are the 3 Classes of Moisture Barriers?
The main three types of moisture barriers are Class I, Class II, and Class III. Each of these class is installed in the house for various moisture conditions. These classes are made with different permeable materials.
Class 1 moisture barriers
Class I moisture barriers are used to block all forms of moisture.
The advantages of Class 1 moisture barriers are:
- Class 1 moisture barriers provide excellent protection against all forms of moisture
- Class 1 moisture barriers are durable and long-lasting.
- Class 1 moisture barriers help to prevent the growth of mold and rot within a building structure.
- Class 1 moisture barriers are suitable for use in high-humidity or wet climates.
Class 2 moisture barriers
Class II moisture barriers are semi-permeable. It allows some moisture to pass through.
The advantages of Class 2 moisture barriers are:
- Class 2 moisture barriers provide a balanced level of moisture protection
- Class 2 moisture barriers are effective in moderate climates where high permeability is not required.
- Class 2 moisture barriers can be combined with other insulation materials to enhance thermal performance.
- Class 2 moisture barriers help to prevent issues like condensation within wall cavities.
Class 3 moisture barriers
Class 3 moisture barriers are the most permeable among the three classes. It allows a higher amount of moisture to pass through the layer.
- Class 3 moisture barriers allow for greater moisture diffusion.
- Class 3 moisture barriers are often more affordable than Class I and Class II barriers.
- Class 3 moisture barriers can be used in combination with other moisture management strategies to ensure optimal indoor air quality.
- Class 3 moisture barriers are often easier to install, making them a popular choice for DIY home improvement projects.
What is the Thickness of Mositure Barrier?
The moisture barrier thickness is available between 6 mil and 20 mil. 6 mil is highly recommended for the walls and temporary walls, and 20 mil is recommended for the heavy-duty commercial uses.
For a standard home crawl space, experts usually recommend 12 mil as a “sweet spot” because it is thick enough to withstand being crawled on without being as expensive or heavy as a 20 mil commercial liner. For concrete slabs, 10 mil is the industry standard to meet ASTM E1745 requirements.
How Much Does it Cost for a Moisture Barrier?
The total cost to install a moisture barrier on the surface for 1 square meter will cost between $7.50 and $22.00. If you choose to do it yourself, the cost for materials alone can be significantly lower, often dropping to between $1.50 and $5.50 per square meter.
This price range typically covers standard professional installation, including both materials and labor. The cost of moisture barrier installation depends on the material thickness, accesbility and space condition, surface preparation, sealing, taping requirement, and geographic location.
How Long Does it Take to Install a Moisture Barrier?
Moisture barrier installation will take between 8 and 12 hours for an average area of 1,000 square feet when performed by a two-person professional crew. For DIY projects or more complex setups, such as full encapsulation, the timeframe can extend to 2 or 3 days to ensure every seam is perfectly airtight and all wall attachments are secure. But it depends on the space condition, preparation, clearance, accessibility, obstacles, system complexicuty and method of attachment.
What are the Purposes of a Moisture Barrier?
Moisture barriers are used mainly 4 purposes:
- The main purpose of the moisture barrier is to prevent moisture from passing through walls, ceilings, and floors. It acts as a protective layer that keeps unwanted moisture out of your home.
- Moisture barriers are useful to prevent problems like mold and mildew growth, wood rotting, and termite infestation. These help to control humidity levels in the home.
- Moisture barriers can control the highly moisture-damaged areas in the home, like bathrooms, kitchens, basements, and crawl spaces
- Moisture barriers can prevent the intrusion of unconditioned air and moisture. They help to maintain the desired temperature inside the home. Hence, you can reduce the heating or cooling equipment usage.
Where to Use Moisture Barriers?
Moisture barriers are used in walls, floorings, crawlspace, basement walls, and roofs for the different purposes mentioned below.
- Walls: Moisture barriers are used for walls to achieve these purposes, such as controlling the moisture on the wall, increasing indoor energy efficiency, preventing pest infestation, increasing wall structural integrity, and improving indoor air quality.
- Moisture Barrier for Flooring: Moisture barriers are used for flooring to achieve these purposes, such as controlling subfloor moisture, preventing mold and mildew growth, prevent pest and termites, and improving the flooring lifespan.
- Crawl Space: Moisture barriers are used for the crawl space to prevent moisture accumulation in the crawl space, protect structural integrity, reduce energy costs, prevent pest infestations, and increase indoor air quality.
- Basement Walls: Moisture barriers are installed on the basement walls to prevent mold growth due to higher dampness, protect the wood from rotting, control pest attraction, increase the structural integrity, and improve the energy efficiency in the home.
- Moisture Barrier for Roof: Moisture barriers are installed on the roof to prevent water infiltration, reduce condensation, improve energy efficiency, and reduce maintenance costs.

How to Install a Moisture Barrier?
Moisture barrier installation can be done as a DIY project. However, you should have expert guidance to minimize the damage and increase efficiency. You can install a moisture barrier in the home as an expert by following the below 8 steps.
- Identify the area: Identify the area where you need to install the moisture barrier. You should install the moisture barrier in basements, crawl spaces, and concrete floors.
- Clean the area before installation: Clean the area thoroughly. Remove any debris or dust that might interfere with the installation.
- Measure the area: Use a tape measure to calculate the size of the area you need to cover.
- Roll out the barrier: Start by rolling out the moisture barrier on the floor or against the wall, ensuring it covers the entire area. Leave a few extra inches on all sides for overlap.
- Overlap the barrier properly: You should overlap the seams and joints of the barrier in order to prevent moisture from leaking through the layer.
- Seal the joints and seams: Use moisture-resistant tape to seal the seams between each sheet of barrier.
- Secure the barrier: You need to secure it with staples or adhesive if you install the barrier in a crawl space or on a wall.
- Cut the excess barrier length: Trim any excess moisture barrier material after the barrier is secured.
How to Protect a Moisture Barrier?
Moisture barrier protection is essential for higher efficiency and prolonged usage. Moisture barriers should be protected before installation, during installation, and after installation steps. You should follow the 7 steps below to protect the moisture barrier for prolonged usage.
- Use quality moisture barrier materials: You should use high-quality materials always when you install a moisture barrier. High quality moisture barriers will last long with higher efficiency.
- Consider the climate before selecting the moisture barrier: Consider the climate and environment where the moisture barrier is being installed. Different climates require different types of barriers hence you should choose the right one always.
- Install the moisture barrier properly: You should ensure that the moisture barrier is properly installed. It should be properly sealed without any gaps or spaces.
- Avoid damages while installing the layer: You should be careful not to puncture or damage the moisture barrier during installation or while carrying out any other work in the area.
- Regularly inspect the moisture barrier: You should regularly inspect your moisture barrier for any signs of damage or wear and tear forming on the surface.
- Do regular maintenance: You should do regular maintenance on the moisture barrier. Because it helps to keep the layer in good condition.
- Maintain proper ventilation: You should maintain the proper ventilation in the house. This can help to control the amount of moisture in the air and reduce the pressure on the moisture barrier.

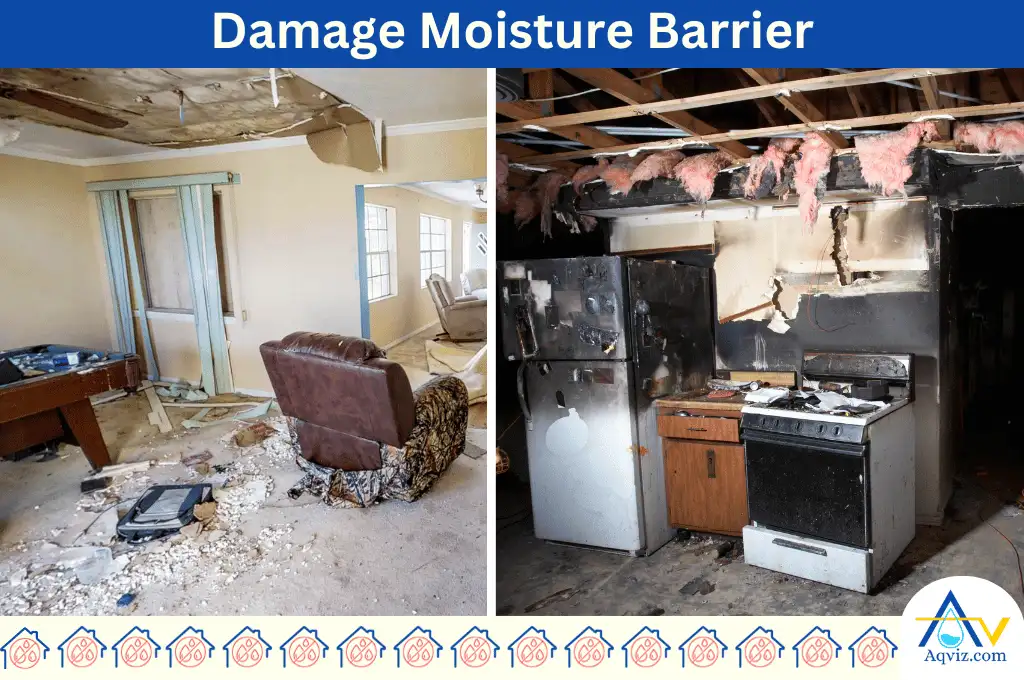
How to Damage a Moisture Barrier?
A moisture barrier can be damaged due to incorrect installation, selecting the wrong type, physical damage on the layer, improper maintenance, and exposure to extreme environmental conditions. These damages reduce the performance and durability of the barrier.
- Incorrect installation on the surface: The moisture barrier can be damaged due to incorrect installation. The incorrect installation does not cover the entire surface area, leaves gaps, or does not properly seal the barrier.
- Select the wrong moisture barrier type: You should choose suitable moisture barrier types among Class 1, 2, 3, The class should be selected according to the environmental condition of the house.
- Physical damage: The moisture barrier can be damaged by punctures or tears after its installation. These damages can reduce the overall efficiency of the layer.
- Improper maintenance of the moisture barrier: Improper maintenance and repairs lead to continued damage over time. It will tend to wear and tear the layer. As a result, the layer efficiency will be reduced.
- Exposure to extreme environmental conditions: Moisture barriers canbe damaged due to exposure to extreme weather conditions or temperatures. This can include severe storms, high winds, or extreme heat or cold.
What are the Disadvantages of Moisture Barriers?
- Traps moisture inside the home if not correctly installed.
- Require regular maintenance and inspection.
- The installation process can be complex.
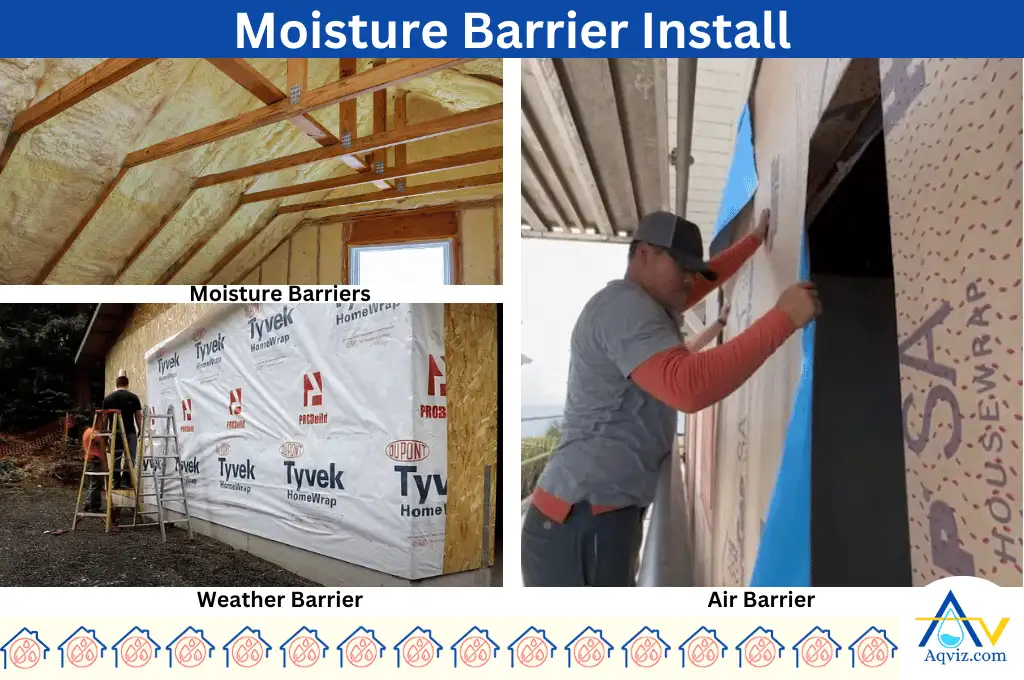
What is a Weather Barrier?
A weather barrier is a protective layer that is applied on the external envelope of a building to prevent rain and moisture from seeping into the house. The weather barrier acts as a shield. It keeps the water outside and maintains the structural integrity and longevity of the building.
What is an Air Barrier?
An air barrier is a material that is designed to stop the flow of air through the building envelope. Its primary task is to prevent the uncontrolled movement of air in and out of a building. Air barrier enhances the energy efficiency of a building and improves its overall performance.