Bathroom Waterproofing: Know these Before Starting

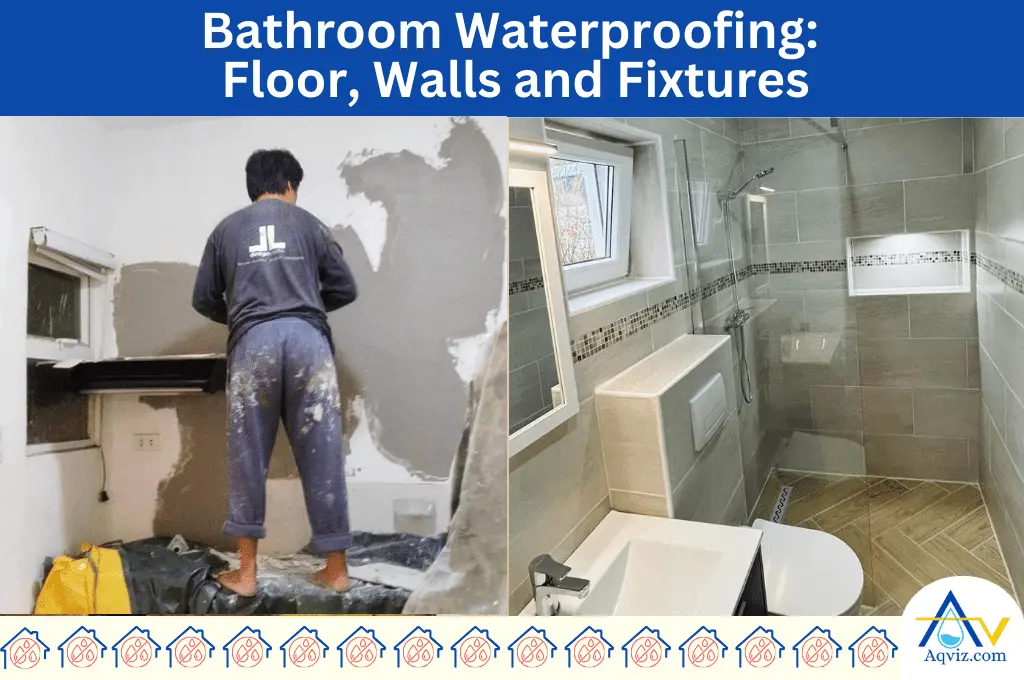
Bathroom waterproofing is the application of a waterproofing membrane on the bathroom floor and walls to prevent water from leaking into the building structure. Installing bathroom waterproofing helps to stop water damage and improve the durability of the bathroom, including different benefits.
To waterproof a bathroom, you can use both liquid and sheet membranes, depending on the substrate. The most used bathroom waterproofing membranes are cementitious, epoxy, acrylic, bituminous, EPDM, HDPE, PVC, and polymer-based waterproofing membranes.
A bathroom waterproofing project typically takes 2-4 days for the professionals. You can do it as a DIY with suitable tools and materials. As well as you should waterproof all the areas in the bathroom specially 6 feet (183cm) height of the shower walls, to prevent water splashing, condensation, and direct water contact on the surface. Aqviz experts have included them all with our 7-step guide. After the bathroom waterproofing is done, you should protect it properly to prevent unnecessary damage. So if you have any question contact us.
What is Bathroom Waterproofing?
Bathroom waterproofing is the application of a waterproofing membrane on the bathroom floor and walls to prevent water from leaking into the building structure. You can use both liquid and sheet membranes to waterproof the bathroom. Bathroom waterproofing helps to prevent mold and mildew growth, musty odor, wall dampness, ceiling dampness, water dripping, peeling paint, and stain marks on the ceiling and walls below.
What are the 6 Benefits of Bathroom Waterproofing?
Bathroom waterproofing provides both functional and financial protection for the property and homeowners. A properly installed bathroom waterproofing membranes always provide the below 6 important benefits.
The 6 benefits of bathroom waterproofing
- Bathroom waterproofing improves moisture control by preventing water from seeping into floors and walls.
- Bathroom waterproofing prevents hidden leaks that can damage the subfloor or wall substrate.
- Bathroom waterproofing protects against mold, mildew, and harmful bacterial growth.
- Bathroom waterproofing extends the lifespan of tiles, grout, and surface finishes.
- Bathroom waterproofing reduces maintenance costs by minimizing water-related repairs.
- Bathroom waterproofing increases property value by maintaining structural integrity.
When Should You Waterproof a Bathroom?
You can waterproof the bathroom during the bathroom construction stage as well as after it is constructed (old bathroom).
When you do it during the construction stage, you should do it right after the surface preparation and priming stage, but before installing tiles or any final finishes. This helps to ensure the waterproofing membrane bonds directly to the structural substrate, creating a continuous barrier in the bathroom.
If you need to install a waterproofing membrane on exsiting bathroom (already constructed), you can use surface waterproofing like EPOXY sealants as tempeory solution. But for the strong, durable, waterproof solution, you should remove its floorings and install a waterproofing membrane on the substrate properly. We highly recommend this.
What are the 6 Signs that a Bathroom needs Waterproofing?
When you see the following 6 signs in your bathroom area, you should install a waterproofing membrane in the bathroom.
- Mold and mildew growth in the bathroom: If you detect mold and mildew growth in the bathroom, it can be due to constant moisture penetration, lack of ventilation, or failed grout and sealant lines. To prevent this, you should install a continuous waterproofing layer to block water from reaching the wall substrate.
- Musty odor in the bathroom: If you observe a musty odor in the bathroom, it can be caused by hidden mold colonies, prolonged water accumulation under tiles, or damp wall cavities. To prevent this, you should make sure the bathroom has a fully sealed waterproofing system to stop moisture infiltration.
- Water dripping sound in the bathroom: If you identify a water dripping sound in the bathroom, it can be from leaking pipes, membrane punctures, or poorly sealed junctions. To prevent this, you should ensure a waterproofing membrane is applied over all wet areas to contain leaks.
- Wall and ceiling dampness near the bathroom: If you observe dampness on walls and ceilings near the bathroom, it can be caused by membrane failure, cracked grout lines, or plumbing leaks. To prevent this, you should waterproof the bathroom floor and walls to contain water within the wet area.
- Peeling paint near bathroom walls: If you detect peeling paint near bathroom walls, it can result from trapped moisture in the substrate, capillary action from leaks, or poor surface sealing. To prevent this, you should use a waterproofing barrier beneath the wall finish to stop water migration.
- Higher water bills: If you identify higher water bills, it can be due to undetected leaks behind tiles, damaged waterproofing layers, or faulty bathroom fixtures. To prevent this, you should make sure the bathroom waterproofing is intact to contain water and prevent hidden wastage.

How Long Does it Take to Waterproof a Bathroom?
Waterproofing a bathroom typically takes 2 to 4 days. However, this depends on the type of waterproofing membrane, drying times, and project size. Liquid membranes often require multiple coats with curing between applications, while sheet membranes can be installed faster but may take longer for detailed cutting and fitting around fixtures.
The installation time for bathroom waterproofing decreases when using fast-curing membranes, such as polyurethane-based systems, quick-dry primers, and heat-assisted drying.
The installation time for bathroom waterproofing increases when working in cold or humid conditions, applying cementitious membranes with longer cure times, or preparing complex bathroom layouts with multiple fixtures, niches, and penetrations that require extra detailing.
How much Height Should I Waterproof the Bathroom Wall?
The required height of the bathroom wall waterproofing is below.
- Shower wall in the bathroom up to 6 feet (183cm)
- Toilet walls in the bathroom should be waterproof for 3 feet (92cm)
- Bathtub walls in the bathroom should be 2.5 feet (76cm)
- Sink walls in the bathroom should be 4 feet (122 cm)
You should maintain the above heights in every bathroom wall. Maintaining these heights help to prevent water penetration to the bathroom wall due to splashing, condensation, and direct water contact on the surface.
Read this guide about Waterproofing Bathroom Walls: Know these Before Starting will explain you everything about bathroom wall waterproofing.
What Bathroom Areas Should You Waterproof?
You should waterproof the following 8 bathroom areas to prevent water penetration into the bathroom substrate.
- Bathroom floor
- Bathroom walls
- Bathroom shower walls
- Bathroom windows
- Bathroom ceiling
- Bathroom tiles
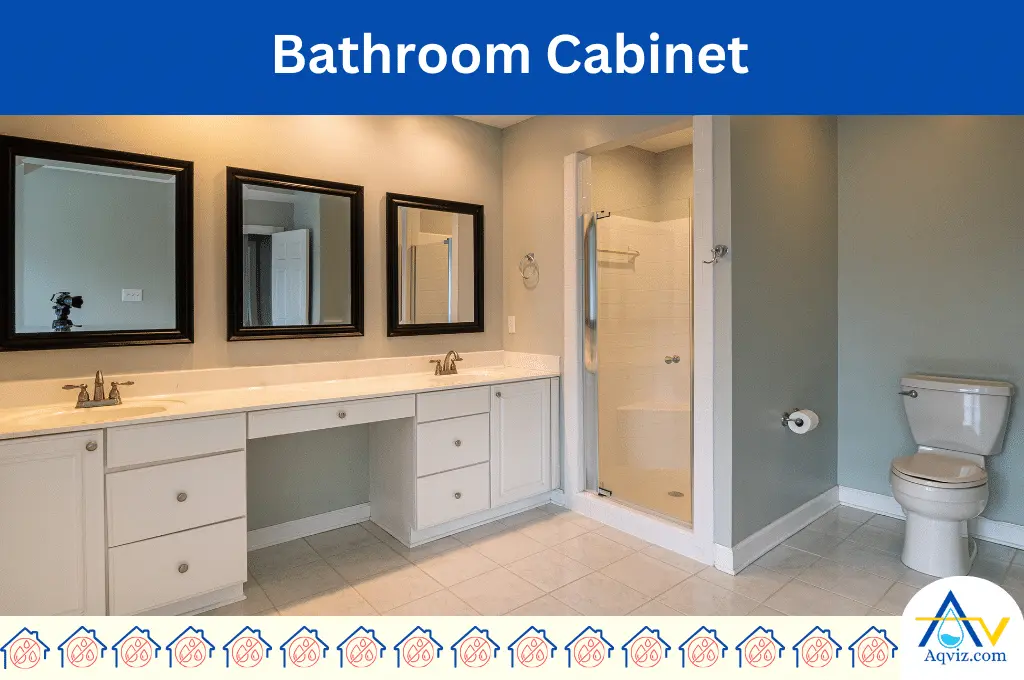
- Bathroom cabinet areas
- Bathroom cladding areas
What are the Waterproof Membranes for Bathroom Waterproofing?
You can use the 8 waterproofing membranes below for bathroom water stops. All of these waterproofing membranes can be categorised into liquid and sheet membranes. Liquid waterproofing membranes are suitable for uneven surfaces, floors, and walls, while sheet waterproofing membranes are suitable for bathroom floor waterproofing.
- Cementitious waterproofing: Cementitious waterproofing can be applied as a liquid coating on the bathroom floor and walls to stop water from leaking.
- Epoxy waterproofing: Epoxy waterproofing is an impermeable, liquid waterproofing membrane that can be used on the bathroom floor and walls. Epoxy can be used for old bathroom water stops, also.
- Acrylic coating waterproofing: Acrylic waterproofing is a liquid waterproofing membrane that can be used for bathroom floors and walls.
- Bituminous coating waterproofing: Bituminous coating waterproofing is a liquid waterproofing membrane that can be used for both bathroom walls and floors to prevent water from leaking.
- EPDM Rubber waterproofing: EPDM rubber waterproofing is a sheet waterproofing membrane that can be used to waterproof bathroom shower areas, walls, and floors.
- HDPE waterproofing: HDPE is a sheet membrane waterproofing that can be used for bathroom wall and floor waterproofing.
- PVC waterproofing: PVC is a sheet membrane waterproofing. PVC can be used to waterproof the shower area and bathroom.
- Polymer waterproofing: Rubber polymer can be used as positive side waterproofing for the shower areas.
How to Waterproof a Bathroom in 7 Steps?
To waterproof a bathroom, Aqviz experts follow the below 7 step by step guide. We highly recommend this step-by-step guide to minimize the circumstances and increase the efficiency of the work.
- Clean the bathroom surface: First, you should clean the bathroom wall and floor surface using a stiff bristle brush, scraper, and mild detergent to remove dust, soap scum, and oils from the surface. This helps to bond the waterproofing membrane to the surface properly.
- Repair the bathroom floor and wall surfaces: Then you should use polymer-modified mortar, a trowel, and a level to fill cracks in the bathroom floor screed and create a 1-2% fall toward the shower drain. This helps for proper slope and prevents prolonged water ponding after waterproofing.
- Apply primers on the bathroom floor and walls: Then, you should apply the manufacturer’s recommended waterproofing primer with a roller or brush on bathroom walls, shower recesses, and floor substrates. Primer helps to reduce the porosity and improve membrane adhesion to the bathroom substrate.
- Seal connections and penetrations in the bathroom: You should use neutral cure silicone, alkali-resistant fabric tape, and a utility knife to seal wall-to-floor junctions, bathtub edges, pipe penetrations, and drain outlets because sealing these voids helps to prevent moisture from penetrating weak points.
- Apply the first waterproofing membrane layer: Then, you should install the first waterproofing layer on the surface. You can use a roller or notched trowel with liquid membranes like RedGard or Mapelastic Aquadefense, or thinset for sheet membranes like KERDI over the shower floor and wet wall zones.
- Recoat or seam the waterproofing system: You should use a second roller pass for liquids or a flat trowel to press sheet membrane overlaps in the bathroom wet areas because this step guarantees continuous waterproofing without gaps.
- Flood test and finish: Fill the shower base with 25 mm (1 in) of water, plug in the tape measure, and check for water loss. This test confirms that the bathroom waterproofing layer is fully sealed before tiling.
What are the Tools for Bathroom Waterproofing?
Bathroom waterproofing requires a set of specialized tools and materials to ensure the waterproofing membrane is applied correctly and the wet areas are fully sealed. Below is a list of tools that Aqviz experts used to waterproof a bathroom.
- Stiff bristle brush and scraper
- Polymer-modified mortar and trowel
- Roller and paintbrush
- Notched trowel
- Neutral cure silicone
- Alkali-resistant fabric tape
- Utility knife
- Measuring tape and level
- Plug and bucket
These are the recommended 21 Essential Waterproofing Tools: Professional, Safety, and Basic by the Aqviz experts.
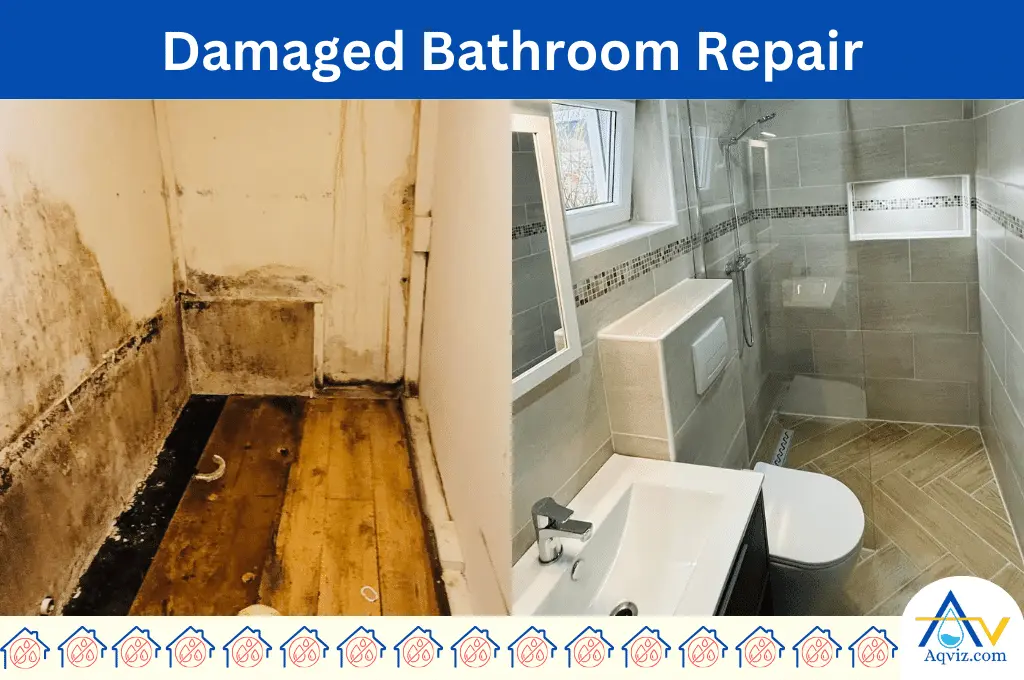
How Can a Bathroom Waterproofing Layer be Damaged?
Bathroom waterproof coating can be damaged due to construction activities and user activities. You should know the below 9 bathroom waterproofing damages in order to prevent them for better waterproof coating efficiency.
- Using the wrong membrane for bathroom waterproofing
- Cutting and drilling on the bathroom surface after installing the waterproofing coating on the bathroom.
- Improper knowledge of bathroom waterproofing
- Not using quality materials for bathroom waterproofing.
- Not following the manufacturer’s guidelines for bathroom waterproofing
- Using harsh chemicals inside the bathroom
- Lack of bathroom maintenance
- Temperature fluctuation in the bathroom area
- Structure settlement
Read More About: 8 Common Bathroom Water Problems and How to Fix Them
How to Protect Bathroom Waterproof Coating?
Bathroom waterproof coating can be protected by following proper methods and usage. The bathroom waterproofing layer should be protected from physical damage and chemical damage. You should follow the steps below to protect the bathroom waterproofing membrane and improve the service life of the waterproofing layer.
- Avoid using harsh chemicals in the bathroom
- Select proper, quality materials for bathroom waterproofing
- Use expert knowledge for waterproofing and installation.
- Follow the correct manufacturer guidelines for bathroom waterproofing.
- Maintenance and repair of the bathroom are done properly
- Use waterproofing membranes that resist temperature fluctuation.
Can I use Tiles for Bathroom Floor Waterproofing?
No, you can’t use only tiles as a waterproofing layer for high-water impact areas like bathrooms because water can leak through the grout lines and seep into the structure. Therefore, you should waterproof the bathroom floor before installing tile in order to have higher protection from the water. You should waterproof the bathroom floor using a sheet membrane or liquid membrane for better results.
Read More: What to Know About Bathroom Floor Waterproofing?
Should I Waterproof a Tiled Bathroom Wall?
Yes, you should waterproof tiled bathroom walls in order to prevent water damage from spreading on the bathroom walls due to the shower and bathtub. Tile bathroom walls can seep water from the grout lines. Hence, you should use a waterproof coating or epoxy on the tile surface to waterproof the bathroom walls.
Is Waterproofing Necessary for All Bathroom Showers?
Yes, waterproofing is necessary for all bathroom showers. This is because showers are consistently exposed to water and humidity. Without proper waterproofing, water can seep into the walls, floors, and other structures, leading to issues like mold growth, structural damage, and unsightly water stains. Therefore, you should waterproof the bathroom shower to maintain its integrity and longevity.