Waterproofing Bathroom Walls: Know these Before Starting

Bathroom wall waterproofing is installing a water-impervious layer on the bathroom walls to prevent water from leaking into the wall structure due to splashing, shower spray, condensation, and capillary moisture movement, which can lead to significant water damage to the structure. The maximum height of the bathroom wall waterproofing is above the shower level.
You can install cementitious, epoxy, acrylic, bituminous, EPDM, HDPE, PVC, and polymer for bathroom wall waterproofing, depending on the structure and substrate. Before starting bathroom wall waterproofing, it should be prepared properly by following the steps below, and follow the 10 expert steps mentioned below to waterproof it DIY as an proffesional handyman.
You can waterproof both constructed and old bathrom wall it there is water damage. After waterproofing a bathroom wall, you should protect it to prevent any unexpected damage to the membrane. So please contact Aqviz experts, and we will support you to do this from scratch.
What is Bathroom Wall Waterproofing?
Bathroom wall waterproofing is installing a water-impervious layer on the bathroom walls to prevent water from leaking into the wall structure due to splashing, shower spray, condensation, and capillary moisture movement, which can lead to paint peeling, plaster damage, mold growth, and structural deterioration over time.
A bathroom wall should be waterproof up to these heights: 6 feet (183 cm) height splash zones in the shower wall, 3 feet (92 cm) height at the toilet wall, 2.5 feet (76 cm) height at the bathtub floor, and 4 feet (122 cm) height at the sink wall.
Bathroom waterproofing is a combined process of waterproofing the bathroom floor and the bathroom walls.
Benefits of Waterproofing Bathroom Walls
Waterproofing bathroom walls always has these 4 main benefits, including: preventing leaks and water damage, improving indoor air quality, extending the lifespan, and preventing mold and mildew growth.
- Prevent leaks and water damage: Bathroom wall waterproofing helps to prevent leaks and water damage. Bathroom wall waterproofing creates a barrier that prevents moisture from penetrating the walls because these walls are constantly exposed to moisture, humidity, and showers, which cause mold growth and water damage.
- Improves indoor air quality: Bathroom wall waterproofing helps to keep the bathroom dry and healthier. Waterproofing these walls will prevent the emission of gases due to mold growth and water leaks, improving indoor air quality.
- Extends the life span of the bathroom walls: Bathroom wall waterproofing extends the lifespan of the wall. Waterproofing the bathroom wall prevents moisture deterioration due to constant exposure to water.
- Prevent mold and mildew growth: Waterproofing bathroom walls prevent the mold and mildew growth inside. It helps to improve air quality, and prevent slippering and a dirty look in the bathroom.
Signs and Requirements of Bathroom Wall Waterproofing
If your bathroom needs waterproofing, you should see these signs, such as mold and mildew growth on the walls, paint and wallcovering damage, wall structure damage, wall tile and grout damage, and any odor issues in the bathroom.
- Mold and Mildew growth on the walls: Mold and mildew can grow on the bathroom walls, corners, and other surfaces if you do not waterproof the bathroom walls.
- Paint and wallcovering damage: Unprotected walls can absorb moisture. This will cause peeling paint, bubbling wallpaper, or discolorations.
- Structural damage: Water can seep into bathroom walls due to leaking. This can weaken materials, rot, and reduce the structural stability.
- Wall tile and grout damage: Bathroom wall tiles and grout can be damaged due to heavy water leaking from the bathroom. This causes biological flux in the space and reduces the strength between the materials.
- Odor issue: Mold and mildew can grow due to the bathroom’s water leaking. When the grown mold and mildew stagnate with bathroom water, an odor can be produced in the bathroom.

Recommended Height of Bathroom Wall Should be Waterproofed
You should waterproof the bathroom wall height as below
- Shower wall splash zone height: 6 feet (183 cm)
- Toilet wall height: 3 feet (92 cm)
- Bathtub wall height: 2.5 feet (76 cm)
- Sink wall height: 4 feet (122 cm)

Waterproofing Membranes for Bathroom Walls
You can use below 8 waterproofing membranes for the bathroom wall water stops. All of these waterproofing membranes can be categorized into liquid and sheet membranes. Liquid waterproofing membranes are suitable for uneven surfaces, floors, and walls, while sheet waterproofing membranes are suitable for bathroom floor waterproofing.
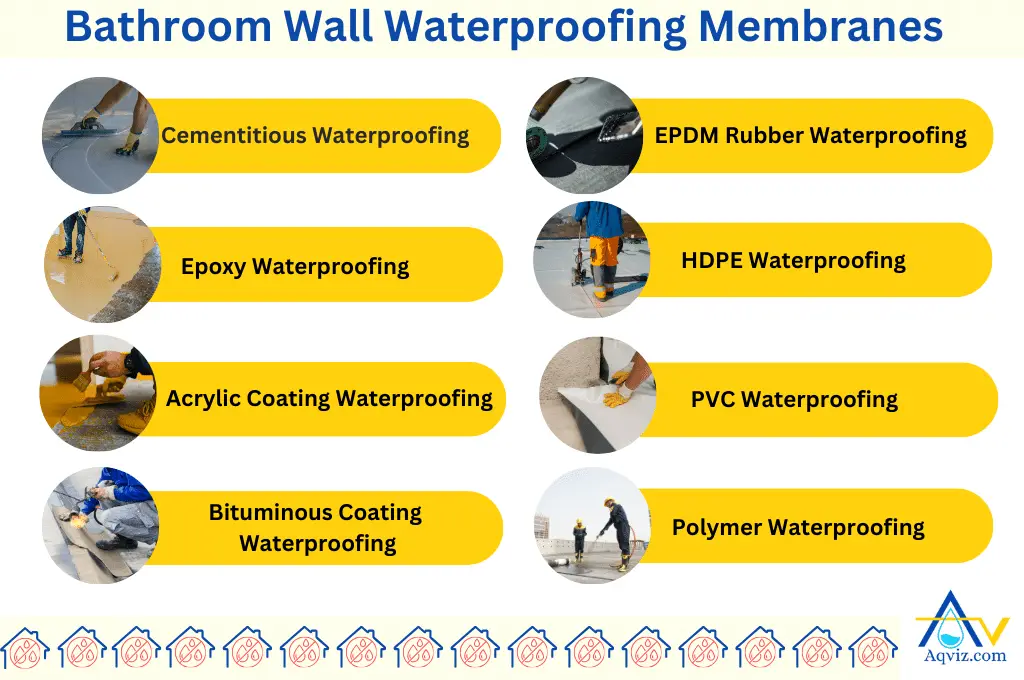
- Cementitious waterproofing: Cementitious waterproofing can be applied as a liquid coating on the bathroom floor and walls to stop water from leaking.
- Epoxy waterproofing: Epoxy waterproofing is an impermeable, liquid waterproofing membrane that can be used on the bathroom floor and walls. Epoxy can be used for old bathroom water stops also.
- Acrylic coating waterproofing: Acrylic waterproofing is a liquid waterproofing membrane that can be used for bathroom floors and walls.
- Bituminous coating waterproofing: Bituminous coating waterproofing is a liquid waterproofing membrane that can be used for both bathroom walls and floors to prevent water leaking.
- EPDM Rubber waterproofing: EPDM rubber waterproofing is a sheet waterproofing membrane that can be used to waterproof bathroom shower areas, walls and floors.
- HDPE waterproofing: HDPE is a sheet membrane waterproofing that can be used to waterproof the bathroom wall and floor.
- PVC waterproofing: PVC is a sheet membrane waterproofing. PVC can be used to waterproof the shower area and bathroom.
- Polymer waterproofing: Rubber polymer can be used as positive side waterproofing for the shower areas.
How to Prepare Bathroom Wall for Waterproofing?
To prepare the bathroom wall before installing a waterproofing membrane, you should follow the 6 guide.
- Dry the wall completely: First, you should keep the wall dry for at least 24 hours, using ventilation or heaters, until no surface moisture remains on the bathroom wall surface.
- Clean thoroughly: Then you should scrub off soap scum, grease, and dirt with an alkaline cleaner. Then rinse well, and let the walls dry.
- Remove loose material: Next, you should scrape away any peeling paint, hollow grout, or loose tiles on the bathroom wall. This helps to bond the coating to the solid wall surface only.
- Repair grout and caulk: Then you should fill missing grout lines and replace damaged silicone in corners and edges on the bathroom walls to block moisture entry points.
- Sand glossy finishes: You should lightly scuff shiny tile or paint to improve adhesion for primers or waterproof coatings on the bathroom walls.
- Prime the surface: You should apply a compatible primer according to your bathroom wall type, such as tile, cement board, or plaster, to improve bonding.
After preparing the bathroom wall for waterproofing, you should install a waterproofing membrane on the bathroom walls.
How to Waterproof a Bathroom Wall?
To install a waterproofing membrane on the bathroom walls, you can follow the 8 expert step by step guide below. This is prepared by the Aqviz experts, and we have included everything for the DIY project.
- Check the bathroom walls for leaks: You should know about bathroom wall waterproofing before starting it DIY. As a first step, you should check the bathroom wall for leaks before waterproofing. You should observe the crack paths and holes that cause water to seep into the bathroom through the walls.
- Clean the bathroom walls: After you check the bathroom walls for leaks, you should clean the surface of the walls. A cleaned bathroom wall surface provides better adhesion for the waterproofing membrane, ensures a smooth finish, and helps identify underlying issues and repair them.
- Seal cracks and joints of the bathroom wall: You should seal the cracks and joints in the bathroom walls using a caulk gun, silicone caulk, backer rod, putty knife, and sandpaper. Let the silicone caulk cure for 24-48 hours, and avoid water exposure in the area during curing time.
- Apply waterproof primer on the wall: You should apply primer on the sealed bathroom wall surface. Primers help to improve the adhesion between the walls and the waterproofing membrane. You should apply a thin, even coat of primer to the walls using a paint roller or a paintbrush. Then, allow the primer coat to dry.
- Install waterproof membranes on the wall: After the primer is applied, you should install a waterproof membrane on the bathroom walls. You should apply a thin, uniform layer of waterproofing membrane sealant to the wall surface using a brush, roller, or sprayer. Then, let it dry according to the manufacturer’s instructions.
- Protect the waterproof layer of the bathroom wall: You should protect the waterproofing layer by using a backer rod and caulk when installing tile, use a shower pan liner underneath the shower pan, use a shower door or curtains to prevent excessive water splashing, and maintain proper ventilation in the bathroom.
- Install tile or covering on the bathroom walls: Install tile or covering on the bathroom walls to create a physical barrier that protects the underlying waterproofing membrane from scratches, bumps, or abrasions. Tiles are highly water-resistant, prevent water from reaching the wall, and protect the waterproofing membrane.
- Regular maintenance of the bathroom properly: You should regularly maintain the bathroom walls by removing the soap scum, debris, and grime, which can deteriorate the waterproofing membrane. Regular bathroom maintenance lets us detect leaks, prevent water damage, and protect the waterproofing membrane.
Can I Waterproof the Existing Bathroom Wall?
Yes, you can waterproof the existing bathroom walls by using waterproofing sealers and paints, epoxy grouting, and silicone caulk. Before applying any waterproofing agent on the bathroom’s existing walls, you should thoroughly clean them to remove mold and mildew and repair any cracks or damage to the walls.
After applying the waterproofing on the walls, you should improve the proper ventilation and prevent excessive humidity in the bathroom to prevent moisture-related issues to the walls.
Is the Shower Attached Wall Need Waterproofing?
The shower attached wall should be waterproof up to 6 feet (183 cm) because an open shower can spread the water to the wall heavily. Therefore, the mounted wall is the heavily water-damaged wall in the bathroom.
How to Damage a Bathroom Wall Waterproofing?
Bathroom wall waterproofing can be damaged due to these 5 common reasons. A damaged waterproofing coating of the bathroom wall can penetrate the water inside the structure, and itcan cause to water related issues to the structure.
- Improper installation: If the bathroom wall waterproofing is not installed properly, it can be damaged easily. Improper bathroom wall waterproofing is using the wrong waterproofing membrane, laying with a thinner thickness, applying fewer coatings, not following the manufacturer’s guidelines, and using non-skilled labor.
- Physical damage: Bathroom wall waterproofing sealant can be damaged when the wall is hit by something, as it can damage the inside of the substrate.
- Chemical damage: The bathroom wall’s waterproofing layer can be damaged due to using harsh chemicals while cleaning.
- Temperature fluctuation: Due to temperature fluctuations, the structure can expand and contract. As a result, the waterproofing layer on the bathroom wall can be damaged easily.
- Water pressure: High water pressure leakage can cause to damage the waterproofing layer.

How to Protect Bathroom Wall Waterproofing?
A bathroom wall can be protected by following the 6 steps below.
- Proper waterproof installation: You should use the recommended waterproofing membrane and product with skilled labour for the proper waterproofing installations for the durable waterproofing coating on the bathroom walls.
- Avoid physical damage: Do not drill, cut, or nail into the bathroom walls because this can damage the waterproofing membrane.
- Use mild cleaning agents: You should use mild cleaning agents instead of harsh chemicals to clean the bathroom floor.
- Control the temperature: Do not let the bathroom floor get too dry or too wet the bathroom floor, which causes temperature fluctuations.
- Do regular maintenance: You should check for regular maintenance and repairs for the bathroom. You should observe cracks, tears, and loose materials in the joints and make immediate repairs.
- Use a sealant: You can use a sealant above the bathroom wall materials. This will prevent the water from penetrating the walls.
How to Use a Bathroom Without Waterproofing Walls?
You can use a bathroom without waterproofing the walls using the following methods:
- Use shower stalls: Shower stalls do not allow water to spread on the bathroom walls. Hence, when you use a bathroom stall, you should not do bathroom waterproofing.
- Use shower curtains or doors: Shower curtain or doors allows the accumulation of water in the bathtub areas without spreading over the walls. This will prevent the water from leaking through the walls.
- Using a bathmat: Place a bathmat near the bathtub area. This will prevent water from being tracked across the bathroom floor and reduce the chance of water reaching the walls.
- Avoid overflowing the bathtub: Do not allow the bathtub area, as wthe alls can seep water.
- Do a quick cleanup: You can wipe down the wet surfaces when the water splashes on the wall.