

The best material for stopping a roof leak right now — the water is dripping onto the bedroom carpet, it is 11 p.m., and the roofer will not arrive until tomorrow — is a heavy-duty tarp, two 8-foot 2x4s, and a box of 2-inch deck screws. The tarp is the emergency repair. The tarp costs $20 to $50. The 2x4s cost $20. The screws cost $5. The tarp is pulled over the ridge of the roof from a ladder, not from standing on the roof, with a 2×4 rolled into the end to anchor it on the far side. The bottom edge is secured with the second 2×4 screwed through the tarp into the fascia board or the roof deck. The tarp extends at least 3 feet past the leak on all sides. The tarp stops the water. The dripping stops. The ceiling is saved. The tarp is the bridge between the leak and the permanent repair. The bridge is $55. The ceiling repair would have been $800 to $2,000. The bridge is cheaper than the ceiling. The bridge is the first material. The bridge buys the time for the permanent repair materials.
Roof leak repair materials fall into two categories: emergency materials that stop the water right now — tarps, temporary sealants, roof cement — and permanent repair materials that fix the underlying problem — replacement shingles, replacement flashing, polyurethane sealant, replacement vent boots. The emergency materials are applied during or immediately after the storm. The permanent materials are applied after the roof has dried, the damage has been assessed, and the repair can be made in dry conditions. The emergency materials buy time. The permanent materials buy years. Here are the materials and the options for both categories.
Emergency Leak Repair Materials, Stop the Water Now
These five materials are applied immediately — during or right after the storm — to stop water from entering the house. They are temporary, lasting weeks to a few years, and buy time for the permanent repair.
| Material | Cost | Best For | How Long It Lasts |
| Heavy-duty tarp (6-mil or thicker) + 2x4s + deck screws | $45 – $75 | Any roof leak, shingle, flashing, decking damage | 30 – 90 days, temporary, durable |
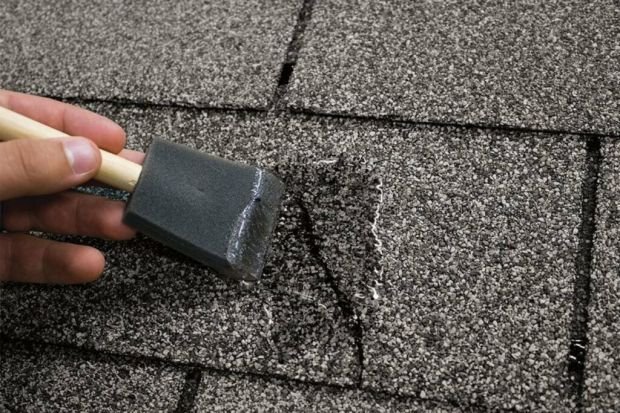
| Polyurethane sealant (caulk tube) | $8 – $15 | Cracked flashing, lifted shingle edges, small punctures | 2 – 5 years, semi-permanent, can be applied in damp conditions |
| Wet/dry roof cement (asphalt-based) | $6 – $10 | Shingle repairs, rolled roofing, flat roof patches | 2 – 5 years, can be applied to wet surfaces |
| Peel-and-stick patch (self-adhesive) | $10 – $20 | Small punctures, torn shingles, flat roof holes | 2 – 5 years, quick, clean, no tools needed |
| Rubber spray sealant (aerosol) | $12 – $20 | Flashing, vent pipes, small leaks in hard-to-reach areas | 1 – 3 years, spray-on, easy application |
Permanent Leak Repair Materials, Fix the Problem
These six materials are the permanent fix — applied after the roof has dried and the damage has been fully assessed. They last as long as the remaining life of the roof.
| Material | Cost | Application | Lifespan |
| Replacement asphalt shingles (matching bundle) | $30 – $50 per bundle | Replace damaged, curled, or missing shingles | Matches remaining roof life |
| Polyurethane sealant (caulk tube) | $8 – $15 | Permanent flashing seal, shingle edge re-adhesion | 20 – 30 years |
| Replacement step flashing (aluminum) | $1 – $3 per linear foot | Replace rusted, cracked, or missing step flashing | 20 – 30 years |
| Replacement vent pipe boot (rubber/neoprene) | $10 – $30 | Replace cracked or deteriorated vent pipe flashing | 15 – 25 years |
| Roofing nails (1-inch, 1.25-inch) + roofing cement | $5 – $15 | Re-secure lifted shingles; seal nail heads with cement | Matches remaining roof life |
| Replacement ridge cap shingles | $2 – $5 per linear foot | Replace damaged or missing ridge cap | Matches remaining roof life |
Leak Location, Choose the Right Material for the Right Place
Leak around a vent pipe or plumbing stack: The rubber boot that seals the vent pipe to the roof has cracked from UV exposure. The crack is visible, a split in the rubber around the base of the pipe, or the rubber has pulled away from the pipe entirely. The emergency fix is polyurethane sealant applied around the pipe, bridging the gap between the pipe and the boot. The permanent fix is a replacement vent pipe boot, $10 to $30, installed by removing the shingles around the vent, sliding the new boot over the pipe, nailing it to the roof deck, and reinstalling the shingles over the flashing flange. The permanent fix takes 30 minutes for a DIY homeowner with basic roofing skills. The plumber or roofer charges $200 to $500 for the same repair.
Leak around a chimney: The chimney flashing, the metal that seals the joint between the chimney and the roof, has separated from the brick or the shingles. The emergency fix is polyurethane sealant applied to the gap between the flashing and the brick, and between the flashing and the shingles. The permanent fix is cutting a reglet, a groove in the mortar joint, and inserting new counter-flashing, then sealing the counter-flashing with polyurethane sealant. The chimney repair is the most common and the most difficult DIY roof leak repair. The chimney involves working at height, working with mortar, and working with multiple layers of flashing. The chimney repair is a professional repair for most homeowners. The professional repair costs $500 to $1,500. The DIY polyurethane sealant fix buys 2 to 3 years while the budget is assembled for the permanent professional repair. The sealant is the bridge. The bridge is $15. The permanent repair is $1,000. The bridge buys the time for the budget. The budget is the permanent repair. The permanent repair is the chimney flashing replacement.
The National Roofing Contractors Association (NRCA) recommends that homeowners address roof leaks immediately with emergency measures, tarping or temporary sealant, to prevent interior water damage, and then schedule a professional inspection and permanent repair. The emergency measures prevent the secondary damage. The secondary damage is the ceiling, the drywall, the insulation, and the flooring that the water destroys after it passes through the roof. The roof leak is the cause. The ceiling stain is the effect. The emergency material stops the cause before the effect spreads. The effect is the expensive part. The emergency material is the cheap part. The cheap part prevents the expensive part.
Flat Roof Leak Materials, Different Membrane, Different Fix
A leak on a flat roof requires materials that are compatible with the membrane type. TPO and PVC membranes are repaired with heat-welded patches, a piece of matching membrane is cut, placed over the leak, and heat-welded to the field membrane. The heat-welded patch is permanent. The DIY version is a peel-and-stick patch designed for the specific membrane type, TPO patch for a TPO roof, EPDM patch for an EPDM roof. The patch must be applied to a clean, dry surface and rolled firmly with a seam roller to ensure full adhesion. The peel-and-stick patch is the emergency fix. The heat-welded patch is the permanent fix. The heat-welded patch requires a professional with a hot-air welder. The professional repair costs $300 to $800 per patch. The DIY peel-and-stick patch costs $15 to $30 and lasts 2 to 5 years. The peel-and-stick is the temporary. The heat-weld is the permanent.
Modified bitumen and built-up roofing are repaired with roof cement and a reinforcing fabric. The cement is troweled onto the leak, a piece of fiberglass or polyester reinforcing fabric is embedded into the cement, and a second coat of cement is applied over the fabric. The repair is called a three-course patch, cement, fabric, cement. The patch costs $15 to $30 in materials and lasts 3 to 7 years. The three-course patch is the standard flat roof repair method for asphalt-based membranes. The patch is within the reach of a DIY homeowner who is comfortable working on a flat roof surface. The flat roof surface is walkable. The repair is at ground level or accessible by a short ladder. The three-course patch is the most DIY-friendly permanent roof leak repair.
Frequently Asked Questions
What is the best material to stop a roof leak immediately?
A heavy-duty tarp secured with 2x4s and deck screws is the best emergency roof leak repair. The tarp costs $20 to $50, works on any roof type, and can be installed from a ladder in 30 minutes. Polyurethane sealant is the best material for sealing a small, localized leak, a cracked flashing, a lifted shingle, when the roof surface is still wet. The sealant costs $8 to $15 per tube and can be applied in damp conditions.
Can I permanently repair a roof leak myself?
Yes, for small, accessible leaks. Replace damaged shingles with matching new shingles and roofing nails, sealing the nail heads with roofing cement. Replace a cracked vent pipe boot with a new neoprene boot. Reseal a lifted shingle with polyurethane sealant. These are permanent repairs within the reach of a DIY homeowner. Leaks around chimneys, in valleys, or involving structural roof decking damage should be repaired by a professional roofer.
How much does it cost to repair a roof leak?
A DIY emergency repair, tarp, sealant, or patch, costs $10 to $75. A DIY permanent repair, shingle replacement, vent boot replacement, costs $30 to $100 in materials. A professional repair costs $350 to $1,500 for most leaks. A chimney flashing repair costs $500 to $1,500. The interior water damage remediation, drywall, insulation, paint, adds $500 to $5,000 if the leak was not stopped quickly.
Does homeowners insurance cover roof leak repair?
Insurance covers leaks caused by sudden, accidental events, a tree branch through the shingles, wind that tears off a section. It does not cover leaks from gradual deterioration, lack of maintenance, or an aging roof. If the adjuster determines the leak was caused by a maintenance issue, the claim will be denied. The emergency repair costs are your responsibility. The permanent repair costs are your responsibility. The interior damage from the leak may be covered if the leak was sudden and accidental. The interior damage from a slow, ongoing leak is not covered.
Can I use a spray-on rubber sealant like Flex Seal to repair a roof leak?
Spray rubber sealants are temporary emergency fixes, not permanent repairs. They seal small leaks and can be applied to wet surfaces. They last 1 to 3 years before UV exposure and temperature cycling degrade the seal. The spray sealant is the quick fix when you cannot get onto the roof. The permanent repair is a physical patch, a new shingle, a new boot, a welded TPO patch. The spray is the bridge. The permanent repair is the destination. The spray buys the time for the destination.
What are the most common causes of roof leaks?
Cracked or deteriorated vent pipe boots are the most common cause. Failed chimney flashing is the second. Cracked sealant around skylights is the third. Missing or damaged shingles, from wind or impact, is the fourth. Ice dams at the eaves, in cold climates, is the fifth. Each cause has a specific repair material. The vent boot gets a new boot. The chimney gets new flashing. The skylight gets new sealant. The shingle gets a replacement shingle. The ice dam gets improved attic insulation and ventilation. The cause determines the material. The material determines the fix.
The Materials That Stop the Drip
A heavy-duty tarp, two 2x4s, and a box of deck screws in the garage for the emergency. A tube of polyurethane sealant for the flashing leak that you can reach from a ladder. A bundle of matching shingles and a box of roofing nails for the shingle that the wind tore off. A replacement vent pipe boot for the cracked rubber around the plumbing stack. A peel-and-stick patch for the flat roof puncture. Roof cement and reinforcing fabric for the built-up roof leak. Each material is the fix for a specific type of leak. The emergency materials are applied during the storm. The permanent materials are applied after the roof is dry. The emergency materials cost $10 to $75 and prevent the ceiling damage. The permanent materials cost $30 to $100 and fix the underlying problem. The professional permanent repair, the chimney flashing, the heat-welded TPO patch, the valley replacement, costs $350 to $1,500 and fixes what the homeowner cannot. The materials are the tools. The tools are the fix. The fix is the dry ceiling. The dry ceiling is the goal. The goal is achieved with the right material at the right time. The right time is now for the emergency. The right time is tomorrow for the permanent. The right material is on the shelf in the garage. The shelf holds the tarp, the sealant, the shingles, and the nails. The shelf is the roof leak repair kit. The kit costs $100. The kit saves the ceiling. The ceiling is above the bed. The bed is dry. The kit did its job. Ever heard that first drip hit the bedroom carpet at 2 a.m., ran to the garage, grabbed the tarp and the 2x4s you bought two years ago after the last storm scare, and had the tarp secured over the ridge before the ceiling bulge had a chance to form? The preparation was not the emergency. The preparation was the kit. The kit cost $55. The kit saved the ceiling. Restock it tomorrow.