
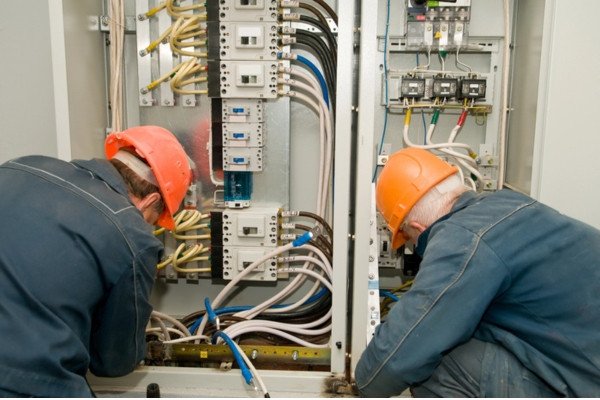

The line between a DIY circuit breaker replacement and hiring a licensed electrician is drawn by whether the main breaker is turned off and whether the bus bar is undamaged. A standard residential breaker — a 15-amp or 20-amp single-pole breaker — can be replaced by a homeowner who turns off the main breaker first, removes the panel cover, unscrews the wire from the old breaker, snaps the old breaker out of the bus bar, snaps the new breaker in, reconnects the wire, torques the terminal screw to the manufacturer’s specification, replaces the panel cover, and turns the main breaker back on. The replacement takes 15 minutes. The breaker costs $5 to $15. The electrician would charge $150 to $300. The DIY savings are $135 to $285 per breaker. A house with three failing breakers that need replacement saves $400 to $850.
But: the main breaker does not de-energize the service entrance cables. The cables that connect the utility meter to the main breaker remain live — carrying 200 amps at 240 volts — even when the main breaker is off. The live cables are inches from the breakers you are replacing. A dropped screwdriver, a slipped hand, or a moment of inattention can bridge those live terminals with a tool or a finger. The result is an arc flash — a plasma fireball that reaches 35,000 degrees Fahrenheit, vaporizes metal, causes third-degree burns, and can be fatal. The arc flash is the reason that working inside a live electrical panel is dangerous. The main breaker off makes the panel safer. The main breaker off does not make the panel safe. The safe part of the panel is away from the service entrance cables. The dangerous part is near them. The electrician knows where the dangerous part is. The homeowner may not. The electrician’s $150 labor charge is the cost of not touching the dangerous part. The $150 is the insurance against the arc flash. The arc flash is the risk. The risk is real. The $150 is the premium. The premium is the cost of the experience. The experience is the knowledge of where not to put the screwdriver.
Here is what you can do yourself, what requires an electrician, and the safety protocol that separates the two.
Circuit Breaker Tasks You Can Do Yourself
These four circuit breaker tasks are DIY-accessible if the main breaker is turned off and the voltage tester confirms the bus bar is dead. Stay away from the service entrance cables.
| Task | DIY Difficulty | DIY Time | Electrician Cost |
| Replace a standard single-pole breaker (same amperage) | Moderate, main off required | 15 min per breaker | $150 – $300 |
| Replace a double-pole breaker (same amperage) | Moderate, main off required | 20 min per breaker | $200 – $400 |
| Reset a tripped breaker | Trivial | 5 seconds | N/A |
| Label breakers at the panel | Easy | 30–60 min for whole panel | N/A |
Circuit Breaker Tasks That Require an Electrician
These six tasks require a licensed electrician. The reasons include live service cables, wire gauge requirements, shared-neutral circuits, and unsafe panel brands.
| Task | Electrician Cost | Why DIY Is Not Recommended |
| Replace a main breaker | $500 – $1,500 | Main breaker lugs are always live even when the main is off, meter must be pulled by utility |
| Install a new circuit breaker where no slot exists (new circuit) | $350 – $700 per circuit | Requires running new wire from the panel to the new outlet or fixture; requires load calculation |
| Upgrade breaker amperage (15A to 20A) | $150 – $300 | Requires verifying that the existing wire is rated for the higher amperage, 14-gauge wire cannot be protected by a 20-amp breaker |
| Replace a damaged bus bar in the panel | $1,500 – $3,500 (usually panel replacement) | Bus bar is not a replaceable part in most residential panels; panel replacement is the fix |
| Install AFCI or GFCI breaker where wiring configuration is unknown | $250 – $500 | AFCI/GFCI breakers require correct neutral wiring; shared-neutral circuits will trip instantly |
| Replace an FPE Stab-Lok, Zinsco, or Sylvania breaker in an existing unsafe panel | $1,500 – $3,500 (panel replacement) | Breakers in unsafe panels should not be replaced individually; the entire panel should be replaced |
DIY Breaker Replacement, the Safety Protocol
The protocol for replacing a circuit breaker yourself, in order. Step 1: Identify the correct replacement breaker. The breaker must match the panel manufacturer, a Square D breaker in a Square D panel, a Siemens breaker in a Siemens panel. The breaker must match the amperage, 15-amp for 14-gauge wire, 20-amp for 12-gauge wire. The breaker must match the type, standard, AFCI, GFCI, or tandem, depending on the existing breaker and the circuit requirements. The wrong breaker will not fit the bus bar securely. The loose connection will generate heat. The heat will damage the bus bar. The damaged bus bar requires panel replacement. The $5 breaker that does not fit costs a $2,500 panel replacement. Buy the correct breaker. The brand and the type are printed on the old breaker’s label. The label is the specification. Match the specification.
Step 2: Turn off the main breaker. The main breaker cuts power to all the branch circuit breakers and the bus bar. The service entrance cables, the large cables connected to the main breaker from the utility side, remain live. Do not touch them. Do not put a tool near them. Do not let anything, a wire, a screwdriver, a finger, come within an inch of the main breaker lugs. The lugs are the live part. The lugs are at the top of the main breaker. Stay away from the top of the panel.
Step 3: Remove the panel cover. The screws are at the corners of the cover. Hold the cover with one hand while removing the last screw, the cover is heavy and will fall if not supported. Set the cover aside. Do not touch anything inside yet. The main breaker is off. The service cables are still live. Confirm with a voltage tester that the bus bar is dead, touch the tester probes to the bus bar terminals. The tester should read zero. If the tester reads voltage, the main breaker did not disconnect. Stop. Replace the cover. Call an electrician. The main breaker has failed internally. The panel is not safe to work on.
Step 4: Remove the old breaker. The breaker is held in place by a clip on the bus bar and the wire terminal. Loosen the terminal screw and remove the wire. Rock the breaker outward from the center of the panel, it pivots on the outer rail and snaps off the bus bar. The wire will come with it. Set the old breaker aside.
Step 5: Install the new breaker. Connect the wire to the new breaker’s terminal, strip 1/2 inch of insulation, insert the wire fully into the terminal, and tighten the screw to the torque specified on the breaker label. The torque specification is in inch-pounds, typically 20 to 35 inch-pounds for residential breakers. A torque screwdriver costs $40 to $80 and is the correct tool. A regular screwdriver has no torque measurement. The torque is either correct or it is not. The loose connection generates heat. The overtightened connection strips the aluminum threads and generates heat. The correct torque is the only torque. The torque screwdriver is the only tool that can achieve it. Press the new breaker onto the bus bar, the outer edge goes into the rail first, then rock the inner edge toward the center until it snaps onto the bus bar. The breaker is seated. Tug gently on the wire to confirm it is secure. Tug gently on the breaker to confirm it is seated on the bus bar.
Step 6: Replace the panel cover. Align the cover with the breaker openings. Insert all screws and tighten them. The cover is the protection. The protection is the barrier between the panel interior and the outside world. The barrier must be complete.
Step 7: Turn on the main breaker. Turn on the new breaker. Test the circuit. The breaker holds. The circuit works. The replacement is complete. The time was 15 minutes. The electrician would have charged $200. The $5 breaker saved $195. The protocol saved the $195. The protocol is the safety. The safety is the main breaker off, the voltage tester confirmed, and the hands away from the service entrance cables. The protocol is the difference between a successful DIY repair and a trip to the emergency room. The protocol is not optional. The protocol is the contract. The contract is with yourself. The contract is: I will follow every step. The breach of contract is the arc flash. The arc flash is the penalty. The penalty is severe. Follow the protocol. The protocol is the guide. The guide is the safety. The safety is the savings. The savings are the $195. The $195 is the reward for following the protocol.
The U.S. Consumer Product Safety Commission (CPSC) recommends that all electrical work be performed in accordance with the National Electrical Code and that consumers who are not experienced with electrical work hire a licensed electrician. The recommendation is the safety. The safety is the electrician. The electrician is the guaranteed safe installation. The DIY installation is the potentially safe installation. The potential is the protocol. The protocol is the difference between safe and unsafe. Follow the protocol. The electrician follows the protocol by training and habit. The homeowner follows the protocol by reading this guide. The guide is the training. The training is the substitute for the electrician’s experience. The substitute is adequate for a single breaker replacement. The substitute is not adequate for any work near the service entrance cables. The electrician is the right choice for any work that involves those cables. The cables are the line. The line is the service entrance. The line is the boundary. Do not cross the line. The line is live.
Frequently Asked Questions
Can I replace a circuit breaker myself without an electrician?
Yes, if you turn off the main breaker, confirm the bus bar is dead with a voltage tester, stay away from the service entrance cables at the top of the panel, and use a torque screwdriver to tighten the terminal screw to the manufacturer’s specification. A standard single-pole breaker replacement takes 15 minutes. If you are not comfortable with any of those steps, hire an electrician. The electrician costs $150 to $300. The arc flash from a mistake costs far more.
How much does it cost to replace a circuit breaker with an electrician?
An electrician charges $150 to $300 to replace a standard single-pole breaker. A double-pole breaker costs $200 to $400. A main breaker costs $500 to $1,500, the utility must disconnect the service for the main breaker to be safely replaced. The breaker itself costs $5 to $15 for standard, $40 to $80 for AFCI or GFCI.
Is it safe to work inside an electrical panel with the main breaker turned off?
The bus bar and the branch circuit breakers are de-energized when the main breaker is off. The service entrance cables, the heavy cables connected to the main breaker from the utility side, remain live at all times. The inside of the panel is safe except for the area immediately around the main breaker lugs. Do not touch anything near the main breaker. Do not let any tool come near the main breaker. The live area is at the top of the panel. The safe area is everywhere else. The safe area is only safe because the main breaker is off. Confirm with a voltage tester. The tester is the verification. The verification is the confidence.
What happens if I install the wrong breaker brand in my panel?
A breaker from a different manufacturer, a Siemens breaker in a Square D panel, may appear to fit but will not make a secure connection to the bus bar. The loose connection will generate heat, damage the bus bar, and eventually cause an electrical fire or panel failure. Only use breakers that are listed for your specific panel. The panel label lists the approved breaker types. The label is on the inside of the panel door. Match the type.
Do I need a permit to replace a circuit breaker?
Replacing a breaker with the same type and amperage does not require a permit in most jurisdictions. Adding a new breaker for a new circuit requires a permit, the new circuit must be inspected. Upgrading the amperage of an existing breaker, 15-amp to 20-amp, may require a permit because the wire must be verified as adequate. Check with your local building department. The permit is the paper trail. The paper trail is the proof that the work was done correctly.
Should I replace my electrical panel instead of individual breakers?
Replace the entire panel if it is a Federal Pacific Electric Stab-Lok, Zinsco, or Sylvania brand, $1,500 to $3,500. Replace the panel if the bus bar is damaged, the metal behind the breakers has arc marks, melting, or pitting. Replace the panel if it is more than 30 years old and breakers are obsolete and no longer available. Replace individual breakers if the panel is a safe brand, less than 25 years old, and the bus bar is undamaged. The panel condition determines the scope. The scope is either a $15 breaker or a $2,500 panel. The electrician can assess the panel. The assessment costs $150 to $300. The assessment is the decision.
The Breaker That Was Replaced Safely
A standard single-pole breaker, same amperage, correct brand, main breaker off, voltage tester confirmed, torque screwdriver set to 25 inch-pounds, hands away from the service entrance cables. The replacement takes 15 minutes. The breaker costs $5. The electrician would charge $200. The $195 saved is the reward for following the protocol.
The line between DIY and electrician is the main breaker. Above the main breaker, the service entrance cables, is the electrician’s territory. Below the main breaker, the bus bar and the branch breakers, is the DIY territory, if the main breaker is off and the voltage tester confirms it. The protocol is the safety. The torqued terminal screw is the reliability. The correct breaker brand is the compatibility. The panel cover replaced is the protection. The circuit tested is the confirmation. The confirmation is the working circuit. The working circuit is the goal. The goal was a breaker that no longer tripped. The breaker was $5. The installation was 15 minutes. The electrician was not needed. The protocol was followed. The circuit works. The house is safe. The safe house is the return on the protocol. The protocol is the guide. The guide was followed. The guide works. Ever stood in front of an open electrical panel, torque screwdriver in hand, staring at the dark bus bar — the main breaker off, the voltage tester showing zero — and felt the weight of the live service cables above you, humming faintly with 200 amps of current that could vaporize the screwdriver in your hand if it touched the wrong terminal? You stayed low. You worked below the main breaker. You torqued the terminal screw to 25 inch-pounds. You snapped the breaker onto the bus bar with a satisfying click. The cover went back on. The main breaker went back on. The circuit worked. The hum of the live cables was still there, inches away. The hum is the reminder. The hum is the reason the protocol exists. The protocol kept you below the hum. The hum is the boundary. The boundary is the line between DIY and electrician. The line was not crossed. The breaker is installed. The circuit works. The hum continues. The hum is always there. The protocol is always the answer.