

This guide covers common leak detection problems and fixes — from spinning meters to hidden slab leaks. The most common leak detection problem is that the leak is hidden — water is flowing somewhere, the water meter is spinning, but there is no visible water anywhere in the house. No puddle under the sink. No drip from the ceiling. No wet spot on the basement floor. The leak is inside a wall, under a concrete slab, or underground between the meter and the house. The homeowner knows a leak exists — the water bill doubled, the meter is spinning with everything turned off — but cannot find it. The search becomes an exercise in deduction: the leak that is not visible in any exposed location is in a location that is not visible. The hidden leak is the most common detection problem because every method the homeowner tries — checking under sinks, looking at ceilings, walking the basement — finds nothing. The methods that work are the water meter test, the isolation valve test, and professional acoustic or thermal detection. The hidden leak requires the tools. The tools are the meter, the isolation valves, and the plumber’s listening equipment. Here are the common leak detection problems and their fixes.
Problem 1: The Water Meter Spins with Everything Off, a Leak Somewhere
The water meter test is the first diagnostic for any suspected leak. Turn off every water fixture in the house, faucets, ice maker, washing machine, dishwasher, irrigation system. Locate the water meter, typically in a box in the ground near the street or in the basement. Note the sweep hand position or the digital reading. Wait 15 to 30 minutes without using any water. Check the meter again. If the sweep hand has moved or the reading has changed, water is flowing. There is a leak somewhere in the system. This test costs nothing and answers the most important question: is there a leak at all? The answer is either yes or no. The yes is the call to action. The no means the leak is intermittent, it only occurs when a specific fixture is used, or the problem is a drain leak, not a supply line leak. The meter test is step one. Every leak investigation starts here.
The meter test is a DIY diagnostic that any homeowner can perform. No plumber, no special tools, no cost. The only requirement is that every fixture be off for the duration of the test, 15 to 30 minutes. The test is conclusive when the meter does not move: there is no continuous leak on the supply side. The test is not conclusive when the meter does move: a leak exists, and the next step is to find it. The next step is the isolation valve test.
The Environmental Protection Agency (EPA) recommends checking the water meter as the first step in detecting household leaks. The EPA estimates that household leaks waste nearly 1 trillion gallons of water annually nationwide, roughly 10,000 gallons per household per year on average. The water meter test identifies whether your household is part of that statistic. The test is the first step. The fix is the second step. The test is free. The fix ranges from a $5 toilet flapper to a $4,000 slab leak repair. The test determines which end of that range applies.
Problem 2: The Meter Spins, Now Find Which Line Is Leaking
The isolation valve test narrows the leak location to a specific section of the plumbing system. The test requires shutoff valves on each branch of the plumbing, the main shutoff at the house, the shutoff on the water heater supply, the shutoffs on the exterior hose bibs, and the shutoffs on any fixture groups. The test is performed by turning off one branch at a time and checking whether the meter stops spinning. If the meter stops when the hot water supply is shut off, the leak is on the hot water side, a leaking water heater, a hot water pipe in a wall, or a hot water fixture. If the meter stops when the irrigation shutoff is closed, the leak is in the irrigation system, a broken sprinkler head or an underground pipe leak. If the meter stops when the main house shutoff is closed, with the irrigation still on, the leak is inside the house. The isolation test narrows the search from “somewhere in the house” to “somewhere on the hot water side” or “somewhere in the irrigation.” The narrowed search is a smaller area for the professional detection equipment to scan. The isolation test saves the plumber time and saves the homeowner money. The plumber’s detection equipment costs $300 to $800 for the visit. The narrowed search reduces the time. The reduced time reduces the cost.
Problem 3: The Running Toilet, the Most Common Leak
A running toilet wastes 200 gallons per day, $50 to $150 per month on the water bill. The toilet leak is the most common household leak and the most commonly overlooked. The owner hears the toilet running, gets used to it, and stops hearing it. The water bill rises. The meter test confirms a leak. The isolation test narrows the leak to a specific room or fixture. The toilet dye test confirms whether the toilet is the source. Place a few drops of food coloring in the toilet tank. Wait 15 minutes without flushing. If the color appears in the bowl, the flapper is leaking. Replace the flapper, $5 to $15, 10 minutes. The toilet dye test is the highest-return DIY leak detection method, $1 of food coloring identifies a $50-per-month water bill increase. The food coloring pays for itself within the first hour after the flapper is replaced. The food coloring is the diagnostic. The flapper is the fix. The fix is permanent. The water bill returns to normal. The normal water bill is the evidence that the fix worked.
Problem 4: Hot Spot on the Floor, Sound of Running Water, a Slab Leak
A slab leak is a leak in a water pipe buried under the concrete slab foundation. The symptoms are: a hot spot on the floor, the hot water line is leaking under the slab and heating the concrete, the sound of running water when no fixtures are on, a water meter that spins continuously, and a water bill that has spiked without explanation. The slab leak is the most expensive household leak, the repair costs $1,000 to $4,000, and the detection costs $400 to $1,200, and is not a DIY fix. The homeowner’s role is to recognize the symptoms and call a plumber with slab leak detection equipment. The equipment is a combination of acoustic listening devices, to hear the sound of water escaping from the pipe, and thermal imaging, to see the hot spot created by the hot water line. The equipment locates the leak to within a few feet. The plumber then breaks through the concrete slab at the leak location, repairs or replaces the leaking section of pipe, and patches the concrete. The slab leak is not repairable from above. The slab must be opened. The opening is the plumber’s work. The plumber’s work costs $1,500 to $4,000. The alternative, rerouting the pipe through the attic or the walls and abandoning the leaking section under the slab, costs $2,000 to $6,000 but avoids breaking the slab. The reroute is the preferred method when the leak is in a line that can be abandoned and replaced. The hot water line is a candidate for rerouting. The main water line is not, the main line must be repaired in place. The plumber determines which method applies. The camera inspection of the pipe is the deciding tool. The camera shows the condition of the pipe. The condition determines the method.
Problem 5: Water Stain on the Ceiling, Find the Source Before Cutting
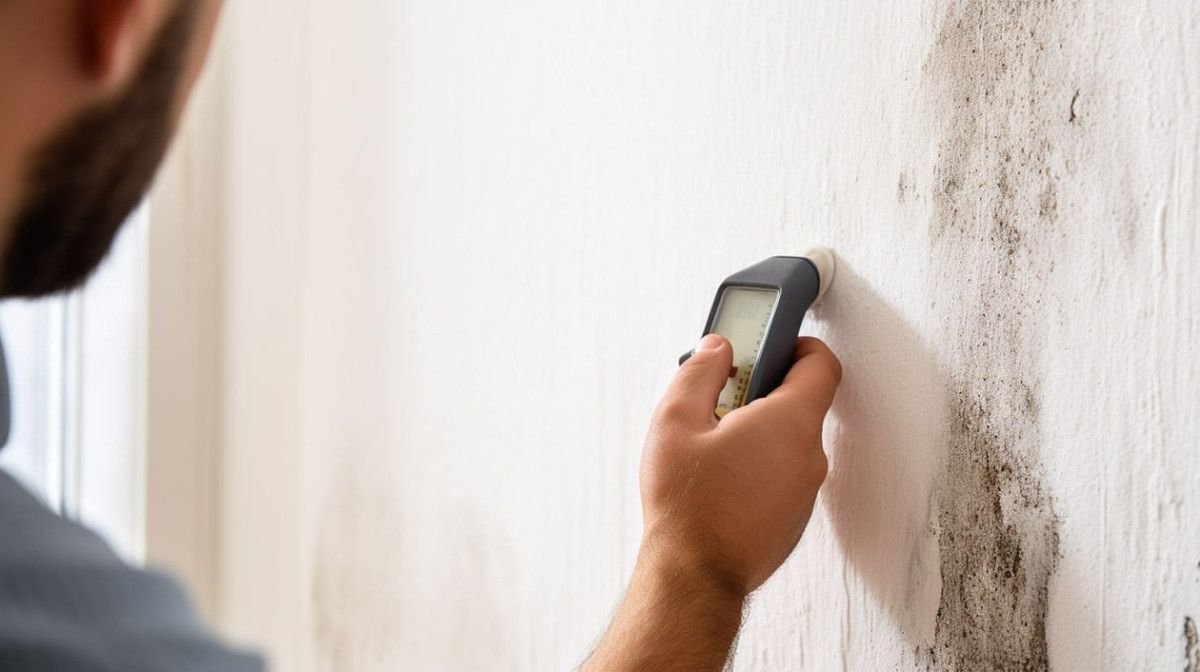
A water stain on the ceiling is the evidence of a leak above the ceiling. The leak could be a roof leak, a plumbing leak from a second-floor bathroom, or a condensation problem from an HVAC duct. The first diagnostic is: does the stain grow when it rains? A stain that darkens or grows after rain is a roof leak. The stain that is independent of the weather is a plumbing leak, a supply line, a drain line, or a fixture above the ceiling. The plumbing leak must be located before the ceiling is cut open. A moisture meter, $20 to $50 at a hardware store, measures the moisture content of the drywall. The area with the highest moisture reading is closest to the source of the leak. The moisture meter is the map. The map shows where to cut. Cut at the highest moisture reading, not at the stain. The stain is the exit point. The leak is uphill from the stain. The moisture meter finds the highest point. The highest point is the closest to the source. The source is the repair location. The repair location is the access hole. The access hole is the smallest cut that reaches the leak. The small cut is the efficient cut. The exploratory cut, cutting from the stain upward, makes a larger hole. The larger hole is more drywall to patch. The moisture meter minimizes the patch. The patch is the ceiling repair. The ceiling repair is the evidence that the leak detection worked.
Frequently Asked Questions
How do I find a hidden water leak without cutting into walls?
Start with the water meter test, turn off everything, check the meter, wait 30 minutes, check again. If the meter moved, a leak exists. Use the isolation valve test to narrow the leak to a specific branch of the plumbing. Call a plumber with acoustic or thermal detection equipment if the isolation test narrows the leak to a hidden location. The plumber’s equipment costs $300 to $800 and locates the leak without cutting into the wall.
What is the most common household leak that goes undetected?
A running toilet is the most common undetected leak. A toilet with a worn flapper leaks silently, the water trickles from the tank into the bowl without any sound. The toilet dye test, food coloring in the tank, wait 15 minutes, identifies the leak. The fix is a $5 to $15 flapper replacement. The toilet that is not tested leaks 200 gallons per day for months or years.
How do plumbers find water leaks behind walls without tearing them down?
Plumbers use acoustic listening devices, sensitive microphones that amplify the sound of water escaping from a pipe, and thermal imaging cameras, infrared cameras that detect the temperature difference between wet and dry areas. The equipment locates the leak to within a few feet. The plumber makes a small access cut at the leak location, repairs the pipe, and the owner patches the drywall. The access cut is the only cut. The detection equipment prevents the exploratory trench through the wall.
Can I use a moisture meter to find a leak behind a wall or ceiling?
Yes, a moisture meter costs $20 to $50 and measures the moisture content of drywall, wood, and other building materials. Scan the area around a water stain or a suspected leak. The area with the highest reading is closest to the source of the water. The moisture meter is the map. The map shows where the water is coming from. The map is the evidence. The evidence is the access cut location. The access cut is the repair entry point.
How do I find a leak in my irrigation or sprinkler system?
Turn off the irrigation shutoff valve at the house. Check the water meter. If the meter stops spinning with the irrigation off, the leak is in the irrigation system. Walk the yard looking for areas of unusually green or lush grass, soft spots, or standing water. The green spot is the leak, the pipe under it is broken and watering the grass. Mark the area. Call an irrigation contractor or a plumber to locate the exact point and repair the pipe.
When should I call a plumber for professional leak detection?
Call a plumber when the water meter test confirms a leak, the isolation test cannot narrow the leak to a specific accessible fixture, and the leak is hidden, inside a wall, under a floor, or underground. The professional detection costs $300 to $800 and uses acoustic and thermal equipment. The detection cost is less than the cost of exploratory holes in the drywall and the cost of water damage from the leak that is not found.
The Leak That Is Found
The water meter test: free, 30 minutes, tells you whether a leak exists. The isolation valve test: narrows the leak to a branch of the plumbing. The toilet dye test: $1, 15 minutes, finds the most common leak. The moisture meter: $30, 5 minutes, maps the leak behind the wall or ceiling. The professional acoustic detection: $400, one visit, finds the hidden leak without cutting into the wall. The diagnostic sequence is: meter, isolation, toilet dye, moisture meter, professional. Each step narrows the search. The search ends when the leak is found. The leak is found when the water stops flowing. The water stops flowing when the leak is fixed. The fix is the repair. The repair is the goal. The goal is the water bill that returns to normal and the ceiling that stays dry. The dry ceiling is the evidence. The evidence is the success. The success is the leak that was found. The leak that was found is the leak that was fixed. The leak that was fixed is the leak that no longer leaks. The leak that no longer leaks is the goal. The goal is achieved with the right diagnostic in the right order. The order is this guide. The guide is the sequence. The sequence is the answer. Ever stood in your basement, staring at the water meter, watching the little red triangle spin slowly while every faucet in the house was off, and felt your stomach tighten as you realized the leak had been running for weeks — maybe months — silently adding gallons to the water bill and moisture to the subfloor? The meter was spinning. The leak was real. The source was unknown. The sequence — meter test, isolation test, professional detection — found it. It was a pinhole in a copper pipe inside the bathroom wall. The detection cost $400. The repair cost $500. The water bill returned to normal. The $900 was the cost of the leak. The $900 was the cost of finding and fixing it. The alternative — not finding it — would have cost $3,000 in water damage by the time the paint started bubbling on the baseboard. The $900 was the early detection. The $3,000 was the late detection. The early detection was the sequence. The sequence was the guide. The guide was followed. The leak was found. The ceiling is dry.