The old ceiling light in the bedroom has been there since the house was built. It is a dome fixture that holds two bulbs and collects dead bugs in a way you try not to look at. You bought a ceiling fan with an integrated light kit because the room needs airflow and the fixture needed replacing anyway. The box is sitting in the hallway. The instructions are folded into a rectangle the size of a credit card and printed in a font that requires reading glasses you do not own.
Installing a ceiling fan with a light fixture is a one-person job if the electrical box is fan-rated and the wiring is already in place. The fan part is mechanical. The light part is electrical. The two systems share a mounting bracket and a power source but they are wired separately, which is the part that trips up first-timers who have only ever replaced a light fixture. This guide covers the full installation with emphasis on the light kit wiring and the ceiling box inspection that determines whether the project is a Saturday job or an electrician call.
Safety First: The Ceiling Box Is the Go/No-Go
According to wikiHow’s ceiling fan installation guide, co-authored by home improvement specialist Allen Lee and master electrician James Hornof, the most important step happens before any wiring is touched. The electrical box in the ceiling must be rated for a ceiling fan. A box rated only for a light fixture is not strong enough to support a fan’s weight and vibration. A fan that falls from the ceiling while running is as dangerous as it sounds.
Turn off power to the room at the circuit breaker. Verify the power is off by flipping the wall switch and confirming the old fixture does not turn on. Then use a non-contact voltage tester on the wires in the ceiling box before touching anything. Breakers are sometimes mislabeled. The tester is $10 and is the difference between a safe installation and a shock.
Remove the old light fixture and look at the electrical box. A fan-rated box will be stamped with the words “Acceptable for Fan Support” or list a weight rating of at least 35 pounds. It will be attached directly to a ceiling joist or supported by an expandable metal brace between two joists. If the box is a shallow plastic pancake box nailed to the side of a joist, it is not fan-rated. If you cannot confirm the box is fan-rated, or the box moves when you push on it, stop. Call an electrician to install a fan-rated box. This is not a corner you can cut.
What You Need
- Ceiling fan with light kit
- Ladder (not a step stool — an actual ladder with a platform shelf)
- Non-contact voltage tester
- Screwdrivers (Phillips and flathead)
- Wire strippers
- Wire nuts (usually included with the fan)
- Electrical tape
- Adjustable wrench or pliers
- Assistant (optional but makes hanging the fan much easier)
Step 1: Assemble the Fan on the Ground
Build as much of the fan as you can before climbing the ladder. Attach the downrod to the motor housing. Thread the wires from the motor through the downrod and the canopy trim ring. Tighten the setscrew at the top of the downrod collar. This is not the screw to be shy with. A loose downrod setscrew is the number one cause of a wobbling ceiling fan.
Allen Lee recommends installing half of the fan blades on the ground. The added weight stabilizes the fan body while you work on the wiring, and you avoid the awkward overhead screwdriver work for at least some of the blades. Leave the light kit and glass shades off. Those go on last, after the wiring is complete and the fan is secured to the ceiling.
Step 2: Mount the Ceiling Bracket
Thread the house wires through the center hole of the mounting bracket. Secure the bracket to the fan-rated electrical box with the screws provided. These screws must go into the metal box, not just the drywall. Tighten them fully. The bracket supports the entire weight of the fan. If it is loose, the fan will wobble. If it is very loose, the fan will eventually come down.
Step 3: Hang the Fan and Connect the Wiring
Lift the assembled fan body up the ladder. Most mounting brackets include a hook or a J-slot that temporarily holds the fan while you connect the wires. Slide the fan’s hanging ball into the bracket and let it rest on the hook. Both hands are now free for wiring.
The wiring is the most intimidating part and the most straightforward once you know what each color does:
- White to white: neutral. Connect the white wire from the fan to the white wire from the ceiling.
- Black to black: hot for the fan motor. Connect the black wire from the fan to the black wire from the ceiling. This powers the fan.
- Blue to black (or red): hot for the light kit. The blue wire from the fan powers the light separately from the motor. Connect it to the black ceiling wire, or to a red wire if your ceiling has separate switch legs for the fan and light.
- Green or bare copper to green or bare copper: ground. Connect the ground wire from the fan to the ground wire from the ceiling. If there is no ground wire from the ceiling, which is common in older homes, attach the fan’s ground wire to the grounding screw on the mounting bracket.
Master electrician James Hornof emphasizes that the blue wire is the one most homeowners ask about. If you want the fan and light controlled by a single wall switch, connect blue and black together to the black ceiling wire. If your ceiling has two wall switches, one for a fan and one for a light, connect blue to the red wire and black to the black wire. This gives independent switch control of the fan and light.
Twist the stripped ends of each wire pair together clockwise with lineman’s pliers, then twist a wire nut over the connection until it is tight. Wrap each wire nut with electrical tape, covering both the nut and a half inch of the wire insulation. Tug each connection. If a wire pulls out, redo it.
Step 4: Secure the Canopy and Finish the Blades
Push the connected wires up into the electrical box carefully. Fold them in rather than stuffing them. Stuffed wires can have a nut pull loose when the canopy is tightened. Slide the canopy up the downrod to cover the bracket and the wiring. Tighten the canopy screws.
Install the remaining fan blades. Tighten each blade screw firmly. A loose blade causes a wobble, and a wobble loosens other screws over time. After all blades are installed, spin the fan by hand and watch the blade tips. If one blade tracks higher or lower than the others, loosen its screws, adjust, and retighten. The blades should spin in a single flat plane.
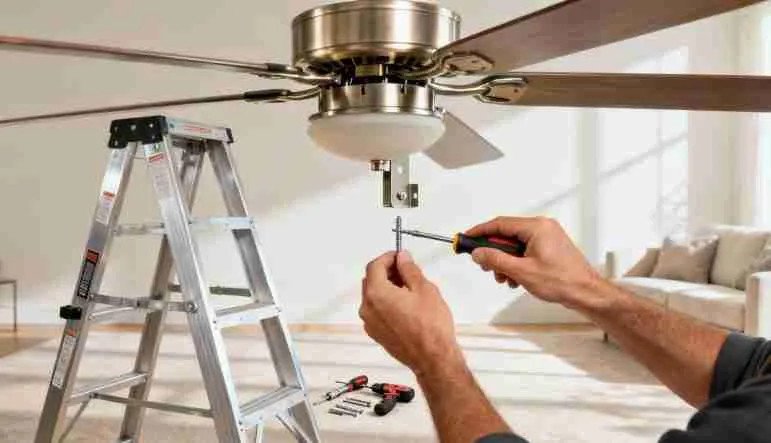
Step 5: Install the Light Kit
The light kit typically mounts to a fitting on the bottom of the fan motor housing. Remove the cap plug at the bottom of the fan to expose the light kit wiring connector. Most modern fans use a plug-and-socket connector for the light kit. Plug the light kit’s wiring harness into the fan’s connector. It only fits one way.
If the fan uses wire nuts instead of a plug connector, connect the wires color-to-color the same way you did in the ceiling: white to white, black (or blue from the fan) to black on the light kit. Secure the light kit housing to the fan with the provided screws.
Install the light bulbs. LED bulbs are recommended because they generate less heat than incandescent bulbs in the enclosed glass shade. Install the glass shade or shades last. They are the most fragile component and the most likely to break if bumped during installation. Tighten the shade retaining screws gently. Glass cracks under uneven pressure.
Step 6: Check the Wall Switch Setup
Ceiling fans with light kits can be controlled in several ways. The simplest is a single wall switch that powers both, with pull chains on the fan to independently control fan speed and light. Most fans come with pull chains installed. Label them if they are not labeled. Reaching up and pulling the wrong chain in the dark is a small frustration that happens every night.
If you want wall control of both fan and light independently, and your ceiling box does not have separate switch legs, you have two options: install a wireless remote control module inside the fan canopy, which most fans include, or run new wiring, which requires an electrician. The remote control module is the practical choice for retrofits.
Do not connect a ceiling fan to a dimmer switch. Dimmers reduce voltage. Fan motors are designed for full voltage and will hum, overheat, or fail if dimmed. If the room currently has a dimmer switch for the old light fixture, replace it with a standard single-pole switch or a fan speed controller rated for ceiling fans.
What Installing a Ceiling Fan With Light Costs
| Item | DIY Cost | Pro Cost |
| Ceiling fan with light kit | $60-300 | $60-300 |
| Fan-rated ceiling box (if needed) | $15-30 | $50-100 (installed) |
| Voltage tester | $10-20 | Included |
| Labor | $0 | $150-400 |
| Total | $85-350 | $260-800 |
| New circuit run (if no existing wiring) | N/A | $300-800 |
DIY is realistic if an existing light fixture is being replaced, the ceiling box is fan-rated, and the wiring is modern with a ground wire. If any of those three conditions is not met, the cost of an electrician is not an expense. It is compliance with the electrical code and the peace of knowing the fan will not fall on someone sleeping under it.
Frequently Asked Questions
What is the blue wire on a ceiling fan and where does it go?
The blue wire powers the light kit independently from the fan motor. Connect it to the black ceiling wire if the fan and light will share a single wall switch. Connect it to the red ceiling wire if the room has separate wall switches for the fan and light. If you want only the fan and no light, cap the blue wire with a wire nut and tuck it into the canopy. It carries current when the fan is on, so do not leave it exposed.
How do I know if my ceiling box is fan-rated without taking the fixture down?
You cannot reliably tell without removing the fixture. Once the fixture is down, look for a stamp on the inside of the box that says “Acceptable for Fan Support” or a weight rating of 35 pounds or more. The box should be metal and attached to a joist or an expandable brace. If the box is plastic, shallow, and nailed to the side of a joist through the drywall, it is a light-only box. Replace it before installing a fan.
Why is my newly installed ceiling fan wobbling?
Wobble is nearly always a mechanical issue, not an electrical one. Check in this order: blade screws are all tight, blades are all tracking in the same plane, the downrod setscrew is tight, the mounting bracket screws are tight into the electrical box, the electrical box itself does not move. If all of those are correct, use the blade-balancing kit included with the fan. It contains a weighted clip and adhesive weights. Attach the clip to one blade at a time and run the fan. When the wobble decreases, the clip is on the light blade. Move the clip to different positions on that blade until the wobble stops, then replace the clip with an adhesive weight at that position.
Can I install a ceiling fan where only a light fixture was before?
Yes, if the ceiling box is fan-rated. The wiring is the same. A standard ceiling light uses black, white, and ground wires. A ceiling fan with light uses the same wires plus a blue wire for the light. The electrical requirements are identical. The only limiting factor is the ceiling box. If the box is not fan-rated, an electrician can replace it without running new wiring, which typically costs $150 to $300 including the box and labor.
The Fan That Does Not Fall
Ceiling fan installation is one of the most satisfying DIY electrical projects because the result is immediately visible and immediately useful. The room is brighter. The air moves. The old bug-collecting dome fixture is in the trash. The only thing that matters beyond the satisfaction is that the fan stays attached to the ceiling. A fan-rated box, tight setscrews, and wire nuts wrapped in electrical tape are the three things that keep it there.
Test the fan on all speeds and the light on all settings before you put the ladder away. Listen for clicking, humming, or scraping. A noise that seems minor on day one will be the only thing you hear on night three. Fix it now, while the ladder is still set up and the tools are still out.