Kohler toilets install like any other toilet in principle: bolt the bowl to the floor, mount the tank on the bowl, connect the water. The differences are in the details, and they are the reason a Kohler installation goes more smoothly if you know what to expect before you open the boxes.
Kohler uses a three-bolt tank connection on many models instead of the standard two-bolt design. The flush valve is an AquaPiston canister, not a flapper. Some models use the DryLock system, which replaces the wax ring with a rubber gasket that bolts directly to the flange. And the seat mounts with a Quick-Release or ReadyLatch hinge that requires no tools. Here is how to install a Kohler toilet correctly, with attention to the parts of the process that are different from a generic toilet.
Before You Start: What Makes Kohler Different
Open both boxes and check that all parts are present. A Kohler two-piece toilet ships in two boxes, one for the bowl and one for the tank. A one-piece toilet ships in a single large box. The toilet includes the wax ring or the DryLock gasket, the tank-to-bowl gasket, the tank bolts and rubber washers, the floor bolts, and the seat with mounting hardware. Confirm everything is present and undamaged before you dispose of the old toilet. A hairline crack in the porcelain that was not visible in the store lighting is grounds for an exchange. Do not install a cracked toilet.
Kohler toilets are heavy. A two-piece Kohler bowl weighs 60 to 80 pounds. A one-piece weighs 100 to 120 pounds. Get help lifting the bowl onto the flange. The bowl must be lowered straight down onto the wax ring. A bowl that is slid sideways onto the ring smears the wax and creates a leak path. Two people make this a controlled lift. One person makes it a gamble.
Step One: Know Your Rough-In Measurement
Kohler toilets require a standard 12-inch rough-in, measured from the finished wall behind the toilet to the center of the flange bolts. Most Kohler models are available only in 12-inch rough-in. Some models are available in 10-inch or 14-inch rough-in for bathrooms with non-standard plumbing. The rough-in measurement is printed on the box and in the specifications. Confirm that your flange is at the correct distance before opening the box. A toilet that does not fit the rough-in cannot be installed without relocating the flange, which is a plumbing project, not a toilet swap.
Step Two: Install the Wax Ring or DryLock Gasket
Kohler toilets that include the DryLock system use a rubber gasket instead of a wax ring. The gasket bolts to the floor flange with two screws. The toilet bowl has a matching receiver on the bottom that locks onto the gasket when the bowl is set in place. The DryLock gasket is reusable, repositionable, and does not compress unevenly the way wax can. If your Kohler model includes DryLock, use it. Do not substitute a wax ring. The DryLock system is designed as a matched set.
If your Kohler toilet uses a standard wax ring, install it on the flange with the plastic sleeve facing down into the drain pipe. The wax ring sits on the flange, not on the bottom of the toilet. Set the toilet straight down onto the ring. Do not slide the toilet sideways once the ring makes contact. A wax-free rubber gasket such as the Fluidmaster Better Than Wax seal is an alternative to wax that is cleaner to install and allows repositioning. It works with any Kohler toilet that does not include DryLock.
Step Three: Set the Bowl
Insert the floor bolts into the flange slots. The T-shaped bolt heads slide into the wide part of the slot, then rotate to lock into the narrow part. The bolts stand upright. Use the plastic bolt caps or the included plastic washers to hold the bolts in position while you lower the bowl.
Lift the bowl and lower it onto the flange bolts. The bolts must pass through the holes in the base of the bowl on each side. Lower the bowl slowly. When the bowl contacts the wax ring, press down firmly on the rim to compress the ring. Do not sit on the toilet to compress the wax. Your body weight is enough to seat the ring. Sitting on an unsecured toilet can crack the porcelain or break the flange.
Place the plastic washers and the nuts on the floor bolts. Tighten the nuts by hand, then snug them with a wrench. Alternate between the left and right bolts, tightening each a little at a time. The nuts are tight enough when the bowl does not rock and the nuts resist the wrench. Overtightening cracks the porcelain at the bolt holes. This is the most common DIY mistake on toilet installation, and it is irreversible. Cracked porcelain cannot be repaired.
If the bowl rocks after tightening, shim it with plastic toilet shims. Slide shims under the low side until the bowl sits solid. Trim the shims flush with the base with a utility knife. A toilet that rocks breaks the wax seal within weeks.
Step Four: Assemble and Mount the Tank
Kohler two-piece toilets use a three-bolt tank connection. The bolts are spaced evenly across the bottom of the tank. The tank-to-bowl gasket is a large doughnut-shaped rubber or foam gasket that fits over the flush valve outlet. The gasket must be centered on the outlet and must seat squarely onto the bowl inlet.
Install the flush valve and the fill valve in the tank before mounting the tank on the bowl. The Kohler AquaPiston flush valve is a canister that lifts straight up when you flush, rather than a flapper that rotates on a hinge. The canister slides into the flush valve body and is held by a chain or a rod connected to the flush lever. Kohler ships the canister installed. Confirm it moves freely before mounting the tank.
The Kohler fill valve is typically a Fluidmaster-style valve with a float that rides on the valve body. The fill valve installs through the hole on the left side of the tank. The lock nut threads on from outside the tank. Tighten by hand. Connect the refill tube from the fill valve to the overflow tube on the flush valve. The tube clips to the top of the overflow tube and must not extend below the water line in the tank, which would create a siphon.
Insert the three tank bolts through the holes in the bottom of the tank from the inside. Each bolt gets a rubber washer under the bolt head inside the tank. The rubber washer seals the bolt hole. The metal washer goes under the nut outside the bowl. A thin bead of silicone caulk under each rubber washer provides an additional seal and is recommended by Kohler installation instructions for some models.
Lift the tank and position it over the bowl. The three bolts must align with the three holes in the bowl. Lower the tank slowly. The large tank-to-bowl gasket must seat squarely onto the bowl inlet. Thread a metal washer and a nut onto each bolt from underneath the bowl. Tighten the nuts by hand, then with a wrench in a star pattern, tightening each nut a little at a time. The tank should draw down evenly. Stop when the tank is snug and does not rock. The gap between the tank and the bowl should be even on all sides.
Kohler specifies a tank-to-bowl bolt torque of 5 to 7 foot-pounds, which is hand-tight plus approximately one full turn with a wrench. If you have a torque wrench, use it. If you do not, the correct tightness is snug. The rubber gasket creates the seal through compression, not through extreme bolt tension. Overtightening the three-bolt connection cracks the tank or the bowl at the bolt holes.
Step Five: Install the Kohler Seat
Kohler toilet seats use a Quick-Release or ReadyLatch mounting system. The seat hinges have posts that slide into mounting holes on the bowl. A locking mechanism on the underside of the bowl or on the hinge itself secures the seat. No tools are required. The seat snaps into place and can be removed for cleaning by releasing the latch.
Position the seat over the mounting holes. Insert the hinge posts into the holes. Press down until the latch clicks. Check that the seat is centered on the bowl and does not slide side to side. If the seat is misaligned, release the latch, reposition, and reseat. The Kohler seat is designed for a specific bowl shape: round front or elongated. A round-front seat will not fit an elongated bowl, and vice versa. The seat model number is on the box.
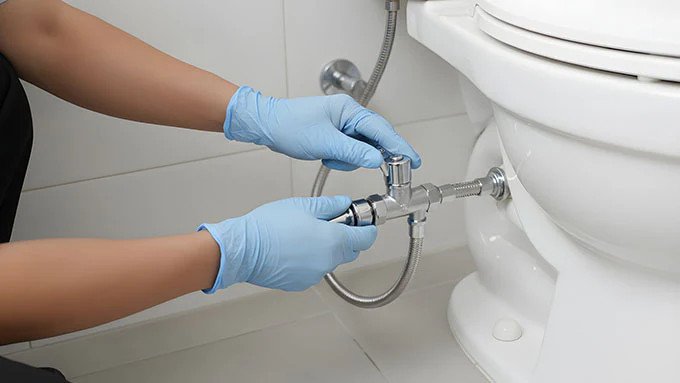
Step Six: Connect the Water and Test
Connect the water supply line to the fill valve. Tighten the nut by hand. Turn the water on slowly at the shutoff valve. Watch for leaks at the supply line connection, the tank-to-bowl connection, and the base of the bowl as the tank fills. Flush the toilet several times. Check for water around the base after each flush. The Kohler AquaPiston canister produces a powerful flush that moves a large volume of water quickly. The flush is louder and faster than a standard flapper toilet. This is normal Kohler operation, not a problem.
Adjust the water level in the tank if necessary. The water level is set by the fill valve float. The correct level for a Kohler toilet is marked on the inside of the tank or is approximately 1/4 inch below the top of the overflow tube. Adjust the float by turning the adjustment screw or by squeezing the clip and sliding the float up or down.
Caulk around the front of the toilet base with a bead of silicone or acrylic caulk. Leave the back of the base uncaulked. The gap at the back reveals a leak before the floor rots. Install the bolt caps over the floor bolts. Install the tank lid.
Frequently Asked Questions
Why does my Kohler tank have three bolts instead of two?
The three-bolt design distributes the clamping force more evenly across the tank-to-bowl gasket, which reduces the risk of cracking the porcelain at the bolt holes. The three bolts are tightened in a star pattern to draw the tank down evenly. The three-bolt design is a Kohler engineering choice. It is not compatible with standard two-bolt tank repair kits. If you need to replace a tank bolt, you must use a Kohler-specific bolt or a bolt of the same length and thread pitch.
Is installing a one-piece Kohler toilet different from a two-piece?
The bowl and tank are integrated. There is no tank-to-bowl connection to assemble. The toilet is a single piece of porcelain weighing 100 to 120 pounds. The installation is simpler because there are fewer steps, but the physical lift onto the flange is more difficult. One-piece toilets are set on the flange as a single unit. The floor bolts are the only fasteners. The water supply connects directly to the fill valve. The rest of the installation is identical to a two-piece toilet.
The AquaPiston flush seems different from my old toilet. Is it working correctly?
Yes. The AquaPiston canister lifts straight up, allowing water to flow into the bowl from all sides of the canister at once. The flush is faster, stronger, and slightly louder than a flapper flush. The water in the bowl drops quickly and refills rapidly. This is the design intent. The canister seal at the bottom of the AquaPiston is the part that wears out over time. If the toilet begins to run intermittently years from now, replacing the canister seal, Kohler part number GP1059291 for most models, is the fix. The seal slides off the bottom of the canister and a new one slides on. It is the Kohler equivalent of replacing a flapper.