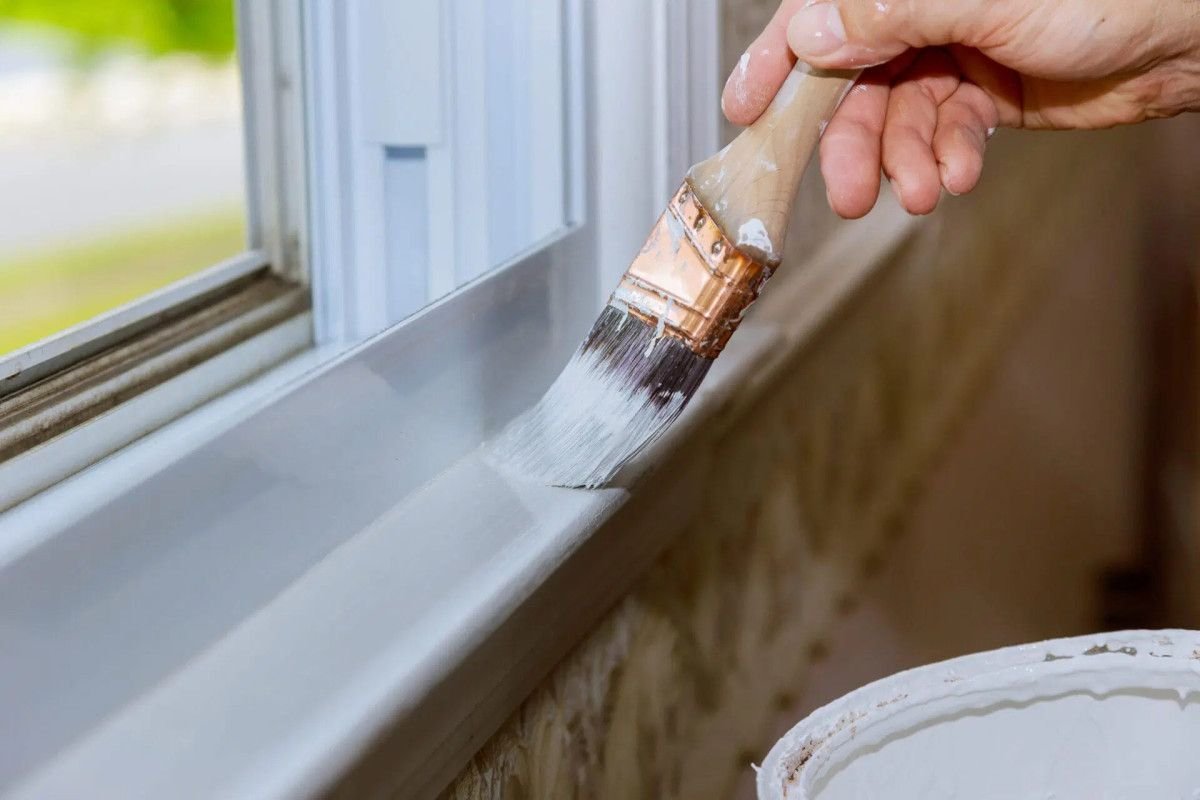
Molding is the shaped profile that gives trim its character. The baseboard is flat with a curved top edge. That curve is the molding. The casing around a door has a stepped profile that catches the light on three different planes. Those steps are the molding. Crown molding is nothing but molding, a continuous shaped profile that runs at a forty-five-degree angle between the wall and the ceiling and forces you to paint overhead with your neck craned back and paint drips falling onto your safety glasses. Painting molding is painting three-dimensional geometry. Each profile has convex curves that catch the brush on the downstroke, concave curves that the brush skips over, and flat sections that must blend seamlessly with the curves on either side. The technique for painting a flat door casing does not work on a piece of crown molding, and the technique for painting crown molding does not work on a piece of quarter-round at the base of the baseboard.
The key to painting molding is understanding that the brush must follow the profile. On a flat surface, the brush travels in a straight line. On a curved profile, the brush travels in an arc that matches the curve. Your wrist rotates as the brush moves. The bristles stay perpendicular to the surface. The pressure stays constant. Painting molding well is a motor skill that takes about thirty minutes to learn and a lifetime to master, and the only way to learn it is to paint molding.
The Four Most Common Moldings in a House and How to Paint Each One
Crown molding runs at the intersection of the wall and the ceiling and is the most difficult molding to paint because it is overhead, angled, and usually the largest profile in the room. The concave curve at the bottom, called the cove, is painted first. Hold the brush at an angle that matches the angle of the molding. Start at one end of the piece and draw the brush along the cove in a single continuous stroke. The convex curve in the middle, called the ovolo or the torus depending on the profile, is painted next, with the brush wrapping over the curve. The flat section that contacts the ceiling is painted last, blending the wet edge into the ceiling cut line. Crown molding painted with the correct sequence has continuous brush strokes that follow the geometry. Crown molding painted out of sequence has lap marks where the strokes from different sections meet at the curves.
Base cap molding is the small shaped piece that sits on top of the flat baseboard. It is usually a simple curved profile, about an inch tall, and it collects more dust than any other molding in the house because it faces upward. The dust sits on the top curve and is invisible until you bend down to paint it. Vacuum the base cap thoroughly before painting. Run a damp rag along the top edge. Paint the base cap in a single stroke from end to end, starting at the top edge and working down the curve. The base cap is narrow enough that one brush width covers the entire profile. Do not stop in the middle. A lap mark on a one-inch-wide molding that runs the entire length of a wall is visible from across the room.
Quarter-round and shoe molding are the small curved moldings at the bottom of the baseboard where the baseboard meets the floor. Quarter-round is a quarter of a circle. Shoe molding is a slightly elongated quarter-round that is taller than it is wide. Both are painted on the floor, which means you are kneeling, and the brush angle is awkward. Paint the molding by drawing the brush along its length, keeping the bristles in contact with the curved surface. Protect the floor with a paint shield, a thin piece of metal or plastic that slides between the molding and the floor and catches the paint that inevitably gets on the floor. A paint shield costs three dollars and replaces an hour of scraping dried paint off the floor with a razor blade.
Panel molding is the rectangular molding that frames the panels in wainscoting and the recessed panels in doors. It is typically a narrow, stepped profile with flat sides and a shaped face. Paint the inner edge first, where the molding meets the recessed panel. Paint the face of the molding next. Paint the outer edge last, where the molding meets the surrounding flat surface. The sequence prevents paint from accumulating in the corners and bridging across the panel gap. A door panel with paint bridging the gap between the molding and the panel will crack the first time the door expands with humidity. The gap must remain open.
The Brush Technique That Makes Molding Look Sprayed
Use a brush that matches the size of the molding. A two-and-a-half-inch brush for crown molding. A two-inch brush for door and window casing. A one-and-a-half-inch brush for baseboard and base cap. A one-inch brush for quarter-round and panel molding. The brush should be slightly wider than the widest flat section of the molding so a single stroke covers the entire flat without overlapping. Overlapping strokes on a curved profile leave a visible line where the second stroke began.
Load the brush with enough paint to flow into the curves but not so much that it drips out of them. Molding curves act like gutters. Paint that is applied too heavily runs down the curve and collects in the cove, where it drips onto the floor or the wall below. The correct amount of paint fills the brush without dripping when the brush is held horizontally. Tap the brush against the side of the can, not the rim. Tapping against the rim removes too much paint from the tip of the brush, which is the part that reaches into the curves.
Paint in sections the length of a single piece of molding whenever possible. A piece of door casing is seven feet long. Paint it in one continuous stroke if your arm will reach. A piece of crown molding runs the entire length of a wall. Divide it into manageable sections of about three feet, and overlap the sections while the paint is wet so the overlap blends. The overlap point, called a wet edge, is where the brush from the previous section meets the brush from the next section. A wet edge blends invisibly. A dry edge, where the previous section has begun to set before the next section is started, leaves a visible line.
Lay off each section with one final light stroke from end to end. The lay-off stroke is the lightest possible touch, just the weight of the brush against the surface, and it smooths the paint into a uniform film. Do not press. Do not go back over an area that has been laid off. The lay-off stroke is the last thing that touches the paint before it begins to level. The quality of the lay-off determines whether the dried paint shows brush marks or looks smooth.
Caulking Molding Joints Before and After Painting
Caulk every joint where molding meets molding at a corner, and every joint where molding meets a flat surface at a transition. Inside corners, where two pieces of crown molding meet, are the most visible joints in the room because they are at eye level and the ceiling light casts a shadow into the corner. A caulked corner that is painted looks like one continuous piece of molding. An uncaulked corner looks like two pieces of wood with a crack between them.
Apply a thin bead of paintable latex caulk to the joint. Smooth it with a wet finger immediately. Wipe the excess with a damp rag. Do not let caulk dry on the face of the molding. Caulk that dries in a thick ridge is visible through the paint, and sanding dried caulk off a curved molding profile is extremely tedious. Prime the caulk before painting. Paint applied directly over unprimed caulk flashes, meaning the sheen is different over the caulk than over the surrounding paint, and the difference is permanent. Priming the caulk prevents flashing.
After painting, inspect every joint. A joint that was caulked and painted can still crack if the molding moves with humidity changes, which it will. Touch up cracked joints with a small artist’s brush and a dab of paint. The touch-up is invisible on fresh paint. It is visible on aged paint that has yellowed or faded. Paint touch-ups on molding are a maintenance task that comes with owning a house with painted woodwork. Accept it. A house with perfectly caulked and painted molding joints that never crack does not exist because wood moves, and caulk can stretch but not infinitely.
FAQ — Painting Wood Trim Molding
The previous owners painted over the molding so many times the profiles are rounded and soft. Can I fix it?
Chemical stripping is the only way to remove multiple layers of paint from detailed molding profiles without damaging the wood. A gel stripper applied thickly, left for the recommended time, and scraped off with a plastic scraper and a dental pick for the crevices will remove the old paint down to the bare wood. Heat guns work on flat surfaces but are impractical on detailed profiles because the heat does not reach into the curves evenly. Sanding multiple layers of paint off molding profiles is extremely slow and inevitably rounds over the sharp edges of the original profile. If the molding is standard off-the-shelf profile available at a lumberyard, replacing it with new molding of the same profile is faster and cheaper than stripping it.
Can I spray molding instead of brushing it?
Yes, and spraying produces a finish with zero brush marks, which is especially valuable on molding because the curved profiles catch light and reveal brush marks that would be invisible on a flat surface. Mask everything that is not molding, which takes hours. Spray the molding in two thin coats with an airless sprayer and a fine finish tip. Back-brush immediately after each coat with a dry brush to work the paint into any wood grain or surface texture. The sprayer applies the paint. The brush ensures adhesion. Spraying is worth the masking time if you are painting every piece of molding in a room or a house. For a single piece of molding, brushing is faster.
Paint keeps dripping from the curves of the crown molding onto the wall. How do I stop it?
You are applying too much paint. Crown molding curves act like gutters, and overloaded curves drip. Load the brush with less paint. Apply it more thinly. If drips still form, you are painting in conditions that are too hot or too humid for the paint to set quickly. Open a window, turn on a fan, or adjust the room temperature to the range specified on the paint can. The second cause of dripping is painting too slowly. Paint that sits in a curve for more than a few seconds without being laid off will gather into a droplet. Keep the brush moving. Paint the section, lay it off, and move to the next section. If you need to stop and study your work, do it after the section is laid off, not while the paint is pooling in the cove.