

Kitchen cabinets account for 30% to 40% of a kitchen remodel budget. For a $30,000 renovation, that is $9,000 to $12,000. The decisions that determine whether that money buys a kitchen that functions for 20 years or one that annoys you every time you cook are made in the planning phase, before a single cabinet is ordered. Get the layout wrong and you live with it every day. Get the order of operations wrong and you delay the project by weeks while cabinets sit in the garage waiting for the drywall to be finished. The planning framework below organizes the 15 to 20 major decisions into the correct sequence, with the specific measurements, clearance requirements, and cabinet specifications that prevent the five most common and expensive planning mistakes.
“First time making kitchen cabinets. I did the entire kitchen myself for less than half of our original budget. Took six months of weekends and I made plenty of mistakes, but the feeling of cooking in a kitchen I built is worth every splinter.”
— r/DIY, December 2024 (10,545 upvotes, 314 comments), source
Building kitchen cabinets yourself is one path. For everyone else, the plan is about measurement, layout, cabinet specification, and the sequence of installation milestones that must happen in the right order. The most common planning error is not the layout itself — it is ordering cabinets before the walls are finished and discovering that the 120-inch wall is actually 119-3/8 inches, and the 1/2-inch filler strip that looked fine in the CAD rendering is a visible mistake in the installed kitchen. Measure after drywall is complete. Order after measuring.
Step 1: Measure the Kitchen — and Do It After Drywall
Measuring a kitchen for cabinets requires more than length times width. The critical dimensions, in order of importance, are the total length of each wall where cabinets will be installed, the ceiling height at three points along each wall (floors and ceilings are rarely perfectly level), the location of every window, door, outlet, vent, and plumbing penetration, and the distance from each corner to the nearest obstacle. Record these measurements on a dimensioned floor plan drawn to scale. Graph paper at 1/2 inch equals 1 foot works. A laser measure and a notebook work better because they capture the slight variations that graph paper rounds away.
The measurement that most first-time planners miss is the distance from the corner to the window casing, not to the window opening. Cabinets butt against casing, not against glass. A 36-inch cabinet that fits on paper between the corner and the window rough opening may not fit between the corner and the window trim. Measure to the trim edge, not the rough opening. The second measurement that gets missed is the ceiling height at the corner where upper cabinets will meet a soffit or bulkhead. A ceiling that slopes 1/2 inch over 8 feet — common in older homes — means the cabinet on one end sits flush to the ceiling and the cabinet on the other end has a 1/2-inch gap that crown molding must cover.
Do not measure for cabinets before drywall is hung, taped, and finished. The stud locations on bare framing tell you where walls exist. They do not tell you the finished wall dimensions with drywall thickness and corner bead. A 1/2-inch discrepancy on each wall adds up to 2 inches across a U-shaped kitchen, and stock cabinets come in 3-inch width increments. Two inches of accumulated error means the filler strip that was supposed to be 3 inches is actually 5 inches, or the cabinet that was supposed to fit does not.
Step 2: Lock In the Layout Before Picking Cabinet Styles
Kitchen cabinet layout is determined by the shape of the room and the location of the work triangle: sink, range, and refrigerator. The three standard layouts — L-shaped, U-shaped, and galley, each have a minimum aisle width requirement that, if violated, makes the kitchen feel cramped regardless of cabinet quality. A single-wall kitchen, where all cabinets line one wall, is the fourth standard layout but requires at least 10 feet of linear wall to fit a sink, range, and refrigerator with adequate counter space between them.
L-shaped kitchen. Cabinets on two adjacent walls. Minimum aisle width between opposing cabinet faces is 42 inches for a single-cook kitchen, 48 inches for a two-cook kitchen. The open end of the L typically faces the dining or living area. An L-shaped kitchen works in rooms 10 by 10 feet or larger. At 10 by 10, the corner cabinet where the two legs meet is the least accessible storage in the kitchen. A lazy Susan, a blind corner pull-out, or a diagonal corner cabinet turns dead space into functional storage.
U-shaped kitchen. Cabinets on three walls with an open end for entry. Minimum aisle width is the same 42 to 48 inches, but the critical dimension is the distance between the two parallel cabinet runs. If that distance is less than 60 inches, two people cannot pass each other in the kitchen. If it is less than 48 inches, the kitchen is a one-person workspace and the third wall of cabinets should be reduced to base cabinets only to avoid the closed-in feeling of upper cabinets on both sides.
Galley kitchen. Two parallel runs of cabinets facing each other with walkways at both ends. Minimum width between cabinet faces is 36 inches for a one-person galley, 42 inches for two-person. A galley narrower than 36 inches does not allow an open dishwasher or oven door without blocking the walkway. The galley is the most efficient layout for cooking, everything is within two steps, and the most claustrophobic if the ceiling is low or the lighting is poor. Upper cabinets in a galley should be light-colored and the lighting should be bright and even to counteract the tunnel effect.
Step 3: Cabinet Types, Sizes, and the Upgrades Worth Paying For
Cabinets come in three grades: stock, semi-custom, and custom. Stock cabinets ship in standard 3-inch width increments and standard heights, 30, 36, or 42 inches for upper cabinets and 34.5 inches for base cabinets with a countertop that brings the total work surface to 36 inches. Stock cabinets cost $80 to $400 per linear foot and ship in 1 to 3 weeks. Semi-custom cabinets offer the same standard widths plus modifications, deeper uppers, taller base cabinets, different door styles on the same box, and cost $150 to $600 per linear foot with a 4- to 8-week lead time. Custom cabinets are built to any dimension, any material, and any configuration. They cost $500 to $1,200 per linear foot and the lead time is 8 to 16 weeks.
The cabinet upgrades that are worth paying for at every budget level are soft-close hinges and full-extension drawer slides. Soft-close hinges prevent cabinet doors from slamming, which extends the life of the cabinet frame and the sanity of everyone in the house. Full-extension drawer slides allow the drawer to pull out completely, giving access to items at the back without reaching into a dark cavity. The cost premium for both is $10 to $20 per drawer or door, or $200 to $500 total for a full kitchen. The upgrade that is not worth paying for at the stock and semi-custom level is solid wood drawer boxes over plywood with a wood veneer. The structural difference is negligible. The visual difference is invisible when the drawer is closed.
According to ENERGY STAR, choosing energy-efficient kitchen appliances during a cabinet remodel can reduce the kitchen’s total energy consumption by 15% to 30%, which means the appliance specifications should be finalized before the cabinet dimensions are locked in, cabinet openings for refrigerators, ranges, and dishwashers are built to specific appliance dimensions.
| Cabinet Grade | Cost/Linear Ft | Lead Time | Width Increments | Best For |
| Stock | $80–$400 | 1–3 weeks | 3 inches | Budget, rental, fast timeline |
| Semi-Custom | $150–$600 | 4–8 weeks | 3 inches + mods | Most kitchen remodels |
| Custom | $500–$1,200 | 8–16 weeks | Any | High-end, unusual spaces |
| IKEA (Reference) | $100–$300 | In stock | 3 inches | DIY, modern design |
Step 4: The Order of Operations That Prevents Timeline Delays
The sequence of a kitchen cabinet project is fixed. Skipping a step or reversing the order creates delays that compound. The correct order:
1. Demolition. Remove existing cabinets, countertops, backsplash, and flooring if replacing. Shut off water and electricity to the kitchen before demo. Cap exposed plumbing and electrical lines.
2. Rough-in plumbing and electrical. This is the window to move supply lines, drains, outlets, switches, and lighting boxes to their final locations. The cabinet layout must be finalized before this step because the outlet and plumbing locations follow the cabinet plan. An outlet placed for a 30-inch upper cabinet that becomes a 36-inch cabinet is in the wrong place and costs $200 to $400 to move after drywall.
3. Drywall, tape, and finish. Walls must be complete to final dimensions before measuring for cabinets.
4. Flooring installation. Install the finished floor before the cabinets go in. Cabinets installed on top of the finished floor allow future flooring replacement without removing cabinets. Cabinets installed on the subfloor with flooring cut around them trap the kitchen in the current flooring choice permanently. The exception is floating floors, LVP, laminate, which must be installed after cabinets because floating floors require an expansion gap at the perimeter that cabinets would block.
5. Cabinet delivery and inspection. Open every box and inspect every cabinet for damage before the installer arrives. Damage claims take days to process. Finding a cracked door on installation day means the installer cannot finish and must return, adding $300 to $500 in trip charges.
6. Upper cabinet installation first. Upper cabinets install before base cabinets. This allows the installer to work without leaning over base cabinets and prevents damage to finished countertops. The upper cabinets are screwed into wall studs through a mounting rail at the top and bottom of each cabinet box.
7. Base cabinet installation. Base cabinets are leveled with shims on the floor and screwed to wall studs and to each other through the face frames or cabinet sides. The countertop template cannot be made until the base cabinets are installed in their final position.
8. Countertop template and fabrication. The countertop fabricator measures the installed base cabinets and produces a template. Fabrication takes 1 to 3 weeks depending on the material and the fabricator’s backlog. Do not schedule the countertop installation for the day after cabinet installation. The gap between cabinet install and countertop install is built into the timeline.
9. Countertop installation, then backsplash, then sink and faucet hookup. This sequence is fixed. Countertops must be in place before the backsplash because the backsplash sits on top of the countertop. The sink and faucet are the last items installed because the plumbing connections are the final step before the kitchen is functional.
Five Planning Mistakes That Cost More to Fix Than to Avoid
Ordering cabinets before the appliances. The refrigerator, range, dishwasher, and vent hood dimensions determine the cabinet openings. Order the appliances first, record their exact dimensions including required clearances (refrigerators need 1/2 to 1 inch of clearance on each side for ventilation), and give those dimensions to the cabinet designer. A cabinet opening that is 1/2 inch too narrow for the refrigerator is a $300 cabinet modification or a $2,000 appliance return.
Forgetting filler strips. Stock cabinets in 3-inch increments rarely fill a wall exactly. Filler strips, 3/4-inch-thick pieces of cabinet material cut to fill the remaining gap, are not optional trim. They are structural components that allow doors and drawers to open without hitting adjacent walls, appliances, or door casings. A cabinet placed tight against a side wall cannot open its door past 90 degrees. A 3-inch filler strip between the cabinet and the wall provides the clearance for the door to swing fully open.
Ignoring corner cabinet accessibility. The corner where two cabinet runs meet is the most expensive square footage in the kitchen and the most difficult to access. A standard corner cabinet with a single door provides access to roughly 40% of its interior volume. A lazy Susan, a blind corner pull-out system, or a diagonal corner cabinet increases that to 80% or more. The corner storage solution costs $200 to $800 and recovers 5 to 10 cubic feet of usable storage, the equivalent of an entire additional cabinet, for less than the cost of adding another cabinet.
Underestimating lighting needs. Upper cabinets cast shadows on the countertop below them. Without under-cabinet lighting, the primary work surface in the kitchen is lit by light that comes from behind the person standing at the counter. Under-cabinet LED strip lights cost $30 to $100 per linear foot and install during the electrical rough-in phase. Adding them after the backsplash is installed requires surface-mounted raceway that is visible and looks like an afterthought. Specify under-cabinet lighting in the electrical plan, not as an upgrade to consider later.
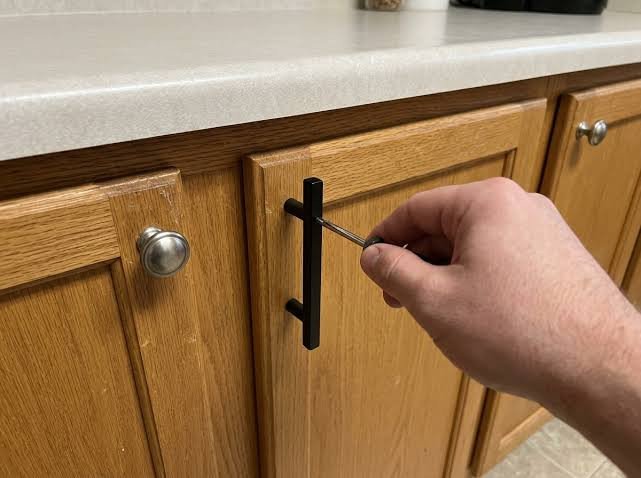
Skipping the cabinet hardware plan. Cabinet knobs and pulls are drilled on-site after installation. The hole spacing must be consistent across every door and drawer. A template, a piece of cardboard with the hole locations marked, costs nothing and ensures that every pull is in the same position on every door. Drilling hardware holes by eye produces a kitchen where the pulls on the upper cabinet doors are 1/4 inch lower than the pulls on the lower cabinet doors and it is noticeable every time you open both.
Frequently Asked Questions
How much does a kitchen cabinet project cost?
Stock cabinets from a home center for a 10-by-10-foot kitchen with 25 linear feet of cabinetry cost $2,000 to $10,000 for the cabinets alone. Semi-custom cabinets for the same kitchen cost $3,750 to $15,000. Custom cabinets cost $12,500 to $30,000. Installation adds $50 to $150 per linear foot, or $1,250 to $3,750 for a standard kitchen. Countertops add $1,500 to $5,000. The all-in cost, cabinets, installation, countertops, for a mid-range semi-custom kitchen remodel with standard stone countertops is $8,000 to $22,000 depending on kitchen size, material choices, and labor rates in your region.
Should I install kitchen cabinets myself or hire a professional?
Installing stock or IKEA cabinets is a realistic DIY project for someone with basic carpentry skills, a 4-foot level, shims, and a helper. The critical skill is patience with leveling, base cabinets must be perfectly level in both directions before they are screwed together, and correcting a cabinet that was screwed down out of level takes longer than leveling it correctly the first time. Installing full-custom cabinets with inset doors, which require the door gaps to be consistent to within 1/16 inch, is professional-level work. If your cabinets have inset doors, hire the installation. The gap inconsistency from a DIY install will be visible every time you look at the cabinets.
How far in advance should I order kitchen cabinets?
Stock cabinets ship in 1 to 3 weeks. Order them 2 weeks before demo so they arrive the week after drywall is finished. Semi-custom cabinets have a 4- to 8-week lead time. Order them 8 weeks before the planned install date to absorb the inevitable production delay. Custom cabinets have an 8- to 16-week lead time. Order them the day the design is finalized and accept that the project timeline revolves around the cabinet delivery date, not the other way around. Any cabinet order placed during a peak season, spring and early summer, will arrive at the longer end of the lead time range.
Are IKEA kitchen cabinets a good option?
IKEA cabinets are the best value in the cabinet market at $100 to $300 per linear foot with Blum soft-close hardware, the same hardware brand used in custom cabinets costing four times as much. The boxes are particleboard with a melamine finish, which is less durable than plywood but entirely adequate for a residential kitchen. The limitation is sizing, IKEA uses standard metric widths that correspond roughly to 3-inch increments, and the selection of decorative end panels, trim, and filler options is narrower than semi-custom lines. For a kitchen with a standard layout and standard ceiling height, IKEA cabinets with aftermarket custom door fronts from a company like Semihandmade deliver a near-custom look at roughly 40% of the cost of semi-custom cabinetry.