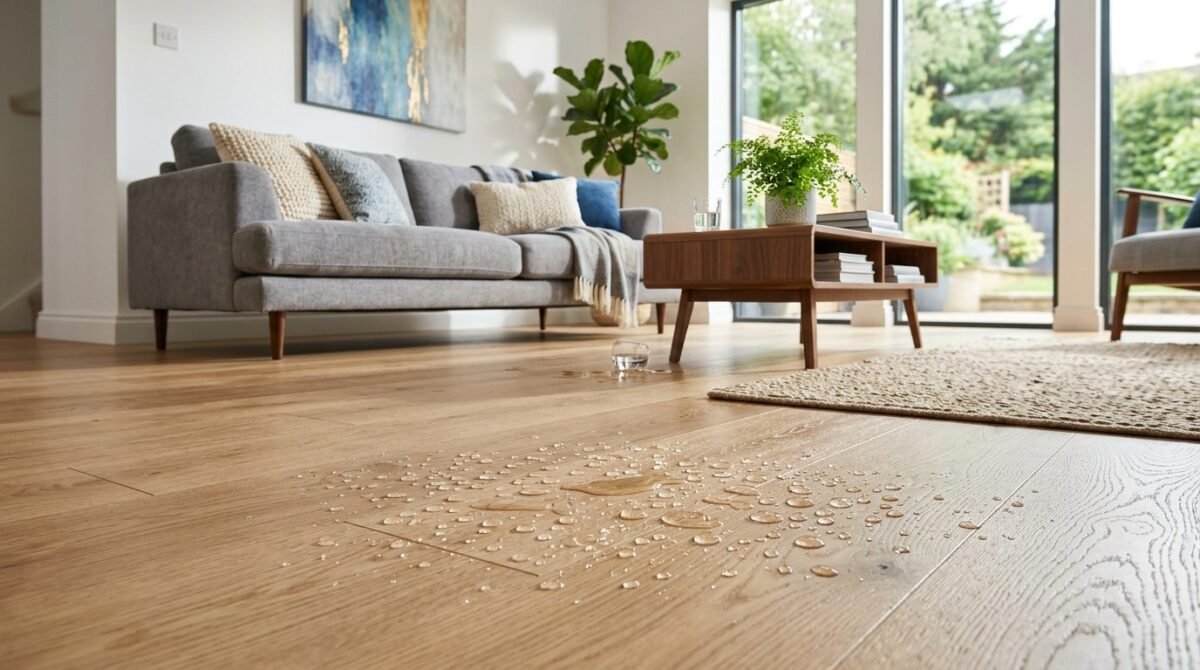
Laminate wood flooring is one of the most popular choices for homeowners — affordable, stylish, and easy to maintain. But water is its biggest enemy. Standard laminate flooring is not waterproof, and even a small amount of moisture seeping into the seams can cause permanent damage. The question most homeowners ask is: is there anything you can actually do about it?
The answer is yes — and knowing how to waterproof laminate wood flooring properly can add years to its life and prevent costly repairs. This guide walks through every proven method, from choosing the right product to sealing joints, installing vapor barriers, and room-specific strategies for bathrooms, kitchens, and basements.
Why Laminate Flooring Is Vulnerable to Water Damage
To understand how to protect laminate flooring from water, you first need to know why it fails. Traditional laminate is built from four layers:
- A backing layer — provides stability and minor moisture resistance from below
- A high-density fiberboard (HDF) core — this is the problem layer. HDF is extremely porous and absorbs water rapidly
- A photographic design layer — gives laminate its wood-like appearance
- A wear layer — the protective surface that resists surface scratches and minor spills
The wear layer handles surface splashes well. But the HDF core is the “Achilles’ heel” of laminate flooring. When water reaches the seams, edges, or any surface scratch, it absorbs directly into the core — and once that happens, the damage is typically irreversible.
The consequences of water penetration include:
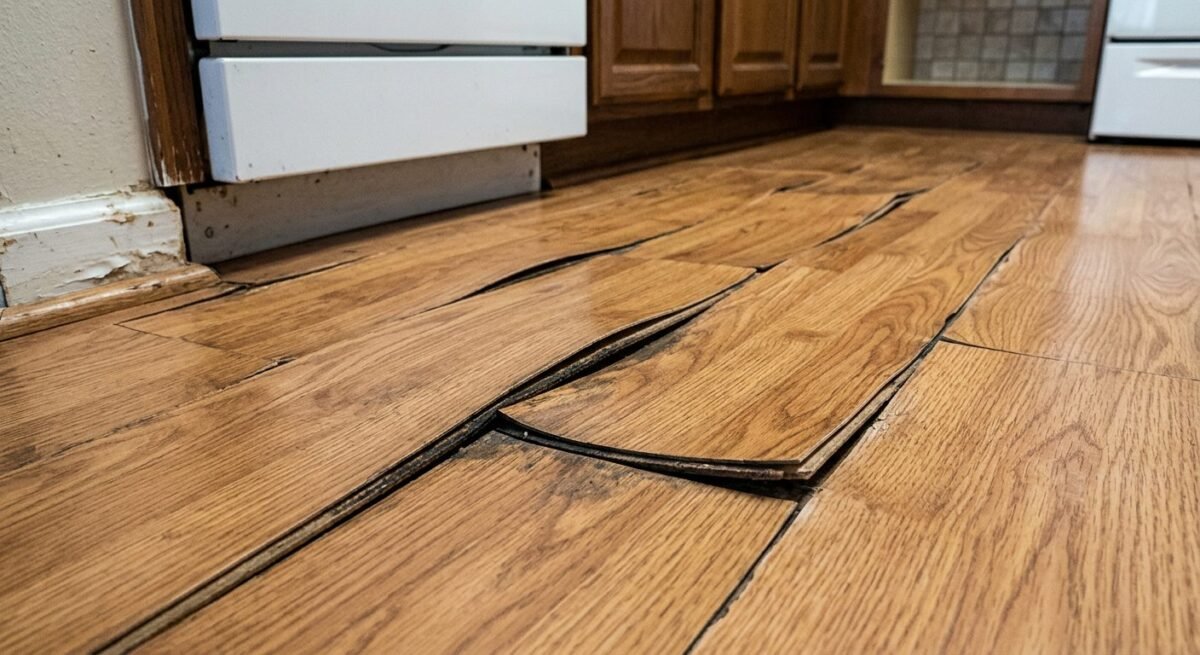
- Swelling and buckling — planks push against each other and lift at the edges
- Cupping and warping — uneven expansion creates a wavy surface
- Delamination — the layers begin to separate
- Mold and mildew growth beneath the floor surface
- Subfloor damage as moisture travels downward
High-risk areas include bathrooms, kitchens, laundry rooms, basements, and entryways. But even in low-risk rooms, cumulative moisture from humidity, spills, and cleaning can cause slow, progressive damage if the floor is not properly protected.
Before You Start: Critical Prep Steps
Whether you are installing new laminate or waterproofing existing floors, these preparation steps are essential:
Test Your Subfloor for Moisture
Before any laminate installation, test the subfloor moisture content. For concrete slabs, use a moisture test kit — the reading should be under 5 lbs/1,000 sq ft/24 hours. For wood subfloors, a moisture meter reading should be under 12%. Installing over a wet subfloor guarantees future damage, no matter how well the laminate is sealed above.
Acclimate Your Planks
Bring the laminate boxes into the room and open the ends. Let the planks acclimate for at least 48–72 hours before installation. This allows the planks to adjust to the room’s temperature and humidity, reducing the risk of post-installation expansion and gap formation.
Choose Square-Edge Planks Over Beveled
Beveled-edge planks create V-shaped grooves between planks where water can pool and eventually seep down. Square-edge planks sit flush against each other, making sealing far more effective. If waterproofing is a priority, always opt for square-edge profiles.
Read Your Warranty Before Sealing
Some manufacturers require specific sealing methods to honor their warranty — and others warn that sealing the joints can void it. Always check the product warranty documentation before applying any glue, sealant, or coating to your laminate.
Method 1: Choose Waterproof Laminate From the Start
The most effective way to waterproof laminate wood flooring is to select a product that is engineered to be waterproof from the core outward. Modern waterproof laminate uses an entirely different construction than traditional HDF-based products.
Look for these core technologies:
- SPC (Stone Plastic Composite) — a rigid, 100% waterproof core made from limestone and PVC. Dense, dimensionally stable, and completely moisture-resistant
- WPC (Wood Plastic Composite) — combines wood fiber and plastic for a waterproof core with a softer, more cushioned feel underfoot
- Sealed click-lock joints — the locking mechanism is treated or wax-coated to prevent water infiltration at seams
- Pre-attached waterproof underlayment — built-in moisture barrier eliminates the need for a separate underlayment layer
Top-rated brands in this category include LifeProof, Pergo WetProtect, and Mohawk RevWood Plus — all of which offer warranties covering standing water for 24–72 hours without damage. For new installations in bathrooms, kitchens, or basements, this is the single most effective waterproofing decision you can make.
Method 2: Install a Vapor Barrier Underlayment
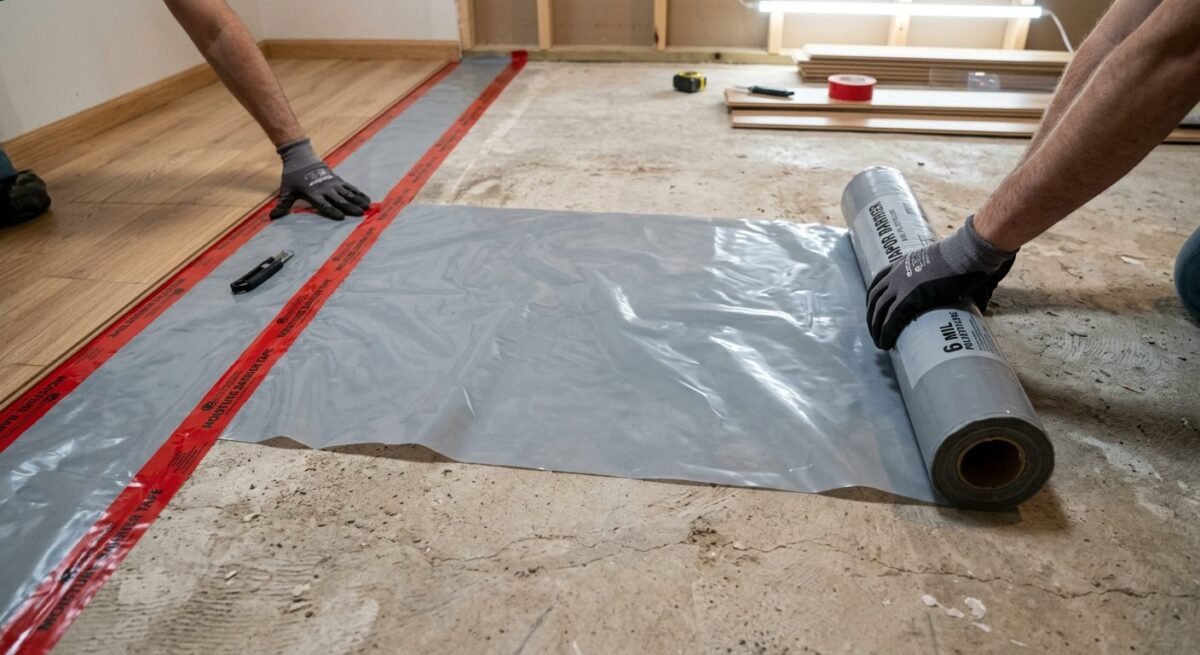
Waterproofing laminate flooring is not just about what happens on the surface — it also means blocking moisture that rises from below. A vapor barrier underlayment is a moisture-resistant layer installed between the subfloor and the laminate planks. It is non-negotiable when installing over concrete or in below-grade spaces.
| Underlayment Type | Best For | Thickness/Rating | Notes |
|---|---|---|---|
| 6-mil polyethylene sheeting | Concrete subfloors | 6 mil | Most affordable; basic protection |
| Foam underlayment with vapor barrier | Most standard installs | 6–12 mil barrier | Adds cushioning + moisture protection |
| Premium closed-cell foam | Basements, humid climates | 12–20 mil barrier | Best protection + sound dampening |
| Pre-attached underlayment | New waterproof laminate | Built-in | Convenient; follow manufacturer specs |
How to Install Vapor Barrier Underlayment
- Unroll the underlayment across the subfloor in the direction you will lay the planks
- Overlap seams by at least 6 inches (150 mm)
- Seal all overlapping seams with moisture-resistant tape (not standard masking tape)
- Run the underlayment 1–2 inches up the walls to create a “bathtub effect” at the perimeter
- Trim excess after baseboard installation
Method 3: Seal the Joints During Installation
The seams between planks are the single most common entry point for water. Even when the wear layer is intact, water can wick down through the click-lock joint and into the HDF core within minutes. Sealing the joints during installation is the most effective long-term waterproofing method for the planks themselves.
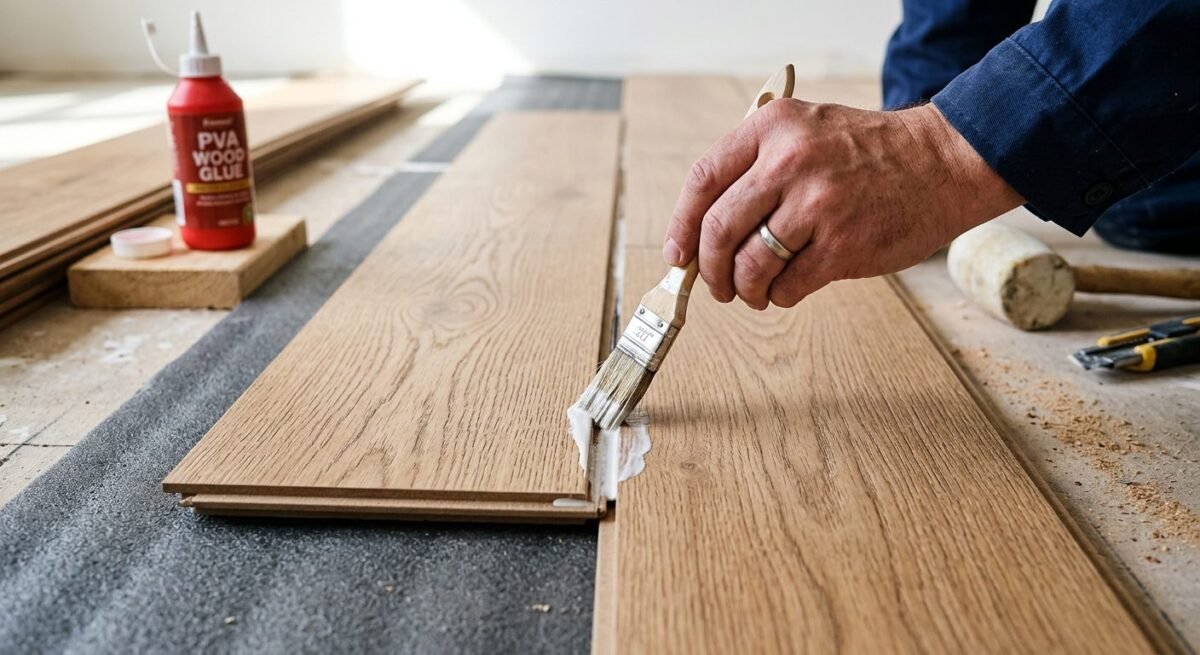
Option A: PVA Type II Glue on the Locking Mechanism
Apply a small amount of PVA Type II waterproof glue to the tongue-and-groove locking mechanism of each plank as you install it. This bonds the joint connection, creating a water-resistant seal without gluing the floor to the subfloor. The floor must remain a floating floor — only glue the joint, never the base.
This method is most recommended for bathrooms and kitchens where moisture exposure is frequent. Note: once glued, individual planks cannot easily be replaced — this is a permanent solution.
Option B: Specialized Seam-Sealing Compound
Products like Click Seal and latex-based laminate joint sealers are applied along the plank edges just before clicking them together. They are less aggressive than PVA glue and may be easier to work with for less experienced installers. Apply a thin bead along the edge of the groove side before clicking in.
Option C: Silicone Bead Along Exposed Seams (Existing Floors)
For already-installed floors, run a thin bead of clear silicone sealant into each visible seam using a fine-tip applicator. Wipe away excess immediately. This is less effective than sealing during installation but still significantly reduces water infiltration at joints.
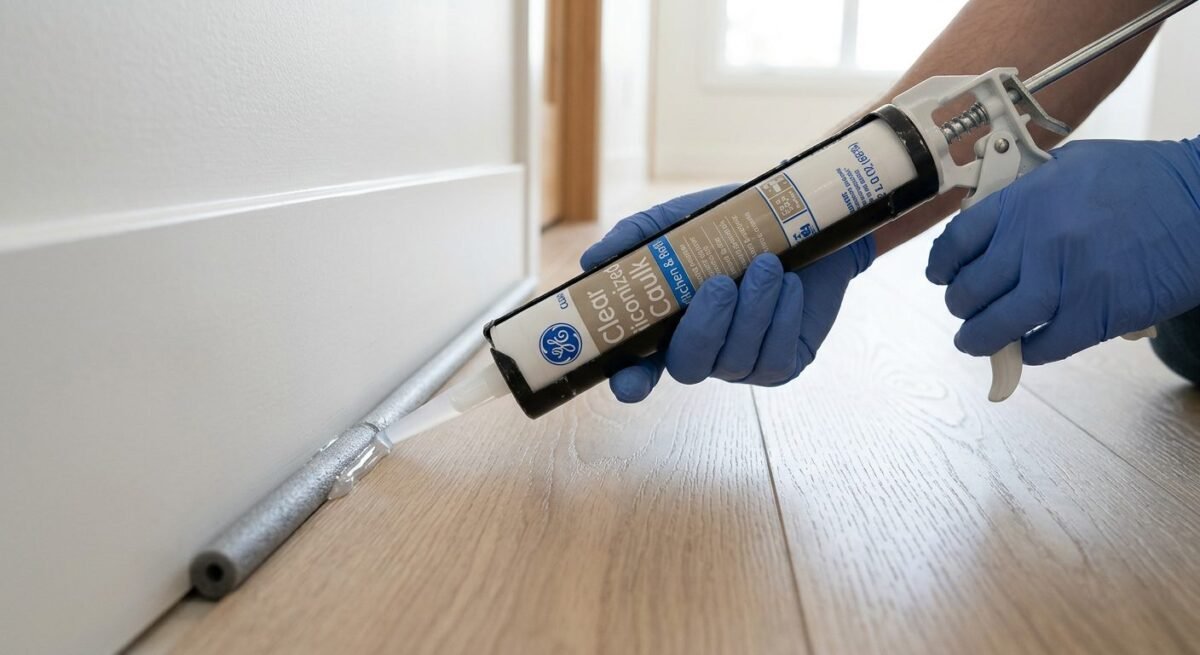
Method 4: Seal the Perimeter with Silicone Caulk and Backer Rod
Even when the planks themselves are well-sealed, water can still enter under the floor through the expansion gap along walls, cabinets, and transitions. The silicone caulk + foam backer rod method is the professional solution used by flooring contractors to close this vulnerability.
What You Need
- PE (polyethylene) foam backer rod — sized slightly larger than the expansion gap
- 100% clear silicone caulk (e.g., GE Silicone II, DAP Kwik Seal Plus)
- Caulking gun
- Utility knife or scissors
- Damp cloth for cleanup
Step-by-Step Perimeter Sealing
- Remove spacers after all planks are installed
- Cut the foam backer rod to length and push it firmly into the expansion gap around the entire perimeter. The backer rod should sit snugly without compressing more than 50%
- Apply silicone caulk over the backer rod, pressing the nozzle into the gap and drawing a smooth, continuous bead
- Tool the caulk with a wet finger or caulk tool to create a concave, sealed surface
- Clean up excess with a damp cloth before the silicone cures
- Allow 24 hours of curing time before exposing to water or foot traffic
- Install baseboards or quarter-round over the sealed perimeter for a finished appearance
The backer rod serves two purposes: it prevents the caulk from sinking deep into the gap, and it provides a solid backing that ensures the caulk bridges the expansion space properly. Do not skip it.
Method 5: Apply a Laminate Floor Polish or Surface Sealant
For existing floors where opening joints or reinstalling with glue is not practical, a laminate-specific surface polish adds a thin protective coating across the entire wear layer, improving moisture resistance and reducing the damage from everyday spills and cleaning.
Important caveat: do not apply polyurethane, acrylic lacquer, or hardwood floor sealers to laminate surfaces. These products do not bond properly to laminate’s resin-based wear layer. They can cloud, peel, and may void your warranty. Only use products specifically formulated for laminate.
Recommended Products
- Bona Polish for Laminate Floors — widely used, gentle, adds a subtle protective sheen
- Black Diamond Wood & Laminate Floor Polish — higher-build finish, good for high-traffic areas
How to Apply
- Clean the floor thoroughly with a laminate-safe cleaner and allow to dry completely
- Pour a small amount of polish directly on the floor
- Spread evenly with a flat-pad mop or applicator, working in the direction of the planks
- Apply thin coats — never over-saturate the floor
- Allow 30–60 minutes drying time between coats
- Apply 2–3 coats for full coverage
- Reapply every 12–18 months in high-moisture or high-traffic areas
Method 6: Control Indoor Humidity Year-Round
Ambient humidity is one of the most overlooked causes of laminate floor damage. Excessive moisture in the air causes laminate planks to expand; extremely dry air causes them to contract and gap. Both extremes degrade the structural integrity of seams over time, making floors more vulnerable to water infiltration.
The industry-recommended indoor relative humidity range for laminate is 35% to 65%. Maintain it with:
- A dehumidifier in basements and humid rooms during summer months
- A humidifier during dry winters to prevent excessive shrinkage and gapping
- Exhaust fans in bathrooms and kitchens — always run them during showers and cooking
- Regular plumbing inspections under sinks, behind washing machines, and beneath dishwashers
- A hygrometer (digital humidity meter) placed in at-risk rooms to monitor levels — these cost under $20
Room-by-Room Waterproofing Guide
How to Waterproof Laminate Flooring in a Bathroom
Bathrooms are the highest-moisture rooms in any home — steam, standing water, and daily splashing create a constant challenge. Standard laminate is not recommended for full bathroom use without significant waterproofing measures.
Best practice for bathroom laminate:
- Use SPC or WPC waterproof laminate (or LVP if waterproofing is the top priority)
- Seal all joints with PVA Type II glue during installation
- Apply silicone + backer rod at the full perimeter, including around the toilet base, tub, and shower
- Ensure a functioning exhaust fan — run it during and 15 minutes after every shower
- Place a waterproof bath mat at all moisture exit points
- Inspect annually for any joint movement or caulk cracking
How to Waterproof Laminate Flooring in a Kitchen
Kitchens face frequent spills, dishwasher leaks, under-sink moisture, and steam from cooking. The areas around the dishwasher, refrigerator, and sink are particularly vulnerable.
Best practice for kitchen laminate:
- Apply silicone caulk around the perimeter of all cabinets and appliances at floor level
- Place a waterproof mat directly in front of the sink and dishwasher
- Install a drip tray under the refrigerator and washing machine if applicable
- Seal around any pipes that penetrate the floor with silicone
- Wipe up spills within 5–10 minutes — never allow liquids to sit
How to Waterproof Laminate Flooring in a Basement
Basements present the most complex moisture challenge because moisture comes from all directions: rising from the concrete slab, condensation from cool surfaces, and potential flooding.
Best practice for basement laminate:
- Always test concrete moisture before installation (calcium chloride test or in-situ RH probe)
- Install a premium closed-cell foam underlayment with a 12–20 mil vapor barrier
- Use SPC laminate instead of standard HDF-core laminate if possible
- Run a dehumidifier year-round and maintain humidity under 60%
- Ensure proper exterior drainage and sump pump function
Daily Maintenance Habits That Protect Your Floors
Even the best waterproofing setup requires consistent maintenance. These habits significantly reduce long-term moisture risk:
- Clean spills within 5–10 minutes — never let liquid sit on laminate. Use a dry cloth first, then a slightly damp one
- Damp mop only — use a microfiber mop lightly dampened with a laminate-safe cleaner. Avoid steam mops and wet mops entirely
- Use waterproof mats at entry points and near sinks — ensure they have breathable, non-trapping backing
- Felt pads under all furniture — prevent scratches that create water entry points
- Trim pet nails regularly — scratches in the wear layer allow moisture penetration
- Drip trays under appliances — refrigerators, washing machines, and dishwashers are the leading sources of slow, undetected leaks
- Inspect seams and caulk annually — look for lifting, cracking, or gaps. Reseal any problem areas immediately
How to Identify Water Damage in Laminate Flooring
Before applying any waterproofing treatments, check whether damage has already occurred. The most common signs include:
- Swollen or raised seams between planks that feel uneven underfoot
- Soft or spongy spots when you press down
- A musty or mildew odor at floor level
- Visible staining, discoloration, or white mineral deposits
- Cupping — plank edges that have lifted and curled upward
- Buckling — entire sections of floor lifting away from the subfloor
Once water damage has reached the HDF core, waterproofing sealants cannot reverse it. Affected planks must be removed and replaced. However, properly waterproofing the surrounding area and resolving the moisture source prevents the problem from spreading to undamaged sections.
Laminate Flooring vs. Luxury Vinyl Plank: When to Upgrade
Waterproofed laminate performs very well in most areas of the home. But in some rooms, luxury vinyl plank (LVP) is simply the better long-term choice:
| Scenario | Recommendation |
|---|---|
| Living room, bedroom, hallway | Laminate (waterproofed) works well |
| Kitchen with normal spills | Laminate (waterproofed) works well |
| Full bathroom | Waterproof laminate (SPC) or LVP preferred |
| Laundry room | LVP strongly recommended |
| Basement (dry) | Waterproof laminate or LVP |
| Basement (moisture-prone) | LVP only |
| Walk-in shower surround | Tile only — no laminate |
LVP is 100% waterproof throughout its entire construction — not just the surface. If the room regularly sees standing water or you simply want zero worry about moisture, LVP is the right upgrade.
Frequently Asked Questions
Can you make laminate flooring completely waterproof?
Standard laminate with an HDF core cannot be made 100% waterproof through aftermarket treatments. The core material remains water-absorbent at its base level. However, by combining sealed joints, a perimeter vapor barrier, a moisture barrier underlayment, and surface maintenance, you can make standard laminate highly water-resistant and safe for most residential areas. For true 100% waterproofing, choose an SPC or WPC core laminate from the manufacturer.
What is the best sealant for laminate flooring joints?
For new installations, PVA Type II waterproof glue applied to the tongue-and-groove locking mechanism provides the strongest joint seal. For existing floors, a clear silicone sealant (such as GE Silicone II) applied in a thin bead along visible seams is the most accessible option. Avoid polyurethane on the surface of laminate — it does not bond to the wear layer and can cause more harm than good.
Do I need a vapor barrier under laminate on concrete?
Yes — always. Concrete is inherently porous and continuously releases moisture vapor, even when it appears dry. A vapor barrier underlayment (minimum 6-mil polyethylene or closed-cell foam with an integrated moisture barrier) is mandatory when installing laminate over concrete subfloors, especially in basements or grade-level rooms. Most manufacturers require it to maintain warranty coverage.
How long does waterproofing sealant last on laminate floors?
Perimeter silicone caulk typically lasts 3–5 years before cracking or shrinking, and should be inspected annually. Surface laminate polish or finish lasts 12–18 months in high-traffic or high-moisture areas. Joint sealant applied during installation (PVA glue) is permanent as long as the planks remain undisturbed. Inspect all treated areas at least once a year and reapply as needed.
Can laminate flooring be installed in a bathroom?
Standard laminate is not recommended for full bathrooms because of continuous moisture exposure. Waterproof laminate with an SPC or WPC core, combined with joint gluing and perimeter silicone sealing, is a viable option for moderate-humidity bathrooms such as half-baths or powder rooms. For full bathrooms with showers, luxury vinyl plank (LVP) is a safer and more durable choice.
Will sealing laminate floors void the warranty?
It depends entirely on the manufacturer. Some brands explicitly require perimeter sealing (silicone caulk around the edges) to maintain their water-resistance warranty. Others prohibit surface coatings or joint gluing. Always read the product-specific warranty documentation before applying any sealant, glue, or coating. When in doubt, contact the manufacturer directly before proceeding.
Final Thoughts
Learning how to waterproof laminate wood flooring is not about a single product or a one-time fix — it is about building a layered defense. The most effective approach combines:
- Starting with the right product — SPC or WPC core for high-moisture rooms
- Blocking moisture from below — quality vapor barrier underlayment
- Sealing the most vulnerable points — joints and perimeter expansion gaps
- Maintaining good daily habits — immediate spill cleanup, humidity control, and annual inspection
No single method is a complete solution on its own. But together, they transform even standard laminate into a floor that holds up confidently to the demands of everyday household life — and gives you years more service before replacement is ever necessary.
Your floors are a significant investment. With the right waterproofing strategy in place from day one, that investment will continue to look and perform beautifully for a decade or more.