How to Apply Cementitious Waterproofing?

Cementitious waterproofing should be applied on the concrete substrate by following proper methods and instructions. When applying cementitious waterproofing on the substrate, there is recommended steps and methods. You should follow them to gain a more efficient waterproofing membrane over time. So as waterproofing experts, we follow the below 7 methods to install the waterproofing layers on the surface.
7 Steps to Apply Cementitious Waterproofing Layer
- Prepare the concrete surface for cementitious waterproofing
- Mix the cementitious waterproofing compound
- Apply first cementitious waterproofing coating
- Wait for the curing of the cementitious waterproofing
- Apply a second cementitious waterproofing layer
- Apply additional cementitious waterproofing layers if needed
- Protect the cementitious waterproofing layer
Each of these steps consists of substeps. Each and every step is important for the overall task. We have included everything with our expert knowledge. We highly recommend using this guide for both newbie DIYs and professionals.
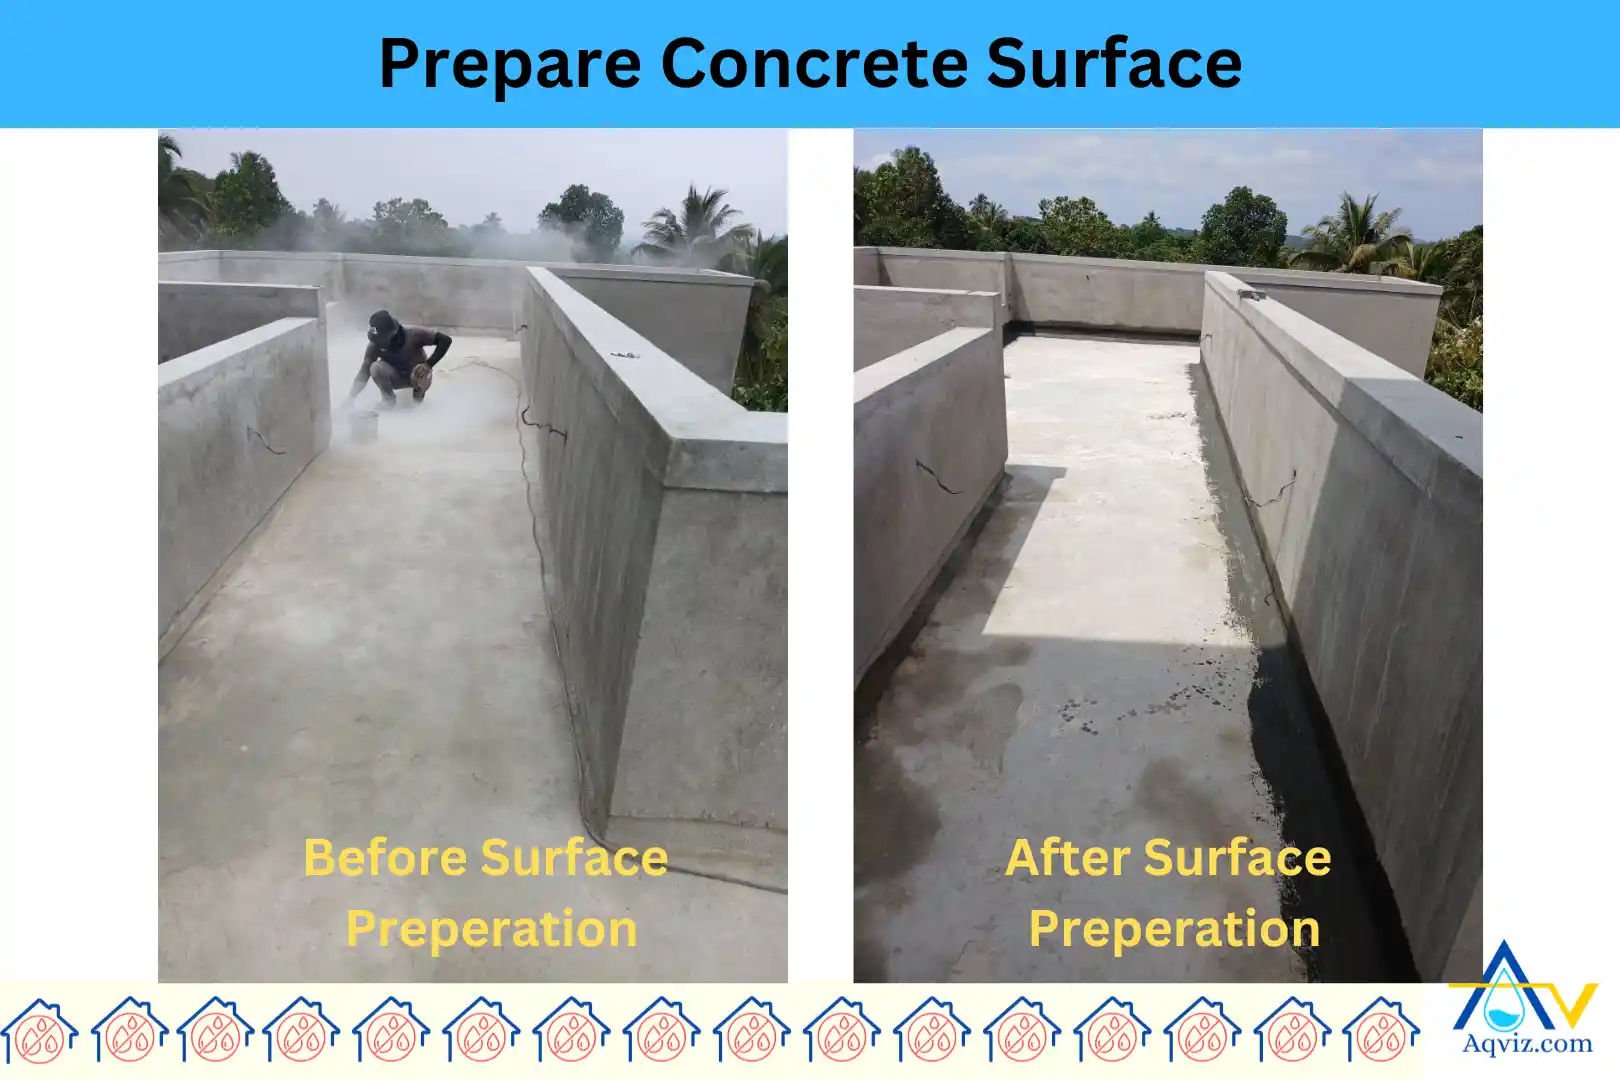
Step 1: Prepare the concrete surface for Cementitious Waterproofing
As the first step for cementitious waterproofing application, we prepare the concrete surface. It helps to improve the durability and effectiveness of the waterproofing system over time. At Aqviz, we always emphasize thorough surface preparation because an unclean or weak substrate can cause adhesion failure, pinholes, or premature waterproofing deterioration. Over the years, we’ve encountered projects where improper preparation led to delamination and seepage issues. Through experience, we’ve developed a structured approach to ensure a strong bond between the waterproofing layer and the concrete surface.
So here is our step by step guide to preparing the concrete surfaces for cementitious waterproofing.
1. Clean the concrete surface
- Remove dirt, dust, oil, grease, laitance, efflorescence, and any contaminants that can affect adhesion. You can use a high-pressure water jet (above 2500 psi), mechanical wire brushing, or shot blasting for deep cleaning. You should avoid acid-based cleaners because they may weaken the substrate over time.
You can use these Waterproofing Tools for this task. Our experts have prepared this by considering all the essential requirements when conducting a wateproofing project.
2. Repairing cracks, voids & honeycombs on the substrate
- Inspect for cracks, holes, and spalled areas on the concrete, which leads to leaks later. You can use polymer-modified cementitious repair mortar to seal cracks (e.g., Unimix UW). If there is any active water leak, apply fast-setting hydraulic cement to stop water seepage before waterproofing.
- We highly recommend you not neglect the hairline cracks. Because many homeowners ignore hairline cracks, assuming the waterproofing will cover them. In some cases, hairline cracks may widen over time, and it can cause the surface to fail.
3. Roughening smooth surfaces
- After the crack reporting method, you should smooth the concrete surface. A roughened surface allows the waterproofing material to grip onto the substrate, improving durability. It helps to enhance the waterproofing adhesion. In this step, you can use mechanical grinding, sandblasting, and shot blasting.
4. Coving & Wall-Floor junction treatment
- Then we create a cove (concave corner) at wall-floor junctions using cement mortar. This prevents water accumulation at corners. As well as we embed waterproofing tapes/membranes at joints and corners as an extra waterproofing solution.
5. Dampening the concrete surface
- After the concrete substrate preparation, we damp the surface before applying the cementitious waterproofing membrane. We pre-wet the concrete to achieve a Saturated Surface Dry (SSD) condition. The surface should be damp but not have standing water—excess water weakens adhesion. Because dry concrete absorbs moisture from the waterproofing layer too quickly, causing poor bonding. On the other hand, standing water creates weak adhesion zones.

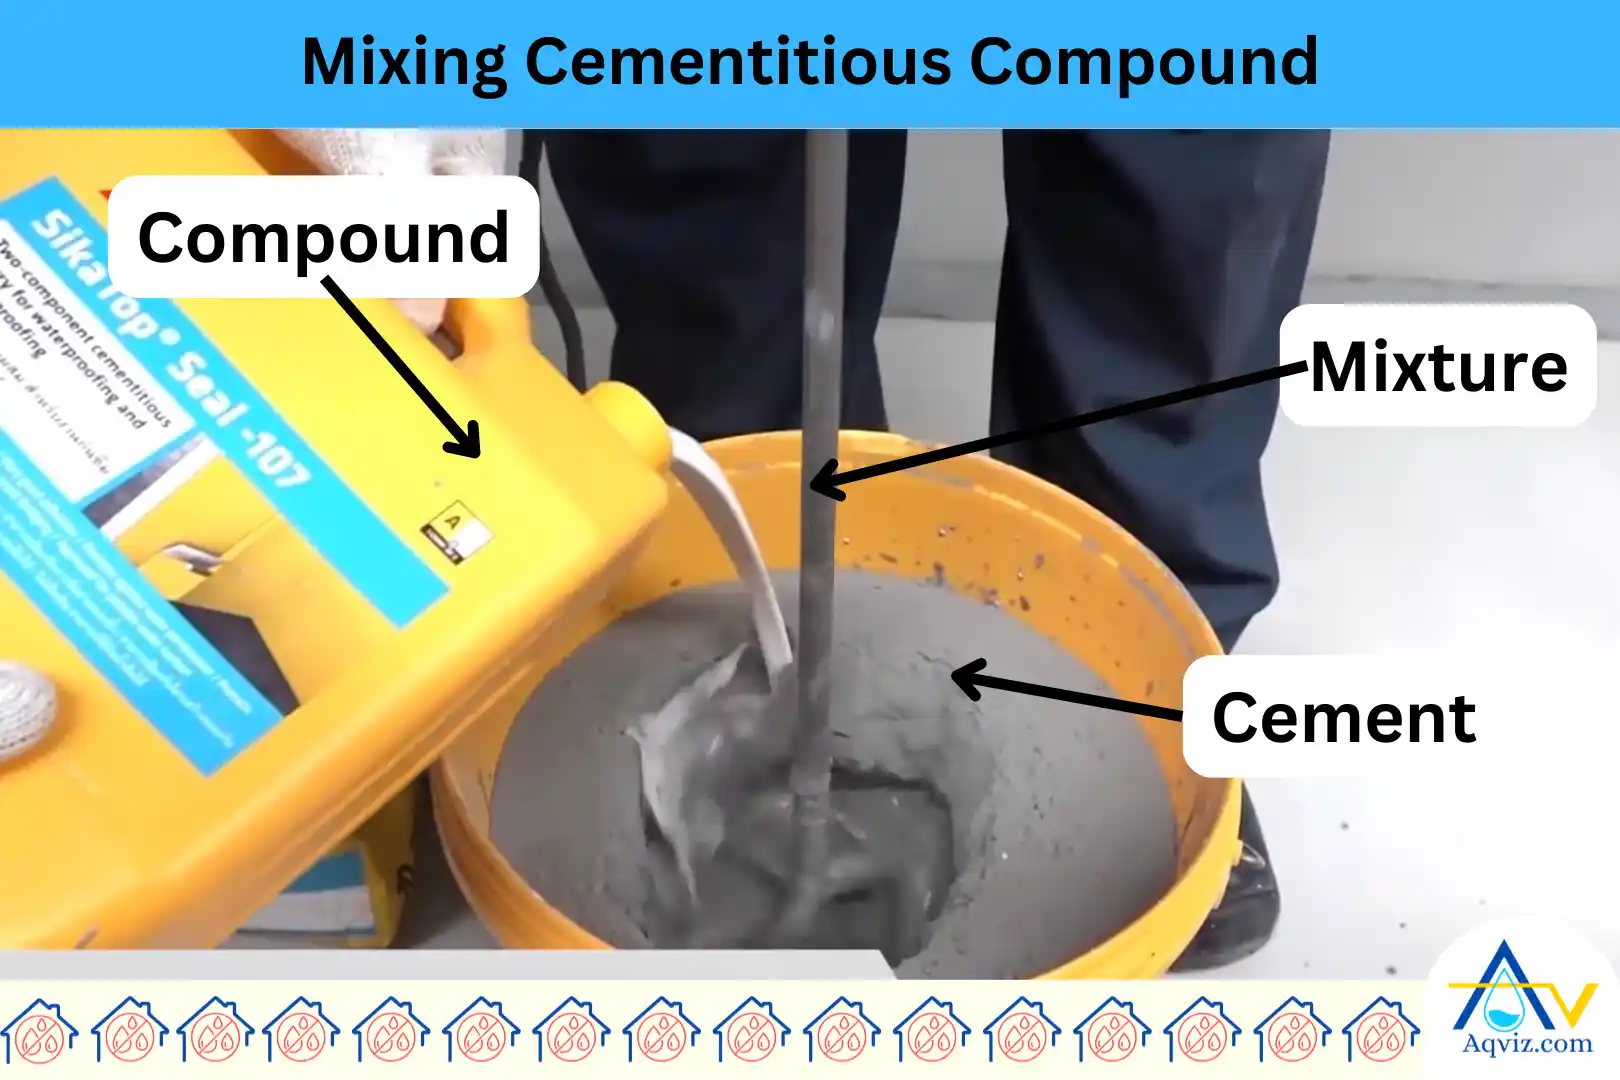
Step 2: Mixing the Cementitious Waterproofing Compound
Once we have a properly prepared surface, the next crucial step is mixing the cementitious waterproofing compound correctly. At Aqviz, we’ve seen projects fail simply due to improper mixing, leading to weak adhesion, cracks, or segregation in the waterproofing layer. To avoid this, we follow strict manufacturer-recommended mixing ratios and use mechanical mixing for uniform consistency.
You can use these 5 types of cementitious waterproofing for your project.
Step-by-Step Mixing Process
1. Check the manufacturer’s instructions
Cementitious waterproofing materials come in one-component (1K) or two-component (2K) systems.
- 1K systems require only water for mixing.
- 2K systems involve mixing a liquid polymer with a cementitious powder for enhanced flexibility.
2. Use a clean mixing container
- Any contaminants (dirt, dust, old residue) can affect the chemical properties of the mixture.
- We use a plastic or metal bucket free of contaminants like dirt, dust, and old residues. Because these can affect the chemical properties of the mixture.
3. Pour the liquid first (for 2K Systems)
- For 2K waterproofing systems, we always pour the liquid polymer first and gradually add the cementitious powder.
- This prevents lump formation and ensures a homogeneous mix.
4. Slowly add the powder
- We add the cementitious powder gradually while continuously mixing to avoid clumps.
- If using a 1K system, we mix the cementitious powder directly with clean water in the recommended ratio.
5. Use a mechanical mixer
- We use a slow-speed mechanical mixer (300-500 RPM) with a paddle attachment for 3–5 minutes to achieve a smooth, lump-free consistency.
- We recommend you not to use hand mixing. Hand mixing causes air pockets in the mixture, which can weaken the waterproofing layer.
6. Let the mixture rest (Maturation Time)
- Then we keep the mixture for maturation if the manufacturer recommends it. Because some products require a resting period of 5-10 minutes to allow air bubbles to escape. We gently remix before application without adding extra water.
Do not do this mistake: Adding extra water after resting weakens the mix. If the mixture starts thickening, we gently re-stir without dilution.
7. Use within the pot life
- Cementitious waterproofing compounds have a limited pot life (typically 30–60 minutes at 25°C).
- We only mix what we can apply within this time to avoid material wastage and performance issues.

Step 3: Applying the First Cementitious Waterproofing Coating
With our waterproofing compound properly mixed, the next critical step is applying the first waterproofing coat correctly. At Aqviz, we apply the first coat strategically, focusing on even coverage, proper thickness, and full adhesion to the substrate. So we follow these steps to apply the cementitious waterproofing layer on the surface.
Step-by-step application process
1. Dampen the surface (pre-wetting)
- Before applying the waterproofing compound, we lightly moisten the concrete to achieve a saturated surface dry (ssd) condition. This prevents the substrate from absorbing moisture from the waterproofing layer, ensuring strong adhesion.
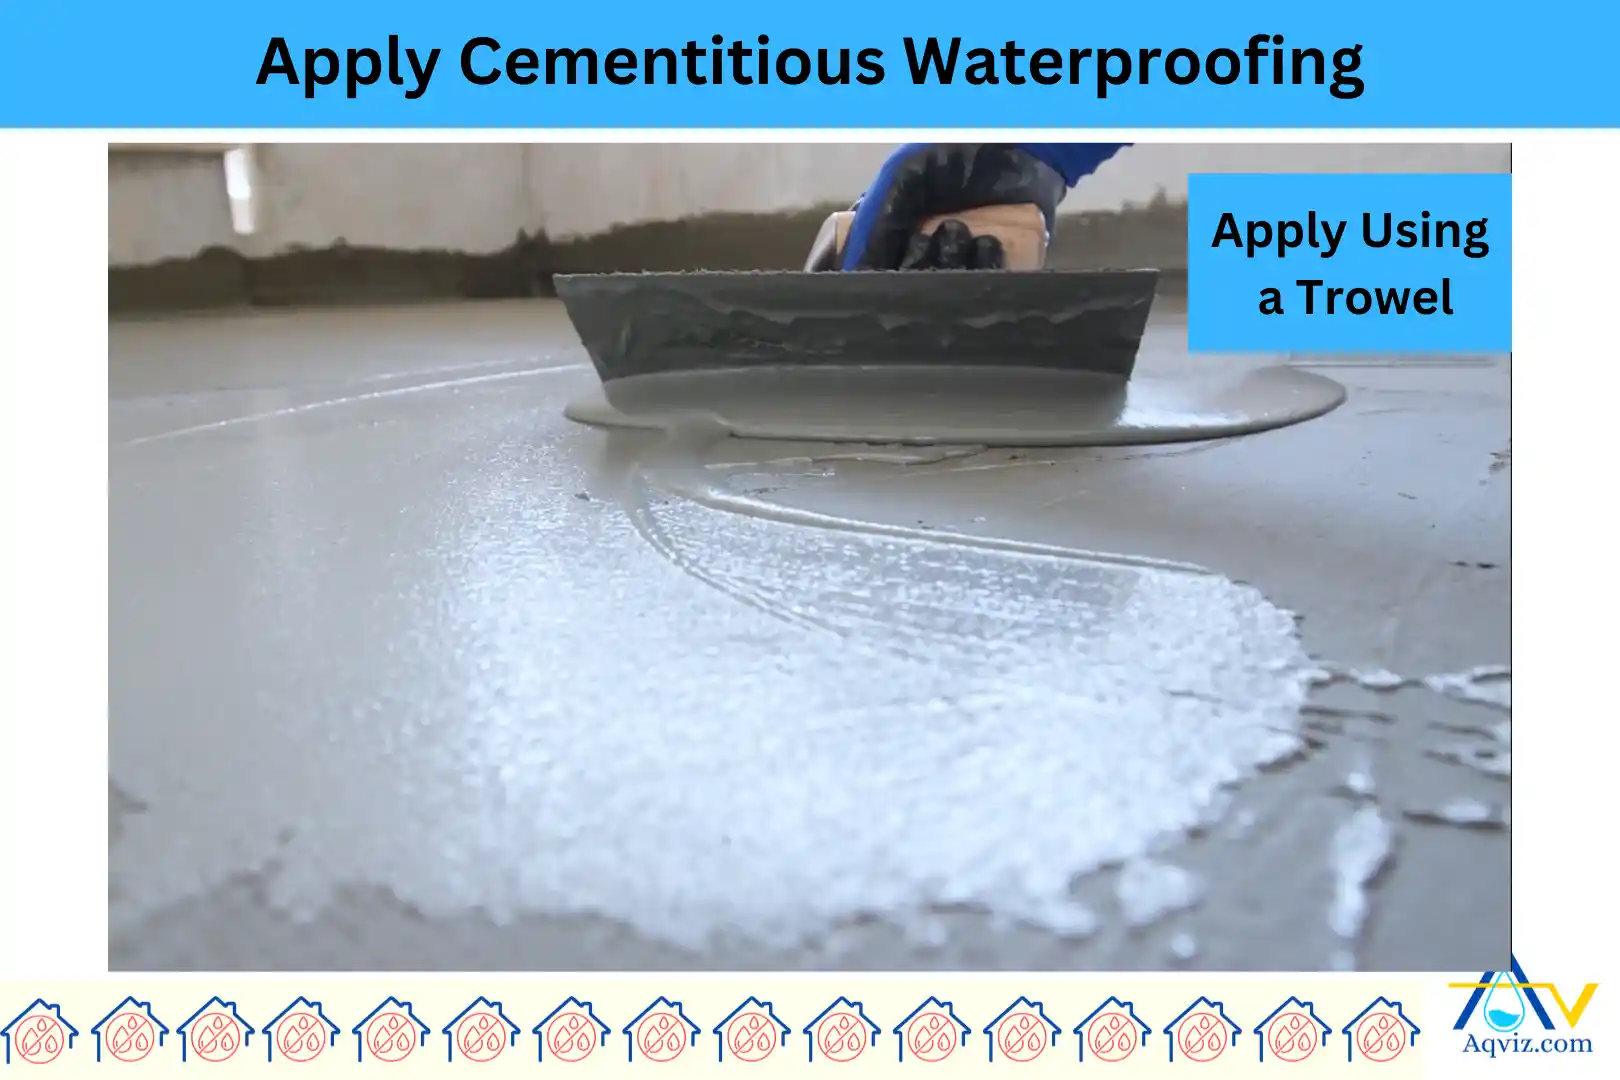
2. Apply the first coat using a brush, roller, or trowel
- Apply the first coat using a suitable tool, such as brush is best for walls, joints, and corners. A roller is ideal for large concrete surfaces. Trowel is highly recommended for thicker applications (2k flexible waterproofing). We work in one direction (horizontal or vertical) to ensure uniform application.
3. Focus on critical areas (joints, corners, and pipes)
- We apply extra material around weak points, such as wall-floor junctions, pipe penetration cracks, and construction joints. We embed reinforcing mesh for additional strength.
4. Ensure proper thickness
- Cementitious waterproofing requires a minimum thickness of 1–2 mm per coat. We use a notched trowel or wet-film gauge to verify uniform thickness.
- If the layer is too thin, it won’t provide sufficient waterproofing. If too thick, it may crack during curing.
5. Avoid air pockets and pinholes
- We use a stiff brush or roller to press the material firmly into the surface, eliminating trapped air. Pinholes are water entry points, so we smooth them out immediately.
6. Drying time before the second coat
- The first coat needs to cure for 4-6 hours (or as specified) before applying the second layer.
- We protect the surface from direct sun, wind, or rain to prevent premature drying or cracking.
Read More: 7 Methods of Cementitious Waterproofing with Pros and Cons

Step 4: Waiting for the Curing of the Cementitious Waterproofing
Once the first coat is applied, we wait until the first coating is cured. Because proper curing is essential for the strength and durability of the waterproofing membrane. we allow sufficient curing time to prevent premature drying, shrinkage, or surface defects. Over the years, we’ve learned that improper curing is one of the top reasons for waterproofing failures.
So our experts follow these steps for efficient curing time.
1. Allow initial curing (4-6 hours minimum)
- Let the first coat dry as per the manufacturer’s recommendations (typically 4–6 hours).
- The surface should be firm to touch but not completely dry before the second coat.
2. Prevent rapid drying
- In hot or dry climates, we mist-spray water or cover with damp cloths to prevent shrinkage cracks.
- We protect from direct sunlight, wind, and rain during curing.
3. Check for any defects
- Before the next coat, we inspect for pinholes, weak spots, or missed areas and touch them up if needed.
Step 5: Applying the Second Cementitious Waterproofing Layer
Once the first coat has cured, the second layer ensures full coverage and added waterproofing strength. Applying the second coat perpendicular to the first is a simple yet effective technique we use to eliminate weak spots and improve overall protection.
Here is our expert steps to apply the second waterproofing coating.
1. Pre-wet the surface again (if needed)
- Lightly moisten the first coat before applying the second cementitious waterproofing coating.
2. Apply the second coat perpendicular to the first
- If the first coat was applied vertically, we applied the second horizontally.
- This technique fills in gaps and improves waterproofing efficiency.
3. Maintain proper thickness
- The second coat should be 1–2 mm thick, ensuring a total system thickness of 2-4 mm.
4. Ensure uniform coverage
- Use a roller, brush, or trowel to smooth out the material and eliminate air pockets or pinholes.
5. Let the second coat cure properly
- Allow 24-48 hours of curing time before any water exposure or protective layer application.
Step 6: Applying Additional Cementitious Waterproofing Layers (If Needed)
For high-exposure areas like basements, water tanks, roofs, and underground structures, an extra waterproofing layer enhances durability and water resistance. At Aqviz, we assess project needs before applying additional layers. Based on hydrostatic pressure, climate conditions, and substrate movement, we determine if an extra layer is necessary.
We strongly recommend you apply an extra cementitious waterproofing layer on the below areas.
- High water pressure areas: For water tanks, basements, and foundations, we apply an extra coat to prevent water infiltration under pressure.
- Heavy traffic or mechanical impact zones: If the surface will be walked on or exposed to mechanical stress, we reinforce it with an extra layer or protective screed.
- Extreme weather condition areas: In areas with high rainfall, extreme heat, or freezing temperatures, additional coats provide better long-term protection.
- Crack-prone surfaces: If the substrate is prone to microcracking, we use a more flexible waterproofing mix and an extra layer.
Step 7: Protecting the Cementitious Waterproofing Layer
Once the waterproofing system is applied and cured, protecting it from damage is essential for long-term performance. Over the years, we’ve seen many waterproofing failures due to mechanical damage, UV exposure, and improper finishing. To prevent this, we apply protective layers depending on the application area.
We protect the cementitious waterproofing layer after it is applied on the concrete substrate by following the below methods.
- We directly apply tiles, screeds, or coatings over the waterproofed surface. In wet areas, we use flexible adhesives to prevent cracks.
- Apply a cement screed, tiles, or protective coating to prevent UV degradation and wear.
- In high-traffic areas, a wear-resistant layer (e.g., epoxy or polyurethane coating) is recommended.
- We cover waterproofed surfaces with geotextile fabric and drainage boards before backfilling.
