How to Apply Polyurethane?

When applying polyurethane, you should follow the proper steps and method statements to have last long polyurethane membrane. As waterproofing experts, we are professionals in this.
We have prepared this step by step guide, including all the tools, materials, and essential steps. So we highly recommend you follow these 7 step guide for polyurethane waterproofing for concrete, wood, and steel.
7 Steps to Apply Polyurethane Membrane
- Provide the necessary tools and materials
- Clean the surface properly
- Prepare the surface for polyurethane waterproofing
- Apply primer on the surface
- Apply the polyurethane waterproofing membrane
- Curing the waterproofing layer
- Protect the waterproofing membrane
1. Provide the Necessary Tools and Materials
First, you should provide the necessary tools and materials. Before applying polyurethane waterproofing, you must gather all the essential tools and materials to ensure a smooth and efficient application process. Aqviz highly recommends you use the right tools and materials always for the last long polyurethane layer.
Tools for Polyurethane Waterproofing
- Wire brush or grinder (for surface preparation)
- Scraper or putty knife (for removing old coatings or debris)
- Paint roller (for large, even coverage)
- Paintbrush (for edges and corners)
- Trowel (for applying primer or thick coatings)
- Measuring tape (for accurate area calculation)
- Utility knife (for cutting reinforcement fabric or materials)
- Mixing drill with paddle (for a uniform polyurethane mixture)
- Bucket or mixing container (for preparing the waterproofing compound)
- Safety gear (gloves, goggles, respirator mask, knee pads)
You should have these waterproofing tools before starting PU waterproofing.
Materials for Polyurethane Waterproofing
- Polyurethane waterproofing membrane (single-component or two-component)
- Polyurethane primer (to enhance adhesion)
- Reinforcement fabric (for cracks, joints, and high-movement areas)
- Sealant or caulk (for sealing small cracks and gaps)
- Cleaning solvent (to remove grease and dust from the surface)
- Sandpaper or grinding disc (for roughening smooth surfaces)
- Masking tape and plastic sheets (to protect surrounding areas)
Now that we have our tools and materials ready, we can move on to preparing the surface before application.
2. Clean the Surface Properly
Second, you should clean the surface. Before applying polyurethane waterproofing, you must ensure the surface is completely clean, dry, and free from any contaminants that could affect adhesion. So you should follow these 3 steps to clean the surface properly.
- Remove loose debris and dust: Use a broom, brush, or industrial vacuum to remove dust, dirt, and debris from the surface.
- Remove old coatings and loose paint: If the surface has old waterproofing, paint, or coatings, use a grinder, wire brush, or scraper to strip them off.
- Eliminate grease, oil, and stains: Apply a degreasing agent or mild detergent to areas with oil or grease stains. Then use a scrub brush or pressure washer (minimum 3000 PSI) to break down stubborn stains. After rinsing thoroughly with clean water, allow the surface to dry completely.
If you do not clean the surface properly, it may cause PU membrane blistering, peeling, and adhesion failure over time. So we strongly recommend you clean the surface properly.
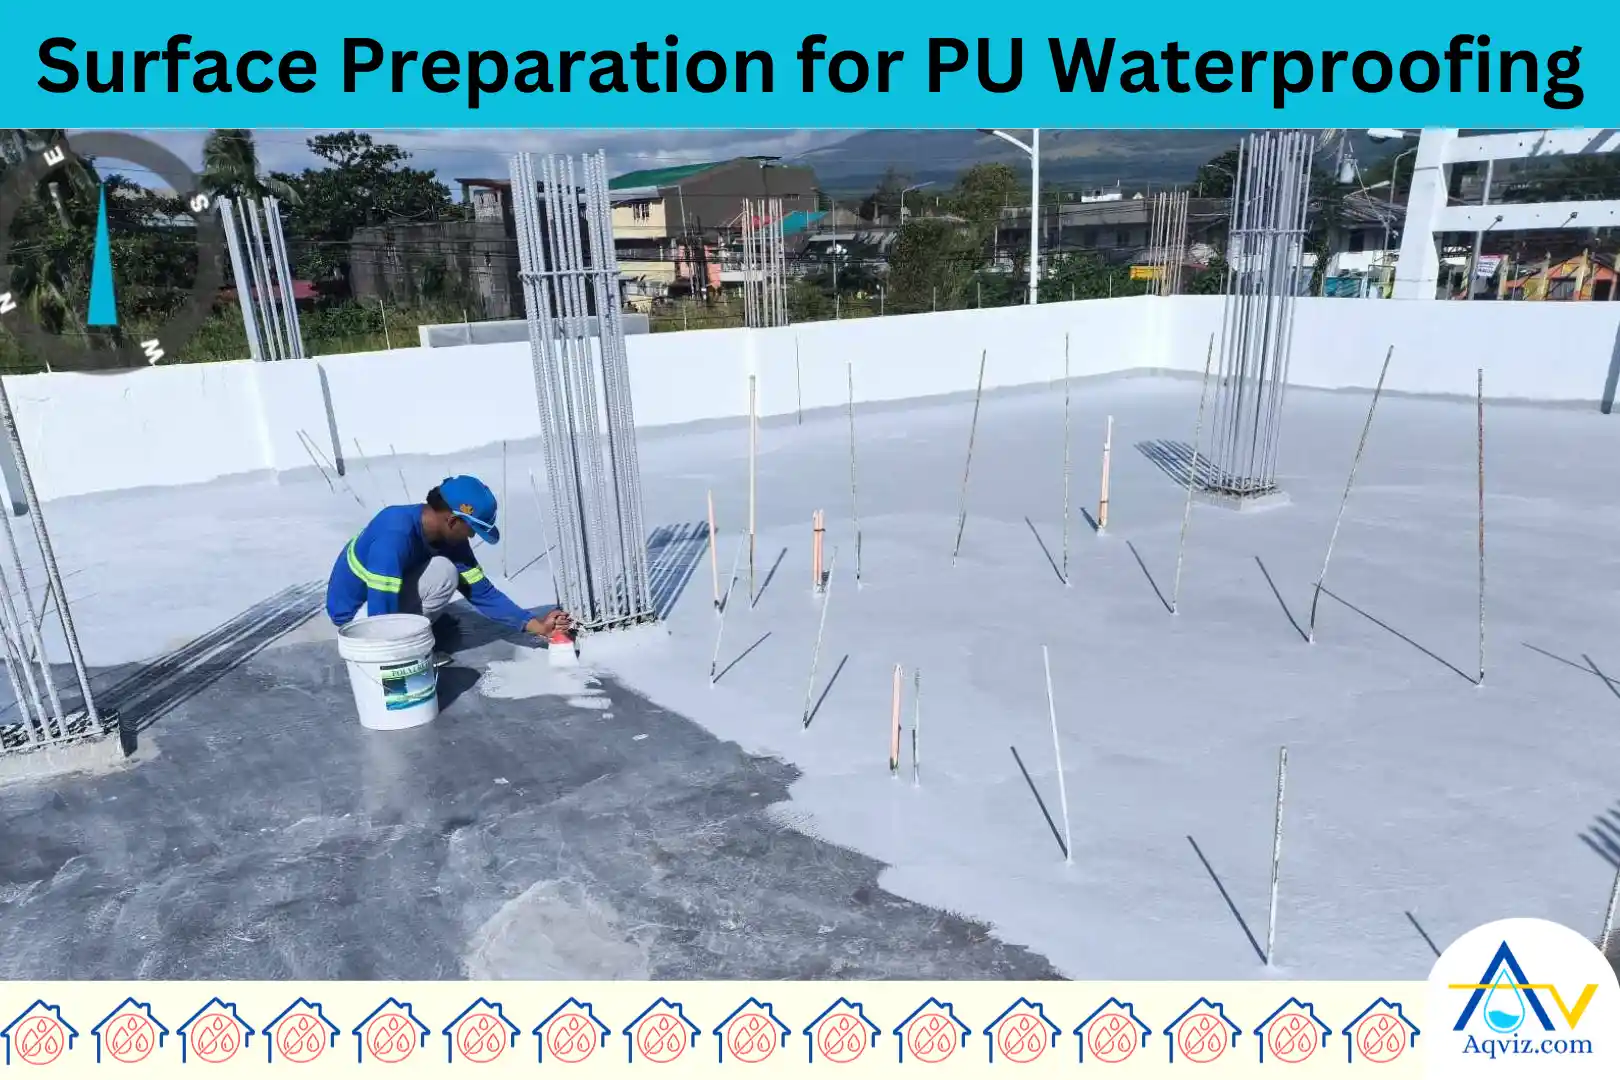
3. Prepare the Surface for Polyurethane Waterproofing
Third, you should prepare the surface as follows.
- Inspect the surface for defects: Carefully check for cracks, holes, weak spots, or structural damage. Pay special attention to corners, joints, and transitions, as these areas are prone to leakage.
- Repair any surface imperfections:
- For cracks and gaps: Use a polyurethane sealant or flexible joint filler to seal any visible cracks. For deep cracks, apply a backer rod before sealing.
- For uneven surfaces: If the surface has depressions or rough patches, apply a self-leveling mortar or cementitious repair compound to create a smooth finish.
- For joints and seams: Reinforce expansion joints, corners, and seams with fiberglass mesh or geotextile fabric to prevent movement-related failures.
- Ensure a smooth and porous surface
- For concrete surfaces: If the concrete is too smooth, it must be roughened to improve adhesion. Use a diamond grinding machine, shot blasting machine, or sandpaper to create a slightly textured finish.
- For metal surfaces: Remove any rust using a wire brush, grinder, or rust converter, then clean with a degreaser.
- For wood surfaces: Ensure the wood is dry, sanded, and free from loose splinters.
- Check for moisture content: Use a moisture meter to check the surface moisture level. It should be below 5% before applying the polyurethane membrane. If moisture is present, use dehumidifiers, or heaters, or allow natural drying for at least 48 hours.
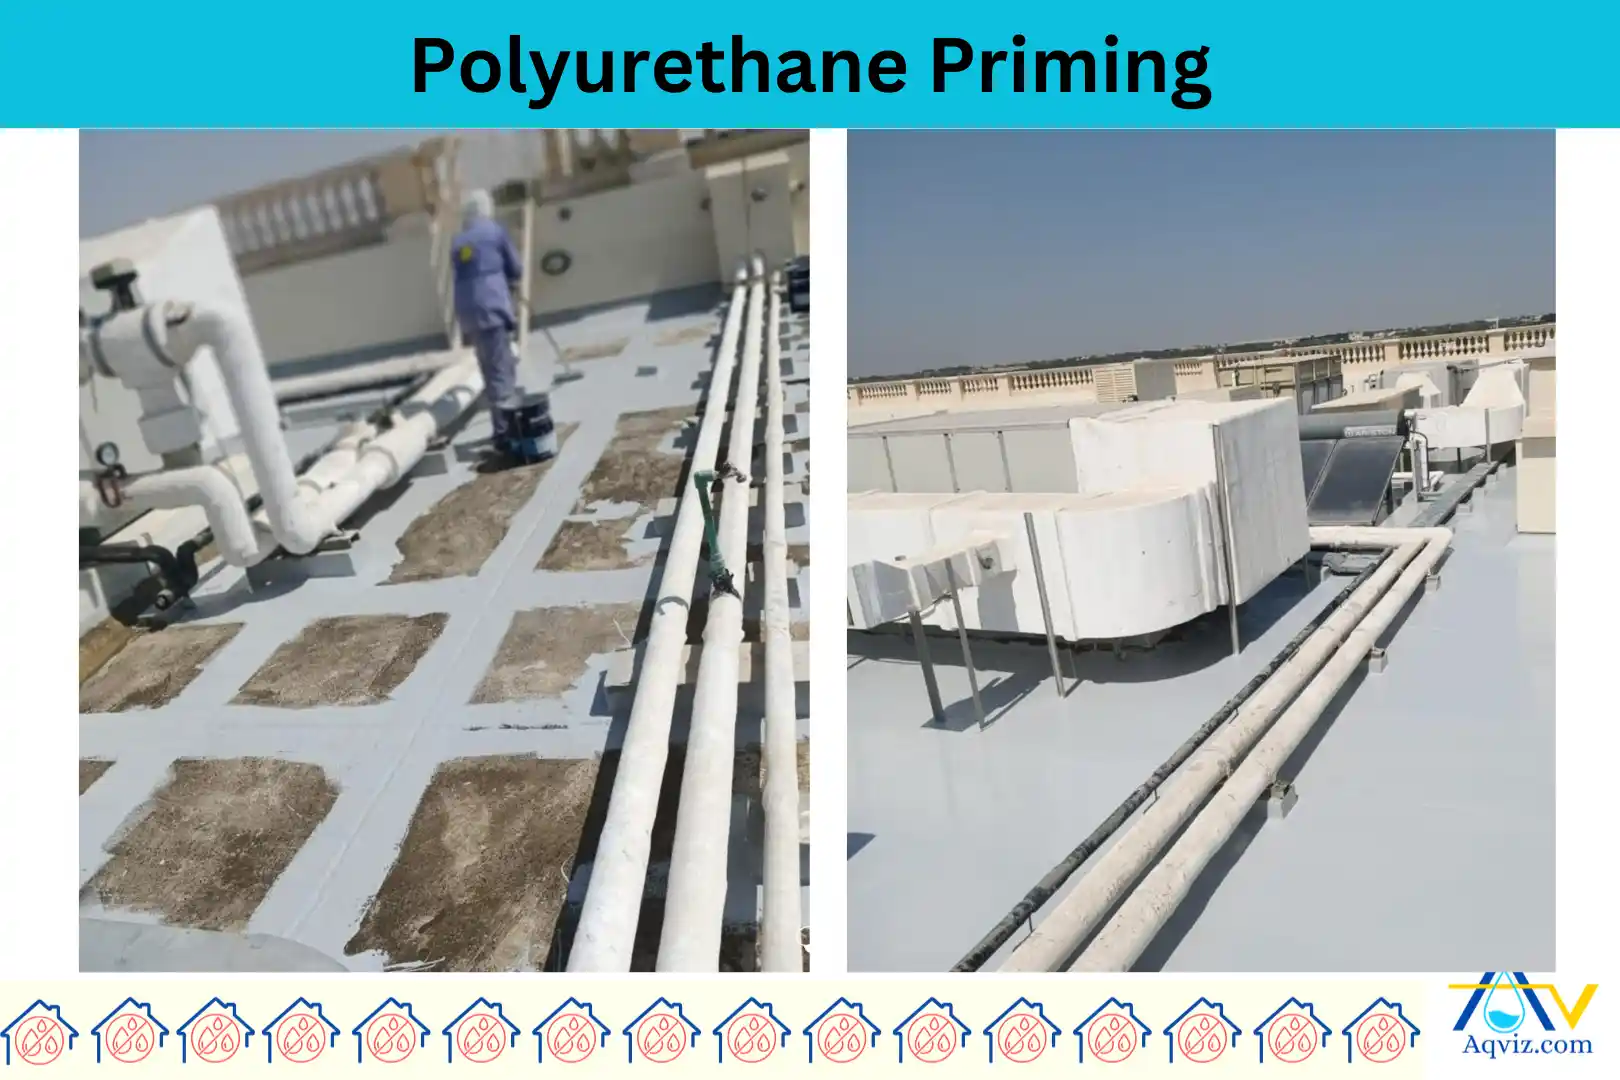
4. Apply Primer on the Surface
In the fourth step, you should apply primer to the surface. Applying a primer is an important step in polyurethane installation because it enhances adhesion, seals porous surfaces, and ensures the longevity of the waterproofing system.
When you apply primer, you should follow these 4 steps.
- Choose the right primer for your surface
- Concrete & masonry surfaces: Use a polyurethane-based or epoxy primer for better penetration and adhesion.
- Metal surfaces: Apply a rust-inhibiting primer to prevent corrosion before waterproofing.
- Wood surfaces: Use a penetrating wood primer to ensure even absorption.
- Prepare the primer mixture: If using a single-component primer, stir it thoroughly to ensure uniform consistency.
- If using a two-component primer, mix resin and hardener in the correct ratio (as specified by the manufacturer).
- Avoid over-mixing, as it may introduce air bubbles, affecting application quality.
- Apply the primer evenly
- Use a roller for large areas and a brush for edges and hard-to-reach spots.
- Apply a thin and even coat to prevent pooling or excessive build-up.
- Work in one direction to ensure proper coverage.
- Allow proper drying time
- Most primers take 4 to 8 hours to dry, but drying times can vary based on humidity and temperature.
- The surface should feel dry to the touch before applying the polyurethane waterproofing membrane.
- If the primer is left exposed for more than 24 hours, a second coat may be required to reactivate adhesion.
Step 05: Apply Polyurethane Membrane
In the fifth step, you should apply the PU membrane. Applying the polyurethane membrane is the most crucial step in achieving a seamless, durable, and watertight surface. This process requires precision, proper layering, and adherence to the manufacturer’s guidelines.
Before starting the application, it’s important to know which type of polyurethane membrane you are using:
Mixing the Polyurethane Waterproofing
- Single-component PU (one-part) membranes are pre-mixed and ready to use.
- Two-component PU (two-part) membrane requires mixing resin (Part A) and hardener (Part B) in a specified ratio (usually 1:1 or 2:1). We highly recommend you to mix it with a mechanical drill mixer at low speed to avoid air bubbles.
- Use a mixing drill with a paddle attachment for at least 3-5 minutes to achieve a homogeneous, lump-free mixture.
- Avoid excessive mixing, as it may introduce air bubbles, leading to pinholes in the final coating.
You can choose one of these 6 Types of Polyurethane for your project for the best performance.
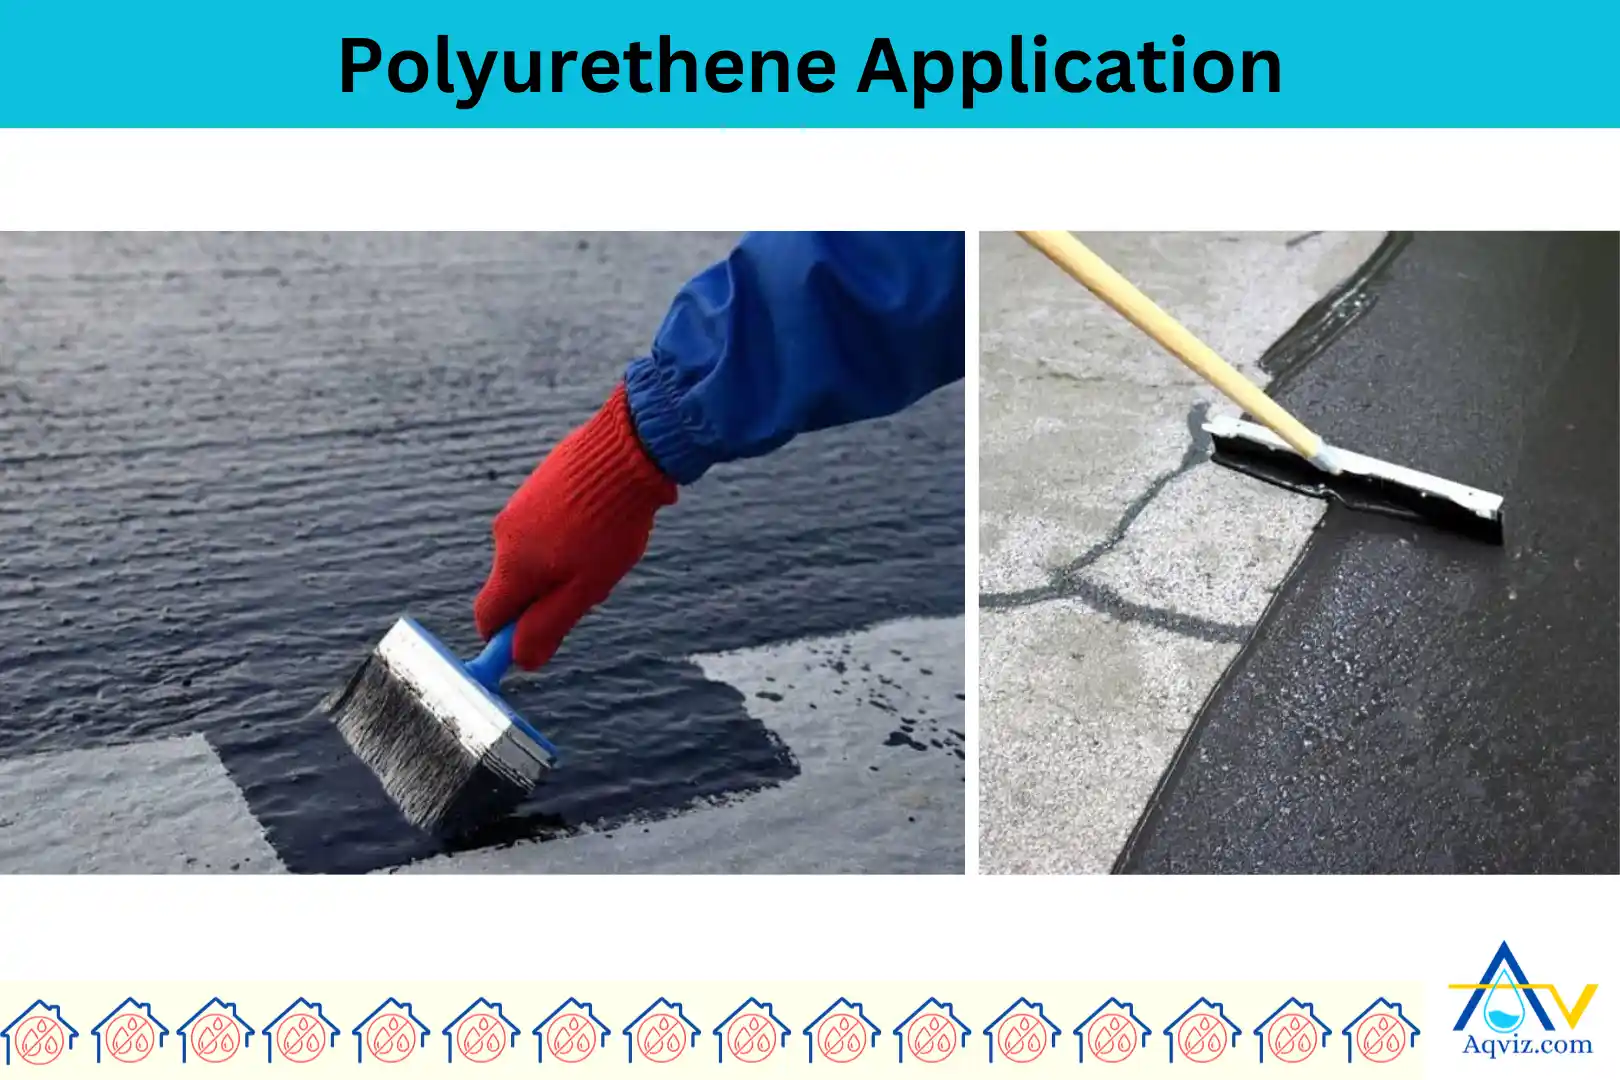
Applying the Polyurethane Membrane on the Surface
Apply polyurethane waterproofing as follows on the surface
- Use a paint roller, brush, or airless spray to apply a thin and even PU coat.
- Start from one end and work in uniform strokes, ensuring full coverage over the space.
- The thickness of the first PU coat should typically be 0.8-1 mm.
- Pay extra attention to corners, wall-floor junctions, and penetrations (pipes, drains, edges) because these are prone to high leaks.
- Let the first layer to dry. The first coat must fully cure before applying the second layer.
- Then apply the second coat perpendicular to the first coat (cross-layer application). The second layer helps to improve coverage and eliminates weak spots.
- Ensure the second coat is slightly thicker (1.0-1.2 mm) than the first for better durability.
6. Let the PU Layer Cure
In the sixth step, you should let the PU layer to cure after installing it. Curing is the process of allowing the polyurethane waterproofing membrane to dry and harden properly, ensuring it achieves its maximum strength, flexibility, and waterproofing performance. This step is essential to prevent premature failure, poor adhesion, and weak spots in the coating.
- Initial drying time of the PU waterproofing: 6 -12 hours (surface becomes touch-dry)
- Full cure of PU waterproofing before water exposure: 24 – 48 hours
- Complete curing of PU waterproofing for maximum strength: 3-7 days
Not only that, you should pay attention to the humidity and environmental temperature. Because higher humidity and lower temperatures slow down the curing process.
Aqviz highly recommends you have better ventilation on the surface. Because higher ventilation and warm temperatures speed up the curing process.
7. Protect the Polyurethane Membrane
Now we are in the last step, This is important, for the last long polyurethane membrane.
After applying and curing the polyurethane waterproofing membrane, it’s crucial to protect it from mechanical damage, UV exposure, chemical spills, and wear and tear. Without proper protection, the membrane can deteriorate prematurely, compromising its waterproofing ability.
- Apply a protective topcoat (for UV and chemical resistance)
- Use protective layering for heavy traffic areas
- Avoid sharp objects and heavy impact
- Prevent chemical and oil spills
- Inspect and maintain regularly
Can you Put Polyurethane Over Paint?
Yes, you can put polyurethane over paint if the paint is fully cured and compatible.
Water-based polyurethane works best over water-based and latex paints because it bonds well and does not yellow. Oil-based polyurethane can go over cured paint, but it may yellow light colors and requires longer drying time. You should allow the paint to cure for 24-72 hours (check the paint manufacturer), lightly scuff the surface with 220-grit sandpaper, remove dust, and then apply polyurethane in thin coats.
From field experience, applying polyurethane over uncured paint or glossy paint without sanding causes peeling, clouding, or poor adhesion.
Can you use Water Based Polyurethane over Oil-Based Stain?
Yes, you can use water-based polyurethane over an oil-based stain, if the stain is fully cured.
Oil-based stain must dry completely before applying water-based polyurethane. You should wait 48-72 hours at minimum, and in cool or humid conditions up to 7 days, until the surface feels dry and no solvent odor remains. Once cured, lightly scuff-sand with 220-grit sandpaper, remove all dust, and then apply the water-based polyurethane in thin, even coats.
From field experience, applying water-based polyurethane over uncured oil-based stain causes adhesion failure, blotching, or a cloudy finish. When the stain is fully cured and properly sanded, water-based polyurethane bonds well and provides a clear, non-yellowing protective layer.