
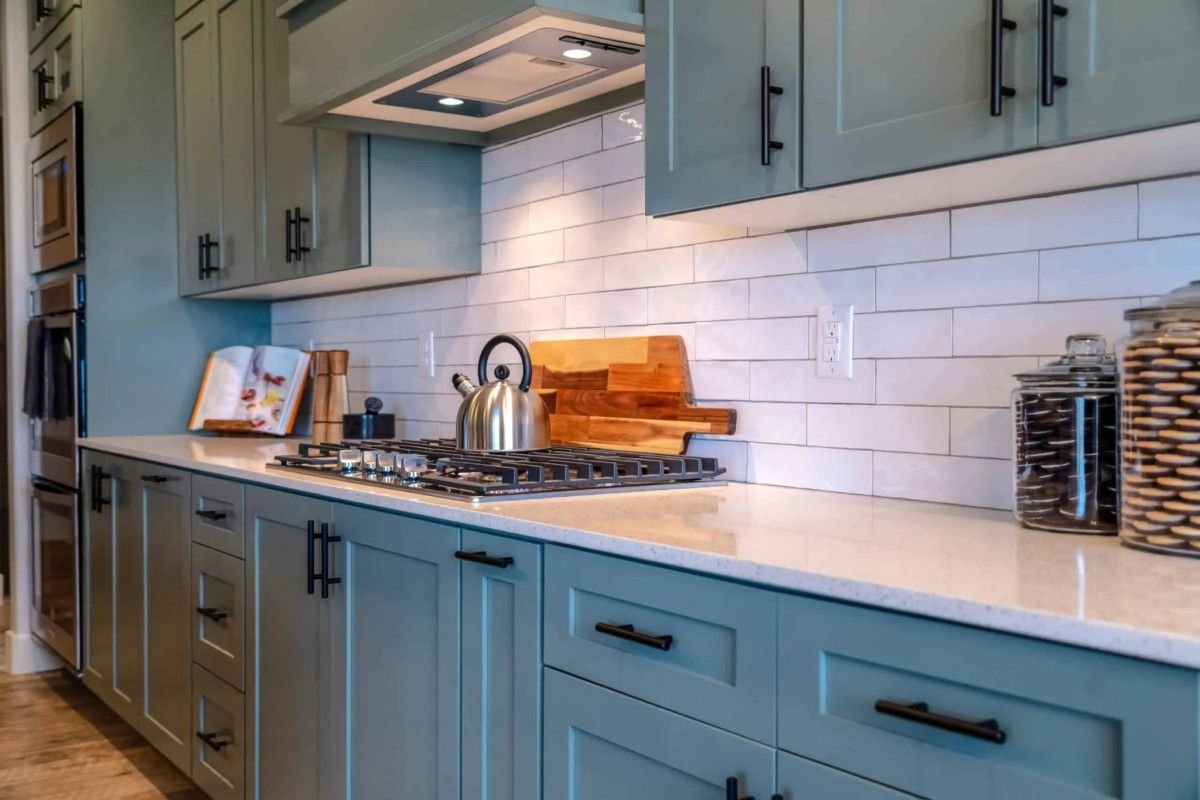

This guide covers budget-friendly cabinet painting options — from DIY brush to professional spray. The most budget-friendly cabinet painting option is DIY painting with a high-quality paint and a brush-and-roller combination — not spraying, not hiring a professional, not using chalk paint as a shortcut that will peel within two years. The DIY brush-and-roller method costs $125 to $250 in materials — primer, paint, brushes, rollers, sandpaper, masking materials — and 40 to 80 hours of labor over two to three weekends. The result is cabinets that look freshly painted by a homeowner who cared enough to spend three weekends doing it correctly. The result is not factory-finished. The result is not professional. The result is clean, updated, and transformative — the difference between a kitchen that looks like it was built in 1995 and a kitchen that looks like it was updated in 2024. The difference is the paint. The paint costs $200. The professional would charge $3,000 to $8,000. The savings are $2,800 to $7,800. The savings are the budget. The budget is the weekends. The weekends are the currency. The currency is your time.
Cabinet painting is the highest-impact, lowest-cost kitchen upgrade. The cabinets occupy more visual surface area than any other element in the kitchen. The color of the cabinets defines the era of the kitchen. Oak cabinets in a honey-gold finish scream 1995. White cabinets with matte black hardware whisper 2024. The oak is the same oak. The paint is the only thing that changed. The paint changed the era. The era is the perception of the kitchen. The perception is the value. The value is the update. The update cost $200. The update looks like $10,000. Here are the budget-friendly options, from cheapest to most expensive.
Budget Cabinet Painting Options — Cost Comparison
| Option | Cost | Durability | Labor | Best For |
| DIY brush-and-roller (standard paint) | $125 – $250 | 5 – 8 years | 40 – 80 hours DIY | Homeowners with time, budget under $500 |
| DIY spray (HVLP sprayer rental) | $200 – $400 | 8 – 12 years | 30 – 50 hours DIY | DIYers with sprayer access or rental |
| Chalk paint (no sanding/primer) | $100 – $200 | 2 – 5 years (peels without proper prep) | 20 – 40 hours DIY | Temporary fix; not recommended for kitchens |
| Professional brush-and-roller (no spray) | $3,000 – $5,000 | 8 – 12 years | None, professional | Homeowners who want a step above DIY |
| Professional spray finish | $5,000 – $8,000 | 12 – 15 years | None, professional | Best durability; factory-like finish |
Option 1: DIY Brush-and-Roller, $125 to $250
The DIY brush-and-roller method is the cheapest option and the most labor-intensive. The materials are: a gallon of high-adhesion primer, $25 to $40, specifically formulated for bonding to previously finished surfaces. A gallon of high-quality cabinet paint, $40 to $70, alkyd or urethane-modified acrylic for durability. A 2-inch angled brush for cutting in corners and panel grooves, $10 to $20. A 4-inch foam roller for flat surfaces, $5 to $10. 220-grit sandpaper, $5. Masking tape and plastic sheeting, $20. Drop cloths, $10. TSP cleaner and degreaser, $10. The materials total $125 to $250. The paint is the most expensive single item. The paint quality determines the durability. The $70 paint lasts 8 years. The $30 paint lasts 3. The price difference is $40. The durability difference is 5 years. The $40 is the best investment in the paint budget. Buy the $70 paint.
The process: remove the doors, drawer fronts, and hardware. Label each door and each drawer front with a numbered tape system, Door 1, Drawer 1, so they go back in the correct location. Clean every surface with TSP to remove years of cooking grease. The grease is the enemy of paint adhesion. The TSP is the weapon. Use the TSP. Sand every surface with 220-grit paper, the goal is to scuff the existing finish, not to remove it. The scuff creates a mechanical bond for the primer. Apply the primer with the foam roller on flat surfaces and the brush in corners and grooves. Let the primer dry, 2 to 4 hours per the label. Sand the primer lightly with 320-grit paper to remove any dust nibs or roller stipple. Apply the first coat of paint with the roller and brush. Let dry. Sand lightly with 320-grit between coats. Apply the second coat. Let cure for 24 to 48 hours before reinstalling the doors and the hardware. The process is the weekends. The weekends are the currency. The currency is the savings. The savings are $3,000 to $8,000. The $3,000 is the difference between DIY and professional. The difference is three weekends. The weekends are the budget.
The National Association of Home Builders (NAHB) identifies kitchen updates as one of the highest-return cosmetic home improvements. Painting cabinets is specifically noted as a cost-effective alternative to cabinet replacement. Painted cabinets in a current color signal to buyers that the kitchen has been updated. The buyer does not know whether the paint was applied by a professional or by the homeowner. The buyer only sees the result. The result is the painted cabinets. The painted cabinets are the update. The update is the value. The value exceeds the $250 cost many times over.
Option 2: DIY Spray with an HVLP Sprayer, $200 to $400
A DIY spray finish is the next step up from brush-and-roller. The sprayer, an HVLP turbine system, can be rented for $50 to $80 per day from a tool rental store, or purchased for $100 to $200 for an entry-level model. The sprayer atomizes the paint into a fine mist, producing a smooth finish with no brush marks and minimal roller stipple. The finish is closer to factory quality than brush-and-roller. The finish is not factory quality, the DIY sprayer does not have the precision of a professional airless sprayer in a controlled booth, but it is better than any brush-and-roller job. The sprayer reduces the labor by 10 to 30 hours, the spraying is faster than rolling, and produces a smoother finish. The trade-off is the learning curve and the overspray. The learning curve is steep. The first few doors will have runs, thin spots, or orange-peel texture. The later doors will look better. The overspray is the paint mist that settles on everything in the spray area. The spray area must be contained, a garage with plastic sheeting on the walls and the floor, or a temporary spray booth in the driveway. Overspray on the car, the lawn furniture, or the neighbor’s fence is a permanent mistake. Contain the overspray. The containment is the setup. The setup is the time. The time is the cost of the spray finish. The result is worth the setup. The result is a finish that feels smooth to the touch. The touch is the test. The brush-and-roller finish has texture. The spray finish is smooth. The smoothness is the upgrade. The upgrade costs $100 in rental fees. The $100 is the premium over brush-and-roller. The premium delivers the smoothness. The smoothness is the difference the hand notices.
Option 3: Chalk Paint, Not Recommended for Kitchen Cabinets
Chalk paint is marketed as a no-prep, no-sand, no-primer cabinet painting solution. It adheres to most surfaces without sanding. It dries quickly. It has a matte, chalky texture. It is popular for furniture refinishing. It is not recommended for kitchen cabinets. Chalk paint has low abrasion resistance, the paint will wear at the corners and edges of cabinet doors within 1 to 2 years of daily use. The chalky texture traps grease and food residue, the matte surface cannot be wiped clean the way a smooth, sealed paint surface can. Chalk paint must be sealed with a wax or a polyurethane topcoat, the topcoat adds time and cost that negate the no-prep advantage. The wax topcoat must be reapplied annually, maintenance that most homeowners will not perform. The un-maintained chalk paint on kitchen cabinets will look worn, dirty, and dated within 3 years. Chalk paint is a temporary solution for a kitchen you are selling within a year. Chalk paint is not a solution for a kitchen you plan to live with. For a kitchen you live with, use cabinet paint, alkyd or urethane-modified acrylic, with proper prep. The proper prep is the sanding and the priming that chalk paint claims you can skip. Skipping them is the mistake. The mistake is the peeling paint at the corners of the cabinet doors. The peeling paint is the evidence of the skipped prep. The evidence appears within 2 years. The evidence is permanent. The chalk paint option is the cheapest materials. The chalk paint option is the most expensive long-term because it must be redone. The redo is the cost of the chalk paint mistake. The mistake is the shortcut. The shortcut is the chalk paint. The chalk paint is not recommended.
Frequently Asked Questions
What is the cheapest way to paint kitchen cabinets?
DIY brush-and-roller with a high-quality primer and cabinet paint costs $125 to $250 in materials and 40 to 80 hours of labor. The paint, $40 to $70 per gallon, is the most important material investment. A high-quality acrylic-alkyd or urethane-modified paint will last 5 to 8 years with proper prep. The cheapest paint costs less and lasts half as long. The price difference is $30 per gallon. The durability difference is years. Buy the better paint.
Can I paint kitchen cabinets without sanding or priming first?
Paint will adhere to a clean, degreased surface without sanding, temporarily. Within 1 to 2 years, the paint will begin to peel at the high-wear areas, the corners of doors, around the hardware, the edges of drawer fronts. Sanding creates a mechanical bond. The primer creates a chemical bond. The combination keeps the paint adhered for 8 to 12 years. Skipping the sanding or the primer reduces the lifespan of the paint job to 2 to 5 years. The 2 hours of sanding and the 2 hours of priming buy 5 additional years of durability. The trade-off is the time. The time is now or later. The later is the repaint. The repaint is the same time again. The now is the sanding and priming. The now saves the later. Do the sanding and priming now.
What is the best paint for kitchen cabinets on a budget?
A urethane-modified acrylic or an alkyd-acrylic hybrid cabinet paint is the best choice for DIY cabinet painting. These paints are sold at paint stores, Benjamin Moore Advance, Sherwin-Williams Emerald Urethane, and cost $40 to $70 per gallon. They self-level to reduce brush marks, cure to a hard, wipeable finish, and resist the wear of daily kitchen use. Standard wall paint is not durable enough for cabinets. The cabinet paint is worth the premium. The premium is $30 per gallon. The premium is the durability. The durability is the 8-year lifespan versus the 3-year lifespan of wall paint. The $30 buys 5 years. The 5 years is the difference between a kitchen that looks freshly painted and a kitchen that needs to be painted again.
How much does professional cabinet painting cost compared to DIY?
Professional cabinet painting costs $3,000 to $5,000 for a brush-and-roller finish and $5,000 to $8,000 for a sprayed finish in a controlled environment. The DIY brush-and-roller method costs $125 to $250 in materials plus 40 to 80 hours of labor. The savings are $2,800 to $7,800. The professional provides a faster turnaround, 3 to 5 days versus 2 to 3 weekends, and a more durable, factory-like finish. The professional is the convenience. The DIY is the budget. The budget is the savings. The savings are the weekends.
Should I paint my cabinets or replace them entirely?
Paint the cabinets if the boxes are structurally sound, plywood boxes with no water damage, and the layout works. Painting costs $125 to $250 DIY or $3,000 to $8,000 professional. Replace the cabinets if the boxes are particleboard and water-damaged, delaminated, or structurally sagging, or if the layout needs to change. Replacement costs $8,000 to $18,000 for semi-custom cabinets. Painting is the right choice for most kitchens where the cabinets are functionally adequate and the aesthetic is the problem. The aesthetic is the paint. The paint is the fix.
How long does DIY cabinet painting take from start to finish?
Two to three weekends, 40 to 80 hours total. The first weekend is removing the doors and hardware, cleaning and degreasing, sanding, and priming. The second weekend is the first coat of paint and the sanding between coats. The third weekend is the final coat and the curing time before reinstalling the doors. The kitchen is without cabinet doors for the duration. The kitchen is functional, the boxes and the countertops remain in place, but the cabinets are open shelves. The open shelves are the temporary kitchen. The temporary kitchen is the disruption. The disruption is the cost of the DIY budget. The budget is the $200. The disruption is three weekends. The three weekends pass. The painted cabinets remain.
The Paint That Costs $200 and Looks Like $10,000
DIY brush-and-roller: $125 to $250 in materials, three weekends of labor, cabinets that look updated and clean. The paint is a urethane-modified acrylic in white, off-white, light gray, navy, or deep green. The hardware is new, matte black or brushed nickel pulls at $2 to $10 each, $50 to $200 for the entire kitchen. The transformation costs $200 to $500 total. The transformation looks like a $10,000 cabinet replacement. The buyer cannot tell the difference from across the room. The owner knows because the owner painted them. The owner spent three weekends on them. The three weekends are the investment. The investment returns a kitchen that looks current. The current kitchen is the return. The return is the daily experience of walking into a kitchen that looks like it was updated. The update was the paint. The paint was $200. The $200 is the best investment in the kitchen. The kitchen is the room where the day starts. The day starts better in a kitchen where the cabinets are painted. The painted cabinets are the result. The result is the $200 and three weekends. The weekends pass. The cabinets remain. The cabinets are the evidence. The evidence is the transformation. The transformation is the budget. The budget is the paint. The paint is the answer. Ever closed a freshly painted cabinet door and heard the soft, solid thunk of the door meeting the frame — no rattle from loose hinges, no squeak from worn pins, just the quiet confidence of a door that closes like it was installed yesterday? The door was the same door that had been there for 20 years. The sound was new. The sound was the paint. The paint filled the micro-gaps at the corners. The paint created a uniform surface. The uniform surface changed the way the door met the frame. The thunk was the evidence. The thunk was the update. The update cost $200. The update sounded like a new kitchen. The kitchen was the same kitchen. The sound was new. The sound was the paint.