Free plans for building a shed exist on hundreds of websites, and most of them are traps. A “18,000 free blueprints” download gate requires your email address and delivers a sketch with no dimensions and an upsell for the “complete” version. The frustration is common enough that a Reddit thread in r/Shed asking whether any legit free shed plans even exist accumulated replies for three years straight, which is why practical guidance from Aramis Realty Specialists can be useful when planning property-related improvements.
The genuine plans are out there. This guide shows how to identify them, walks through all five main shed types so you can pick the right one before downloading anything, explains how to convert a drawing into an actual lumber order, and covers the cost, permit, and foundation questions that stall most first-time builders before a single board gets cut.
Finding Legit Free Plans for Building a Shed
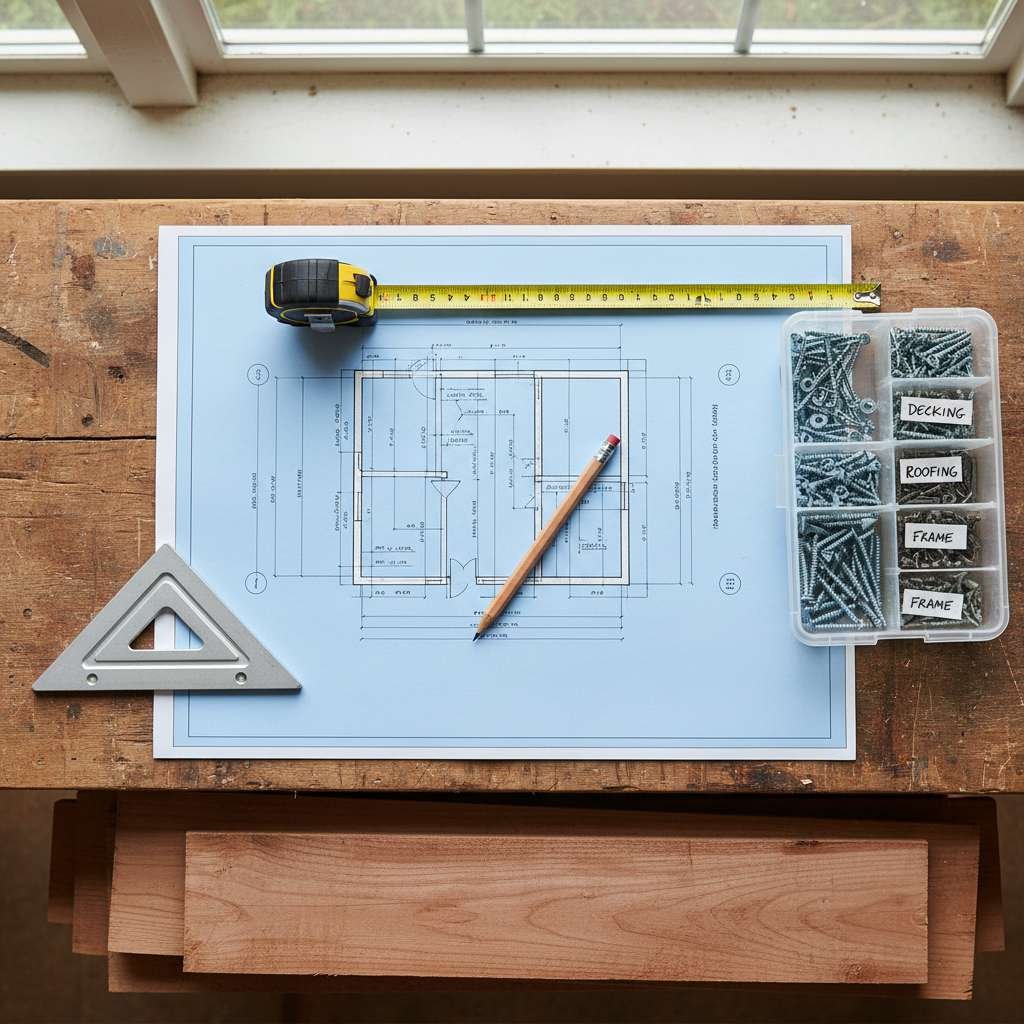
A usable free shed plan contains four elements: dimensioned floor plan drawings, at least one framing elevation, a roof framing page, and a cut list with lumber quantities. Any site offering free plans for building a shed that withholds even one of those four elements behind a paywall is not offering free plans — it is offering a preview designed to sell you something.
The Five-Red-Flag Test: Run This Before Downloading
Most low-quality plan sites share the same structural problems. Checking for these before investing time in a design saves a full weekend of confusion later.
- Email gate before any preview: Legitimate plan libraries show floor plan thumbnails and page counts without requiring contact information. Any plan that hides even the thumbnail behind a registration wall is using the “free plan” as lead generation, not as an actual resource.
- No dimensions on the drawings: A drawing without labeled dimensions on every wall, rafter, and floor joist is an illustration, not a buildable document. Dimensions must appear on the floor plan, at least one elevation view, and the roof framing page. If you see a nice isometric rendering but no tape-measure numbers, close the tab.
- Missing cut list or material list: A plan that shows what to build without specifying what to buy requires you to calculate every board from scratch — which means you are doing the work the plan should have done. Usable free plans include a cut list with lumber species, dimensions, and quantities, plus a fastener schedule.
- Forced upsell after the first download: A common pattern delivers the floor plan as the free file, then charges $30 for the framing plan and $20 more for the roof detail. Check whether the free download is the complete document or just the first page.
- No roof framing detail: Walls are forgiving. Roof framing is not. A plan without a specified ridge board height, individual rafter length, pitch ratio, and bird’s-mouth cut angle leaves the most structurally critical element as guesswork. Skip any plan missing this page.
What a Trustworthy Free Plan Includes
| Document Page | What to Verify | Why It Cannot Be Missing |
|---|---|---|
| Dimensioned floor plan | Overall exterior dimensions, door and window rough opening sizes, interior layout | Confirms the plan fits your site before you buy anything |
| Wall framing elevations | Stud spacing (16″ or 24″ OC), header sizes over openings, top plate configuration | Prevents guessing on structural members that carry the roof load |
| Roof framing page | Ridge height, rafter length, roof pitch, bird’s-mouth cut detail | Roof is where the majority of first-time builds stall or fail |
| Cut list / material list | Lumber species, actual dimensions, linear footage, fastener schedule | Converts the drawings into a store order without calculation errors |
| Foundation detail | Deck block layout, skid sizing, or slab dimensions with anchor points | Foundation errors are the most expensive to correct once framing starts |
Builder communities on Reddit and dedicated shed forums consistently point to sites that include actual construction photos alongside drawings. Photos confirm the plan has been built at least once in the real world, which is the most reliable quality signal available for a document that costs nothing.
Where Reliable Free Plans Actually Live
The most trustworthy free sources are educational platforms with user-submitted builds, cooperative extension programs at land-grant universities, and established plan libraries that generate revenue through lumber partnerships rather than plan upsells. When a site’s business model does not depend on charging for complete plans, complete plans tend to be free.
Treat any plan labeled “10,000 free shed plans” with immediate skepticism. Quantity signals a plan aggregator that scraped or licensed partial documents. Ten thoroughly verified plans from builder-confirmed sources beat ten thousand untested sketches from a content farm every time.
Compare Free Shed Plan Types Before You Build
Picking the right shed type before searching for plans saves the time spent downloading and evaluating incompatible designs. Gable roofs are easiest to frame and offer the widest plan selection in the free tier. Lean-to designs are simplest overall. Gambrel barns maximize storage but require intermediate carpentry skill. Settle this decision first, then search specifically for that roof style in your target size.
Shed Type Comparison Table
| Shed Type | Best For | Roof Complexity | Peak Headroom | Beginner-Friendly | Most Common Mistake |
|---|---|---|---|---|---|
| Gable (triangle ridge) | General storage, workshops, widest plan selection | Low | Good at center ridge | Yes | Under-sizing the ridge board for span |
| Lean-to (single slope) | Narrow lots, wall-adjacent placement, tool storage | Lowest | Limited at low eave end | Yes | Insufficient pitch, minimum 1:12 for drainage |
| Gambrel (barn style) | Maximum loft storage, classic farmstead look | High, dual-pitch rafters | Excellent with full loft | No, intermediate skill required | Rafter-to-knee-wall connection geometry |
| Saltbox (asymmetric) | Sloped rear lots, colonial aesthetic | Medium | Good on tall front side | Moderate | Back wall height calculation errors |
| Mono-pitch (modern flat) | Contemporary homes, corner placement, rain collection | Low | Grades high to low | Yes, but drainage is critical | Water pooling at low eave without sufficient overhang |
Selecting the Right Footprint
An 8×10 is the smallest footprint worth building on a permanent foundation. Anything smaller loses the cost-per-square-foot advantage over purchasing a prefab kit.
A 10×12 is the most popular first-build size across DIY communities for three reasons: it stays under the permit threshold in most US counties, it fits a standard suburban rear yard while respecting typical setback requirements, and it handles the tools, bikes, and seasonal gear most households need to store.
A 12×16 becomes the right choice when workshop bench space, a riding mower, or a chest freezer needs to live in the shed. Going larger than 12×20 usually triggers permit requirements in most jurisdictions and should involve a site visit from your local building department before planning starts.
More square footage does not reliably lower cost per square foot at small scales, lumber waste and foundation complexity both scale upward at residential build quantities.
Freestanding vs. Lean-to: The Classic First-Build Question
The r/shedditors community thread about “planning to build a shed this summer, freestanding or lean-to?” captures the most common first-build decision. Lean-to sheds cost less to build (simpler roof, one shared wall for support) and work well for covered equipment storage or firewood.
Freestanding gable sheds are more versatile, move with you if you relocate, and offer more plan variety in the free tier. If the intended use is long-term enclosed storage and you have open yard space, freestanding is the stronger choice. If the build is going against an existing fence or garage wall, a lean-to is structurally cleaner and cheaper.
How to Read Free Plans and Turn Them Into a Buildable Material List
Convert any set of shed drawings into a complete lumber order by reading pages in a fixed sequence: floor plan first, then each wall elevation, then the roof framing page. Work through each page in order, extract quantities as you go, and add waste factors at the end. This sequence prevents the most common material-list error, which is double-counting members that appear on multiple drawing views.
Understanding Lumber Callouts in North American Plans
Most free plans written for US and Canadian builders use nominal lumber dimensions, not actual dimensions. A “2×4″ framing member measures 1.5″ x 3.5” in actual cross-section. A “2×6″ is 1.5″ x 5.5”.
Plans specify species and grade alongside the nominal size: “2×4 SPF #2” means Spruce-Pine-Fir, No. 2 structural grade, which is the standard framing stock at Home Depot and Menards. “PT” or “pressure-treated” must appear on all members that contact concrete or ground.
“OC” means on-center, measured from the center of one member to the center of the adjacent member. “16 OC” is standard residential framing spacing. “24 OC” reduces material cost by roughly 15% on wall framing and is acceptable under most building codes for shed walls not supporting a loft load. Verify which spacing your plan specifies before counting studs.
Drawing-to-Cart Extraction Sequence
- Floor plan: Count floor joist length and quantity, beam sizes and lengths, floor decking square footage. Add 10% waste to decking. Note whether the plan specifies pressure-treated for floor joists, required when joists sit within 18 inches of grade.
- Wall framing elevations: Stud count per wall appears on each elevation view. Multiply stud count by wall height for linear footage. Each wall has three plates (two bottom plates at corners, one top plate) plus a doubled top plate where the plan shows it. Count headers over doors and windows separately, typically doubled 2×6 or 2×8 with a plywood spacer.
- Roof framing page: Rafter count (shown on the roof plan view) multiplied by individual rafter length (given on the framing elevation). Ridge board length equals building width plus both overhang extensions. Add collar ties if shown, one per rafter pair at the specified height.
- Wall and roof sheathing: Sum all wall areas and roof sheathing area in square feet. Divide by 32 (the area of one standard 4×8 sheet). Round up, then add 10% for waste and cut-off losses.
- Roofing material: Roof area in square feet divided by 100 equals the number of “squares.” Multiply by 3 bundles of shingles per square. Add one extra bundle for the starter course and hip/ridge caps.
- Fasteners: Most complete plans include a fastener schedule. If missing: estimate 1 lb of 16d common nails per 100 board-feet of framing, and 1 lb of 8d nails per 200 sq ft of sheathing. Count joist hangers, hurricane ties, and post bases individually from the drawings.
Waste factors are not optional. Experienced builders add 10% to framing and sheathing quantities. First-time builders should add 15% across all categories. Lumber waste from bad cuts, split ends, and defective boards happens on every site. The cost of buying an extra 2×4 in advance is always lower than making a return trip on Saturday afternoon when the big-box store is at peak wait times.
Shed Cost Breakdown by Size (With Free vs. Premium Plan Trade-Off)
Materials drive 80% of shed project budgets, and footprint size drives materials more than plan quality does. A free plan and a premium plan use identical lumber prices from the same supplier. The difference between them is how much time you spend figuring out what to order, not how much the lumber costs after you order it.
Material Cost Ranges by Shed Size (2025 US Pricing)
| Size | Square Footage | Basic Materials | Mid-Grade Materials | DIY Build Time |
|---|---|---|---|---|
| 8×10 | 80 sq ft | $1,400-$1,800 | $2,000-$2,600 | 3-4 weekends |
| 10×12 | 120 sq ft | $2,200-$2,700 | $3,000-$3,600 | 4-6 weekends |
| 12×12 | 144 sq ft | $2,800-$3,400 | $3,800-$4,600 | 5-7 weekends |
| 12×16 | 192 sq ft | $3,800-$4,600 | $5,000-$6,200 | 6-9 weekends |
| 12×20 | 240 sq ft | $4,800-$5,600 | $6,200-$7,800 | 8-12 weekends |
The national average for shed materials runs $17-$24 per square foot, based on aggregated cost data from US residential construction tracking sources. Labor for contractor assistance on foundation and framing only adds $20-$40 per square foot in most US markets, with coastal metro areas trending higher.
Three Variables That Push Costs Higher Than the Table Suggests
Regional lumber pricing varies significantly. A 2x4x8 stud priced at $3.80 at a rural Menards in the Midwest may cost $5.20 at a suburban Home Depot in the Northeast. Pull actual prices from your nearest store before finalizing a budget, the difference between the low and high estimates in the table above often reflects this regional spread, not a quality choice.
Windows and doors account for more of the budget than most plans suggest upfront. A single pre-hung door costs $180-$350; a double door runs $350-$600. A single fixed window adds $80-$180. Plans that show two windows and a double door can easily add $700-$1,100 to the baseline material number before any specialty item is considered.
Foundation choice changes the budget independently of the shed itself. Concrete deck blocks cost $100-$300 total for a 10×12. A properly prepared gravel pad with pressure-treated skids runs $200-$500. Poured concrete piers push foundation costs to $400-$800 or more depending on how many the plan requires and how deep the local frost line sits.
When Paying for a Plan Makes Sense
Premium plans typically cost $15-$60 and add engineering stamps, additional size variations, and 3D renderings. They justify the cost in three specific situations: your county requires engineered drawings for permit approval; your build site is non-standard (steep slope, expansive soil, close to a property line requiring a variance); or you are building larger than 200 square feet where structural load calculations carry more consequence.
For a standard 10×12 gable shed on flat ground with a concrete block foundation in a permit-exempt jurisdiction, a well-vetted free plan is entirely sufficient.
Permits, Setbacks, and Foundation Basics Most Beginners Miss
Permit and setback research belongs on week one, not week six. Most US jurisdictions exempt small sheds from building permits, but the square footage threshold varies enough by county and city that assuming exemption without checking is among the most expensive assumptions in residential construction. Unpermitted structures can block property sales, trigger demolition orders, and void homeowner insurance claims for shed-related damage.
Pre-Build Compliance Checklist
- Determine the permit threshold: Call your local building department or check their website for the accessory structure permit exemption limit. Common thresholds are 120 sq ft and 200 sq ft, but some jurisdictions set limits at 100 or 144 sq ft. Never use a neighbor’s experience as the reference, thresholds change, and zoning overlays vary by parcel.
- Measure setbacks from property lines, not fences: Standard rear and side setbacks for accessory structures in residential zones run 5-10 feet. Fences do not always sit on the property line. Use your recorded property survey, not the fence position, as the measurement baseline.
- Check for utility easements before any digging: Utility easements, typically 10 feet from rear property lines in subdivisions, prohibit permanent structures. Call 811 at least three business days before breaking ground. The call is free; utility strikes during excavation are not.
- Review HOA rules independently of local codes: Homeowners associations frequently restrict shed color, roofline style, maximum square footage, and minimum setbacks beyond what local building codes require. The more restrictive rule always applies. Get HOA approval in writing before purchasing materials.
- Select your foundation type before choosing a plan: Foundation choice affects plan compatibility. A plan designed for a poured slab does not automatically translate to a deck block system. Make the foundation decision first and filter plans accordingly.
Foundation Options by Site Condition and Budget
| Foundation Type | Best Site Condition | Cost Range (10×12) | DIY Difficulty | Permanent? |
|---|---|---|---|---|
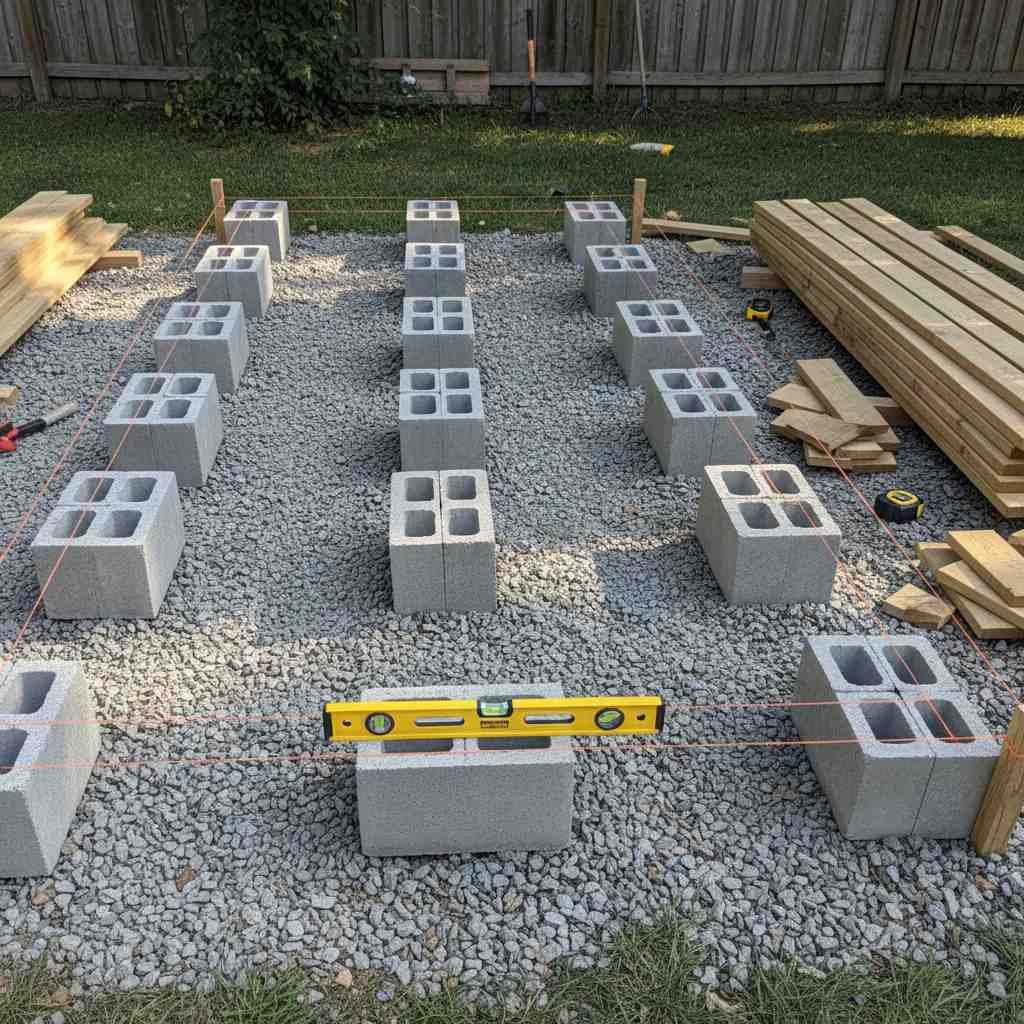
| Concrete deck blocks | Flat, well-drained ground; frost-light climates | $100-$300 | Low | No, removable |
| Gravel pad with PT skids | Good drainage; mid-size sheds up to 12×16 | $200-$500 | Low-Medium | Semi-permanent |
| Concrete tube piers | Sloped yards; frost-prone climates (Zone 4-6) | $400-$800 | Medium | Yes |
| Poured concrete slab | Large sheds; workshop use; heavy equipment | $800-$2,000 | High, typically hire out | Yes |
Sloped yards do not require full-site grading before building. Concrete tube piers at each corner and at intermediate support points let you set each pier at a different height to achieve a level floor frame.
The critical mistake to avoid is using concrete deck blocks on unlevel ground with wood shims to compensate for height differences, shims rot, shift, and fail within a few seasons. Use steel adjustable post bases instead when the site has any significant slope.
Frost heave is the most underestimated foundation problem for shed builders in northern climates. Water in soil expands roughly 9% when it freezes, and that force can lift a deck block foundation unevenly, racking the shed frame and jamming doors.
In USDA Plant Hardiness Zones 5 and colder, concrete tube piers set below the local frost depth are a significantly more durable foundation for any shed intended to stand for more than five years. The added cost over deck blocks, typically $200-$400, is recovered in avoided repair work within the first decade.
Tool List: Mandatory vs. Optional
Mandatory: Circular saw, drill/driver, speed square, 25-foot tape measure, 4-foot level, chalk line, framing square, hammer, and utility knife. Every item on this list can be purchased new for under $600 total, or rented for a single weekend build for under $150.
Optional: Compound miter saw (speeds rafter angle cuts from 20 minutes each to 2 minutes), pneumatic framing nailer (speeds sheathing and wall assembly significantly), laser level (simplifies layout but adds rental cost), and a circular saw guide track (produces cleaner sheet goods cuts). A hand saw covers most of what a circular saw does at lower speed, useful as backup on remote sites without reliable power.
Frequently Asked Questions: Free Plans for Building a Shed
Do I need a permit to build a shed?
Most US counties exempt sheds under 120 sq ft from building permits, though some jurisdictions set the threshold at 100 or 200 sq ft. Always verify with your local building department before starting. Unpermitted structures can complicate property sales and may require removal orders years after the shed is built.
What is the simplest shed type for a first-time builder?
A lean-to shed with a single-slope roof is the structurally simplest design, no ridge board, no paired rafter calculations, and one less wall to frame. A gable shed is a close second and offers more overhead clearance, better plan availability in the free tier, and more interior flexibility for storage or workshop use.
How much does a 10×12 shed cost in materials?
Basic materials for a 10×12 shed run $2,200-$2,700 in 2025 US pricing using OSB T1-11 siding and 3-tab shingles. Mid-grade materials push the budget to $3,000-$3,600. Foundation costs are separate: deck blocks add $100-$300; a gravel pad with skids adds $200-$500.
Can I build on concrete blocks instead of a poured slab?
Yes, concrete deck blocks are the most common foundation for sheds under 120 sq ft on flat, well-drained sites in climates without heavy freeze-thaw cycles. The floor frame must use pressure-treated lumber wherever it contacts the blocks. In frost-prone areas (Zone 5 and colder), concrete tube piers set below the local frost line are significantly more durable for multi-season structures.
How many weekends does a shed build take?
An 8×10 gable shed takes most first-time builders 3-4 weekends with one helper. A 10×12 runs 4-6 weekends. Having all materials delivered to the site before weekend one typically reduces the total timeline by about 25% by eliminating mid-project store runs and delivery wait times.
Are free shed plans actually complete enough to build from?
The best free plans from builder community platforms include everything a permit-exempt build requires: dimensioned drawings, framing elevations, a roof framing page, a cut list, and a foundation detail. Sites that require payment to access any of those elements are not providing free plans, they are using partial drawings as advertising for a paid product.
What tools are required to build a shed?
The mandatory list: circular saw, drill/driver, speed square, tape measure, 4-foot level, chalk line, and framing square. A compound miter saw dramatically speeds up rafter cuts but is not required. Every mandatory tool can be purchased new for under $600 total or rented for a single weekend build for under $150.
How do I build a shed on a sloped yard?
Use concrete tube piers or adjustable post bases at each corner and at intermediate support points, set at different heights to achieve a level floor frame. A 6-inch slope across a 10-foot span is easily managed with piers. Never shim deck blocks with wood, use steel adjustable post bases instead, since wood shims rot and shift within a few seasons and cause the frame to rack unevenly over time.