PVC trim boards look like wood, cut like wood, and install like wood, but they do not absorb paint like wood. Paint applied to bare PVC without proper preparation peels off in sheets within a season. The surface is smooth, non-porous, and expands and contracts with temperature changes far more than wood. Paint that sticks to wood will not stick to PVC unless you prepare the surface and use the right products.
Painting PVC trim correctly adds a day to the project for cleaning and priming compared to painting wood. Cutting corners adds a year of peeling paint and a weekend of stripping and repainting. Here is how to do it once.
Why PVC Trim Is Different From Wood
PVC trim is cellular PVC, a closed-cell foam that is waterproof, rot-proof, and insect-proof. It will never absorb water and will never rot. Those are the reasons it is used. The same properties that make it waterproof make it resistant to paint adhesion. Wood has grain that paint mechanically bonds to. PVC has a smooth, slick surface that paint slides off unless the surface is prepared.
PVC expands and contracts with temperature. A 16-foot PVC trim board expands by approximately 1/8 inch between winter and summer. The paint film on top of the PVC must stretch and shrink with the board without cracking. Standard exterior latex paint is flexible enough to move with PVC. Oil-based paint is not. It dries hard and brittle and will crack as the PVC moves underneath it.
PVC trim comes from the factory with a light film of dust, manufacturing residue, and sometimes a glossy surface from the extrusion process. This must be removed before painting. The residue prevents paint adhesion as effectively as a coating of wax. The good news is that PVC trim does not need to be sanded to bare material. A light scuffing with fine sandpaper and a thorough cleaning are sufficient.
Color Matters: Dark Paint Can Warp PVC Trim
The most important rule of painting PVC trim is this: do not paint it a dark color. Dark paint absorbs solar heat. PVC softens at temperatures above 140 degrees Fahrenheit. On a sunny day, dark-painted PVC trim can reach 160 to 180 degrees, which is hot enough to cause the trim to warp, sag, or pull away from its fasteners. The damage is permanent.
Manufacturers specify a maximum light reflectance value, or LRV, for paint applied to PVC trim. An LRV of 55 or higher is generally required. This translates to white, off-white, beige, light gray, and pastel colors. Medium brown, dark gray, navy blue, forest green, and black are not approved for PVC trim. If you want dark-colored trim, use wood, fiber cement, or a PVC product specifically engineered for dark colors, such as Azek’s darker color collection. Standard white PVC trim cannot be painted dark.
Check the paint can for the LRV number. Many paint manufacturers print it on the label or on the color swatch. If the LRV is not listed, ask the paint store or look it up on the manufacturer’s website. If the LRV is below 55, that paint is not for PVC trim.
Step One: Clean the Trim Thoroughly
PVC trim must be cleaned before painting, even if it looks clean. The cleaning removes manufacturing residue, dust, and any oils from handling. Use a mild detergent and water with a scrub brush or a sponge. Rinse thoroughly with clean water. Let the trim dry completely. Any cleaner residue left on the surface interferes with paint adhesion.
For installed trim that has been exposed to the weather, additional cleaning may be required. Use a trisodium phosphate substitute, or TSP substitute, mixed with water, or a dedicated PVC cleaner recommended by the trim manufacturer. These products remove the chalky oxidation layer that forms on PVC exposed to UV light. If the trim has been installed for more than a few weeks, clean it with TSP substitute before painting.
Do not use solvent-based cleaners, acetone, or lacquer thinner on PVC trim. These chemicals soften and etch the PVC surface, creating a roughened texture that is difficult to paint evenly. Mild detergent and water is sufficient for new trim. TSP substitute is sufficient for weathered trim.
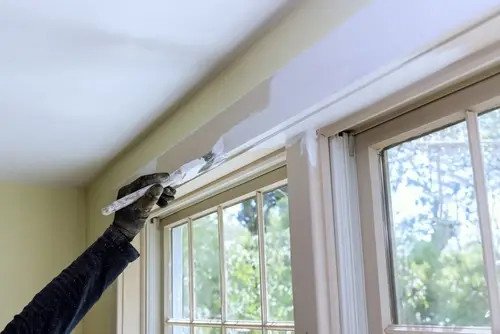
Step Two: Apply the Right Primer
PVC trim requires a primer. The primer provides the bond between the slick PVC surface and the paint. Use an exterior acrylic latex primer or a bonding primer specifically formulated for PVC and vinyl. The can should say suitable for vinyl, PVC, or plastic on the label. Standard wood primer does not adhere to PVC.
Some paint manufacturers sell paint-and-primer combination products that are rated for PVC and vinyl. If the label specifically says suitable for PVC without a separate primer, and the PVC trim manufacturer’s installation instructions confirm that a paint-and-primer product is acceptable, you can skip the separate primer step. If the label is silent on PVC, use a separate primer. Err on the side of priming. The cost of a quart of primer is small compared to the cost of repainting peeling trim.
Apply the primer with a brush, a roller, or an airless sprayer. Brush application provides good adhesion because the bristles work the primer into the surface. Spray application is faster but may not provide the same mechanical bond. If spraying, back-brush the primer immediately after spraying. Roll the primer onto the trim with a brush, working it into any texture or embossing on the trim surface. Apply one coat of primer evenly. A thick coat of primer is not better. It takes longer to dry and can crack as it cures.
Let the primer dry completely according to the manufacturer’s instructions, typically two to four hours. PVC is non-porous, so the primer dries by evaporation, not absorption. In humid conditions, drying takes longer. Do not rush the drying time. Paint applied over primer that is not fully dry will not bond properly.
Step Three: Apply Acrylic Latex Paint
Use 100 percent acrylic latex exterior paint. Acrylic latex is flexible enough to move with PVC trim through temperature cycles. It resists UV degradation better than vinyl acrylic or oil-based paints. The paint sheen affects durability. Satin or semi-gloss sheens are recommended for exterior PVC trim because they resist dirt and mildew better than flat paint, and they are easier to clean. For interior PVC trim, any sheen is acceptable.
Apply the paint with a brush or sprayer. One coat is usually sufficient over primer. If a second coat is needed, allow the first coat to dry per the manufacturer’s instructions before applying the second. PVC does not absorb the first coat the way wood does, so coverage is better and fewer coats are needed.
Paint all sides of the trim, including the back, if the trim is not yet installed. PVC trim that is painted on only the exposed faces can absorb moisture from the unpainted back face, which causes differential expansion and warping. Back-priming and painting all six sides of each trim board before installation is the best practice. At a minimum, prime the back and the ends. End grain is more porous than the face and absorbs more moisture. A sealed end cut reduces moisture absorption and the expansion that follows.
Painting Already-Installed PVC Trim
If the trim is already installed, the back face cannot be painted. This is normal for replacement and repainting projects. The paint on the exposed faces protects against UV and weather, which are the primary causes of paint failure. The unpainted back face against the house is protected from sun and rain and does not experience the same expansion forces as the front face.
Fill nail holes and joints with an exterior-grade PVC-compatible filler or caulk. Standard wood filler does not adhere to PVC and will crack and fall out as the PVC expands and contracts. Use a filler specifically labeled for PVC or a high-quality exterior acrylic caulk. Smooth the filler flush with the trim surface before priming. Primer and paint applied over unsanded filler will highlight the filled area as a visible patch.
Caulk the joints between PVC trim boards and between the trim and the wall with a high-quality exterior acrylic caulk. The caulk must be paintable. Silicone caulk is not paintable. Acrylic caulk labeled paintable is the correct product. Apply the caulk after priming but before painting. The paint seals the caulk and creates a uniform surface across the caulked joint.
Frequently Asked Questions
Can I use spray paint on PVC trim?
Yes, if the spray paint is rated for plastic and PVC. Look for spray paint labeled for plastic or vinyl on the can. Standard spray paint may not adhere and may contain solvents that soften the PVC. Spray paint is best for small trim pieces and touch-ups. For large areas of trim, brush-applied or sprayed acrylic latex from a can or airless sprayer produces a more durable finish.
Can I leave PVC trim unpainted?
Yes. PVC trim is manufactured with UV stabilizers and is designed to be left unpainted if desired. White PVC trim stays white for years without painting. Exposed cut ends may yellow slightly over time but do not rot or degrade structurally. The decision to paint PVC trim is aesthetic, not protective. Unlike wood, PVC does not need paint to survive outdoors. Paint PVC trim because you want a different color, not because the trim needs protection.
My painted PVC trim is peeling. How do I fix it?
The paint failed because the surface was not properly cleaned or primed, or the wrong paint was used. Strip the peeling paint with a plastic scraper. Do not use a heat gun, which warps PVC. Sand the remaining paint lightly with 120-grit sandpaper to feather the edges. Clean the exposed PVC with TSP substitute. Apply a bonding primer rated for PVC and vinyl. Repaint with 100 percent acrylic latex exterior paint in a light color. If the peeling is widespread across multiple boards, the original installation did not include proper surface preparation. A full strip and repaint is the only permanent fix.