The toilet has been running intermittently for weeks. It stops when you jiggle the handle. It starts again at random intervals, usually when you are trying to fall asleep. You have been ignoring it because toilet repairs seem like the kind of thing that requires a plumber, or at minimum, a wrench and a bucket and a trip to the hardware store you do not have time for. Replacing a toilet flapper requires none of those things. The water stays on. The tank stays full. The repair takes ten minutes and the part costs six dollars.
A toilet flapper is a round rubber disk at the bottom of the tank, connected to the flush handle by a small chain. When you press the handle, the chain lifts the flapper, water rushes from the tank into the bowl, and the toilet flushes. The flapper drops back down, seals the opening, and the tank refills. When the flapper gets old, it warps, hardens, or develops mineral buildup that prevents it from sealing completely. Water seeps past it into the bowl. The fill valve detects the dropping water level and tops up the tank. This cycle repeats indefinitely. The sound you hear at night is the fill valve refilling the tank because the flapper is letting water escape. Fixing the flapper fixes the noise.
How to Know It Is the Flapper and Not Something Else
According to licensed plumber James Schuelke, co-owner of Twin Home Experts with over 32 years of plumbing experience, the flapper is the most common cause of a running toilet. The diagnosis is simple and does not require any tools:
- Remove the tank lid and set it aside on a towel on the floor. The lid is ceramic and will crack if it tips over.
- Watch the water level in the tank. If the water is not overflowing into the overflow tube, which is the open vertical pipe in the center of the tank, the fill valve is not the problem. The flapper is.
- Put a few drops of food coloring into the tank water. Do not flush. Wait 15 minutes. If colored water appears in the toilet bowl, the flapper is leaking. The dye travels from the tank, past the flapper seal, and into the bowl. Clear bowl water after 15 minutes means the flapper is sealing and the problem is elsewhere.
The food coloring test is definitive. If the bowl water changes color, replace the flapper. If it does not, and the toilet is still running, the fill valve or the overflow tube is the cause.
Buying the Right Replacement Flapper
Not all flappers are interchangeable. The wrong flapper will not seal, and a toilet that runs after a brand-new flapper is installed is almost always a toilet with the wrong flapper.
Flappers come in three sizes: 2-inch, 3-inch, and 4-inch. The size refers to the diameter of the flush valve opening at the bottom of the tank. The 2-inch flapper is the most common, found in standard toilets manufactured in the last 30 years. The 3-inch and 4-inch flappers are used in newer high-efficiency toilets that flush with less water by opening a larger valve.
The easiest way to get the right part is to take the old flapper with you to the hardware store. Unhook it from the overflow tube pegs, disconnect the chain from the handle arm, and drop it in a plastic bag. Match it to the replacement on the shelf. Universal flappers exist and work in most toilets, but if your toilet is from a specific brand like Kohler, Toto, or American Standard, the brand-specific flapper is more likely to seal correctly on the first try.
How to Replace the Flapper: Step by Step
Step 1: Remove the Old Flapper
You do not need to turn off the water supply. You do not need to drain the tank. The flapper sits above the water. Reach into the tank and unhook the chain from the flush handle arm. The chain is connected to the arm by a small clip. Unclip it.
The flapper is attached to the overflow tube by two small rubber ears that hook onto plastic pegs on either side of the tube. Slide the ears off the pegs. The old flapper is now free. Lift it out of the tank. Water will drip off it into the tank. This is fine. The tank is where water lives.
Step 2: Inspect the Flush Valve Seat
With the flapper removed, run your finger around the rim of the flush valve opening. This is the plastic ring the flapper seals against. If it feels rough, gritty, or has mineral deposits, clean it with a cloth or a piece of fine steel wool. A new flapper cannot seal against a dirty seat. If the seat is cracked or chipped, the flush valve itself needs replacement, which is a more involved repair. A cracked seat is rare. Mineral buildup is common.
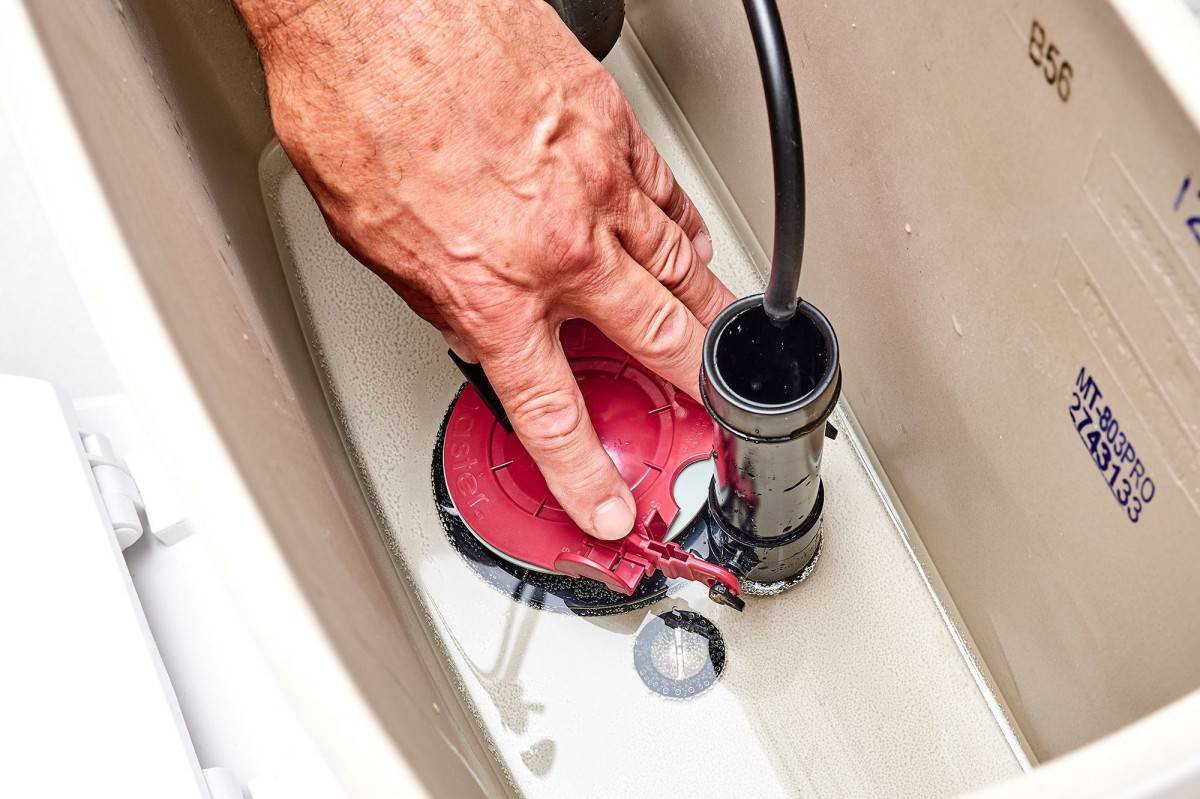
Step 3: Install the New Flapper
Hook the rubber ears of the new flapper onto the pegs on the overflow tube. The flapper should sit centered over the flush valve opening. It should move freely up and down without binding.
Attach the chain to the flush handle arm. The chain should have about half an inch of slack when the flapper is closed and the handle is at rest. If the chain is too tight, it holds the flapper slightly open and the toilet runs continuously. If the chain is too loose, the handle has excessive free travel before the flapper lifts, and the chain can get caught under the flapper when it drops back down, holding it open. Adjust the chain by clipping it to a different link until the slack is correct.
Step 4: Test the Flush
Flush the toilet and watch the flapper operate. It should lift fully when the handle is pressed, allowing a strong flush, and drop back down immediately when the handle is released. The flapper should seat centered on the opening. Listen after the tank refills. Silence means the seal is good. If water is still running, check that the chain has slack and that the flapper is the correct size for the valve opening.
Adjustable Flappers: The Float Dial
Some replacement flappers have a small dial or float on the chain or on the flapper body itself. This dial controls how quickly the flapper drops back down after the flush, which determines how much water leaves the tank per flush. A flapper that drops too quickly produces a weak flush because the tank only partially empties. A flapper that floats too long wastes water by draining more of the tank than necessary.
Start with the float dial in the middle position. Flush and observe. If the flush is weak, move the dial to increase float time, keeping the flapper open longer. If the flush is strong but uses what seems like too much water, move the dial to decrease float time. The sweet spot is a flapper that stays open long enough for a complete flush but closes before the tank fully drains. For most standard toilets, the tank should not fully empty on a single flush. The last inch of water in the bottom of the tank is reserve volume for the bowl refill.
Chain Problems That Mimic a Bad Flapper
A chain that is the wrong length causes the same symptoms as a bad flapper. Before replacing the flapper, check the chain first. It takes ten seconds and costs nothing:
- Chain too short: pulls the flapper slightly open even when the handle is at rest. The toilet runs constantly because water is always escaping. The fix is moving the chain clip to a link further from the handle.
- Chain too long: has excess slack that can fall under the flapper as it drops. The flapper lands on the chain instead of on the valve seat. The toilet runs constantly. The fix is trimming the chain or moving the clip to a link closer to the handle.
- Chain tangled: wrapped around the overflow tube or caught on a fill valve component. The flapper cannot close. Untangle it and the problem is solved.
If adjusting the chain does not stop the running, then proceed with flapper replacement. The part is the same one you would buy anyway. The diagnostic time is not wasted.
Flapper vs. Canister Flush Valves
Some modern toilets, particularly Kohler and Toto models, use a canister-style flush valve instead of a flapper. The canister is a vertical cylinder that lifts straight up when the flush lever is pressed. It seals with a flat silicone gasket at the bottom instead of a domed rubber flapper. If your toilet has a tower-shaped center assembly rather than a flat flapper, you have a canister valve. The seal is replaced the same way: twist and lift the canister out, remove the old seal, install the new seal, and reinsert the canister. The seal costs $8 to $15 and is brand-specific. Do not try to install a flapper on a canister valve. It will not fit and will not seal.
When Replacing the Flapper Is Not Enough
If the new flapper is the correct size, the chain is adjusted properly, the flush valve seat is clean, and the toilet still runs, the problem is the flush valve itself. The plastic seat may have a hairline crack, or the overflow tube may be cracked where it connects to the valve body. A cracked flush valve requires removing the tank from the bowl, replacing the flush valve assembly, and replacing the tank-to-bowl gasket. The parts cost $20 to $30, and the labor, including removing and reinstalling the tank, takes about an hour. This is a step beyond a simple flapper replacement but is still within reach of a homeowner with basic tools.
If the toilet is more than 20 years old and the flush valve is the original, consider replacing the fill valve at the same time as the flush valve. Both components have the same service life, and replacing both while the tank is off the bowl avoids a second repair in the near future.
Frequently Asked Questions
Will a universal flapper work in my toilet?
Universal flappers work in most standard 2-inch flush valve toilets. They use a flexible design that conforms to slight variations in the valve seat shape. However, they are less reliable than brand-specific flappers, particularly in Kohler and Toto toilets, which use proprietary flush valve designs. If a universal flapper does not stop the running toilet within the first few flushes, it is not going to. Return it and buy the manufacturer’s specific part.
How often should a toilet flapper be replaced?
A toilet flapper typically lasts 4 to 7 years. Hard water and chlorine-based toilet tank tablets shorten this lifespan to 2 to 4 years. The chlorine attacks the rubber, causing it to harden and warp prematurely. If you use drop-in tank tablets and your flappers fail frequently, switch to a bowl-based cleaner and replace the flapper. You will replace fewer flappers.
My new flapper has a rubber strap instead of a chain. How do I adjust it?
Some flappers use a perforated rubber strap instead of a metal or plastic chain. Adjustment is the same principle: the strap should have slight slack when the handle is at rest. If the strap is too tight, move the handle clip to a hole further from the flapper. If too loose, move to a hole closer to the flapper. The strap stretches slightly over time, so check the adjustment after the first week and readjust if needed.
The Six-Dollar Fix You Have Been Putting Off
Replacing a toilet flapper is the least expensive and least invasive toilet repair. The water stays on. No tools are required beyond your hands. The part costs five to ten dollars. The entire process from removing the tank lid to flushing the test flush takes ten minutes.
The flapper in your toilet is probably the original one that came with the house. It has been sealing and unsealing thousands of times a year since the day it was installed. Rubber ages. It hardens. It stops sealing. The running toilet is not a plumbing problem. It is a rubber expiry notification. Replace the flapper and the notification stops.