
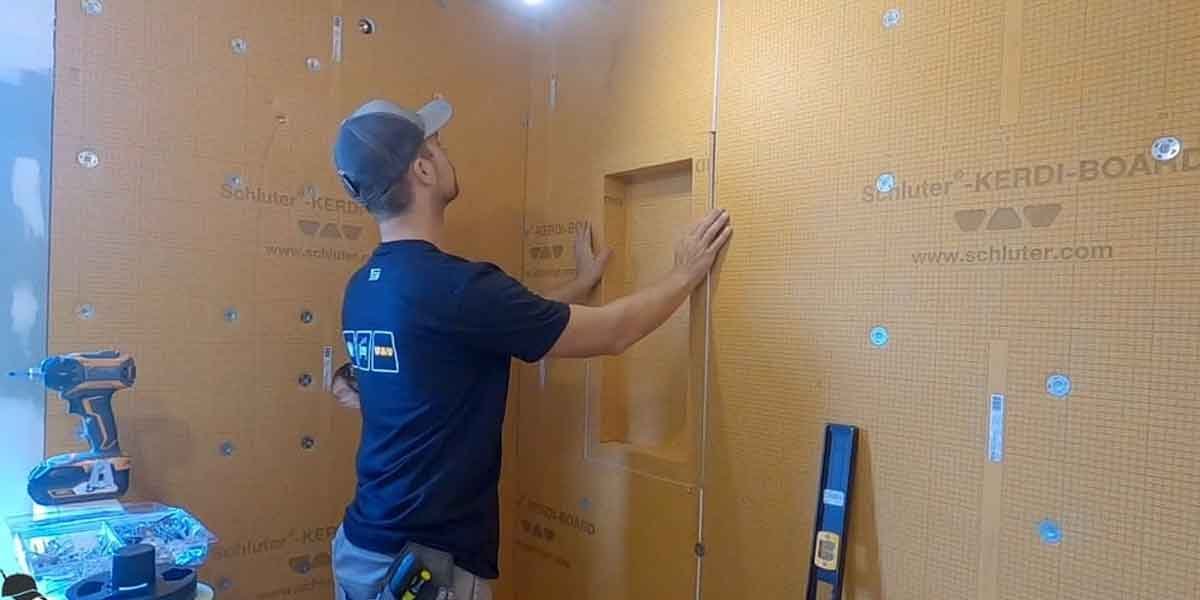

Shower waterproofing membrane tape is the strip that turns separate pieces of membrane into one continuous surface, and Schluter’s own instruction sheet compresses the whole rule into a single line: every seam and every fastener takes a 2-inch (50 mm) overlap.
Sheeting a shower is the easy half. The joints are where the assembly fails. Water reaches the substrate at inside corners, at the drain flange, and at the valve cutout long before it finds a way through the field of a sheet, and those are precisely the places a band decides the outcome.
The name on the roll matters less than how it bonds. Two systems dominate residential work, and they join seams in opposite directions: one bonds dry, the other has to be bonded while the coating is still open.
What Counts as Membrane Tape, and What Does Not
Membrane tape is a strip of the same material as the sheet, sold in rolls, that bonds two sheets or two planes into one layer. A rubberized repair tape from a hardware aisle does not qualify, because it covers the face of the assembly and the seam under it stays untied.
Schluter sells its version as KERDI-BAND, a 4 mil waterproofing strip made for butt joints and floor-to-wall connections. The thickness is deliberate. Heavier material would leave a ridge beneath the tile, and the band folds tightly into inside and outside corners without rounding over the transition (Schluter).
Liquid systems use the same idea in a different form. Custom Building Products sells RedGard Fabric Membrane as a separate component of the RedGard family, and that fabric goes into the liquid rather than on top of it.
Three products share a shelf and only two belong under tile. Fleece-backed band bonds to a sheet system. Open-weave fabric bonds to a liquid system. The self-adhesive rubber roll bonds to a painted wall, which is a different job with a different failure mode.
Two Systems, Two Ways to Bond a Seam
Sheet membranes are joined dry to dry, with two pieces butted together and a band centered over the joint in thin-set mortar. Liquid membranes are joined wet to wet, with fabric pressed into the first coat while that coat is still open and a second coat burying it. The lap is 2 inches either way. The working window is not.
Sheet membrane: butt the sheets, center the band
Schluter specifies an unmodified thin-set mortar, or one of its own mortars, for bonding KERDI to a substrate and KERDI-BAND over a seam, mixed fluid enough to hold a notch and no stiffer. The chemistry behind that requirement explains more than a warranty clause does, because a modified mortar has to dry as well as cure, and a waterproof membrane on one side with porcelain tile on the other leaves almost nowhere for the water in the mix to go.
Forum member jadnashua, listed in his profile as a retired defense industry engineer, described the mechanic in a 2015 thread about thin-set choice:
“The Kerdi fabric’s seam waterproofing relies on there being fleece on the overlaps of both sheets…you won’t have that with AquaDefense on the wall. The small fibers from both sheets in intimate contact with the spaces filled with the thinset break up capillary action, creating the waterproofing.” (Terry Love Plumbing forum)
That description changes what the 2-inch rule measures.
The overlap is not a glued lap but a patch of contact area wide enough for two fleece faces to interlock through cured mortar, and the fibers are what stop water from creeping along the joint.
Liquid membrane: embed the fabric while the coat is wet
A fluid membrane hardens into a film, so the fabric has to be pressed into the first pass of material and stay there. The check is visual: after the top coat, no white fabric should show anywhere along the seam. Weave or a pale patch means the reinforcement was never fully encapsulated.
The mistake that costs a redo is a coat that has already skinned. Rolled-on material can look wet at a glance and still carry a skin the fabric cannot penetrate. Once that skin forms, the fabric floats on the surface and the joint only appears reinforced.
Fluid systems also hand thickness control to the installer instead of the factory. RedGard’s coverage chart shows how far one gallon goes in each role it is rated for: 25 sq ft as a crack prevention membrane meeting ANSI A118.12, 40 sq ft as a pan liner meeting ANSI A118.10, and 55 sq ft as a general waterproof membrane (Custom Building Products). The same pail covers less than half as much floor in the strictest role, and corners and seams eat material faster than flat runs do.
The Two-Inch Rule and Its One Exception
Two inches is the number Schluter repeats across its shower documentation, and its FAQ states the rule as a blanket requirement for the whole assembly. The same page carries the sentence outright: “All seams and fasteners must be treated with KERDI-BAND or KERDI, ensuring a 2″ (50 mm) overlap.”
That covers more ground than the word seam suggests. Fasteners count as well, so every screw holding cement board or a foam panel is treated like a joint, not just the butt lines between panels.
Two inches rather than one buys tolerance. The seal depends on fleece meeting fleece through cured mortar, so a narrow lap leaves little room for the placement errors that show up on a real job. Half an inch of slip on a one-inch lap consumes half the contact area. The same slip on a two-inch lap still leaves most of it.
The exception runs the other way and turns up during repairs. Schluter allows KERDI-FIX sealant for small punctures on walls above the curb height, or 2 inches above the floor in a curbless shower, where a full patch will not fit. Below that line, a piece of KERDI or KERDI-BAND with the overlap carried in all directions is the only repair its warranty recognizes (Schluter FAQ).
Every Seam a Shower Has
Count the joints before taping starts: the floor-to-wall transition, inside and outside corners, the curb, the drain flange, valve and showerhead penetrations, and the joints between backer or foam panels. Six families, and band goes on all of them.
- Floor to wall. The one transition that runs unbroken around the enclosure, and the one that sits closest to standing water.
- Inside and outside corners. Band folds into these without rounding, which is the reason it is thin. Pre-formed corner pieces do the same job faster.
- The curb. Where the curb meets the side walls, and along the top where it caps the pan.
- The drain flange. The joint between membrane and drain body, bonded with thin-set or the drain’s own clamping or bonding flange.
- Valve and showerhead cutouts. Round holes in a rectangular field, closed with a collar or a banded patch.
- Panel joints and fastener heads. Every screw in cement board or foam board, plus the seams between panels.
The drain flange is the seam that fails in public. A California homeowner posting as bronzefury ran two 24-hour water tests in August 2025 on a KERDI pan over a FloFX bond flange drain. The first test, filled below the membrane-to-flange seam, held its level. The second test, filled above that seam, did not:
“So, I filled the shower pan with water to a level above the seam where the kerdi membrane attaches to the bond flange. The result was a leak – the water level fell down to close to the level of the first test.” (Terry Love Plumbing forum)
The repair he planned was a membrane patch set with a two-inch lap over the cut section, which is the same geometry the original joint called for and did not get.
Why a Taped Seam Still Leaks
A banded joint leaks for one of four reasons: mortar too stiff or already skinned, air trapped under the band, a dusty substrate, or materials from two different systems meeting at the same seam.
Air is the failure you can watch happen. Press the band from the middle of the joint outward with the flat side of a trowel, and bubbles travel to the open edges where they can be worked out. Start at one end and the air has no exit.
Dust is the failure you cannot see. Thin-set bonds to a clean surface, and a membrane field left open overnight collects drywall dust, sawdust from a cut, and grit tracked in from a doorway. Wiping the joint before the band goes down costs seconds.
Mixing systems costs more. Liquid membrane laid over a sheet system does not tie into the sheet’s fleece, and jadnashua’s warning in the same thread deserves to be taken literally: “when you mix waterproofing systems, you essentially have no warranty from any of the companies involved.”
The check that catches all four is a peel.
Lift an edge of cured band with a putty knife. A sound bond shows mortar on the back of the band and mortar on the substrate beneath it, with no bare patches and no trowel ridges. Band that lifts clean is band that never bonded, and the same test works at a corner or around a valve collar.
For the corners and penetrations, the sequence that produces those results is worth keeping: a shower niche or recess is where the same rules get tested on four planes at once, and the cuts there are usually the first ones to leak.
Shower Waterproofing Membrane Tape: Common Questions
What kind of tape sticks to a shower wall?
Fleece-backed band bonded with thin-set mortar, or reinforcing fabric embedded in a wet liquid coat, is what sticks to a shower wall. A waterproof tape with its own adhesive does not, because it bonds to the tile face and leaves the joint between panels untreated.
How do you waterproof around a shower valve?
Cut the membrane or board tight to the valve body, then seal the opening with a banded patch or a pre-formed collar lapping 2 inches onto the surrounding membrane. The cut edge of the board is the weak point, and a ring of sealant by itself does not close it.
Is shower waterproofing membrane tape the same as a rubberized repair tape?
No. Membrane tape belongs to the waterproof layer and sits behind the tile, lapped onto both sides of a joint. A rubberized repair tape is a surface patch applied to a finished wall, and no part of a tile assembly depends on it.
Do you need tape if the membrane comes in one piece?
Yes, wherever the membrane stops. A single sheet still has to meet the drain flange, the valve, the curb, and every corner, and those terminations take band. One large sheet with no banding leaves four edges of untreated seam.
How long do you wait before flood testing a taped shower?
Long enough for the mortar to cure, then fill the pan to the top of the curb and leave it overnight. A level that drops points at a seam rather than at the field of the sheet, which is why the peel check at the drain flange runs first.
Pull a corner of cured band at the drain flange before the water goes in. That seam is the first one a flood test finds, and the only one nobody can inspect once the tile is set.