
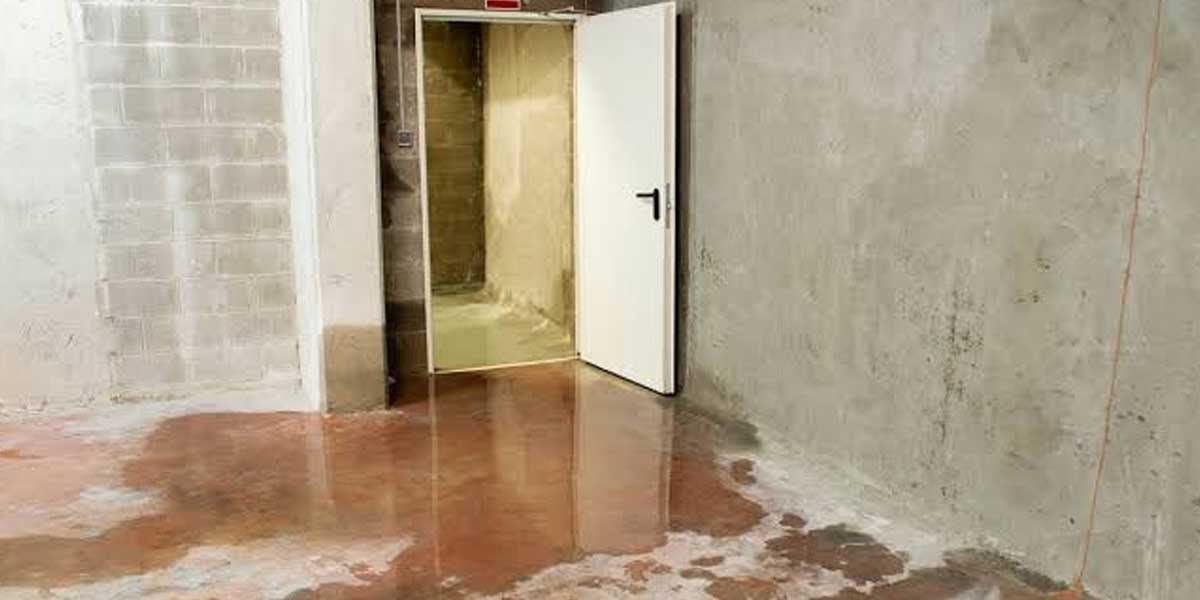

A basement leaking where wall meets floor almost always means groundwater is being pushed up through the cove joint, the seam where the foundation wall sits on the slab. The water is rarely coming through the wall itself. It is coming from underneath the floor.
You notice it on the second day of a long rain. A dark line creeps along the base of the wall in the corner, the carpet smells faintly of soil, and the dehumidifier runs without stopping. Two weeks earlier that corner was bone dry.
It comes down to pressure. Saturated soil beside the footing has to send the water somewhere, and the seam where the wall meets the floor is the easiest exit it can find.
Why Water Leaks at the Seam Where Wall Meets Floor
The cove joint is the cold joint between a poured concrete foundation wall and the basement slab, and it is the weakest point in the floor assembly. Water collects in the soil beside the footing, builds hydrostatic pressure, and rises through that seam because nothing solid meets across it.
Hydrostatic pressure is the sideways and upward force that saturated soil puts on a foundation. After days of rain or a spring thaw, it is the single most common reason a basement leaks at the base of the wall.
Three paths carry the water up through the seam. The first is the cove joint itself, which is poured last and bonds weakly to both the wall and the slab. The second is a crack in the slab that reaches the seam. The third is the porous body of the concrete, which lets water climb the same way a paper towel wicks a spill.
Pressure, not a crack, is the driver. A hairline seam that stays dry all summer will pass gallons a day once the soil around it is fully saturated.
That is why the season matters more than the size of the gap. Under a rising water table, even a gap the width of a credit card becomes a small drain working against you.
Reading the Pattern: What the Leak Is Telling You
Diagnosis starts with timing and location. A seam leak that appears only during heavy rain points to surface water and grading, while one that shows up in dry weather points to a high water table pressing under the slab. Match the pattern to the cause before you spend a dollar on a fix.
| What you see | Likely cause | What to test first |
|---|---|---|
| Wet seam only during heavy rain | Surface water and poor grading | Watch a downspout during a storm |
| Wet seam in dry weather too | Rising water table under the slab | Check a nearby sump or floor drain |
| Water along the whole wall base | Failed or missing footing drain | Look for a footer tile or daylight outlet |
| One wet corner with a salt line | Localized crack at the cove joint | Look for white efflorescence staining |
| Water bubbling up through a floor crack | Sub-slab pressure, slab crack to the seam | Mark the crack and watch it during rain |
| Beads of water, no stain, dry wall | Condensation, not a leak | Run a dehumidifier and re-check |
A damp wall and a wet floor look related but rarely are. One is water passing through the concrete. The other is water being pushed in from below.
Confirming the Source in an Afternoon
You can confirm a surface-water cause without a contractor. On a dry day, run a garden hose at a low trickle against the base of the wall for twenty minutes and watch the seam. If it stays dry, the leak is coming from below rather than from grading.
A cheap pin-type moisture meter adds a second reading. Numbers that climb up the wall from the seam point to water rising under the slab, while numbers that stay low and spike only at the seam point to surface water finding a gap.
Why It Leaks After Rain but Not in a Dry Spell
That pattern is a volume problem. The soil around the foundation saturates faster than it drains, the water table lifts, and the pressure against the base of the wall spikes. A long, slow rain pushes the water table up much further than a short burst does.
It also tells you the drainage was the weak link, not the concrete. A basement that stays dry for months and then takes on water across a two-day storm was never sealed wrong. It was never drained right.
Why Sealing the Seam Alone Backfires
Sealing the cove joint from the inside treats the symptom and ignores the pressure. Hydraulic cement and epoxy can plug a seeping seam for a season, but the water under the slab simply moves to the next weak point and pushes through there instead.
Hydraulic cement sets in minutes and stops a running trickle. It is a plug, not a repair, and it earns its keep only as a stopgap while you plan the real work.
Crystalline and cementitious coatings block capillary movement through a damp wall, which is real value on a porous surface. They still lose to hydrostatic pressure at a seam, because pressure finds the path of least resistance rather than the path you coated.
Why does a fresh coat of sealer fail by the next spring? Because the water was never coming through the coating in the first place. When water arrives at the base of the wall from below, only drainage moves it away. See how these products behave on concrete waterproofing sealers before you rely on one to hold back pressure.
Sound familiar? Most failed seam repairs start with a tube of sealer and end with the same wet corner.
The Fix That Lasts: Interior Drain Tile and a Sump Pump
The durable repair for a basement leaking where wall meets floor is an interior drain tile set in gravel beside the footing, feeding a sump pit and pump. It captures the water below the slab before that water can reach the seam and lift into the room.
The system is built in a short trench broken out along the inside of the footing. Perforated pipe sits in washed gravel, the concrete is patched back over it, and the pipe carries water to a sump basin. A pump lifts it out and away from the house.
How an Interior Drain Tile System Works
An interior drain tile lowers the water table under the floor instead of blocking it at the surface. By giving the water a path to the sump, it removes the pressure that pushes water up the cove joint in the first place.
The detail most people miss is the discharge. A pipe that empties right beside the foundation just recycles the water, so the outlet has to daylight well away from the house or lift to a storm drain.
This is the same principle behind a well-built interior French drain, and it is why a drainage system almost always beats a sealer on a seam that leaks in wet weather.
Pair the pump with a sump pump battery backup if the basement is finished. The storms that push the water table up are the same storms that knock out power, which is exactly when the pump is needed most.
A finished basement usually adds a drainage mat against the wall, a dimpled sheet that gives any weeping water a clear path down to the pipe behind the drywall. Without it, a little moisture can still stain the base of the wall after the seam itself is dry.
Sizing matters as much as the layout. A pump that cannot keep pace with a two-day storm lets the pit overflow right when it is needed most, which is how a finished basement floods even with a system already in place.
Exterior Fixes That Remove the Water Before It Arrives
Exterior work attacks the leak at its source: a footing drain, a waterproof membrane on the wall, and grading that carries surface water away. It costs more and disrupts the yard, but it keeps water out of the wall and off the seam entirely.
The most effective exterior fix is a new footing drain, a perforated pipe laid beside the base of the footing on a bed of gravel and wrapped in filter fabric. It collects water before it can build pressure against the wall and carries it to a daylight outlet or a dry well.
On the wall itself, a waterproof membrane or a fluid-applied coating sheds the water that reaches the foundation. This is the layer that fails first on an older home, which is why exterior waterproofing is the only method that stops water at the wall rather than managing it inside.
Grading and gutters are the cheap half of the same idea. Water that never reaches the foundation cannot press on the seam, and most of it arrives from the roof and the yard.
- Clear gutters and downspouts before spring and fall rain.
- Extend downspout outlets at least six feet from the wall.
- Keep the soil sloping away from the house, not toward it.
- Repair window wells so they drain instead of holding water.
- Check the slope for yard drainage after any landscaping change.
Surface work like window well drainage rarely solves a true seam leak on its own, but it removes the extra load that tips a borderline basement into a wet one.
What It Costs to Fix a Leak Where Wall Meets Floor
Repairs run from a few hundred dollars for a single crack injection to five figures for exterior excavation. Most homes with a wall-floor seam leak land between $2,000 and $8,000 because interior drainage is the standard fix. The ranges below are typical for U.S. homes, and access and local labor move the numbers.
| Repair | Typical range | Best for |
|---|---|---|
| Hydraulic cement (DIY) | $10 to $40 | A stopgap on a running trickle |
| Crack injection (per seam) | $250 to $800 | One active crack at the cove joint |
| Waterproof sealer or paint | $1 to $6 per sq ft | Damp walls, not pressure |
| Interior drain tile and sump | $2,000 to $7,000 | The durable seam-leak fix |
| Sump pump plus battery backup | $500 to $2,000 | Finished basements |
| Exterior footing drain and membrane | $8,000 to $25,000 | Water stopped at the wall |
| Downspout extensions | $10 to $50 each | The cheapest first move |
| Regrading the yard | $1,000 to $3,000 | Fixing surface runoff |
Spending on the wrong line is the common mistake. A twelve-dollar downspout extension can cure what looks like a foundation leak, and no interior sealer fixes a water table that rises under the slab.
Quotes vary because the scope hides in the details. Two contractors can both price “interior drain tile” while only one includes a new sump, a battery backup, and a discharge line that actually reaches daylight.
Keeping the Seam Dry After the Repair
Once drainage is in place, prevention is mostly about keeping water away from the foundation so the pressure never rebuilds. Clean gutters, extended downspouts, and a slope that falls away from the house do most of that work.
Ask any contractor who has torn out a failed system, and the same clues show up by year three: a clogged outlet, a downspout that was never extended, or a patio that the owner graded toward the wall. The pipe was fine; the conditions around it changed.
The basement waterproofing reference on Wikipedia covers the full range of interior and exterior methods, which helps when you compare bids that describe the same work with different names.
Inside, control humidity and watch for the first faint stain rather than the first puddle. The U.S. Environmental Protection Agency’s mold and moisture guidance notes that mold needs a wet surface to grow, which is why a damp seam can feed mold behind a finished wall long before anyone sees water.
Frequently Asked Questions
Is a basement leaking where wall meets floor serious?
It is rarely a structural emergency, but it is a slow problem with fast consequences. A wet seam feeds mold, lifts floor coatings, and can weaken mortar over time, and it does not fix itself.
What causes water to leak where the basement wall meets the floor?
The usual cause is hydrostatic pressure from saturated soil pushing water up through the cove joint, helped by a failed footing drain, a slab crack, or a rising water table.
Can a wall-floor seam leak be fixed from the inside?
Yes, in most homes. An interior drain tile and sump pump manage the water from inside at a fraction of the cost of digging outside. The exception is a missing or collapsed exterior footing drain, which needs attention from the outside.
Why does my basement only leak there after heavy rain?
That pattern points to surface water and runoff rather than a permanently high water table. Grading, gutters, and downspouts are the first things to check, and the cheapest to fix.
Will hydraulic cement or sealer stop it permanently?
No. Both can slow a light leak for a season, but neither holds against hydrostatic pressure. Water finds the next weak point and the seam leaks again.
How much does it cost to fix a leak where the wall meets the floor?
A single crack injection runs about $250 to $800, while an interior drain tile and sump system usually costs $2,000 to $7,000. A full exterior footing drain and membrane starts around $8,000.
Does a French drain or sump pump actually stop it?
An interior drain tile with a sump pump stops the leak by lowering the water table under the slab. A surface French drain in the yard helps surface water but does little for a seam driven by pressure from below.
When a Wall-Floor Leak Needs a Professional
A leak at the wall-floor seam moves past do-it-yourself work when water rises through the slab, when a sump pit overflows during a storm, or when the wall shows horizontal cracks or bowing. Those signs mean the foundation, not just the drainage, needs attention.
For everything else, work in order. Fix the cheap water-away-from-the-house items first, watch for two or three rain events, and only then commit to drain tile if the seam is still wet.
Water always takes the easiest path out of the ground. The job is not to seal every gap. It is to make sure the easiest path never leads into your basement.