Crawl Space Encapsulation: Know these Before Starting

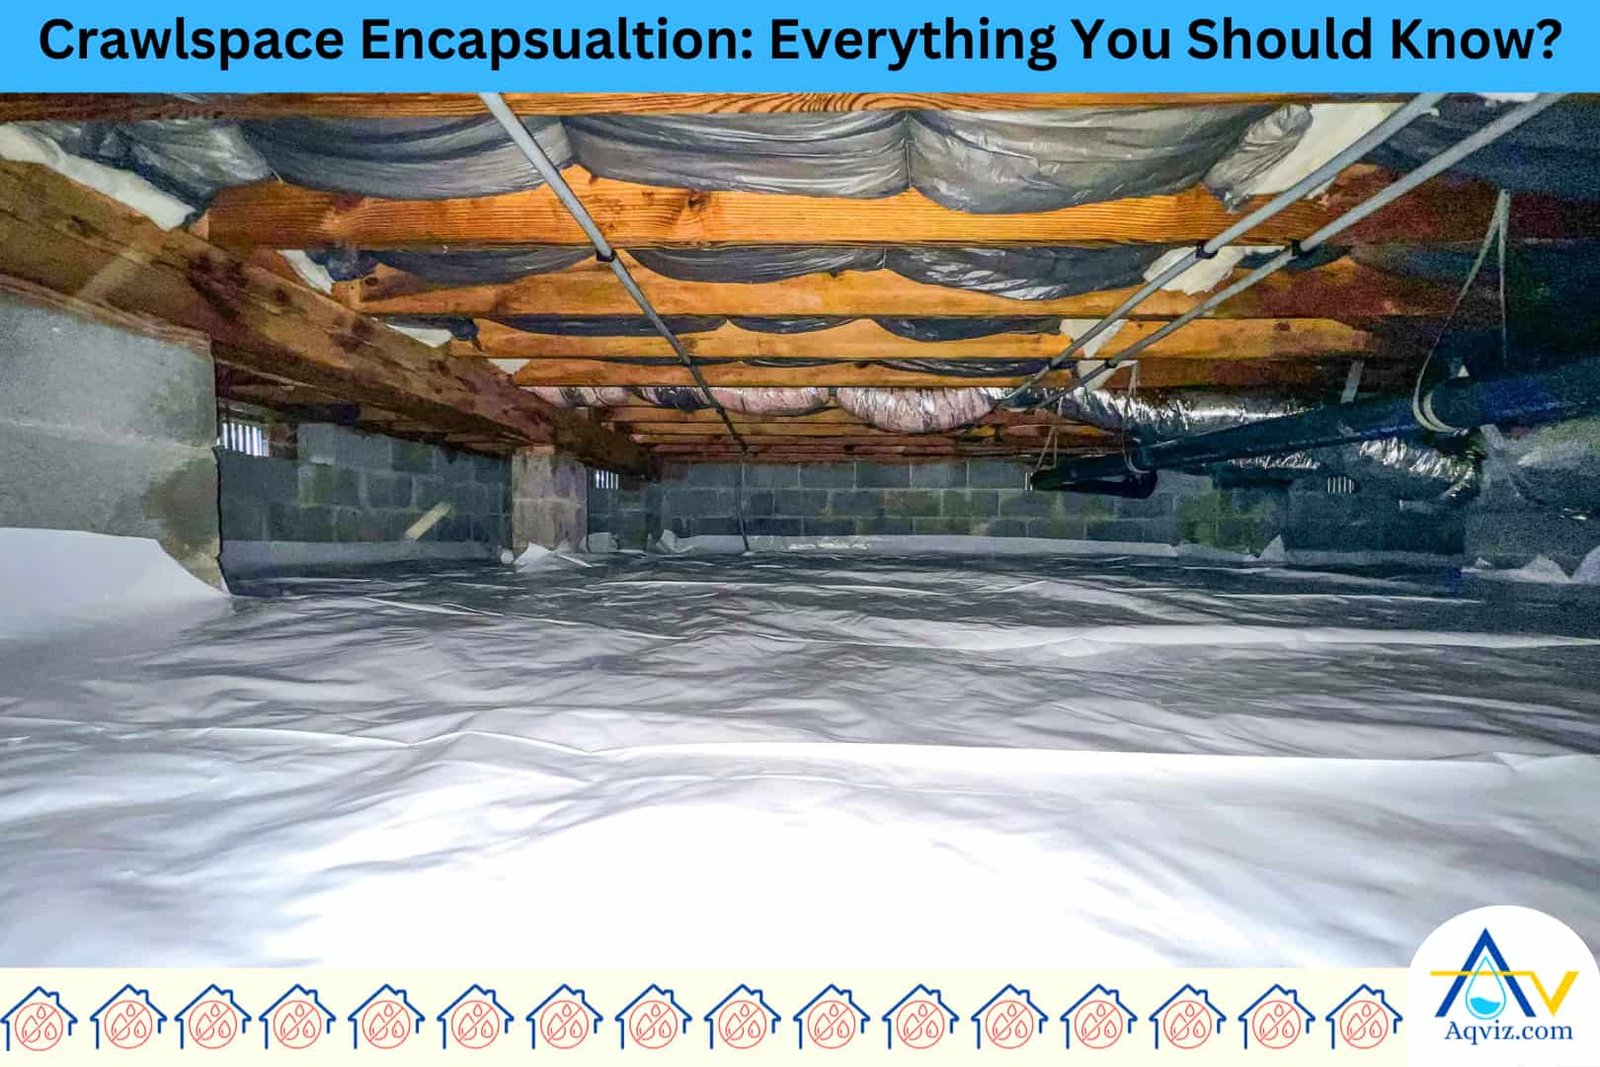
Crawl space encapsulation is a moisture and vapor control method that seals the crawl space beneath a building. Crawl space encapsulation involves installing a reinforced polyethylene vapor barrier over the soil and foundation walls, along with sealing all vents, joints, and access points in the crawl space. Crawl space encapsulation helps to prevent indoor moisture content, improve energy efficiency, protect the structure from water and vapor damage, improve indoor air quality, and increase the property value.
You should encapsulate the crawl space when you observe signs of excessive moisture, air leakage, or material deterioration in the home. To encapsulate the crawl space, there are 9 steps to be followed with recommended tools and materials. You have to spend USD 5,000 to USD 16,000 for the crawl space encapsulation project, and it will last 15-20 years when it is done and maintained properly. If you plan to encapsulate the crawl space, you should do it in late spring to early summer and early fall.
Crawl space encapsulation has some drawbacks because it requires higher professional knowledge and cost. So we highly recommend that you get instructions from experts and not do it alone. Aqviz experts are always available for this. So reach us 24/7.
What is Crawl Space Encapsulation?
Crawl space encapsulation is a moisture and vapor control method that seals the crawl space beneath a building. Crawl space encapsulation involves installing a reinforced polyethylene vapor barrier over the soil and foundation walls, along with sealing all vents, joints, and access points in the crawl space. The crawl space encapsulation process also includes using a dehumidifier, sump pump, and rigid foam insulation to completely isolate the area from ground moisture and outdoor air.
Crawl space encapsulation transforms the space into a dry, enclosed zone that blocks humidity, prevents mold growth, and protects structural components. Crawl space sealing helps maintain consistent indoor air quality, lowers energy costs, and increases the durability of insulation, wood, and mechanical systems within the home.
The main purpose of crawl space encapsulation is to block ground moisture and outside air from entering the crawl space. More than that, there are other purposes of crawl space encapsulation, including preventing mold and mildew growth, protecting structural integrity, improving energy efficiency, eliminating pest infestation, and enhancing the indoor air quality in the home.
Read More About: Crawl space Waterproofing: Know these Before Starting
What Are the 5 Benefits of Crawl Space Encapsulation?
Crawl space encapsulation offers multiple long-term advantages by turning the crawl space into a sealed, controlled environment.
The five major benefits of crawl space encapsulation include
- Prevent indoor moisture content: Crawl space encapsulation blocks up to 98% of ground vapor and condensation.
- Improve energy efficiency: Crawl space encapsulation lowers heating and cooling costs by 15-25% annually.
- Protect structure from damage: Crawl space encapsulation prevents wood rot, corrosion, and concrete damage.
- Improve indoor air quality: Crawl space encapsulation reduces allergens, mold spores, and musty odors.
- Increase property value: Crawl space encapsulation adds resale appeal and extends the building’s lifespan.
What are the Reasons for Crawl Space Encapsulation?
Crawl space encapsulation should be done when the crawl space shows signs of excessive moisture, air leakage, or material deterioration.
You should encapsulate the crawl space when you see the following problems occur.
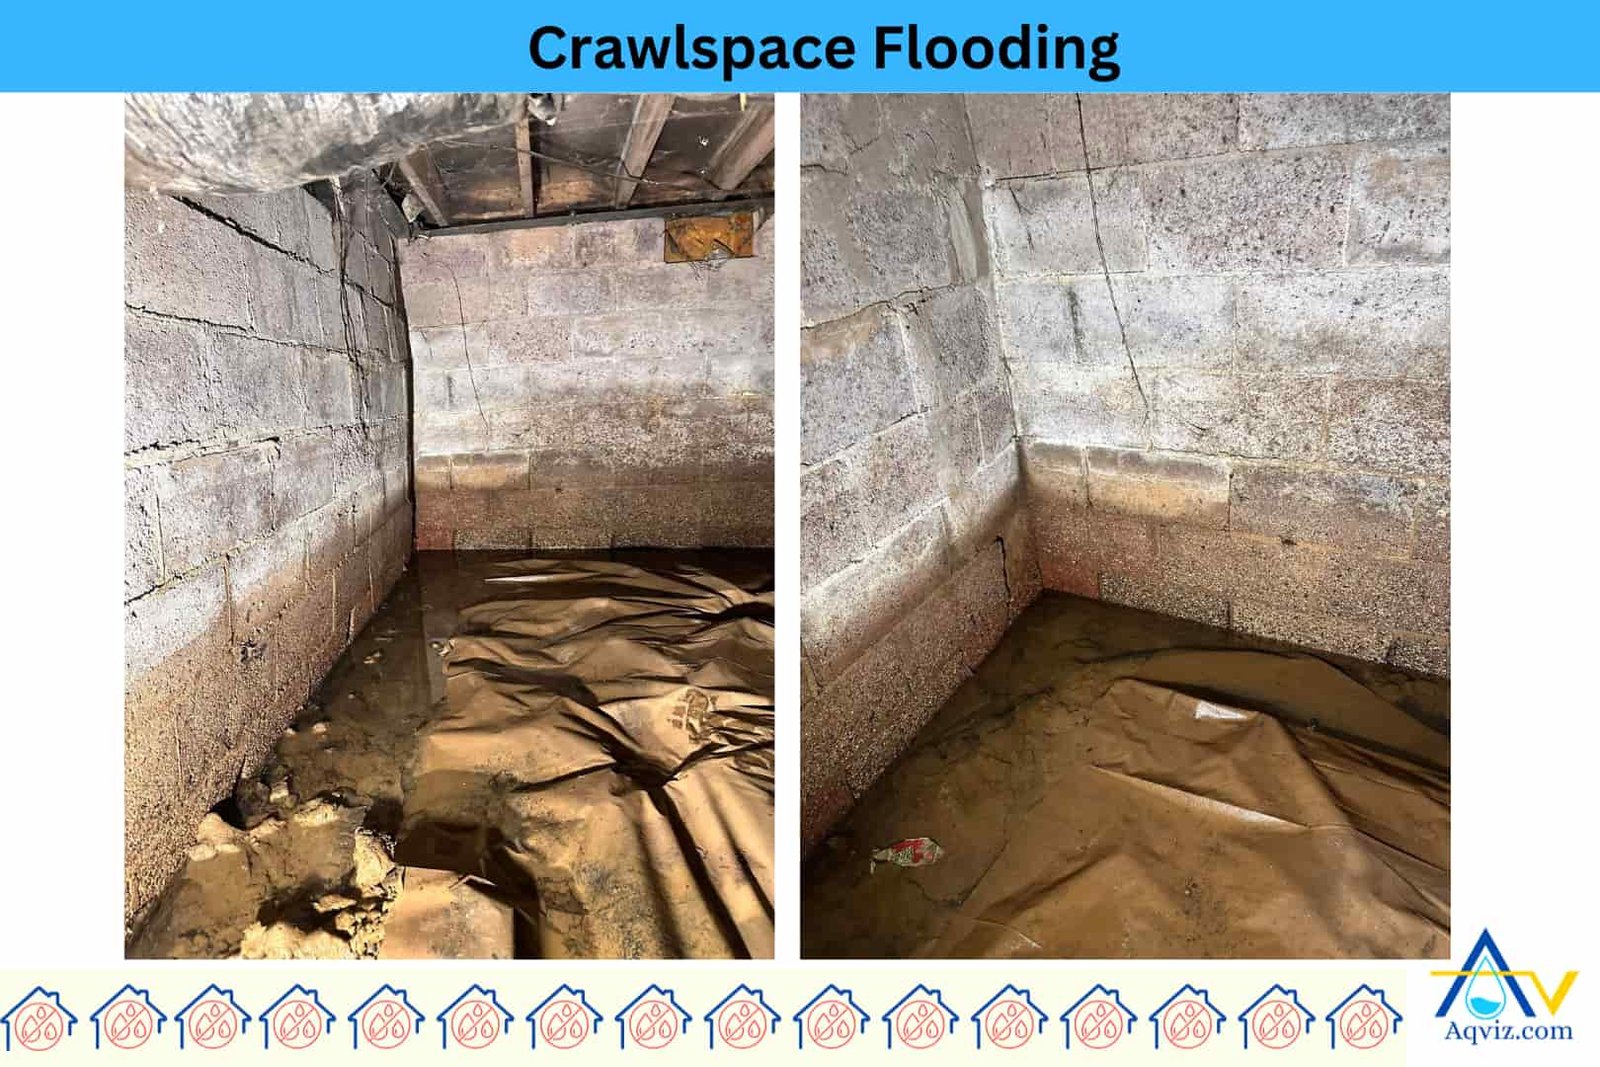
- Standing water or damp soil in the crawl space
- High humidity level in the crawl space
- Musty odors rising from the crawl space
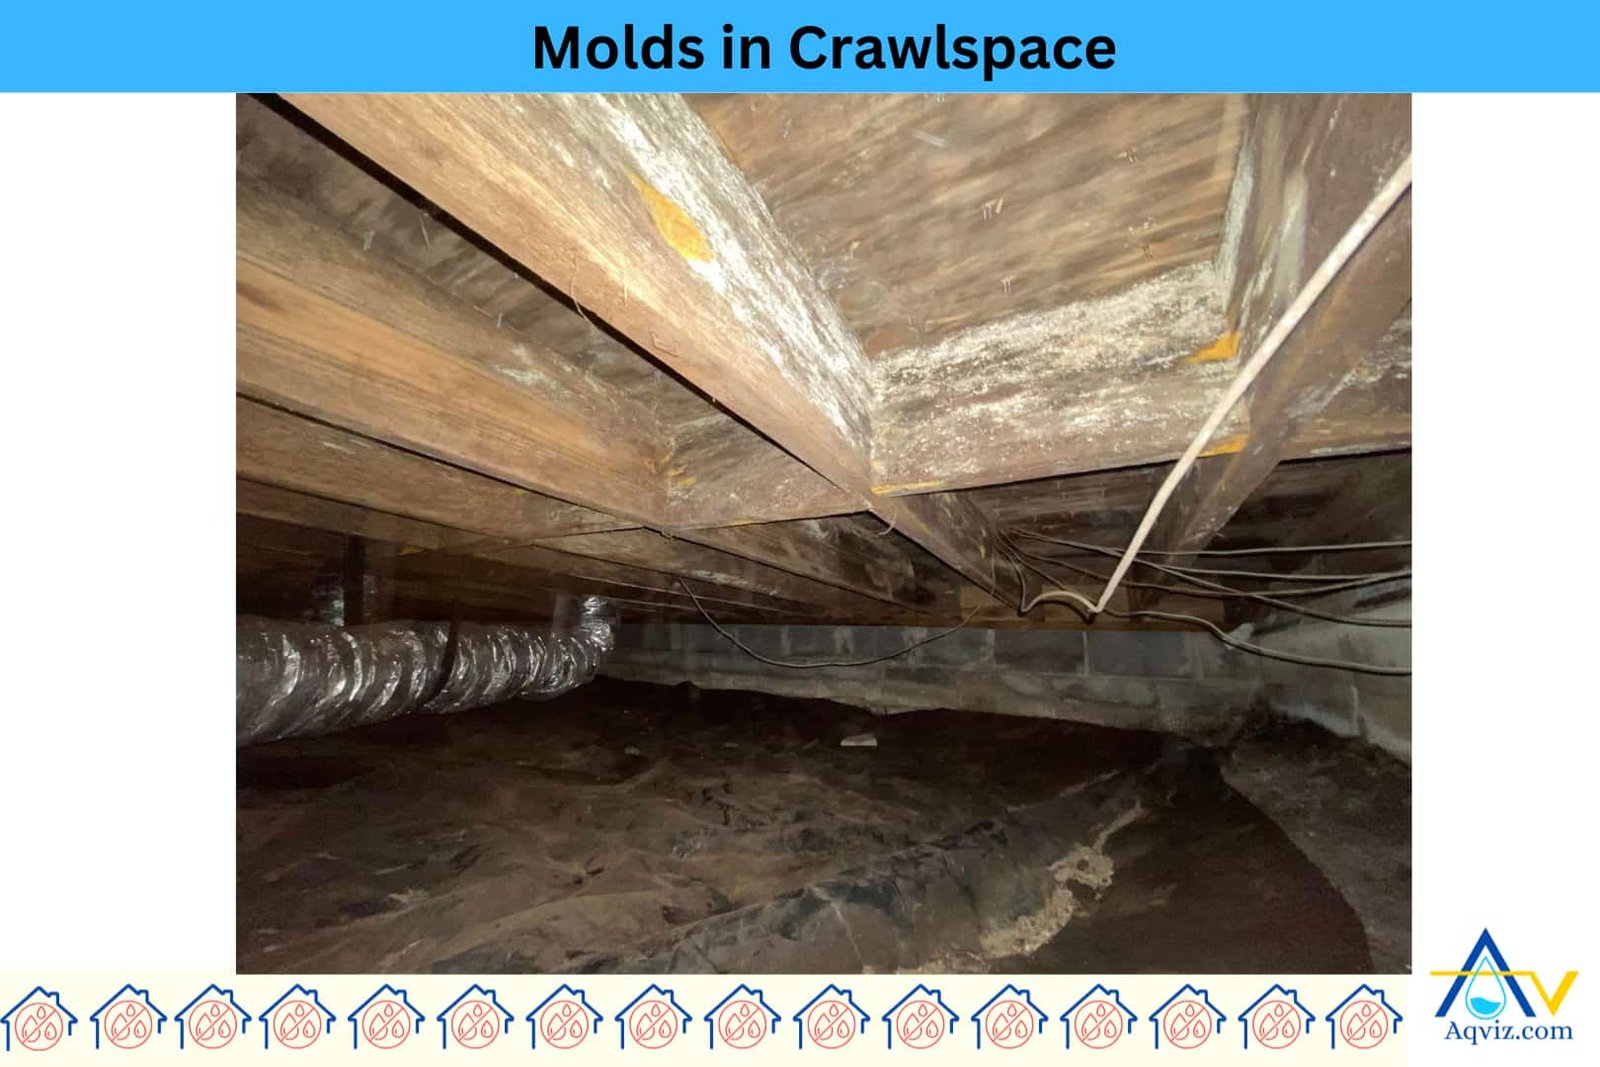
- Visible mold and mildew growth in organic materials in the crawl space
- Sagging insulation or wood rotting in the crawl space
What are Crawl Space Encapsulation Materials?
To encapsulate the crawl space, you will need these 5 materials
- Vapor barrier (6-20 mil polyethylene): Vapor barrier covers ground and walls to block moisture in the crawl space.
- Seam tape or butyl tape: Sealing tapes seal overlaps and joints in the vapor barrier.
- Rigid foam board insulation: Insulates foundation walls and improves energy efficiency in the crawl space.
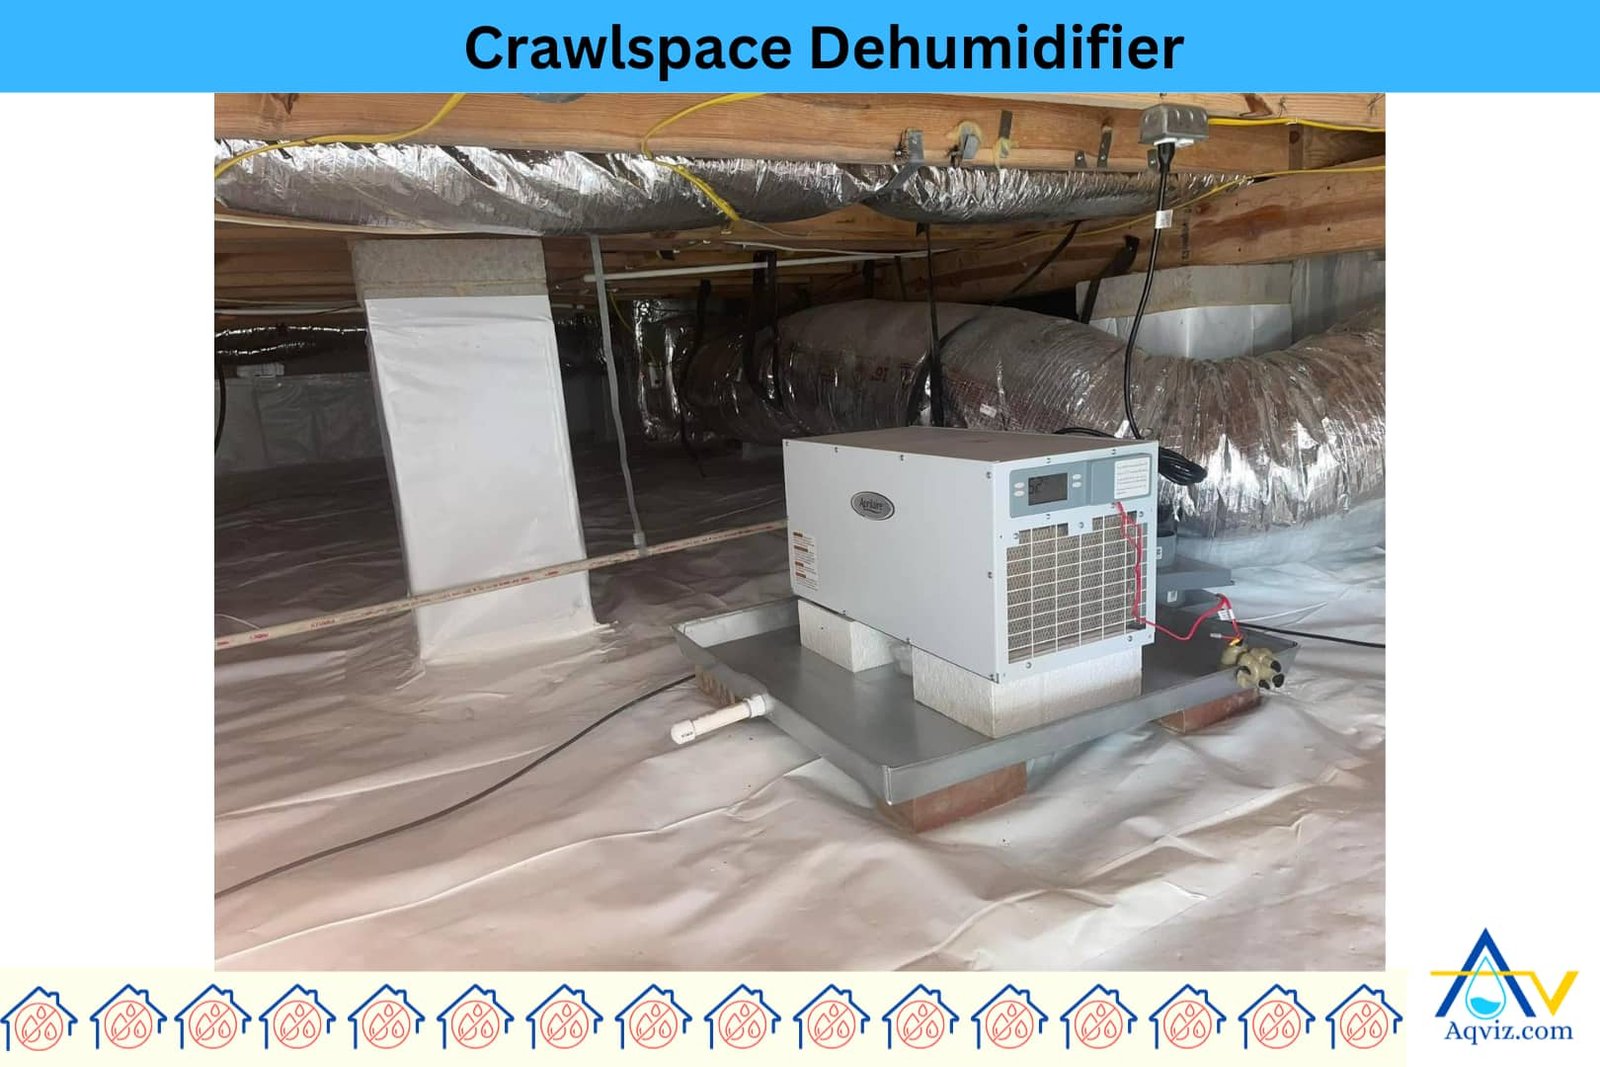
- Dehumidifier (energy-efficient): Crawl space dehumidifier maintains relative humidity below 60% in the crawl space.
- Sump pump with basin and check valve: Crawl space sump pump removes groundwater and prevents crawl space flooding.
When Should You Encapsulate the Crawl Space?
There are 2 recommended periods of the year to encapsulate a crawl space, based on moisture behavior and installation efficiency, according to the Aqviz experts: late spring to early summer and early fall.
- Late spring to early summer: Late spring to early summer is the best time to encapsulate a crawl space because groundwater levels start to drop after winter and heavy rains, allowing the soil to dry. During this period, humidity levels are easier to control, vapor barriers adhere properly, and sealants cure faster, which reduces trapped moisture risk after encapsulation.
- Early fall: Early fall is also a good time to encapsulate a crawl space because temperatures remain moderate between 15-25 °C (60-77 °F) and rainfall is typically lower. These conditions allow proper installation of liners, tapes, and insulation without condensation forming on surfaces, which improves long-term durability.
How to Encapsulate the Crawl Space?
To encapsulate the crawl space, you should follow these 9 steps. These steps have been prepared based on the Aqviz experts expert’s expereince. Following these 9 steps will help you to encapsulate your crawl space as a pro.
9 Step-by-step guide for crawl space encapsulation.
- Inspect and clean the crawl space: Remove debris, old insulation, and sharp objects in the crawl space. Identify damage, mold, or pest infestations that must be addressed before crawl space sealing.
- Repair structural and plumbing issues: Fix cracks, leaks, and damaged wood framing in the crawl space. Then replace or treat mold-affected areas and seal wall penetrations with foam or caulk.
- Grade and level the crawl space floor: Ensure proper slope toward a drainage point in the subfloor. If water intrusion exists, install a French drain system around the perimeter.
- Install a sump pump: Position a sump basin at the lowest point of the crawl space. Then connect the sump pump to a check valve and discharge pipe for groundwater removal.
- Seal crawl space vents, access doors, and openings: Use foam board, caulk, and weatherstripping to block air leaks and insect entry through wall vents, pipe gaps, and entry doors.
- Apply a vapor barrier on the ground and walls: Lay a 12-20 mil polyethylene sheet across the crawl space ground, then extend it 6-12 inches up the walls. Overlap seams by at least 12 inches and seal with butyl tape or poly tape.
- Install crawl space wall insulation: Attach rigid foam insulation boards to foundation walls with adhesive or mechanical fasteners.
- Set up a dehumidifier in the crawl space: Choose a crawl space-rated dehumidifier sized to the space. Place it on a concrete pad or a hanging shelf and connect a drainage line to the sump or exterior.
- Perform final sealing and testing: Recheck all seams, overlaps, and corners for gaps in the crawl space. Monitor relative humidity and ground moisture for the next few days to confirm effectiveness.
Can You Encapsulate Crawl Space Diy?
No, crawl space encapsulation should not be attempted as a DIY project due to its complexity, health risks, and technical requirements. The process involves handling vapor barriers, insulation, dehumidifiers, and sump pumps, all of which require specialized tools and expertise to install properly. A poorly done DIY crawl space encapsulation can trap moisture instead of blocking it, leading to mold growth, wood rot, or even foundation damage.
How Long Can a Crawl Space Last?
An encapsulated crawl space can last 15-20 years. The durability of a crawl space depends on the thickness of the vapor barrier, the performance of the drainage system, the groundwater level, the quality of installation, and long-term moisture control.
To improve the durability of a crawl space you should do these things such as install a minimum 12–20 mil vapor barrier, add a perimeter French drain with a sump pump if groundwater is present, maintain a sealed crawl space dehumidifier at 45-55% RH, seal all vents and wall penetrations with polyurethane sealant, and perform annual inspections for liner damage and drainage blockages.
How much Does it Cost for Crawl Space Encapsulation?
The total cost of crawl space encapsulation typically ranges from USD 5,000 to USD 16,000, with a national average of USD 5,500-7,500 for a standard residential home. Based on our field experience at Aqviz, full encapsulation systems generally cost USD 3-10 per ft² (USD 32-108 per m²) depending on moisture severity, soil condition, and system complexity. Minor vapor barrier-only projects may start around USD 1,500, while full systems with drainage, sump pumps, and dehumidifiers can exceed USD 15,000-20,000.
Cost for different crawl space sizes
Crawl space size directly impacts material quantity, labor hours, and equipment selection.
- 500 ft² (46 m²) crawl space: USD 1,500-5,000
- 1,000 ft² (93 m²) crawl space: USD 2,000-10,000
- 1,500 ft² (139 m²) crawl space: USD 3,500-15,000
- 2,000 ft² (186 m²) crawl space: USD 4,000-20,000
Cost for labor
Labor cost usually accounts for 50%-70% of the total crawl space encapsulation cost.
- Average labor cost range: USD 2,500-8,000
- Typical labor duration: 2-5 days depending on size and access height
- Labor scope includes surface preparation, liner installation, sealing piers, taping seams, and system testing
Additional cost for crawl space encapsulation
Additional components may be required based on site conditions and moisture levels.
- Dehumidifier installation: USD 1,000-3,000+
- Sump pump and French drain system: USD 1,000-3,000+
- Mold remediation: USD 500-3,000+
- Structural repair and joist reinforcement: USD 1,000-7,500
What are the 5 Drawbacks of Crawl Space Encapsulation?
There are 5 main drawbacks of crawl space encapsulation: higher cost, moisture trapping risk, dependence on the mechanical system, installation complexity, and limited benefits in a dry climate.
- Higher cost: Crawl space encapsulation has a higher upfront cost because it requires thick vapor barriers, sealing materials, drainage systems, and professional labor, which makes it not useful for homes with very low moisture issues.
- Moisture trapping risk: Crawl space encapsulation can stop natural air movement, and if drainage or dehumidification is not installed properly, trapped moisture can increase humidity instead of reducing it.
- Dependence on mechanical systems: Encapsulated crawl spaces stop natural ventilation and depend on dehumidifiers and sump pumps, so power failure or equipment breakdown can cause moisture buildup.
- Installation complexity: Crawl space encapsulation is not a simple DIY task because of limited access, uneven soil, and structural obstructions that increase labor difficulty and slow down the process.
- Limited benefit in dry climates: Crawl space encapsulation is not useful in very dry regions because moisture levels are already low, making the cost and effort unnecessary.
Read More About:
- Crawl Space Mold: Warning Signs, Damage and Removal Tips
- Crawl Space Flooding: Causes, Warning Signs and How to Fix
What are the Alternatives for Crawl Space Encapsulation?
If the crawl space cannot be encapsulated, there are 3 alternatives: crawl space waterproofing, crawl space insulation, and foam installation in the crawl space.
- Crawl space waterproofing focuses on managing water entry using crawl space French drain systems, sump pumps, and sealants, but it doesn’t block vapor or insulate the space.
- Crawl space insulation helps control temperature using fiberglass or foam board, yet it lacks vapor barriers and air sealing found in encapsulation.
- Crawl space foam installation involves spraying closed-cell foam to insulate and reduce air leakage, but it can’t control ground moisture alone without a vapor barrier system.
Can Mice Get into an Encapsulated Crawl Space?
Yes, mice can get into an encapsulated crawl space if the encapsulation system has gaps, damaged liners, unsealed vents, or poorly sealed pipe and cable penetrations. Crawl space encapsulation stops moisture and air movement, but it does not stop rodents unless all entry points larger than 6-7 mm (0.25 in) are sealed with metal mesh, rigid barriers, and durable sealants. From our experience at Aqviz, rodent access usually happens at foundation cracks, rim joists, and utility penetrations when pest-proofing is not included in the encapsulation scope.