

How to manage humidity in a crawl space comes down to order of work: cut the water source, seal the ground, then dry the air. Hold that air between 45 and 55 percent and check the surfaces, because the soil, the water pipes, and the rim joist down there sit cooler than the rooms above and reach the dew point while the living space still feels fine.
The order of work decides the outcome. The ground gets closed off before the air gets dried, because a dehumidifier running over bare dirt is a pump draining a lake through a sponge.
The warning signs arrive earlier than the meter does. A musty smell that strengthens after rain, a floor with spring in the middle of the house, cupped hardwood, condensation on duct runs, and a winter floor cold enough to feel through socks. Any of those means moisture has already been at work for a while.
What Humidity Level a Crawl Space Actually Needs
Fifty percent is the working target, with 45 to 55 the range worth holding through summer. The EPA’s guide to mold and moisture keeps indoor relative humidity below 60 percent and calls 30 to 50 ideal, and the lower half of that band is the part worth borrowing for a floor cavity.
The EPA guidance also prices the tool itself: a humidity meter runs about $10 to $50 at a hardware store. Buy the logging kind instead of the cheapest dial gauge, because a single number says almost nothing about a space that swings ten points between morning and afternoon.
Sixty-five percent describes air only, and mold reads the surface the air touches. Cool a volume of air ten degrees without adding a drop of water and its relative humidity climbs roughly twenty points, which is what happens to outdoor air the moment it enters a vented opening.
Sixty-five percent in the middle of the space can read in the eighties against a sixty-eight-degree duct.
Why Closing the Vents Usually Beats Opening Them in Humid Air
Close the vents where summer dew points run above the temperature of the surfaces down there. Vents were sized for drying lumber under open pier foundations, and in a humid summer they pull in air that condenses the moment it touches something cool.
Run the arithmetic on a July afternoon in the Mid-Atlantic. Outdoor air at 85°F and 75 percent relative humidity has a dew point near 76°F, which is the temperature a surface has to fall to before the air above it gives up water. The dirt surface, the supply ducts, and the stem wall usually run 65 to 72°F. Everything below 76°F is wet. No dehumidifier setting changes a dew point.
Winter hides the problem. Vents do dry the space out in January, and they also drain heat from the floor above it. The soil underneath releases vapor all winter, so the spring rebound is not a surprise.
Building code got ahead of the sales pitch on this one. Section R408.3 of the International Residential Code allows the ventilation openings to be dropped entirely, but only as a package: a continuous Class I vapor retarder over all exposed earth, joints overlapped at least 6 inches and sealed or taped, edges carried at least 6 inches up the stem wall and attached there, and perimeter walls insulated. The space also needs one of four mechanical paths, and one of those is dehumidification sized at 70 pints per day for every 1,000 square feet of floor area.
Ground cover alone does not meet that package, and it rarely fixes the space either. A lot of owner-installed encapsulation stalls at that point, with the plastic down and the old vents still open.
Dry regions run the other way. Where outdoor dew points stay low through the wettest three months, a vented crawl space can be the cheaper answer, and sealing it up without mechanical drying makes the space stuffier and no drier. The deciding variable is the dew point outside, not whether the state calls itself humid.
Fix the Water Path First: How to Manage Humidity in a Crawl Space
Work in this order: standing water and pipe leaks, ground cover, the vent decision, dehumidifier capacity, insulation placement. Each step changes what the next one has to do, and skipping ahead is how the same crawl space gets paid for twice.
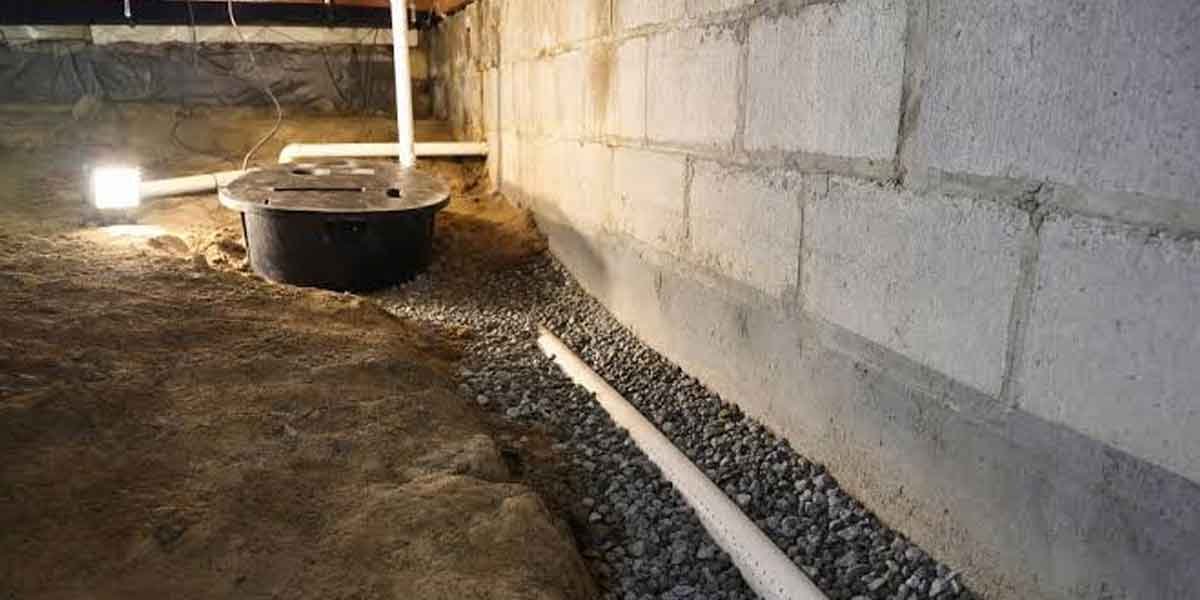
- Find the liquid water first. Look for puddles, one dark corner, and rust streaks under the ducts. Check the grade outside too, because soil sloping toward the foundation pushes rain against the stem wall. A sump float that has stuck is a common find, and the test is a bucket of water poured into the pit twice a year.
- Cover the ground with a Class I retarder. A Class I vapor retarder is sheeting rated at 0.1 perm or less, and 6-mil polyethylene is the material the code names. Sealing the laps matters as much as the thickness, and this site’s crawl space vapor barrier guide puts the material for a typical home at $150 to $700. Loose sheets are worse than bare dirt, because vapor collects underneath and the soil above stays damp.
- Decide about the vents, then finish the job. Closing them without ground cover and one of the four mechanical paths from R408.3 leaves a sealed box holding the same water load. Rigid foam or solid blocking plus sealant closes an old masonry vent; taped plastic will not survive a season.
- Size the machine against a moving yardstick. The code figure is 70 pints per day per 1,000 square feet. Then read the carton, because a Department of Energy test-procedure change that took effect in June 2019 moved portable ratings from 80°F to 65°F at 60 percent relative humidity. An old 70-pint label is roughly a new 50-pint one, ENERGY STAR publishes the conversion, and the factor is about 0.71. A space that stays below 65°F needs a low-temperature or desiccant unit, because a standard refrigerant coil ices up in that range.
- Put the insulation on the right side of the moisture. In an unvented space, the wall and rim joist take the insulation and the floor above stays bare. Batts tucked between floor joists in a sealed, damp cavity sit on the cold side and grow mold on their own facing.
Cost follows the same sequence. A ground cover laid by the owner lands in the low hundreds of dollars including the tape and the staples. Full encapsulation with wall liners, sealed vents, drainage, and a dehumidifier is contractor-scale work. Angi and HomeAdvisor, two brands drawing on one shared dataset, published 2025 ranges that put a 2,000 square foot crawl space from about $2,000 to $10,000, with complete encapsulation commonly landing near $6,000 to $9,000 and the top of the range reserved for spaces with standing water or rot.
How Do You Read the Numbers Without Fooling Yourself?
Put a logging hygrometer in the middle of the space, two or three feet above the dirt, away from the vent and the dehumidifier’s exhaust. One reading taken at the access hatch on a dry afternoon is not evidence of anything.
It takes one trip to learn where the meter belongs. Kneel at the hatch with a flashlight and the air smells like wet cardboard; crawl to the middle and the meter drops four points; hold it near the supply trunk and it drops again. Nothing changed except the distance from the door.
| What the meter shows | What it usually means |
|---|---|
| Low at the hatch, higher in the middle | The hatch measured outdoor air and the middle measured the space. Trust the middle. |
| Low only near the dehumidifier | That is the machine’s exhaust. Move the meter five feet away and read again. |
| Air inside the band, pipes still dripping | The surface sits below the dew point, and drying the air cannot reach it. |
| 62 percent in August, 40 percent in January | A normal seasonal swing over a live water source. |
| Air fine, joists soft and stained | Wood above 20 percent moisture content. Put a pin meter in the joist. |
An infrared thermometer covers the other half of the picture. Point it at the first course of the stem wall, the supply trunk, and the rim joist, then compare those readings against the dew point the hygrometer reports. So is the surface colder than the dew point? Then it is condensing right then, whatever the room number says.
When a Dry Reading Is Misleading
A crawl space can read 50 percent and still rot the joists. Two conditions break the number, and both take minutes to check.
The first is a loose ground cover. Sheets laid down without taped laps leave the vapor path open, and the moisture that collects beneath the plastic turns the soil wetter than it started. Run a hand along the laps, starting at the piers, where tape peels first.
The second is wet wood behind a dry meter. A joist that has been soaked for weeks holds water long after the air around it has fallen to 50 percent. Moisture content is the weight of water in the wood as a share of its dry weight, and decay fungi need that figure above roughly 20 percent to keep working. A pin-type meter pushed into the end grain of a joist answers it in ten seconds.
Mechanical leaks fool people the same way. In a long-running thread on HVAC-Talk, an owner sealed his crawl space, monitored it for months, and still watched the reading sit between 65 and 78 percent. The cause turned out to be air leaking at the pivot points of fourteen supply dampers. The ground cover was fine. The ducts were not.
Frequently Asked Questions
What humidity level should a crawl space be?
Aim for 45 to 55 percent relative humidity in the crawl space air and treat 60 percent as the ceiling. The EPA sets indoor air below 60 percent with 30 to 50 as the ideal band, and a space with cool ducts and soil needs the tighter end of that range to keep its surfaces dry.
How much does it cost to encapsulate a 2,000 square foot crawl space?
Angi and HomeAdvisor’s 2025 data put a 2,000 square foot crawl space between roughly $2,000 and $10,000, with complete encapsulation typically near $6,000 to $9,000. The low end assumes dry soil, easy access, and no repairs. Compare bids by scope, because dehumidifiers, wall liners, and vent sealing are the line items cheap quotes leave out.
Does DampRid work in a crawl space?
No, not at the scale of a house. Calcium chloride buckets are built for closets, boats, and cabinets, and the coverage they claim is measured in tens or low hundreds of square feet. A 1,200 square foot crawl space over bare soil feeds a bucket more vapor in a week than it absorbs in a month, and every bucket has to be replaced once it fills.
No Dehumidifier? How to Manage Humidity in a Crawl Space Without One
Close the water path and the air may hold itself in range. A sealed Class I ground cover, working drainage, and an insulated rim joist cut most of the load in a crawl space that stays dry in winter, and in a low-dew-point climate a vented space with a ground cover is often enough on its own. Where summer dew points run high, the cover alone usually is not, because duct leaks and outdoor air keep feeding the space.
Will a crawl space dry out on its own?
Only seasonally. Cold weather lowers the moisture in the air and the reading drops, which looks like recovery until the soil warms back up in June. Without a ground cover and drainage, the water source never left, and the summer reading returns to where it started.
Late July is the honest test. A space that held 50 percent in May and reads above 60 in the first real heat wave has a vapor path still open, most often at the ground-cover laps or at a vent that was covered instead of sealed.