
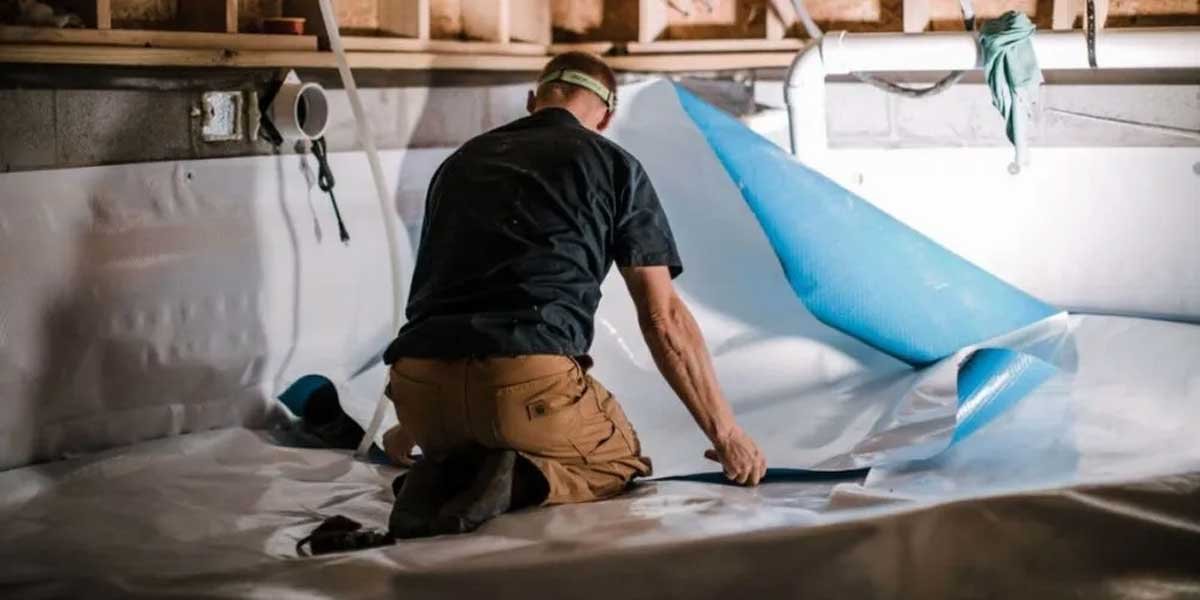

A crawl space vapor barrier is polyethylene sheeting, 6 to 20 mils thick, laid over the dirt to block ground moisture from rising into the house. Materials for a typical home cost $150 to $700, and a careful owner can lay one in a weekend.
The plastic is the cheap part. Where barriers fail is at the seams, the piers, and the edges, and in a humid vented crawl space the sheet on the ground is only half the moisture fix. Both failure modes are avoidable if you decide two things before buying a roll: how thick, and whether your climate lets you stop at a ground cover.
Do You Need a Vapor Barrier in the Crawl Space?
Any crawl space with exposed soil needs one; the dirt keeps releasing water vapor into the framing even in dry climates. The model residential code (IRC Section R408) builds its ventilation rules around a Class I vapor retarder on the ground, and inspectors flag bare dirt routinely on home sales.
The signs it is missing or spent show up above the floor first: musty rooms in summer, cupping hardwood, condensation on ductwork, rusting furnace cabinets. Buyers of older homes meet the deteriorated version of the problem:
“Out of the four homes I’ve owned in the area only our current 1994 home has had a vapor barrier. It’s pretty much deteriorated now. I don’t want to replace it unless it’s really worth it. We’ve been here 5 months now. It wasn’t listed in the inspection reports as something that needed replacing.”
– r/BayAreaRealEstate, December 2025 (8 upvotes)
The check that settles it costs $15: put a hygrometer in the crawl space for a week in warm weather. Readings held under 60 percent relative humidity mean the existing setup is doing its job. Readings above 70 percent mean moisture is winning, whatever the inspection report said. The EPA’s mold guidance draws the danger line at the same place, because sustained humidity at that level is what wood-rot fungi and mold wait for.
What Thickness to Buy
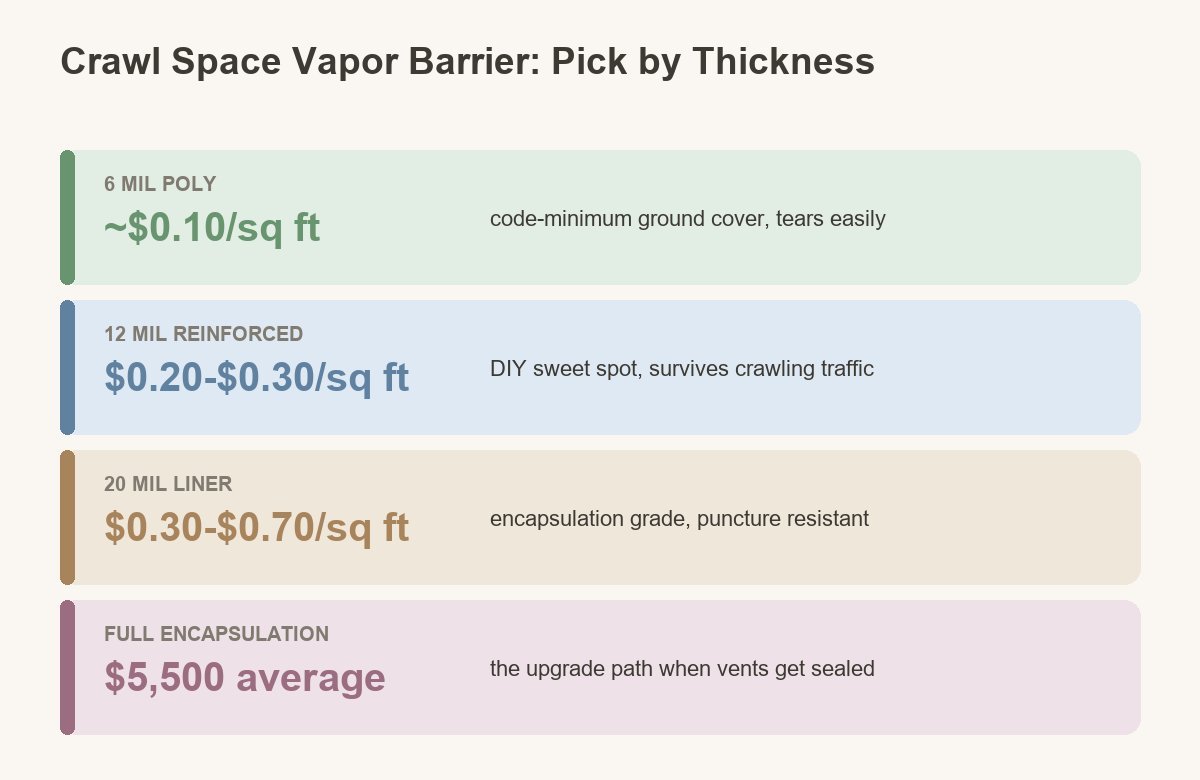
Mil thickness (see our moisture barrier classes overview) decides how the sheet survives being installed and serviced, not how well it blocks vapor. Match it to traffic:
| Thickness | Material cost | Where it belongs |
|---|---|---|
| 6-mil poly | about $0.10/sq ft | Code-minimum ground cover for a space nobody enters; tears during install if the grade is rocky |
| 10–12-mil reinforced | $0.20–$0.30/sq ft | The DIY sweet spot; string reinforcement takes knee-and-elbow traffic and HVAC service visits |
| 20-mil liner | $0.30–$0.70/sq ft | Encapsulation-grade; justified when the space stores anything or gets sealed later |
Color is preference, not performance. Black hides dirt, white brightens the space for inspections, and the black-and-white combination sheets do both. Skip clear poly except as a temporary cover; it degrades fastest.
What It Costs, DIY and Installed
A 1,500-square-foot crawl space needs about 1,700 square feet of sheeting once 12-inch overlaps are figured in. In 12-mil reinforced material that is $340 to $500, and seam tape, sod staples or stakes, and butyl tape for the piers add $75 to $150. Call it $400 to $650 in materials for a barrier done properly, roughly the price of one hour of a remediation crew’s minimum call-out in many metros.
Professional ground-cover installs price mostly by labor and debris removal, and they climb fast when old liner and soaked insulation have to come out first. Once a contractor’s quote reaches five figures, you are no longer buying a vapor barrier; you are buying encapsulation (our crawl space encapsulation cost breakdown decodes those quotes tier by tier), which Bob Vila’s cost data puts at $1,500 to $15,000 with a $5,500 average. Knowing which product is on the quote is the difference between a fair deal and paying encapsulation money for plastic.
Installing a Crawl Space Vapor Barrier, Step by Step
Laying the barrier takes seven steps: clear the grade, resolve liquid water, strip the old liner, roll out panels with 12-inch overlaps, tape every seam and pier, terminate below the sill, and pin the sheet down. The ugly steps come first, and they decide whether the pretty ones hold:
- Clear the grade. Haul out construction scrap, fallen insulation, and rocks. Anything organic left under the plastic becomes a mold buffet later.
- Fix liquid water first. Standing water or active seepage means drainage work before plastic; a barrier over a wet grade seals the problem in.
- Remove the old liner. Layering new over old traps debris and moisture between sheets. Strip it, then start clean.
- Roll out with 12-inch overlaps. Run panels the long direction of the space, lapping each seam at least 12 inches, and cut collars to fit around piers.
- Tape every seam and pier. Seam tape on overlaps, butyl tape where the sheet meets masonry. Untaped seams are why “we have a vapor barrier” and “the crawl space is still damp” describe the same house.
- Run it up the wall, but stop 3 inches below the sill. That exposed strip of foundation is the termite inspection gap; several states require it, and pest inspectors will cut your liner to get one.
- Pin it down and date it. Sod staples in the field, fasteners at the wall, and the install date written on the liner in marker for the next owner.
Will Mold Grow Under the Barrier?
Mold under an intact vapor barrier stays a cosmetic issue, because mold needs organic material to feed on and the soil side of the plastic offers none once the grade is cleared. Condensation droplets under the sheet are normal physics, not failure; that is the moisture the barrier exists to intercept.
The exception is the one created during installation: wood scraps, cardboard, or old insulation left under the plastic give mold both food and a humidity chamber. The other place mold persists is on top, in vented crawl spaces where summer air condenses on the cool sheet:
“I had this problem in a coastal, very high humidity area. Replacing the vapor barrier will go a long way to toning things down. But for those really humid hot periods, your cool vented crawl space will condense the humid vent air into puddles on that nice vapor barrier. I even tried a massive vent fan to maintain circulation into my crawl space to dry it out on lower humidity days with no success. I eventually sealed the vents and installed a dehumidifier- spent $700 for the dehumidifier on Ama…”
– r/centuryhomes, July 2026 (7 upvotes)
That experience marks the boundary of what a ground cover can do. In humid climates with open vents, outdoor air delivers more water than the dirt does, and no thickness of plastic on the ground touches that source.
When a Barrier Is Enough, and When It Is Not
A ground-cover vapor barrier is enough for dry and mixed climates, spaces that pass the hygrometer test after installation, and budgets that need the $500 fix now. Field work by the nonprofit Advanced Energy on closed crawl spaces found sealed, moisture-managed designs outperform vented ones on both humidity and energy use in the humid Southeast, which is why the upgrade path exists: sealed vents, wall insulation, a dehumidifier, and a 20-mil liner as the floor of that system.
Let the hygrometer make the call a season after the barrier goes in. Under 60 percent through summer, you are done for a decade. Over 70 percent with the vents open, budget for sealing and dehumidification, and treat the liner you just installed as the first component of it.
Crawl Space Vapor Barrier FAQ
What are the code requirements for a crawl space vapor barrier?
The model residential code (IRC R408) expects a Class I vapor retarder, in practice 6-mil polyethylene at minimum, with lapped joints, and it rewards ground coverage by allowing far less ventilation area. Local amendments vary, and termite-prone states add the exposed inspection strip at the foundation top; check the county code office before sealing to the sill.
Can I lay a new vapor barrier over the old one?
No; strip the old liner out first. Stacked sheets trap debris and moisture between layers, hide grade problems, and give pest inspectors two layers to cut through. Removal is unpleasant labor, which is exactly why the crews charging four figures earn part of the fee.
How long does a crawl space vapor barrier last?
A taped, pinned 12-to-20-mil barrier is a 10-to-20-year installation, and thin 6-mil poly can fail in 5 wherever it gets foot traffic. Lifespan tracks abuse, not age: service technicians crawling to the furnace do more damage than time does.
Can I install a vapor barrier myself?
Yes, if you can work on your back in a tight space for a weekend; the materials cost $400 to $650 for a typical home and no specialized tools are needed. Hand the job off when the space has standing water, mold remediation ahead of it, or clearance too low to move a roll through.