
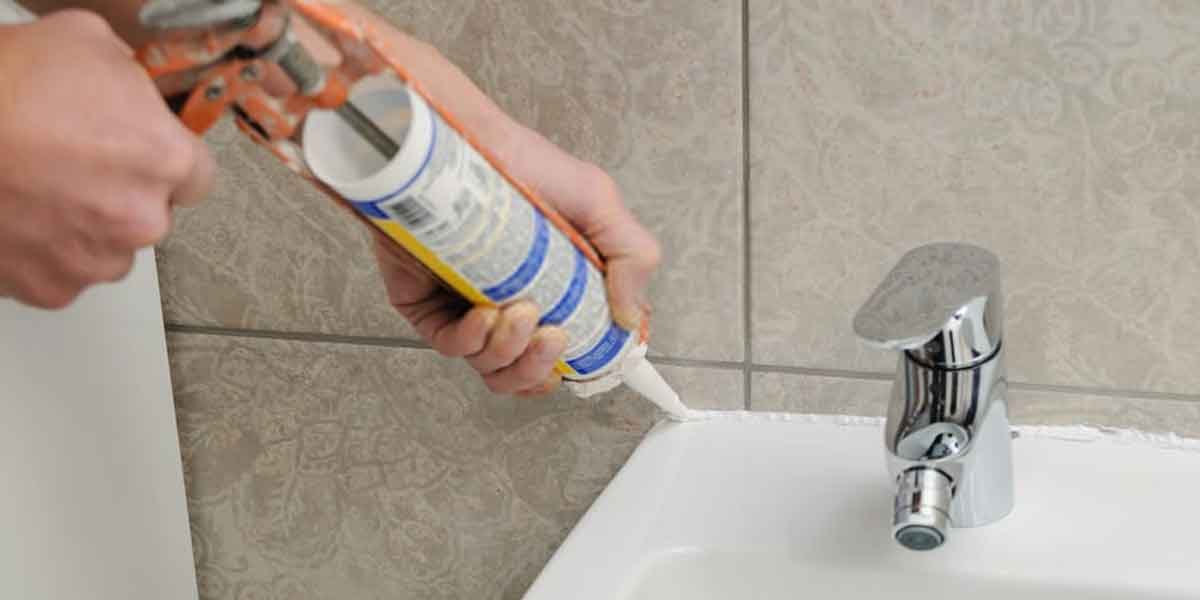

Every shower joint that moves wants 100% silicone. That takes in the inside corners, the seam where a tub or a tray meets the tile above it, and the openings cut for a valve or a shower arm. The flat run between tiles wants grout, and most of the waterproof caulk for shower tile bought in a hurry gets asked to rescue a joint that no tube was ever able to rescue.
“Waterproof” on a label says very little about any of that. What decides whether a bead is still intact two winters from now is whether the material can stretch with the joint it fills, and whether that joint was shaped so the sealant is free to stretch at all.
Joint geometry is the part that gets skipped, and it is the reason a bead that looked flawless in March is split by September.
Silicone or acrylic: which one holds in a wet shower
Only 100% silicone belongs on a joint that stays wet, because acrylic latex softens under a standing film of water and then feeds mildew. Oatey, which sells all three families of sealant, sorts them by location: plain latex for painted trim, siliconized acrylic for tub and shower surrounds that will be painted, and 100% silicone for the wet seams themselves.
The hybrid earns its keep more often than shoppers expect. A siliconized acrylic keeps part of silicone’s grip and adds the one thing silicone cannot offer, which is paint. Oatey lists its hybrid as dry in about 24 hours, a paintable acrylic as tack-free in half an hour and ready for a second coat in two, and its 100% silicone as fully cured inside the same 24-hour window.
Acrylic also cleans up with soap and water and puts out fewer fumes, which matters in a small bathroom with the window cracked open. Elasticity across years of hot showers and cold mornings is what it does not carry, and GE’s shower sealing guide routes the wet seams to silicone for that reason.
The label on the tube settles the rest of the decision faster than the chemistry does. A sealant marked for bath and kitchen or for tub and tile has been formulated for wet service and carries the mildewcide that a general-purpose tube may not include, which is the wording GE tells buyers to look for.
Which shower joints move, and what each one needs
Joints between flat tiles barely move, and rigid grout suits them. Any seam shaped by two planes, or closed by a fixture that carries weight, opens and shuts enough to crack a rigid joint, so those seams take a flexible sealant.
| Where the seam sits | What belongs in it | Why that material |
|---|---|---|
| Flat run between tile faces | Cement grout | Tile and grout expand together, so the joint holds still |
| Inside corner where two planes meet | 100% silicone | The two planes warm and cool on separate schedules |
| Shower tray or tub against the tile | 100% silicone | The joint is loaded and unloaded every time the shower is used |
| Any seam that will be painted | Siliconized acrylic caulk | Paint bonds to acrylic and slides off cured silicone |
Silicone run along a flat field joint is a wasted tube, and grout packed into a corner is a crack with a date on it. The load on that lower seam is not a thought experiment: Sashco, a sealant manufacturer, puts a filled tub plus one adult at roughly 350 pounds of shifting weight on the tub-to-tile seam, which flexes each time someone climbs in.
Shower door frames are the seam most often left rigid. Water collects in the track, and grout or a hard fill there cracks within a season. The frame-to-tile line wants silicone too, with the drain slots in the track left clear so the track can empty itself.
The openings cut for a shower arm, a valve, and the trim ring around it are seams as well. GE’s list of sealing points inside a shower puts them beside the corners and the tray line, and each of those holes was cut through the waterproofing to reach the pipe behind it. The line where the tile stops under the ceiling behaves the same way.
Why a fresh bead cracks, peels, or turns black
Most failures start behind the bead instead of on it. Sealant bonded to all three sides of an opening has nowhere to stretch when the joint moves, so stress lands inside the bead and surfaces later as a split or a peel.
The three-sided bond problem
Backer rod exists to break that third bond. A foam rod pressed into the joint forces the sealant against the two sides of the opening, sets the thickness of the bead, and gives it the hourglass cross-section that lets it flex. The mechanism is set out in a 1980 technical review of backer rods published in The Construction Specifier and summarized in the Wikipedia entry on caulk.
How hard the rod is squeezed matters as much as its presence. Closed-cell foam does not absorb water, but it should not be compressed past 25 percent of its diameter. Open-cell rod, made for compression between 25 and 75 percent, lets air reach the back of the bead and shortens the cure on silicones. Squeeze a closed-cell rod past its limit and it can lose its shape and push trapped gas through a fresh bead, leaving pinholes behind.
Adhesion failures follow a different pattern. A seam that was damp when the tube came out, or dusty, or wiped with a rag that carried oil, bonds along part of its length and releases at the ends. That is why the wipe-down and the drying step below matter more than the brand of sealant.
Black spots that are not the sealant
Anti-mildew additives protect the bead, not the room, which is how a product can carry a seven-year, a ten-year, or a lifetime mold-free claim and still speckle in a bathroom cleaned every weekend. The growth feeds on soap scum, body oil, and shampoo residue sitting on the surface of the bead. EPA guidance aims upstream of the tube: hold indoor humidity below 60 percent, ideally between 30 and 50, and check it with a meter that costs $10 to $50 instead of judging by how the room feels.
GE’s instructions carry one related habit worth keeping. Do not smooth a fresh bead with a soapy finger. Soap left on the bead works against the seal it is forming, and a bare wet finger or a finishing tool does the same job without the residue.
Replacing a failed bead without repeating it
Old sealant has to come out completely, because nothing bonds to a cured silicone film, including more silicone. The seam then gets scrubbed, dried, wiped with isopropyl alcohol, and left alone long enough to cure before the shower runs again.
- Cut the old bead out with a plastic scraper or a caulk-removal tool, and keep metal blades away from acrylic trays and painted trim.
- Scrub the seam and let it dry all the way. Damp substrate is the usual reason a new bead lets go at one end.
- Wipe the joint with isopropyl alcohol on a clean rag to lift oils and dust.
- Cut the tip at 45 degrees, run a single continuous bead, and smooth it right away.
- Wait out the cure before the first shower. Silicone that resists splashes after half an hour still wants about 24 hours to finish curing, and a tub-and-tile caulk from the same shelf can need as long as 48.
Patching stays reasonable while the damage is local and cosmetic. Two failed bands on one seam mean the material is done along its length, and GE puts the working life of an average sealant at about five years, with its own silicones expected to last longer when the surface is cleaned rather than scrubbed.
Waterproof caulk for shower: common questions
What type of waterproof caulk for shower tile works best?
100% silicone works best on any shower joint that stays wet, including the seams around tile, a tub, or a tray.
It holds its flexibility in standing water, resists shrinking away from the joint the way a latex caulk can, and does not absorb the dirt that feeds surface growth. Where a seam has to be painted, a siliconized acrylic is the better fit.
Do bathtubs need to be sealed where they meet the wall?
Yes, the seam between a tub and the tile above it needs a flexible sealant, and grout is the wrong material there.
A tub shifts when it is filled and when someone steps in, so the joint has to follow that movement. Silicone, or a sealant labeled for tub and tile, does that. A cement joint cracks.
Is silicone waterproof?
Silicone sheds water and stays flexible while wet, so the material itself handles constant moisture.
A bead keeps water out only while it stays bonded to both sides of the joint, and preparation decides that far more than the brand on the tube does.
How do you apply silicone caulk in a shower?
Cut the tip at 45 degrees, run one continuous bead along the joint, and smooth it right away with a finishing tool or a wet finger.
Then keep water off it for the cure window printed on the tube, around 24 hours for most silicones. Skipping that wait is the usual reason a fresh bead fails under its first shower.
How often does a shower need new caulk?
Expect roughly five years from an average sealant, which is the working life GE publishes for its own products, with the interval shrinking in a bathroom that never dries out.
A seam that fails again in the same spot within a year points at the joint rather than the calendar.
Sealant sits at the end of a shower assembly, and it can only protect what the layers behind it already contain. When the sign is a softened patch beside the shower, paint lifting on a ceiling below, or a baseboard that never dries, the repair starts inside the assembly; the walk-in shower waterproofing checklist covers that layer order from the preslope up.