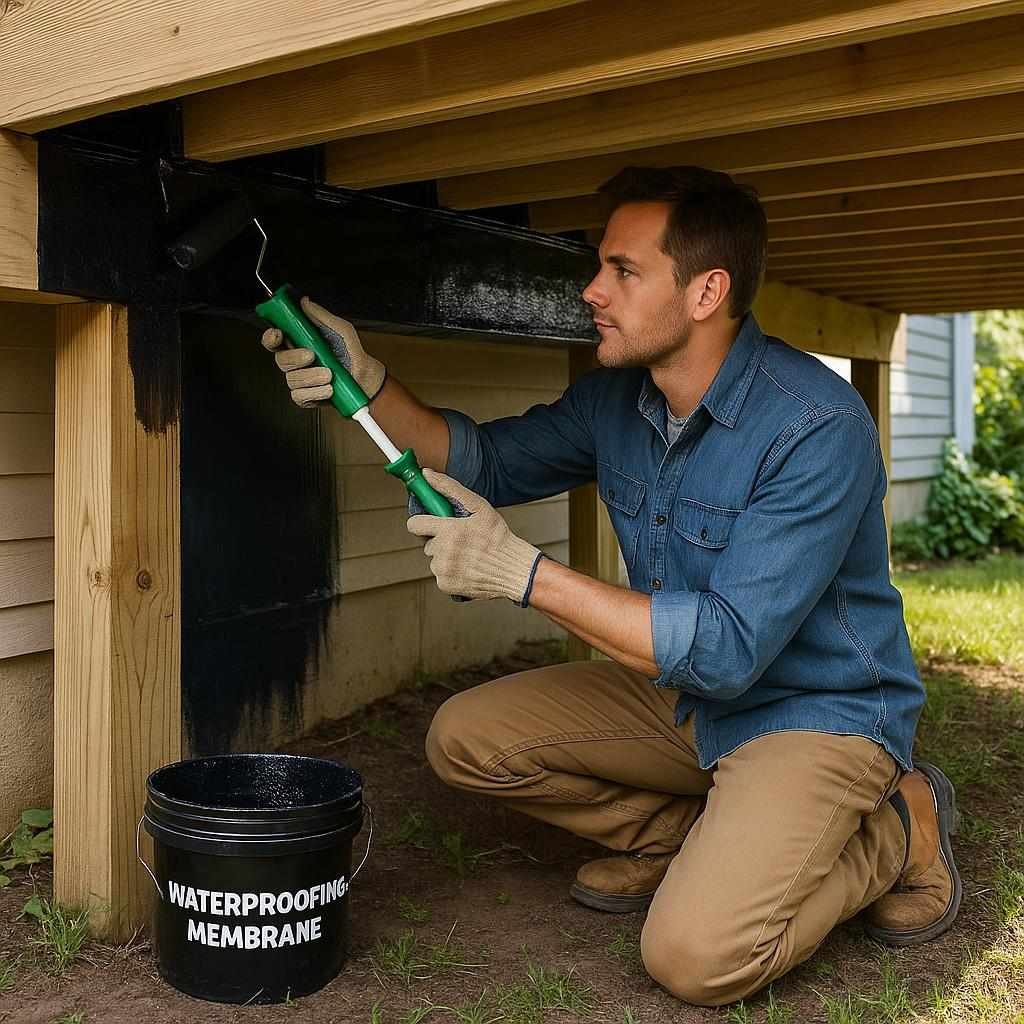
Waterproofing under a deck prevents costly water damage, mold growth, and structural decay. Many homeowners overlook effective solutions, leading to persistent moisture problems and expensive repairs. Installing a reliable waterproof underlayment membrane combined with proper deck drainage panels channels water away, protecting the space below. Techniques like vapor barrier installation and crawl space encapsulation further enhance moisture control, creating a dry, usable area beneath the deck.
Understanding how to waterproof under a deck involves choosing the right materials and methods tailored to the deck’s design and local climate, balancing durability, cost, and ease of installation. A well-executed waterproofing system not only preserves the deck’s integrity but also improves overall home health and comfort.
Understanding Waterproofing Options for Under-Deck Spaces
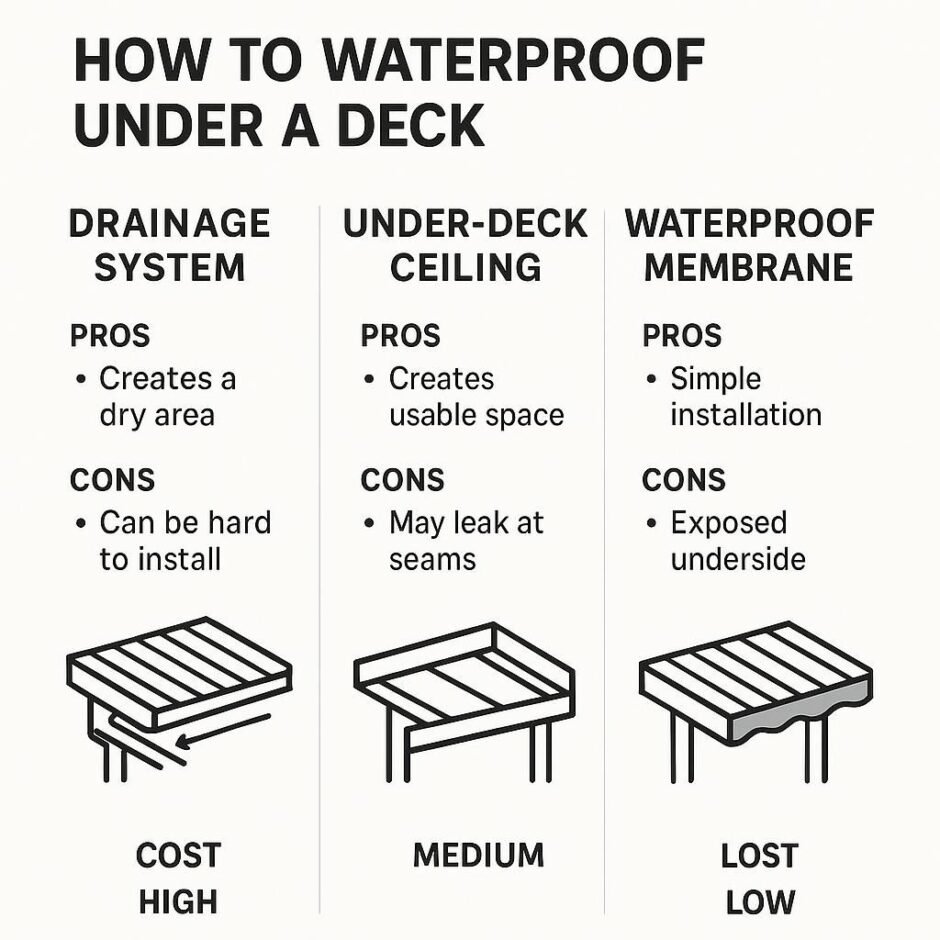
Choosing the right waterproofing method for under a deck hinges on balancing durability, ease of installation, and budget. Effective waterproofing prevents water damage, mold, and wood rot while creating usable dry space beneath the deck. Three primary approaches dominate: waterproof membranes, deck drainage systems, and waterproof paints or sealants. Each has distinct benefits and drawbacks that influence suitability for different deck types and climates.
Waterproof Membranes and Underlayment
Waterproof underlayment membranes form a continuous barrier that blocks water from penetrating the deck’s surface. They come in three main types: peel-and-stick sheets, liquid-applied membranes, and roll-on sheet membranes. Peel-and-stick membranes offer a thick, durable layer that adheres tightly to wood or concrete, making them highly effective for long-term waterproofing. Liquid-applied membranes provide flexibility to cover irregular surfaces but require more curing time and careful application to avoid thin spots.
Sheet membranes, often rubberized, balance ease of installation with strong water resistance.
Membranes excel in preventing leaks and can extend deck lifespan significantly. However, installation demands thorough surface preparation. Any dirt, nails, or unevenness risks compromising adhesion and waterproofing integrity. Typical material costs range from $1.50 to $3 per square foot, with professional installation adding to expenses. For DIYers, peel-and-stick membranes are generally the most user-friendly due to their straightforward application.
Deck Drainage Systems
Deck drainage panels, such as the Trex RainEscape system, don’t waterproof the deck surface but instead channel water off the deck through an integrated drainage layer. These panels install beneath deck boards, creating a sloped system that directs water to gutters or drains. This method effectively manages water without altering the deck’s structural components.
Drainage systems are ideal for elevated decks where water runoff needs controlled routing. They reduce moisture buildup underneath and protect landscaping or storage areas below. Installation is more complex than membranes, often requiring partial deck board removal and precise alignment. Costs typically range from $3 to $6 per square foot, including materials and hardware. While professional installation is recommended, skilled DIYers can manage the process with detailed instructions.
Waterproof Paints and Sealants
Waterproof paints and sealants offer a budget-friendly option for light water resistance but are generally insufficient for heavy or prolonged exposure. These products create a thin, protective layer that repels water and slows moisture penetration. They work best on decks in dry climates or areas with minimal rainfall.
The main drawback is limited durability—sealants often require reapplication every 1-3 years, and paint may peel or crack with temperature changes. They also do not address water seepage from gaps or cracks effectively. For crawl space encapsulation or vapor barrier installation beneath decks, sealants are typically a supplementary measure rather than a standalone solution.
Comparison Table of Waterproofing Options
| Option | Best Use | Cost Range (Materials) | Durability | DIY-Friendliness | Maintenance |
|---|---|---|---|---|---|
| Waterproof Membranes (Underlayment) | Long-term waterproofing under decks with moderate to heavy exposure | $1.50 – $3 / sq ft | High (10+ years) | Moderate (surface prep critical) | Low (inspect seals annually) |
| Deck Drainage Panels (e.g., Trex RainEscape) | Elevated decks needing water diversion and dry space below | $3 – $6 / sq ft | High (10+ years) | Low to Moderate (requires deck board removal) | Low (clear gutters and drains) |
| Waterproof Paints and Sealants | Light water resistance in dry climates or as supplemental protection | $0.50 – $1.50 / sq ft | Low to Moderate (1-3 years) | High (easy to apply) | High (frequent reapplication) |
Environmental and safety considerations are vital. Membranes and drainage systems reduce moisture-related mold risks and improve air quality in crawl spaces. However, some liquid membranes and sealants contain volatile organic compounds (VOCs), so choosing low-VOC or water-based products is advisable for health and environmental safety. Proper ventilation during installation also minimizes exposure.
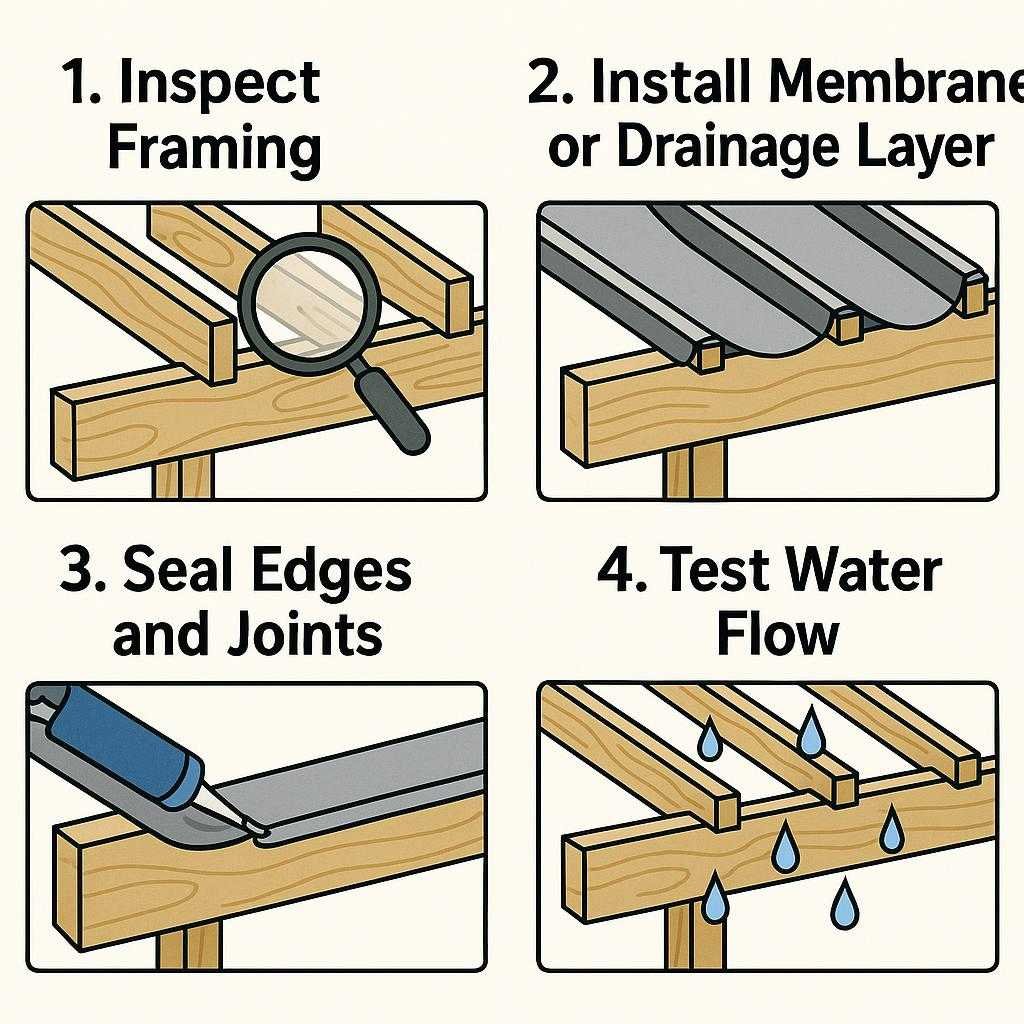
Step-by-Step DIY Waterproofing Under a Deck
Effective waterproofing under a deck requires a combination of surface preparation, membrane installation, and drainage setup to prevent moisture buildup and wood rot. Homeowners can achieve durable results by following precise steps with common materials and tools, avoiding costly repairs down the line.
Preparing the Deck Underside
Start by clearing debris, cobwebs, and loose insulation under the deck. Use a stiff broom or leaf blower to remove dirt, then inspect the joists and beams for signs of rot, mold, or insect damage. Replace any compromised wood before continuing. Accurate measurements of the deck’s underside—length, width, and joist spacing—are essential for ordering materials and planning installation.
Check for existing drainage paths or water stains. If water pools or drips regularly, note these spots for targeted waterproofing. Proper surface prep ensures better adhesion of waterproof underlayment membranes and reduces failure risk.
Installing a Waterproof Membrane
Waterproof underlayment membranes come in peel-and-stick sheets, liquid-applied coatings, or roll-on sheets. Peel-and-stick membranes offer a reliable DIY option with strong adhesion and durability when installed correctly. Begin by sweeping the surface clean and allowing it to dry completely.
- Cut the membrane to fit between joists, allowing at least 2 inches of overlap on edges.
- Apply a primer recommended by the membrane manufacturer to the wood surfaces to enhance bonding.
- Peel the backing off and press the membrane firmly onto the joists and beams, smoothing out air bubbles with a roller.
- Seal overlaps and edges with waterproof tape or compatible sealant to prevent water intrusion.
- For liquid-applied membranes, use a brush or roller to coat the entire underside, extending beyond the deck perimeter by at least 6 inches.
Proper sealing is critical. Gaps or wrinkles can channel water underneath, causing damage. According to the U.S. Department of Housing and Urban Development (HUD, 2023), membranes with fully adhered edges reduce water penetration risk by up to 80% compared to loose materials.
Setting Up a Drainage System
Water must be directed away efficiently to avoid pooling under the deck. Installing deck drainage panels—such as polypropylene panels with raised dimples—creates a channel for water to flow freely to the ground or collected drainage pipes.
- Attach drainage panels directly under the deck boards, securing with corrosion-resistant screws.
- Ensure panels slope away from the house at a minimum 1% grade to promote runoff.
- Install gutters or downspouts at the deck perimeter to collect and divert water safely.
- Consider crawl space encapsulation with a vapor barrier installation on the ground beneath the deck to prevent moisture from rising into the airspace.
Drainage panels not only protect wood but improve under-deck usability by keeping the area dry. The Trex RainEscape system, for example, reportedly reduces moisture-related damage by 60% in field tests (Trex RainEscape, 2023).
Alternative DIY Methods with Household Materials
For budget-conscious projects, plastic sheeting or heavy-duty vapor barriers can serve as temporary moisture shields. Use 6-mil polyethylene sheeting stretched taut between joists, securing with staples or nails, then seal seams with waterproof tape.
Waterproof paints or elastomeric sealants can be brushed onto the deck underside wood to add a protective layer. These are best for decks with minimal water exposure and no direct downpour. However, they lack the durability and drainage benefits of membranes and panels.
Combining vapor barrier installation with basic drainage improvements—like gravel beds or French drains beneath the deck—can significantly reduce ground moisture and humidity in crawl space areas, extending wood life and preventing mold.
| Method | Materials Needed | DIY Difficulty | Pros | Cons |
|---|---|---|---|---|
| Waterproof Membrane (Peel-and-Stick) | Membrane sheets, primer, roller, sealant | Moderate | Durable, effective seal, long-lasting | Requires surface prep, moderate cost |
| Deck Drainage Panels | Drainage panels, screws, slope setup | Moderate | Efficient water channeling, dry space creation | Installation complexity, material cost |
| Plastic Sheeting / Vapor Barrier | Polyethylene sheeting, staple gun, tape | Easy | Low cost, quick installation | Temporary, less durable, no drainage |
| Waterproof Paints / Sealants | Paint, brushes, rollers | Easy | Affordable, simple application | Limited protection, frequent reapplication |
Maintenance, Troubleshooting, and Common Mistakes to Avoid
Guide readers on how to maintain their waterproofing system, troubleshoot common issues, and avoid costly errors. This section gives the direct takeaway first, then explains the specific services, evidence, and practical details readers should know before moving deeper.
Regular Inspection and Cleaning Tips
Routine inspection is essential to keep a deck’s waterproofing system effective and prevent costly damage. Check the underside of the deck at least twice a year, ideally in spring and fall, focusing on signs of moisture, mold, or debris buildup. Remove leaves, dirt, and any organic matter that can trap water and accelerate decay.
Special attention should be paid to deck drainage panels and vapor barrier installation areas, ensuring they remain intact and free-flowing.
Cleaning with a mild detergent and water helps maintain the waterproof underlayment membrane’s integrity without causing damage. Avoid harsh chemicals that can degrade membranes or sealants. For crawl space encapsulation efforts, maintain proper ventilation and verify that all vapor barriers are sealed tightly to prevent moisture infiltration.
Identifying and Fixing Leaks or Damage
Leaks often manifest as water stains, mold growth, or wood rot beneath the deck. Early detection requires a thorough visual check of seams, fasteners, and membrane edges. If you spot peeling or bubbling on the waterproof membrane, it usually signals compromised adhesion. Small punctures or tears can be patched effectively using compatible membrane patches or waterproof sealants.
Drainage blockages within deck drainage panels can cause pooling water, increasing pressure on the waterproofing system. Clear blockages promptly to restore proper water flow. For extensive damage or persistent leaks, replacing sections of the membrane or consulting a professional may be necessary to avoid structural issues.
Common Mistakes
| Mistake | Impact | How to Avoid |
|---|---|---|
| Poor Surface Preparation | Membrane adhesion failure and early leaks | Clean and dry all surfaces thoroughly before installation |
| Ignoring Drainage Needs | Water pooling causing rot and mold growth | Install and maintain deck drainage panels to channel water away |
| Using Wrong Materials | Reduced waterproofing lifespan and compatibility issues | Choose materials designed for outdoor, high-moisture environments |
| Neglecting Vapor Barrier Installation | Increased crawl space humidity and wood decay | Install vapor barriers correctly and seal seams tightly |
Avoiding these mistakes can extend the life of waterproofing systems under decks by years. Effective maintenance combined with proper material choice and drainage management is key to preventing water damage and costly repairs.
Frequently Asked Questions
Under Deck is best understood through frequently asked questions. This section gives the direct takeaway first, then explains the specific services, evidence, and practical details readers should know before moving deeper.
How do you waterproof under a deck?
Waterproofing under a deck involves installing a waterproof underlayment membrane or deck drainage panels that channel water away, combined with vapor barrier installation to prevent moisture buildup. Proper surface preparation, sealing edges, and ensuring adequate drainage are essential to prevent water damage and mold growth in the crawl space below.
What materials are best for waterproofing under a deck?
Peel-and-stick waterproof membranes and deck drainage panels like Trex RainEscape offer durable, DIY-friendly solutions. Vapor barriers and crawl space encapsulation systems enhance moisture control, especially in humid climates. Waterproof paints and sealants work as secondary protection but lack the longevity of membranes or drainage systems.
Can you waterproof under a deck yourself?
Yes, many homeowners successfully waterproof under a deck using step-by-step methods with accessible materials. Installing drainage panels or laying a waterproof membrane requires basic tools and patience. However, precise vapor barrier installation and sealing are critical to avoid leaks and maximize effectiveness.
How much does it cost to waterproof under a deck?
Costs vary by method: waterproof membranes typically range from $1.50 to $3.50 per square foot, while deck drainage panels cost $2 to $5 per square foot installed. DIY vapor barrier installation can reduce expenses, often totaling under $500 for average decks, whereas professional crawl space encapsulation may exceed $3,000.
How do you prevent water damage under a deck?
Effective prevention combines waterproof underlayment membranes, proper slope and drainage via deck drainage panels, and vapor barrier installation to reduce ground moisture. Regular inspections and maintenance eliminate clogged drains or tears in membranes that cause leaks, protecting wood supports and preventing mold.
| Method | Best Use | DIY Difficulty | Cost Range | Maintenance |
|---|---|---|---|---|
| Waterproof Membrane | Long-term water barrier | Moderate | $1.50–$3.50/sq ft | Inspect seals yearly |
| Deck Drainage Panels | Channeling water away | Moderate | $2–$5/sq ft installed | Clear debris seasonally |
| Vapor Barrier Installation | Moisture control in crawl space | Easy to Moderate | Under $500 DIY | Check for tears |
| Waterproof Paints/Sealants | Supplemental protection | Easy | Under $100 | Reapply every 2–3 years |
Conclusion
Summarize the importance of choosing the right waterproofing method, following proper installation steps, and maintaining the system for long-term deck protection and usability. Encourage readers to plan carefully and consider both DIY and professional options based on their needs.
Choosing the Right Waterproofing Method
Selecting the appropriate waterproofing approach depends on your deck’s design, climate, and budget. Waterproof underlayment membranes offer durable protection, while deck drainage panels efficiently channel water away, preventing buildup. Vapor barrier installation and crawl space encapsulation add layers of defense, especially in humid or flood-prone areas. Each method balances cost, ease of installation, and longevity differently.
Proper Installation and Ongoing Maintenance
Correct surface preparation and meticulous installation are crucial to avoid leaks and extend system life. Regular inspection, cleaning debris from drainage panels, and promptly repairing membrane damage can preserve functionality for over a decade. Neglecting maintenance often leads to costly structural damage and mold issues beneath the deck.
Plan Thoughtfully and Consider Professional Help
DIY waterproofing is feasible with common materials and clear steps, but complex drainage challenges or larger decks may warrant professional expertise. Early planning and budgeting minimize surprises, ensuring a dry, usable under-deck space that adds real value to your home.
For more detailed guidance on deck drainage systems, visit the Trex RainEscape official site for product specifications and installation tips.
For authoritative information on waterproof membranes and vapor barriers, consult resources from the U.S. Department of Housing and Urban Development (HUD).
SEO Title & Description
This copy-ready SEO snippet matches the article title while covering extra search phrasing. Paste it into Rank Math as the primary SEO title and description for this page.
SEO Title: How to Waterproof Under a Deck | DIY Guide for 2026
SEO Description: Learn how to waterproof under a deck with step-by-step DIY methods, compare materials, and get expert tips on maintenance and costs.
Related Reading
These internal resources add extra context and help readers explore closely related topics on this site.